Platinum Roofing and Fascias (Home Improvements)
Flat Roofing. Platinum Roofing and Fascias (Home Improvements) has been vetted and approved by TrustATrader. Covering Wolverhampton, Willenhall, Bilston, Tettenhall, Codsall, Perton, Walsall, Albrighton, Halesowen, Kidderminster, Stourbridge, Dudley, Telford, Cannock, Stafford, Shrewsbury, Bridgnorth, Worcester, Stourbridge, Kingswinford, Halesowen, Great Barr, Sutton Coldfield and all the Birmingham area
Membership number TT18377
Don't forget! Please mention TrustATrader when you contact any of our trusted traders.
All TrustATrader members are checked and vetted!
Get extra peace of mind and cover your next agreed job with this trader for free by registering for the TrustATrader Guarantee. Find out more
Register GuaranteeAbout Platinum Roofing and Fascias (Home Improvements), Wolverhampton
Platinum Roofing and Fascias (Home Improvements)
I have been advertising on here 5 years June, please look through all of my reviews and my gallery, there are photos covering all repairs and roof work 😀
Wolverhampton based also covering all surrounding areas such as: Willenhall, Dudley, Bilston, Albrighton, Telford, Walsall, Cannock, Stafford, Tettenhall, Perton, Codsall, Bridgnorth, Shrewsbury, Kingswinford, Stourbridge, Halesowen, Kidderminster, Worcester, Sutton Coldfield, Great Barr, and the surrounding Birmingham area .. and more!
We are a professional, reliable roofing company with unrivalled expertise in the industry. Drawing on over fifteen years’ experience, we focus on providing all varieties of roofing, repairs, maintenance, any roofline jobs considered, fitted, giving each customer an outstanding quality service and the highest finish which is made to last.
Whether you are looking for a full re-roof, minor repairs or general maintenance, any home improvements jobs needed, we have a selection of all work carried out by our teams, a various selection of pictures applied below, please take time to look through my gallery of work we have completed over the years. We do apply the same standards to all of our work no matter how big or small the job. We believe that everyone should receive a great service that will protect their property for many years to come.
Me and my team offer a comprehensive range of services including:
- Complete installation of re-roofs or roof repairs.
- New or current ridges installed with the new dry fix system, or new mortar.
- Dry verge clips fitted to gable ends etc.
- Chimney re-point, chimney removals.
- Any lead work required to be changed upon the chimneys etc.
- New fascia, soffits, guttering and down pipes fitted.
- Firestone rubber flat roofs fitted
- Polycarbonate or Fibreglass roofs fitted.
- Cladding installation.
- Moss removals.
- Re-pointing chimneys etc
- new windows and doors supplied and fitted.
- Driveways and Patios also.
- All work considered.
Our skilled team are on hand to help with any queries that you may have. We are happy to help and offer free advice, non-obligatory quotes and estimates.
Please see face book link below, and please look at my website showing a gallery of completed work, thank you.
Please mention Trustatrader when calling.
Photo gallery
-
Image
1
-
Image
2
-
Image
3
-
Image
4
-
Image
5
-
Image
6
-
Image
7
-
Image
8
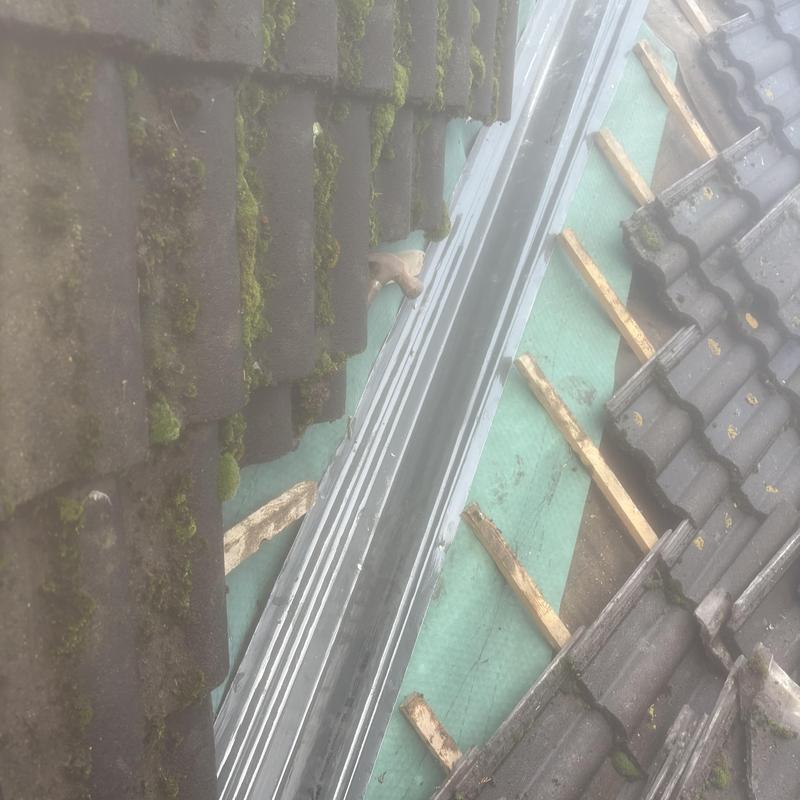
-
Image
9
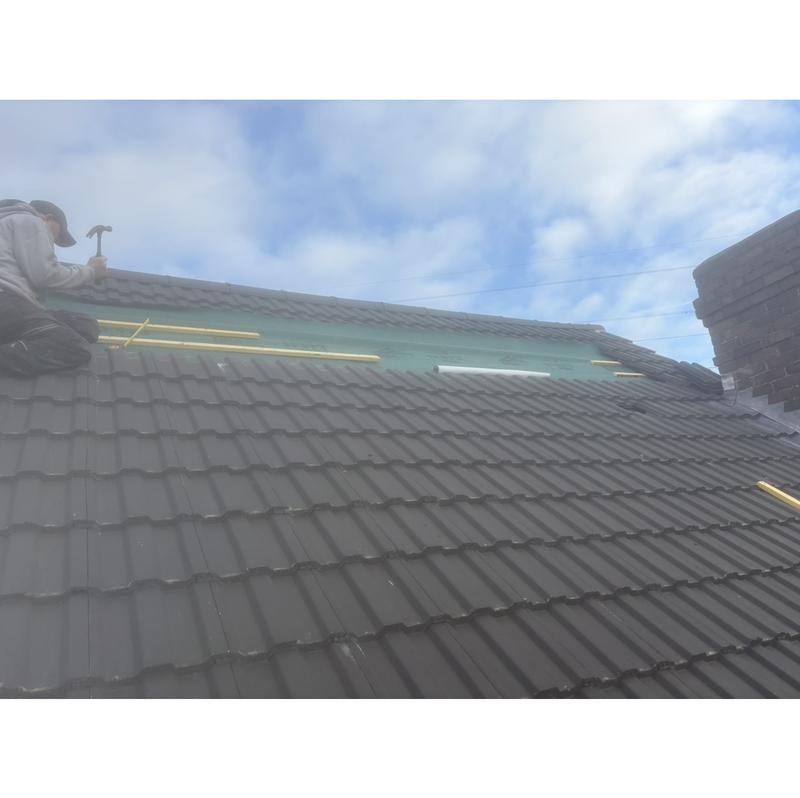
-
Image
10
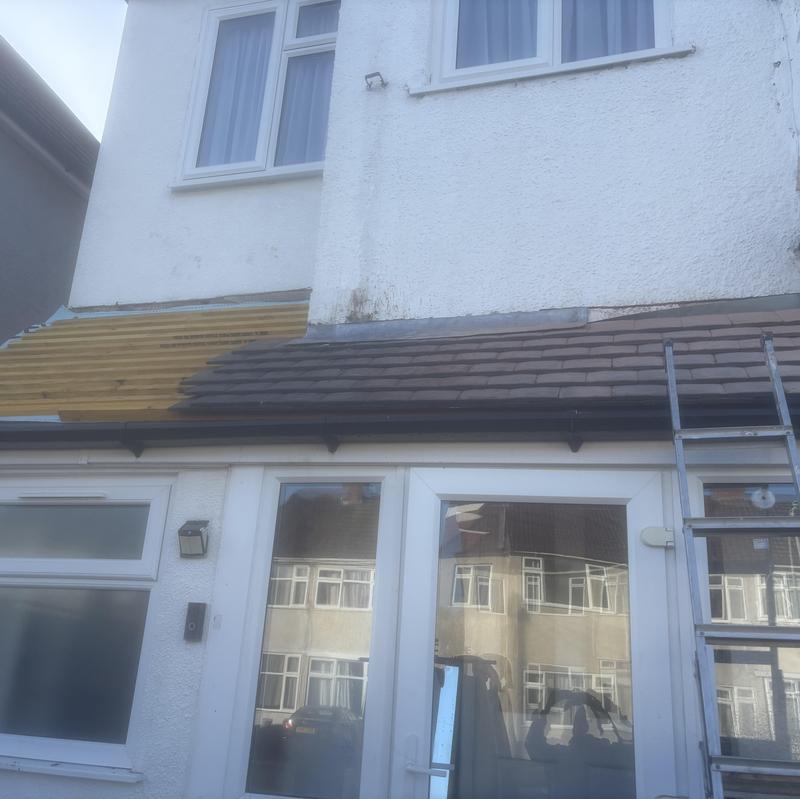
-
Image
11
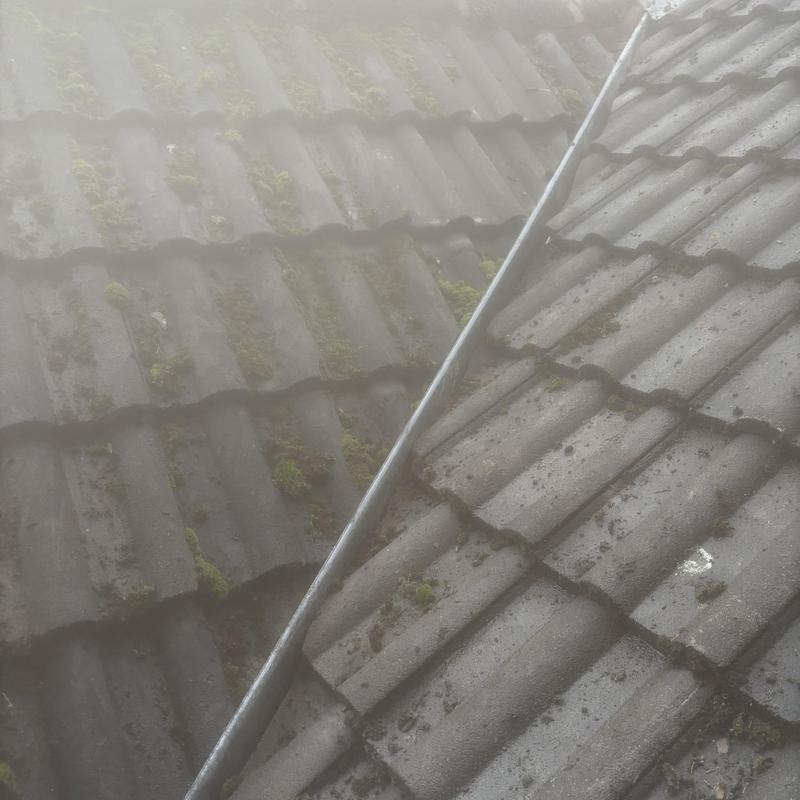
-
Image
12
-
Image
13
-
Image
14
-
Image
15
-
Image
16
-
Image
17
-
Image
18
-
Image
19
-
Image
20
-
Image
21

-
Image
22
-
Image
23
-
Image
24
-
Image
25
-
Image
26
-
Image
27
-
Image
28
-
Image
29
-
Image
30
-
Image
31
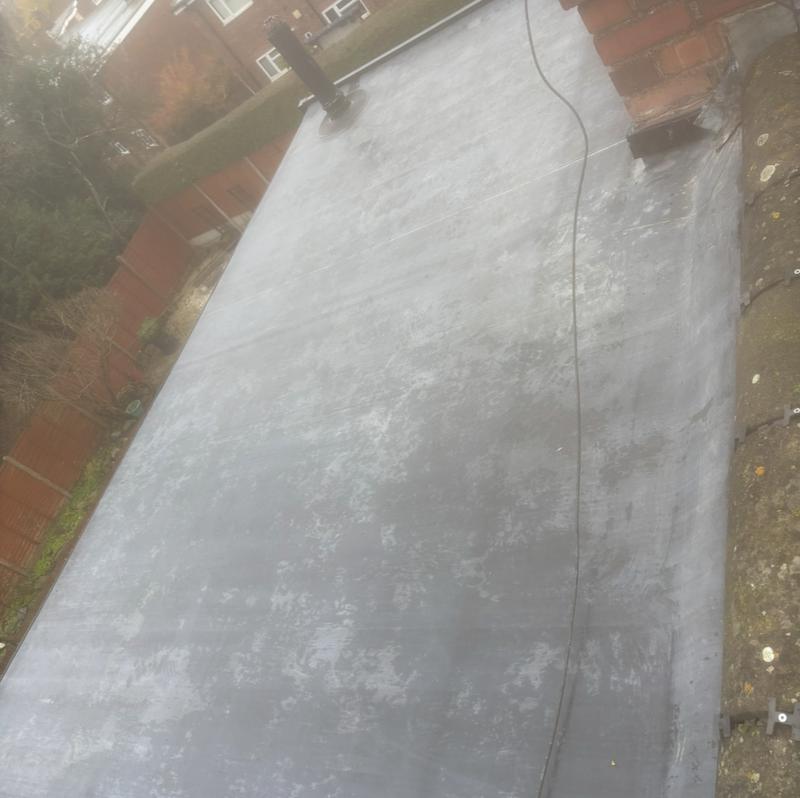
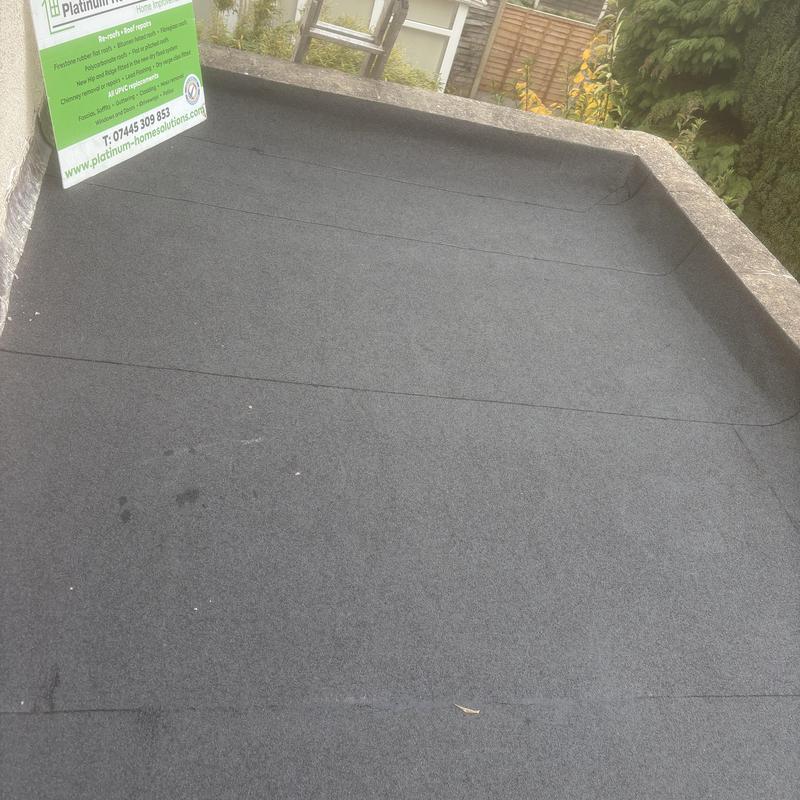
- Charcoal felted Roof.
-
Image
32
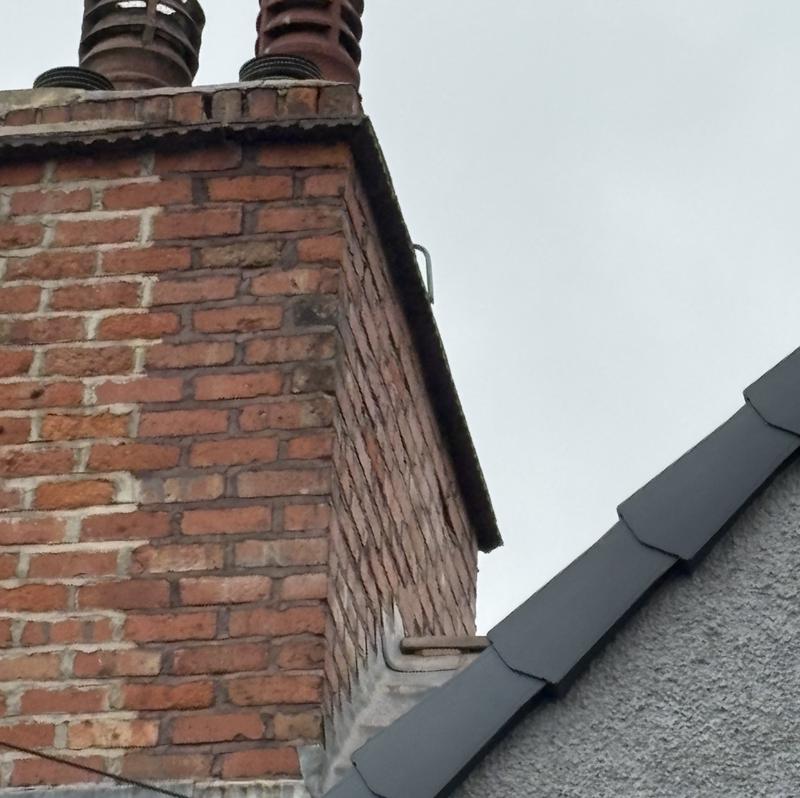
- Repointed to the right side of this Chimney, we did not do the left side, we use brown mortar, it makes it look more natural with Brown mortar.
-
Image
33
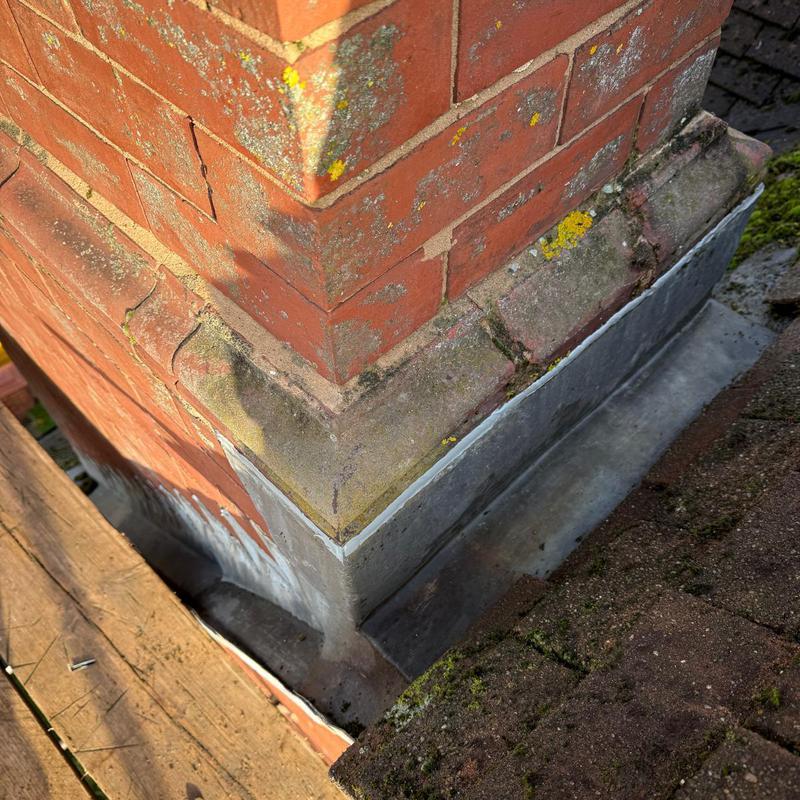
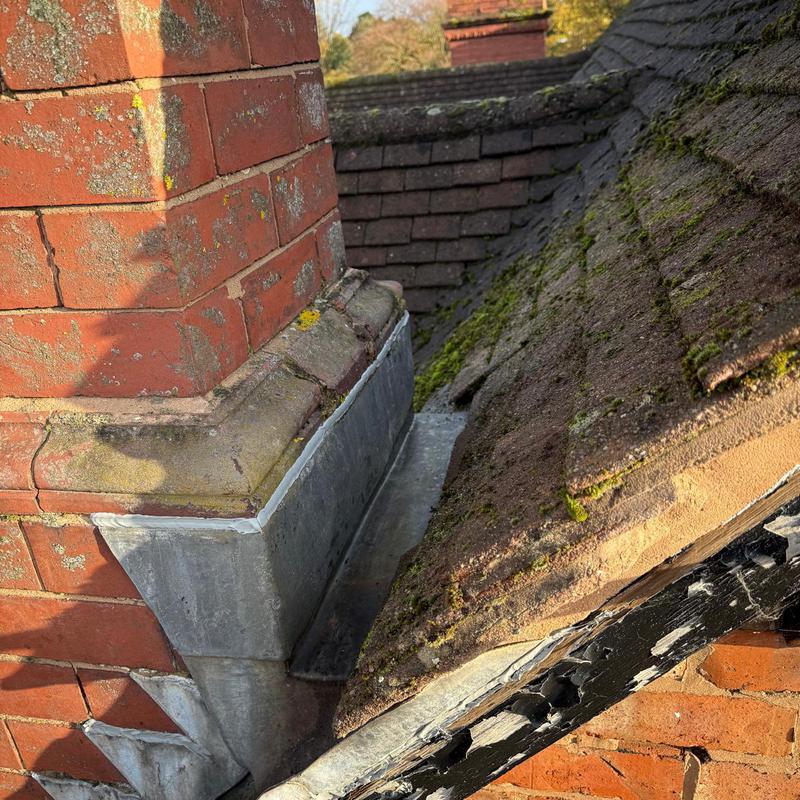
- Lead Apron fitted to the rear of this Chimney in Kiddiminster.
-
Image
34
-
Image
35
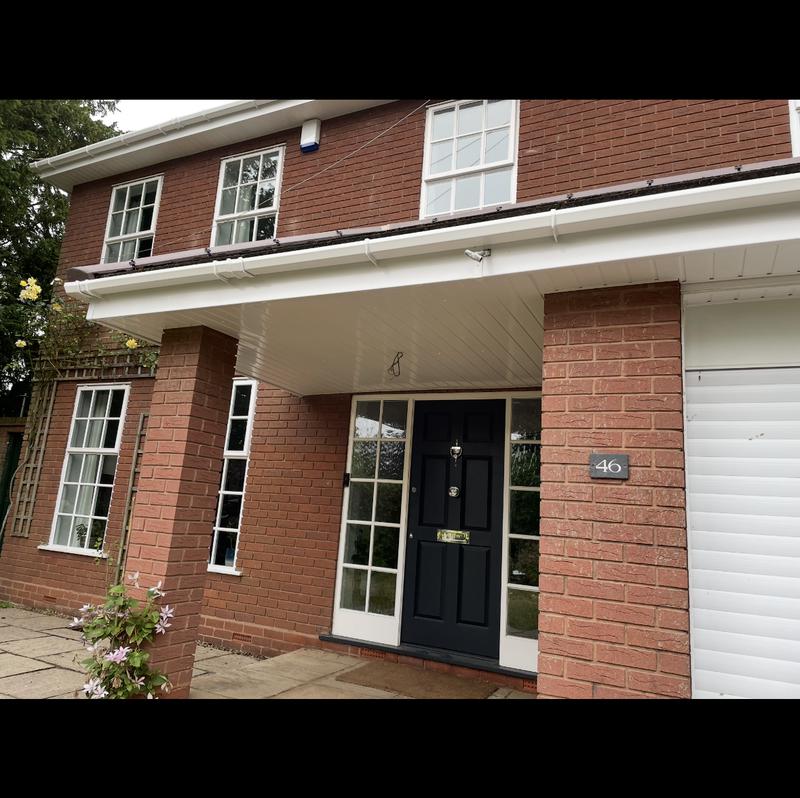
- White cladding here fitted underneath.
-
Image
36
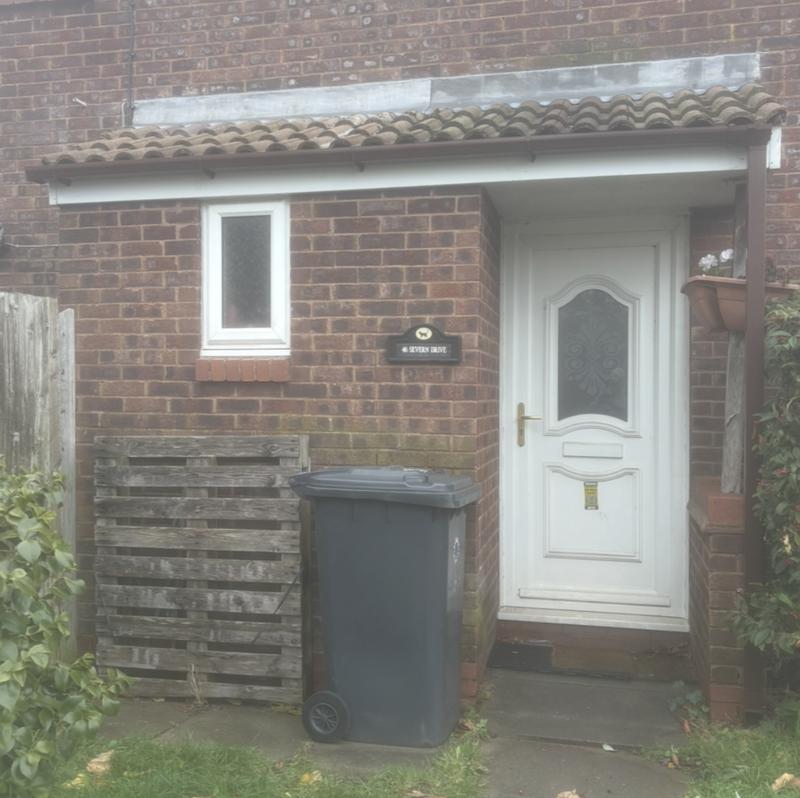
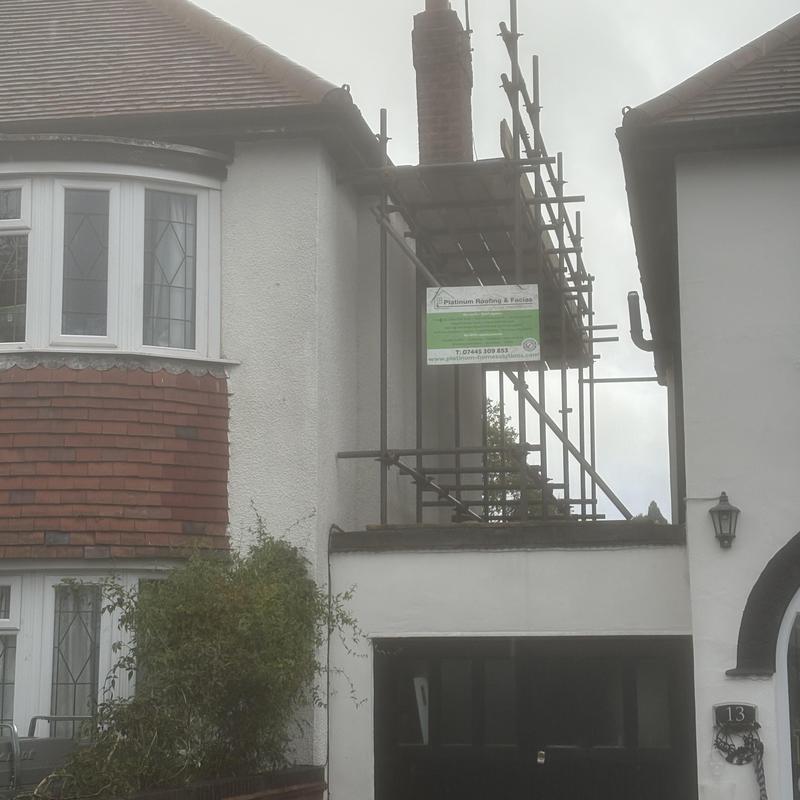
- New Lead fitted here along with new Brown guttering and a Down pipe.
-
Image
37
-
Image
38
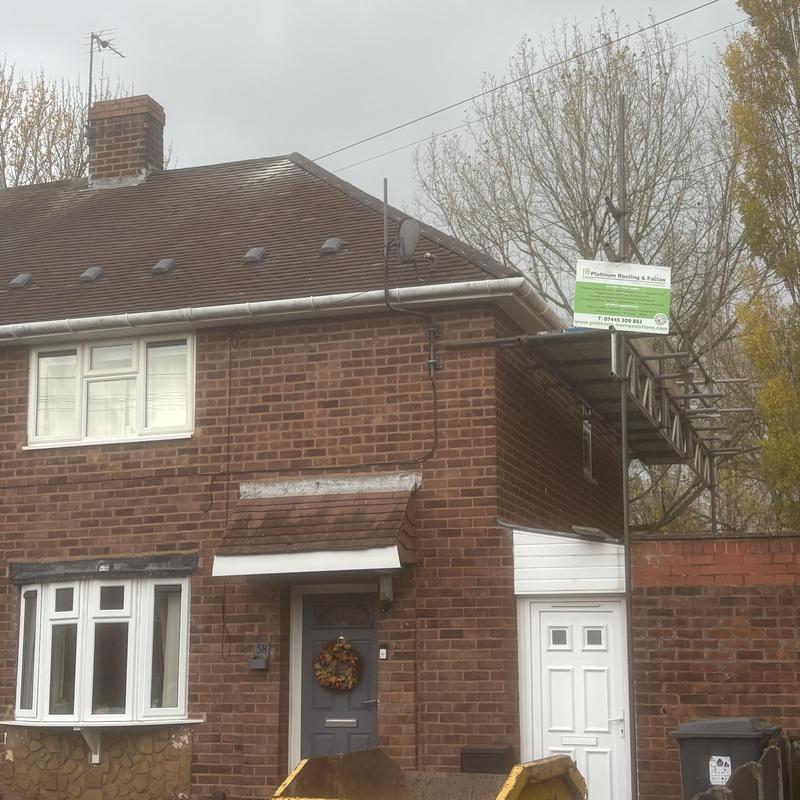
- Antique Brown Ridge tiles were fitted in the dry fix system.
-
Image
39
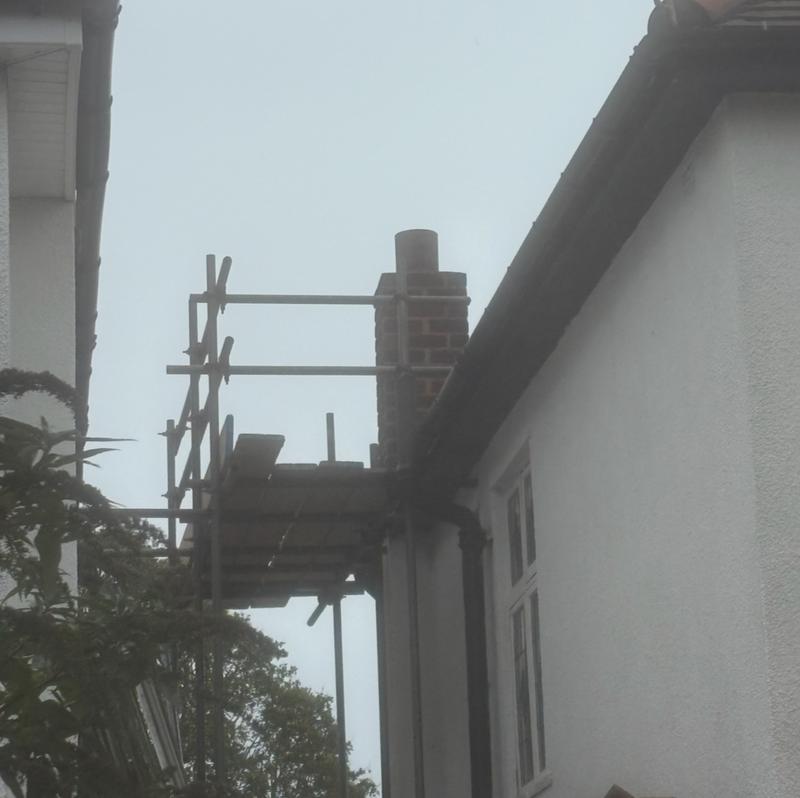
- After photo of the Chimney we reduced down in Penn
-
Image
40
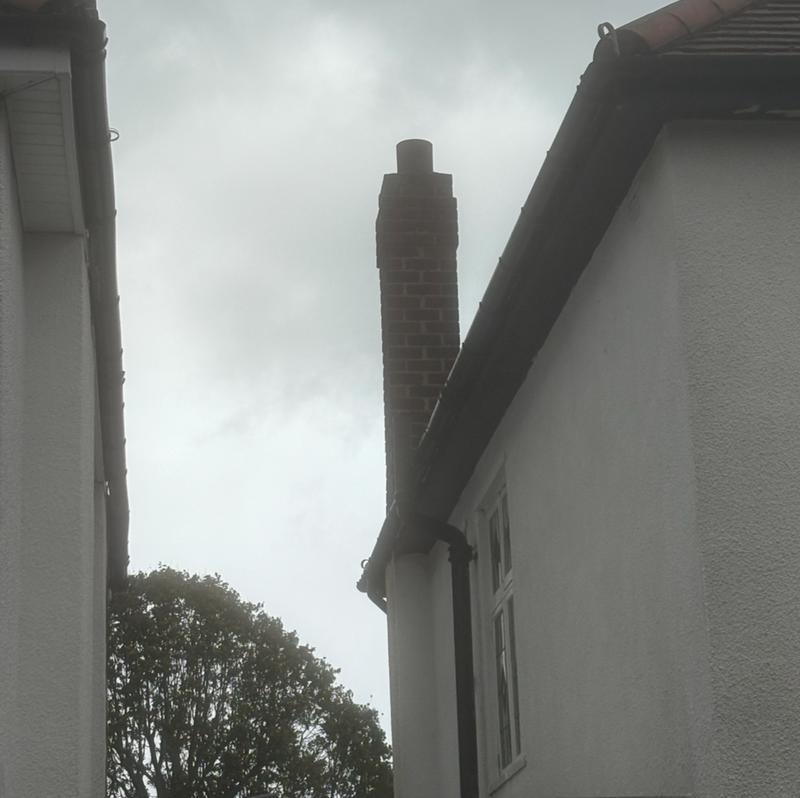
- Chimney to the rear here before we reduced this one down.
-
Image
41
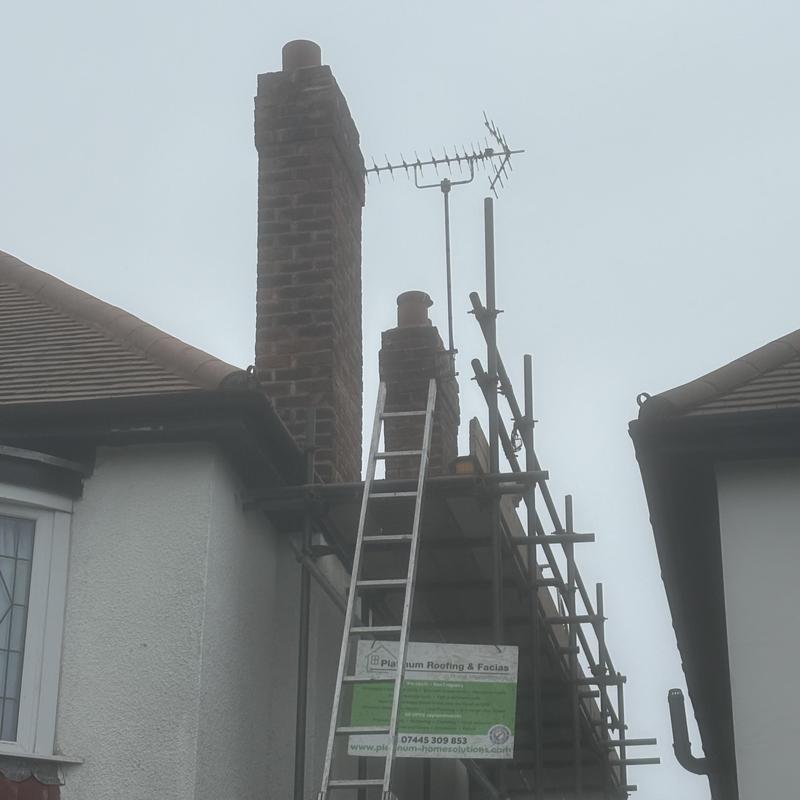
- The rear Chimney has been repointed, we are to remove the front Chimney now.
-
Image
42
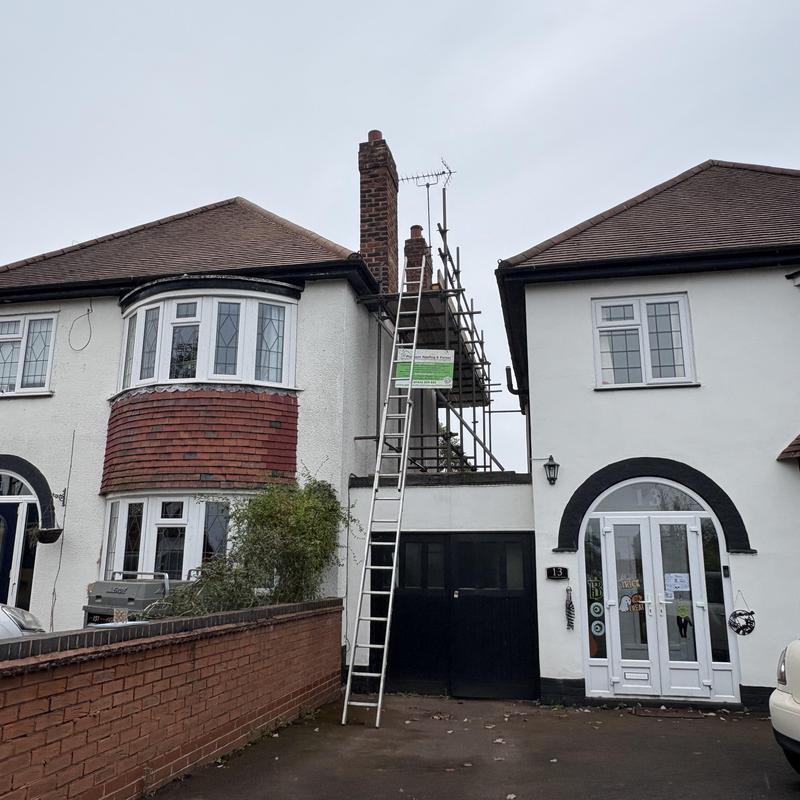
- Chimneys here in Penn before we repointed the rear one and removed the front one.
-
Image
43
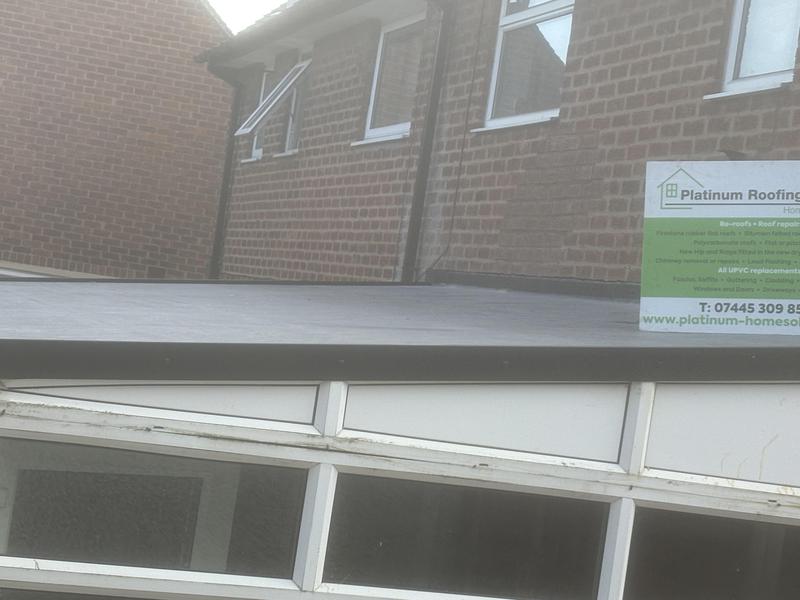
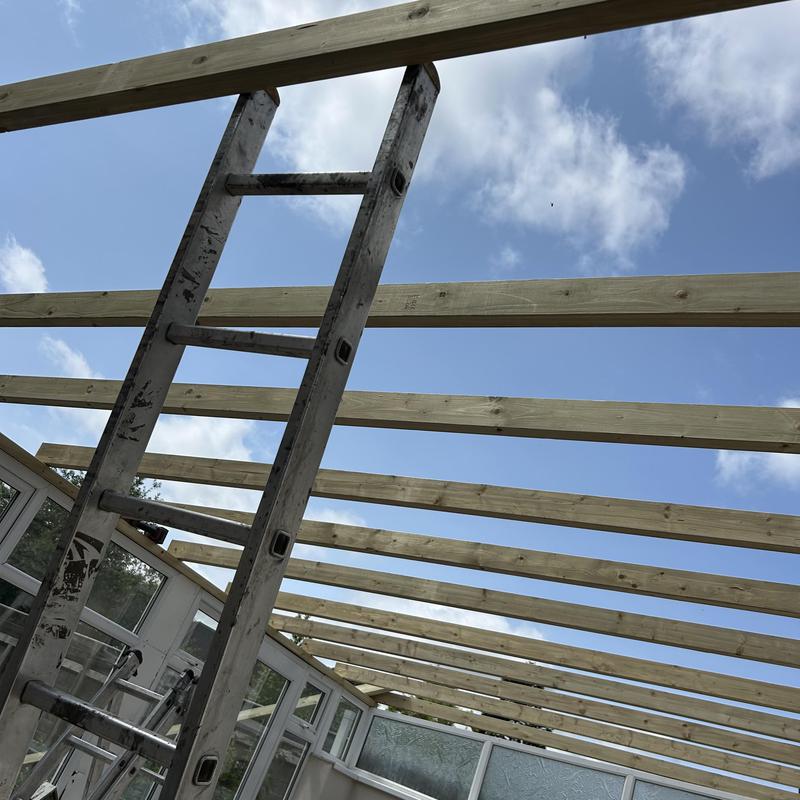
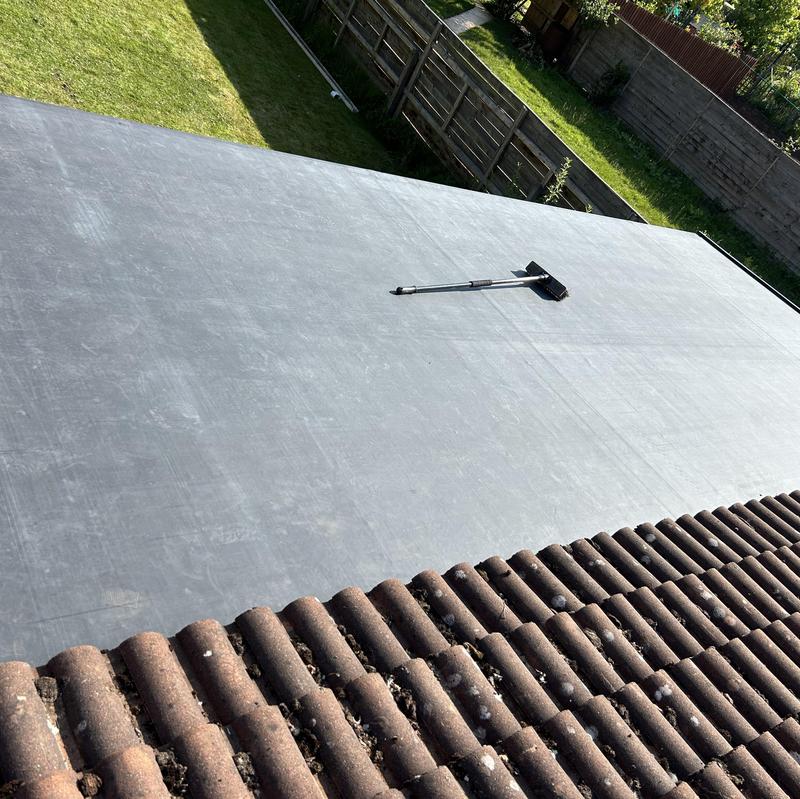
- Rubber Roof fitted here in replacement to the Conservatory Roof
-
Image
44
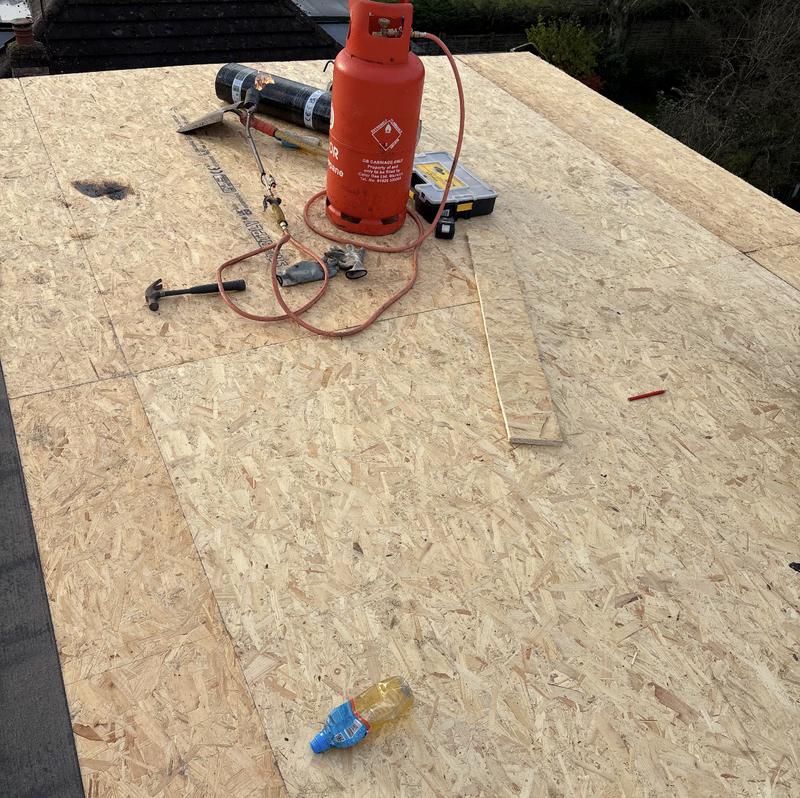
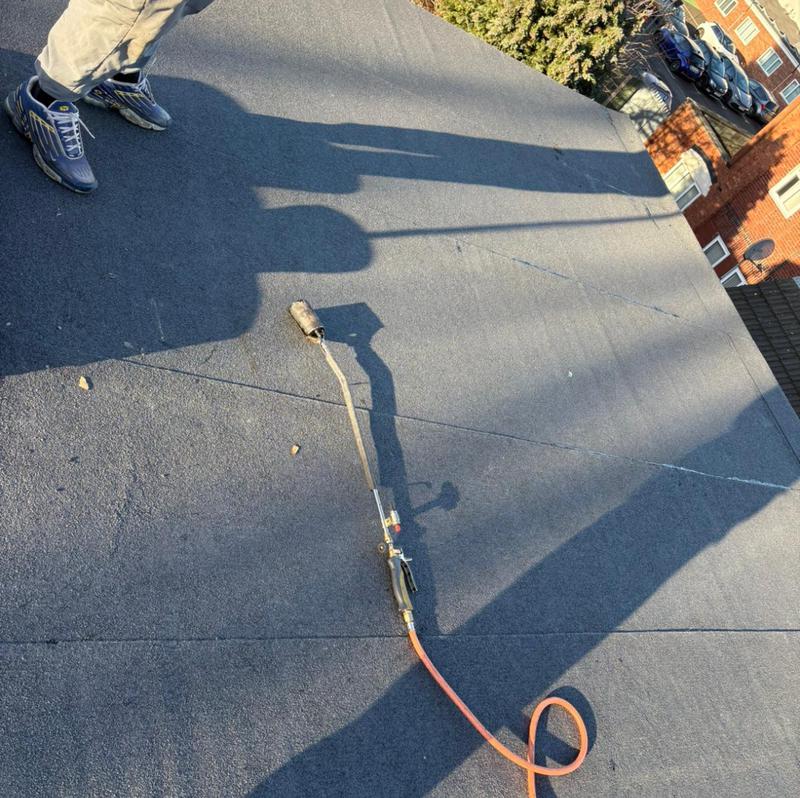
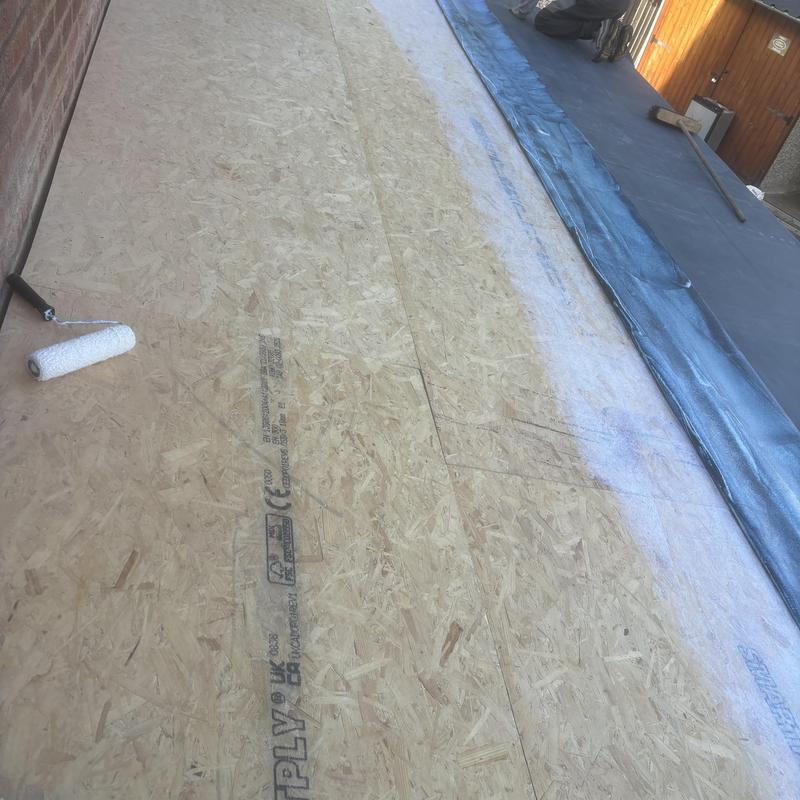
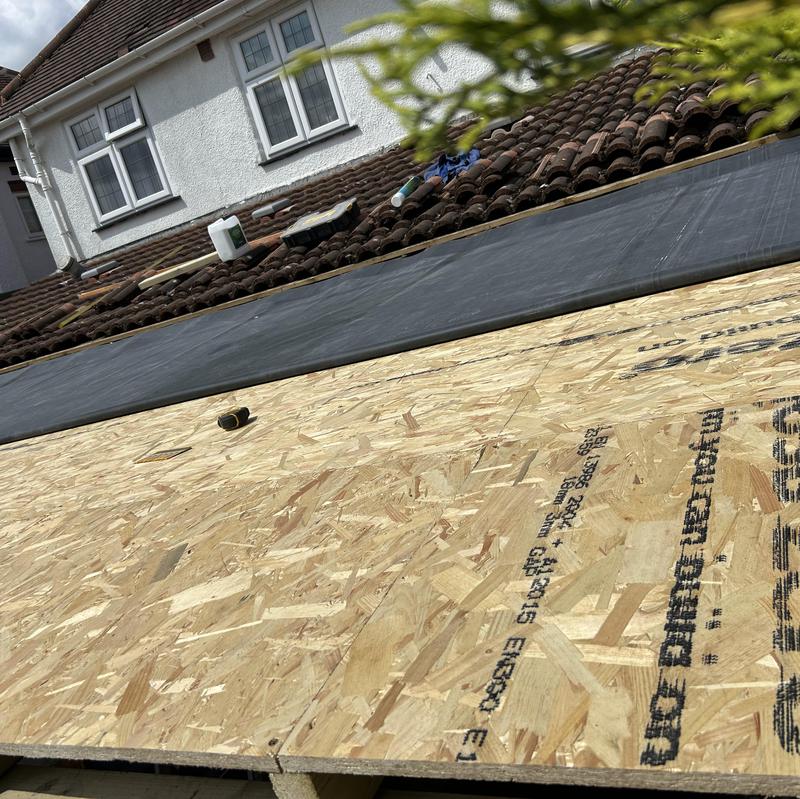
- Preparing the Tubber with Water based glue rolled onto the new clean osb boards.
-
Image
45
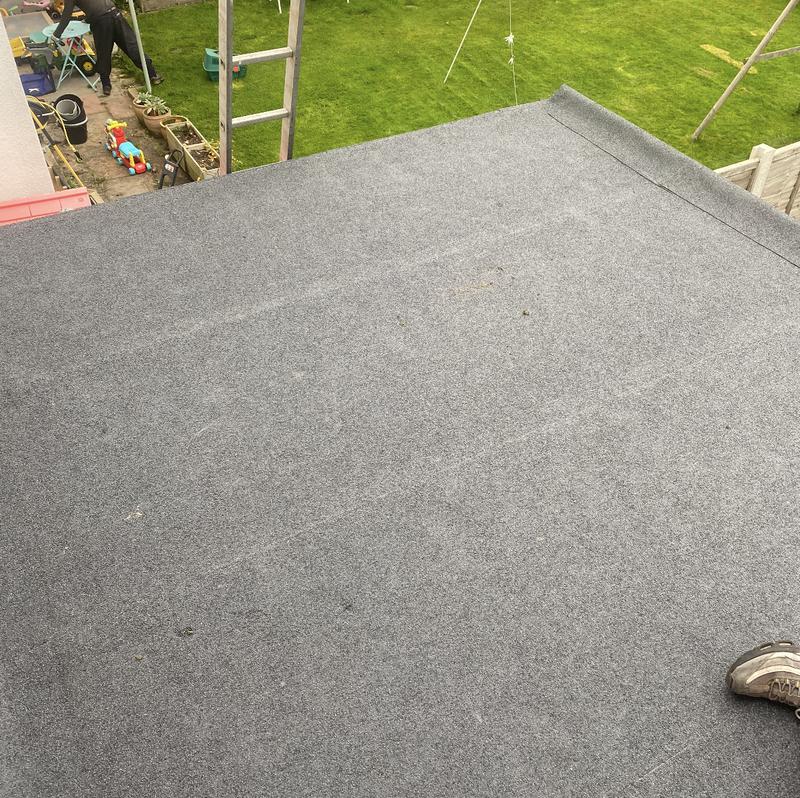
- Completed Felted Re Roof .
-
Image
46
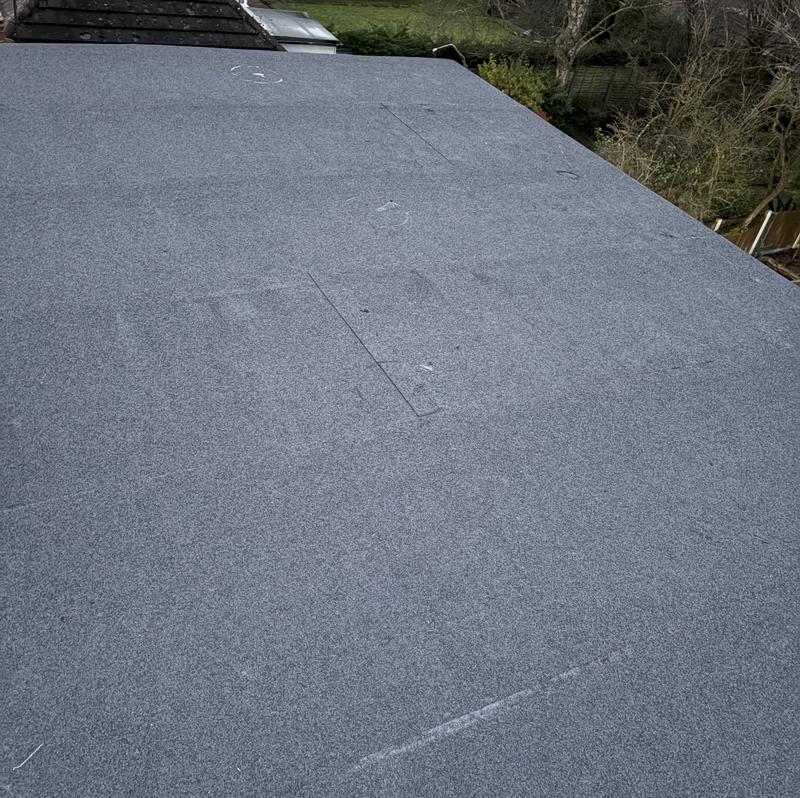
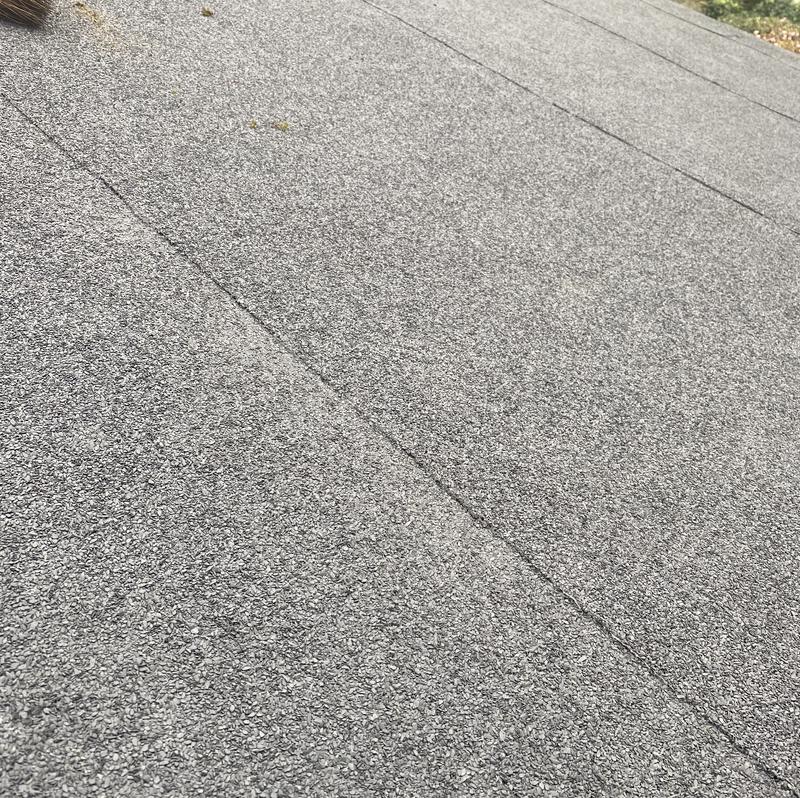
- Completed Charcoal felted Roof.
-
Image
47
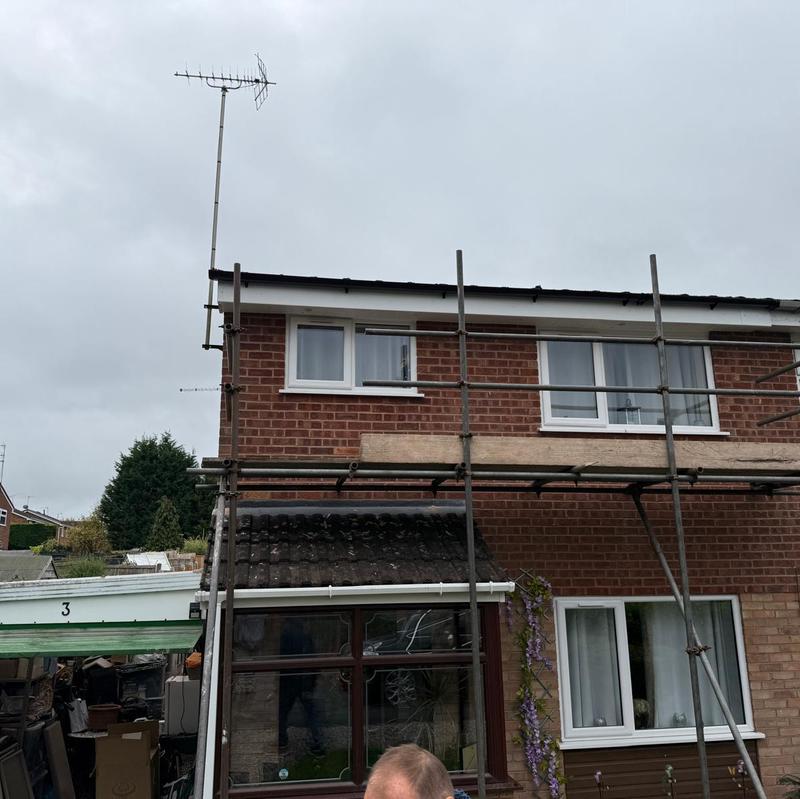
- Completed white Fascia, Soffits and Black guttering to the front of the House in Perton.
-
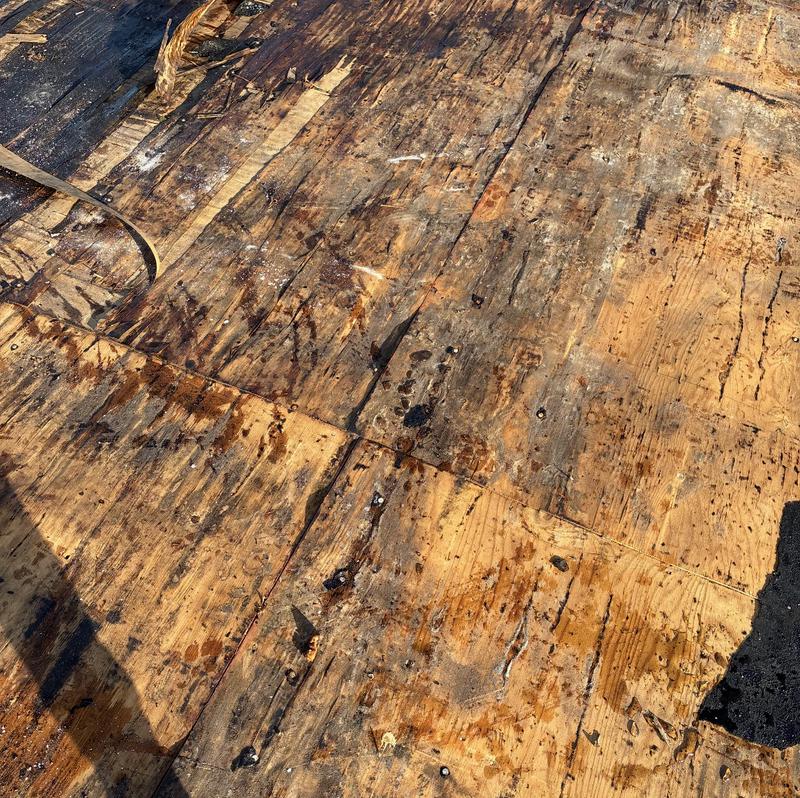
Image
48
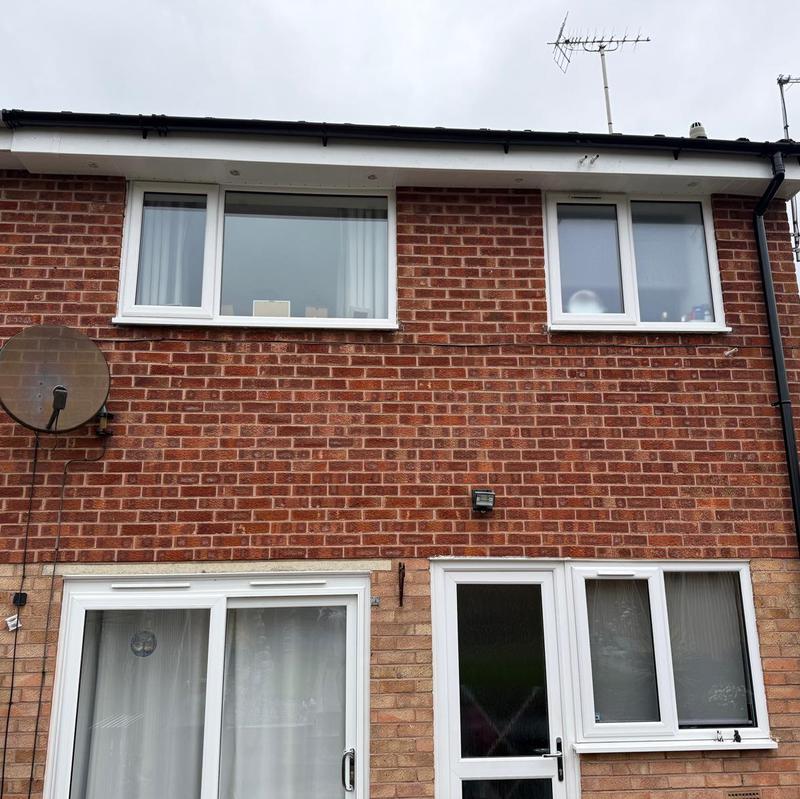
- Completed Fascias etc to the rear of the house in Perton.
-
Image
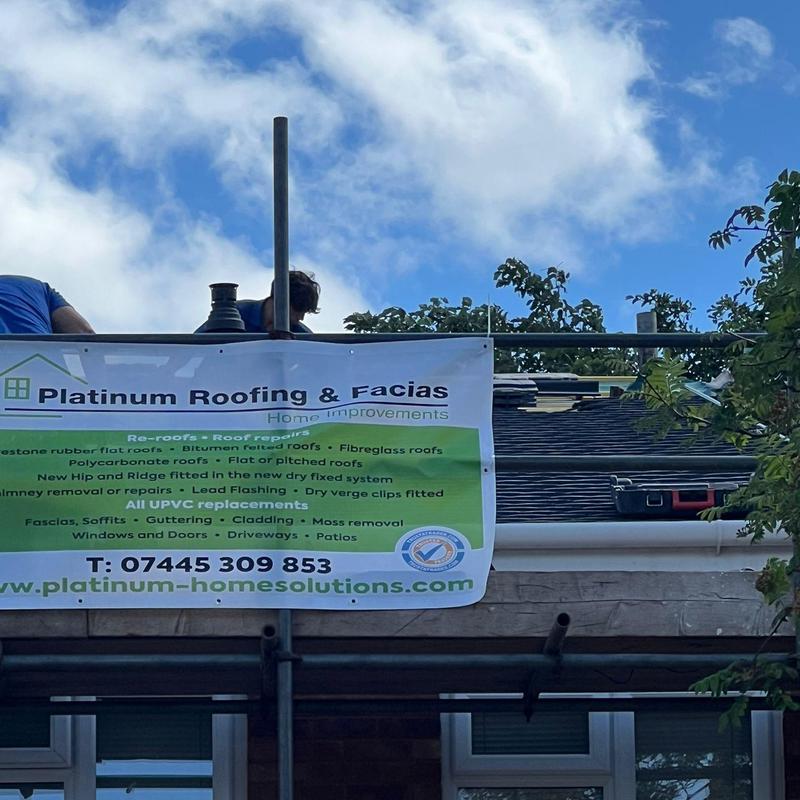
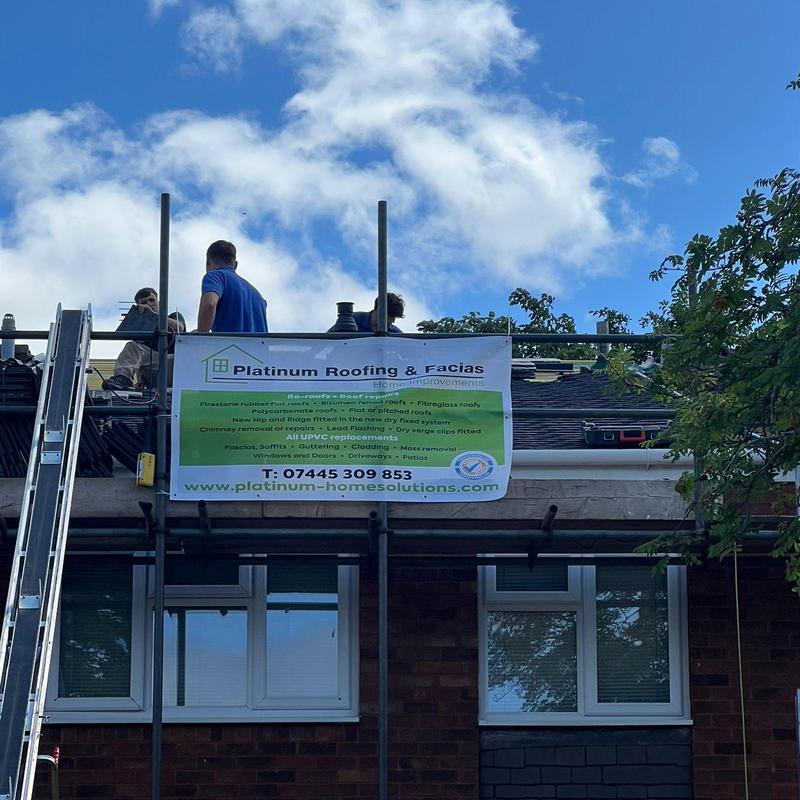
49
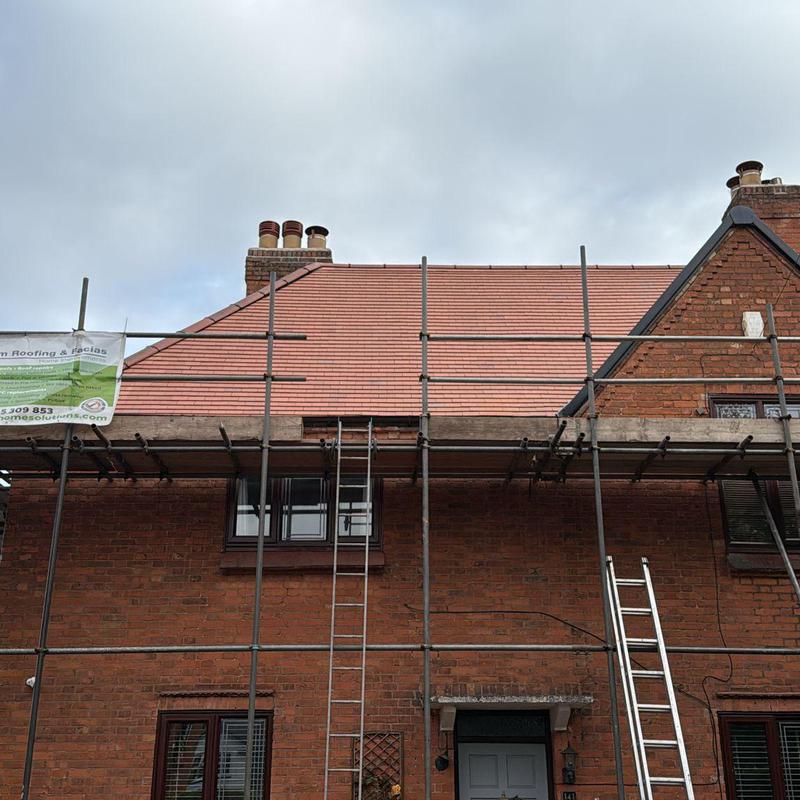
- Re roof we completed in Bournville, absolutely stunning I think, perfect tile choice by the owner, Love this one.
-
Image
50
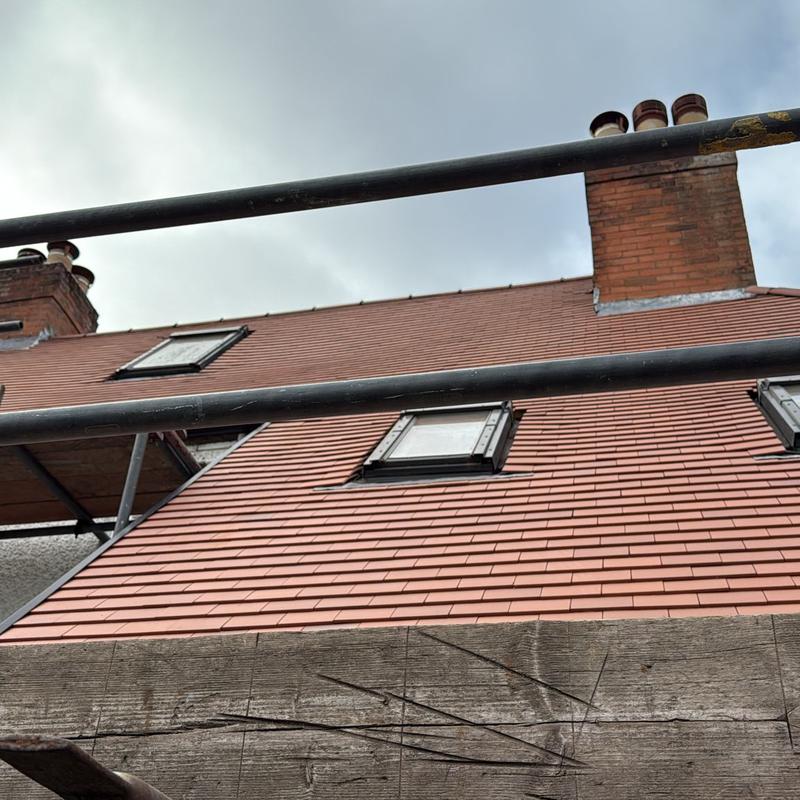
- Photo to the rear of the House.
-
Image
51
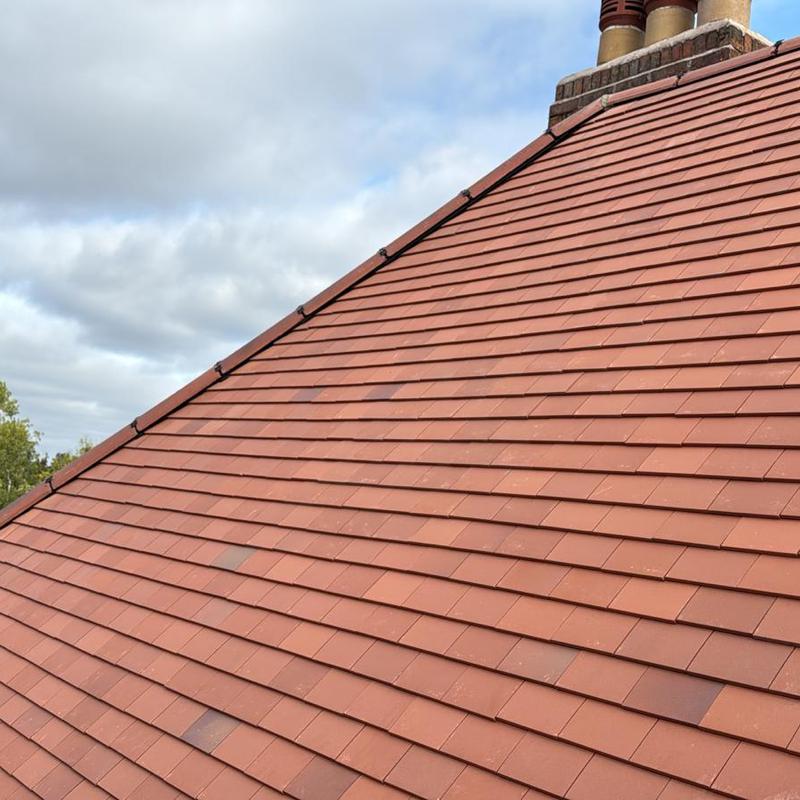
- To the side of the Roof.
-
Image
52
-
Image
53
-
Image
54
-
Image
55
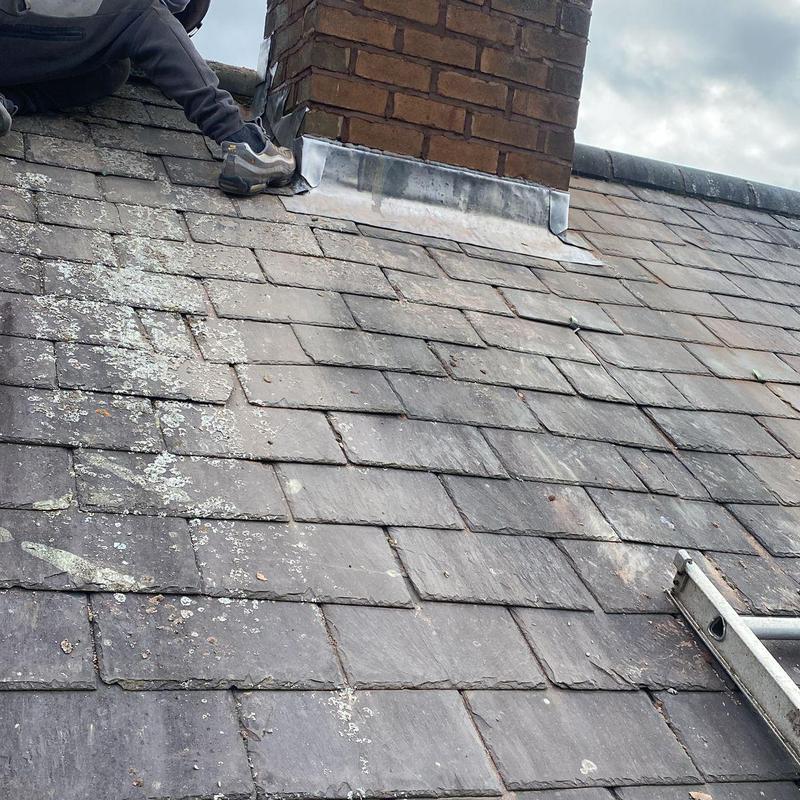
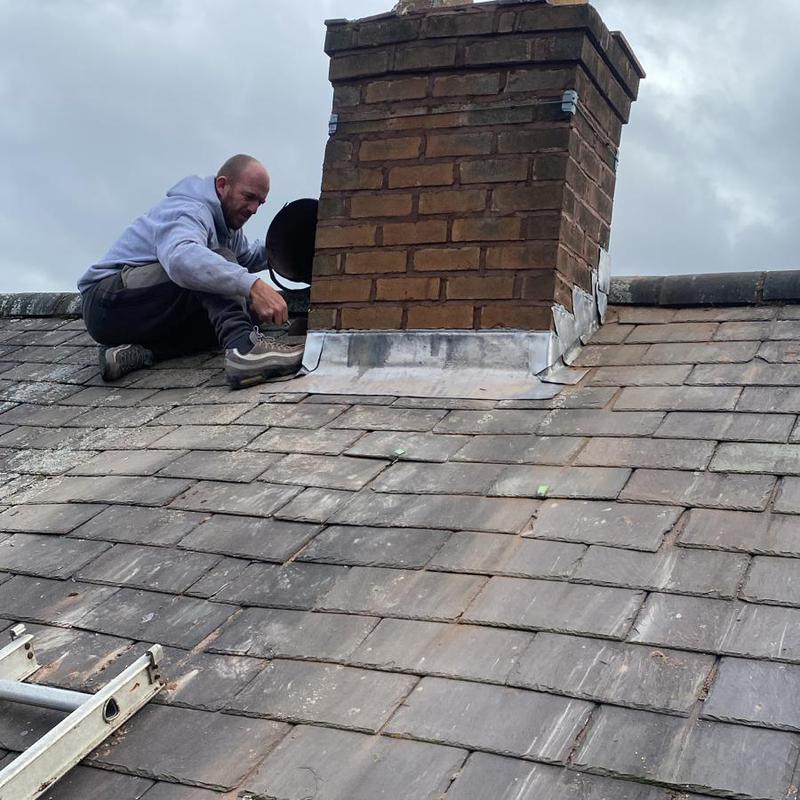
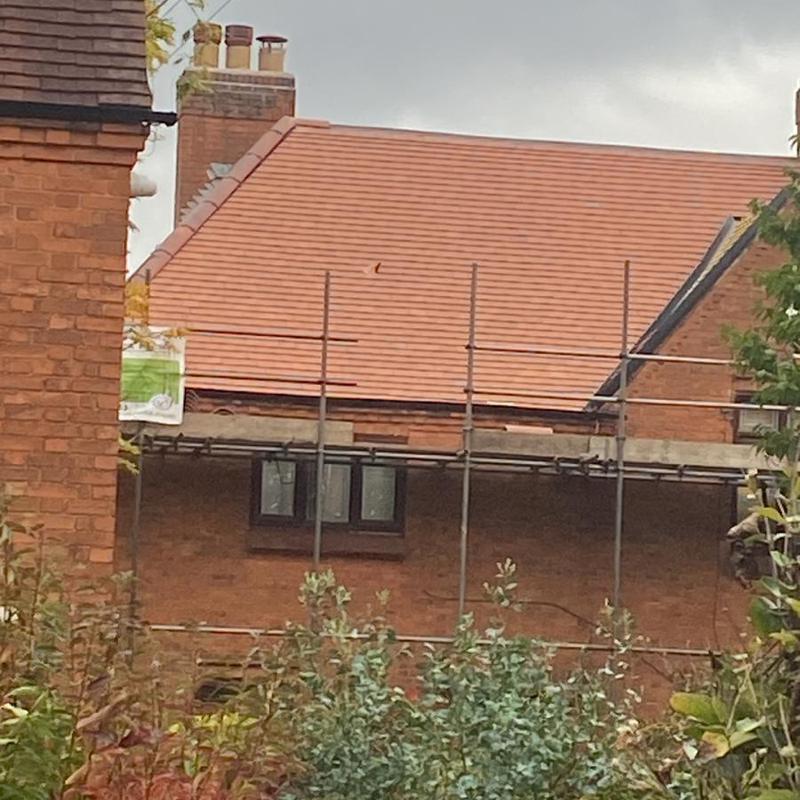
- Replacing the code four Lead and Re Pointing the Chimney for Syed.
-
Image
56
-
Image
57
-
Image
58
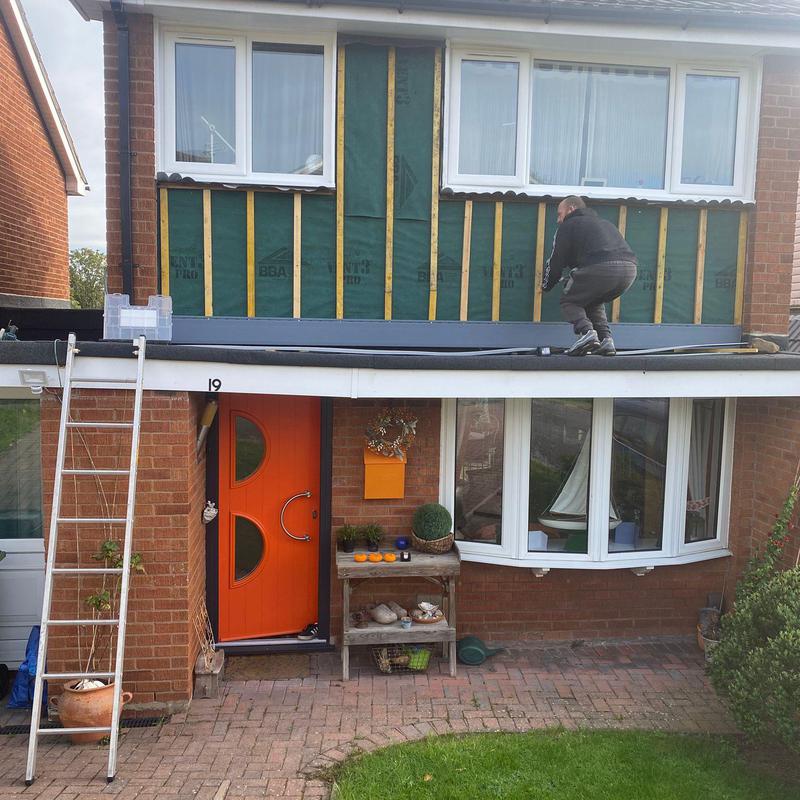
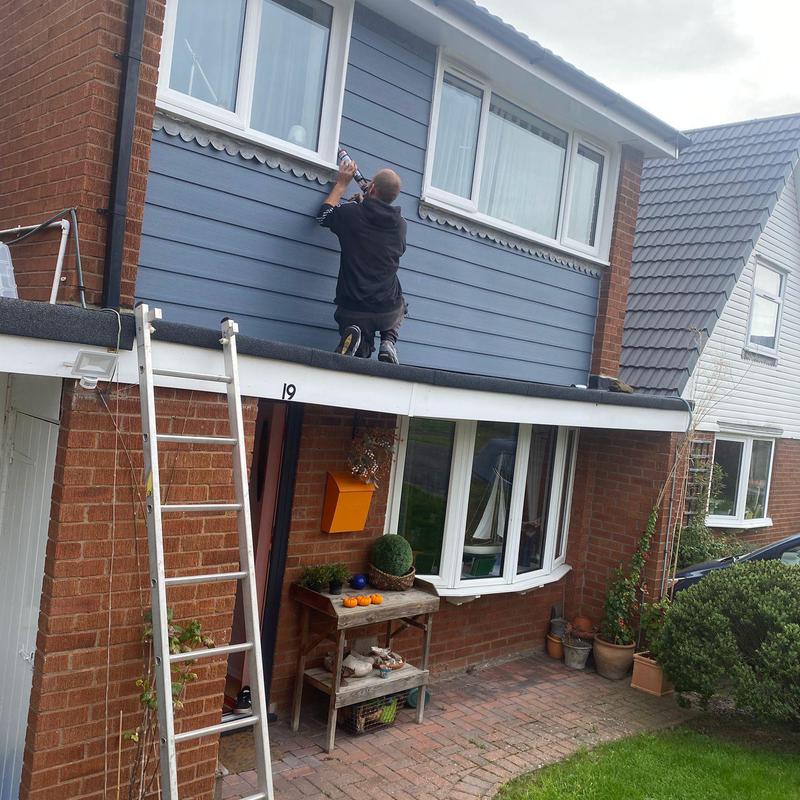
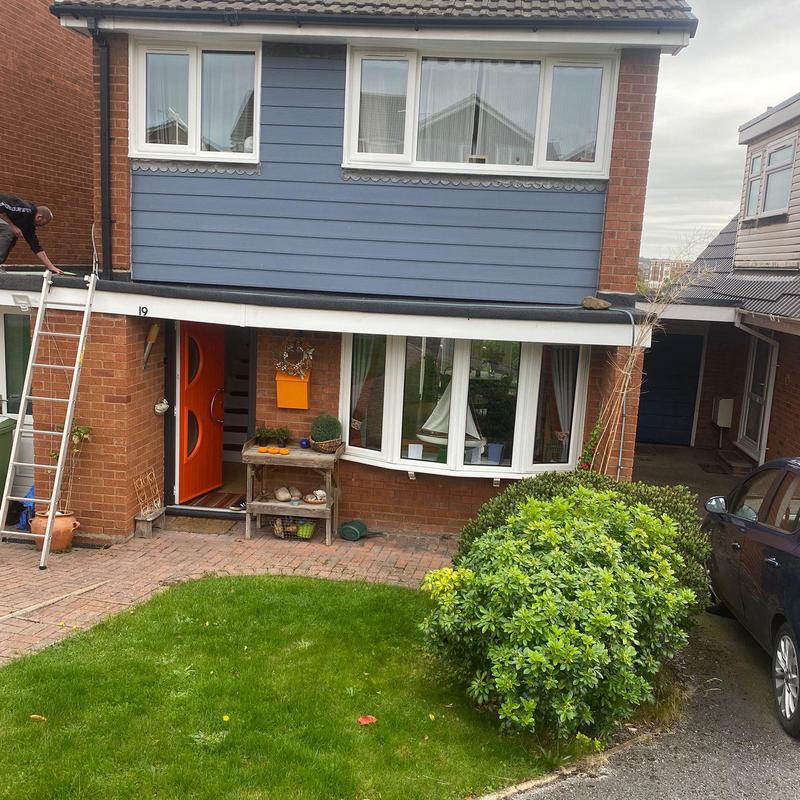
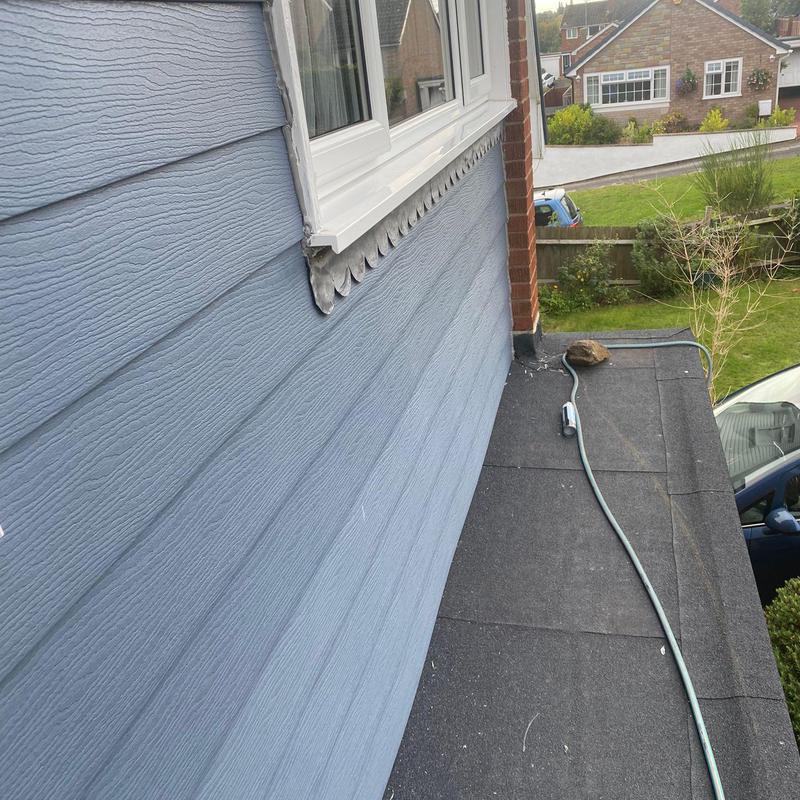
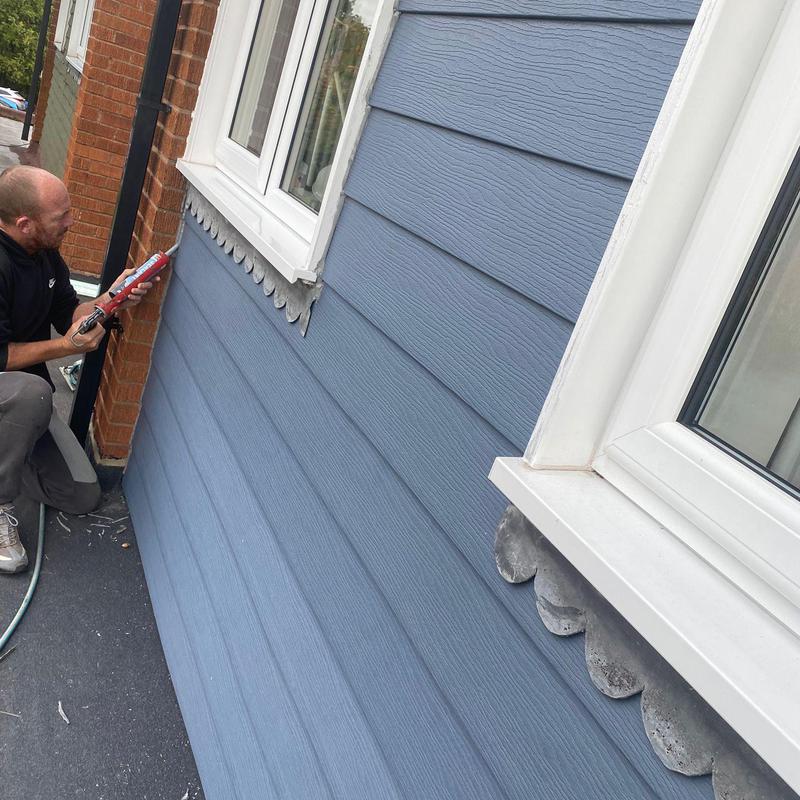
- Re Cladding the front of this house in Stafford.
-
Image
59
-
Image
60
- Completed.
-
Image
61
-
Image
62
-
Image
63
-
Image
64
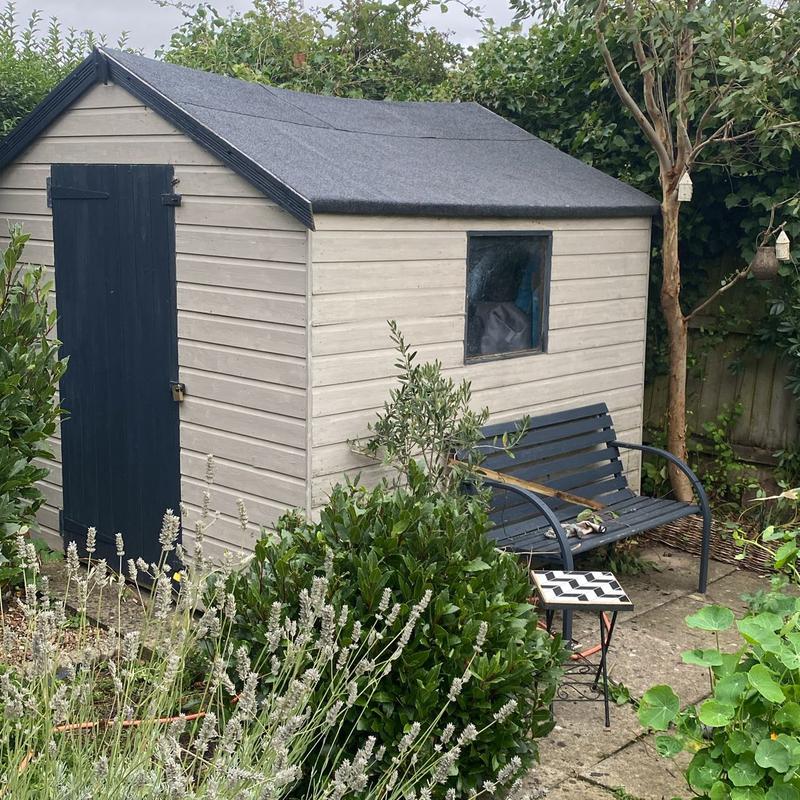
- We also covered the shed in Bournville with new felt after we completed his Re Roof.
-
Image
65
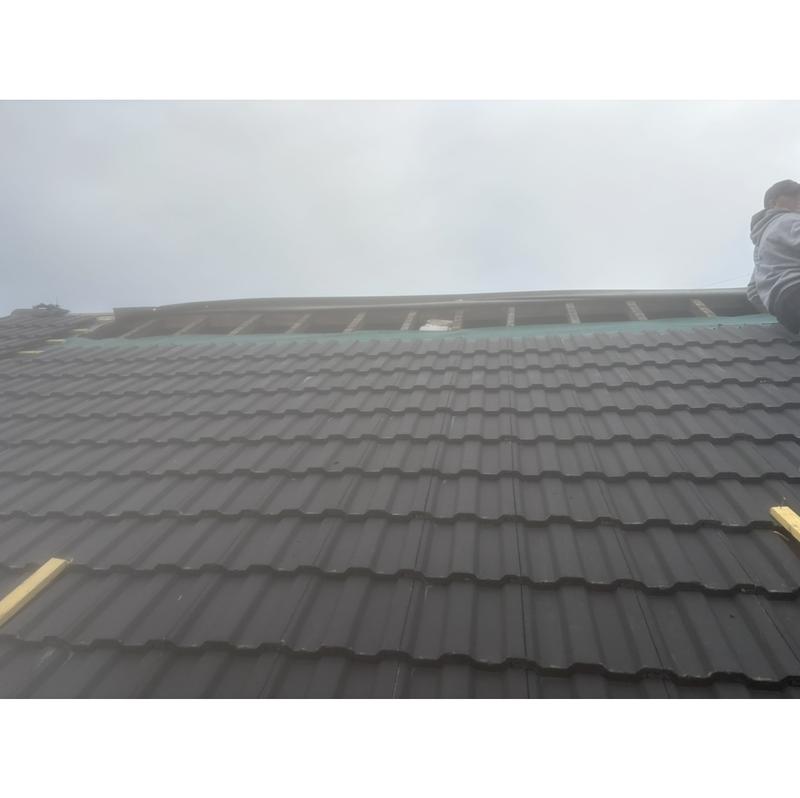
- Showing each stages of the Rood we completed.
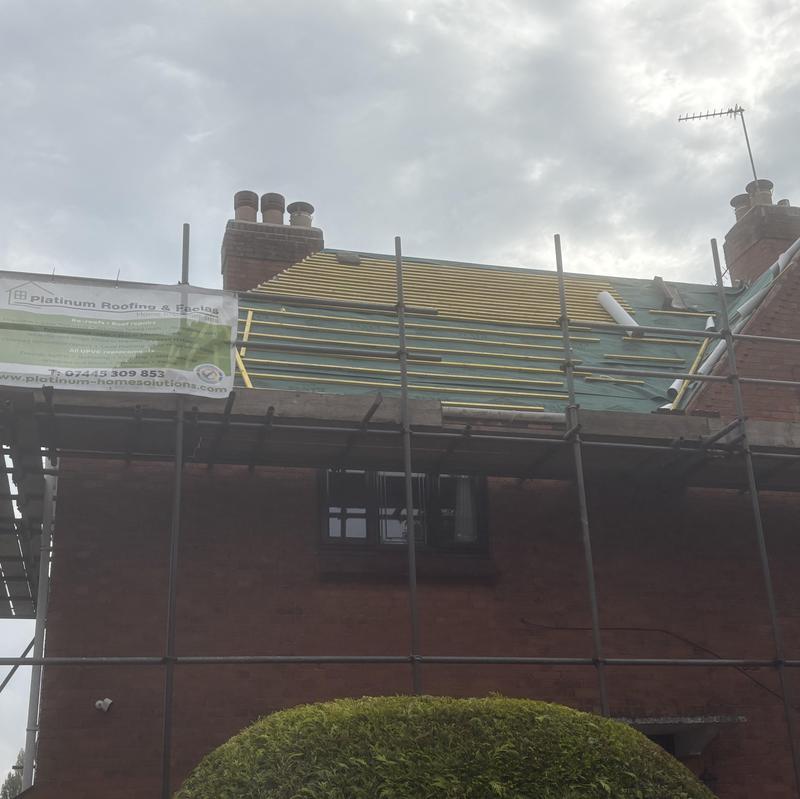
-
Image
66
- Stages of the Re Roof in Bournville.
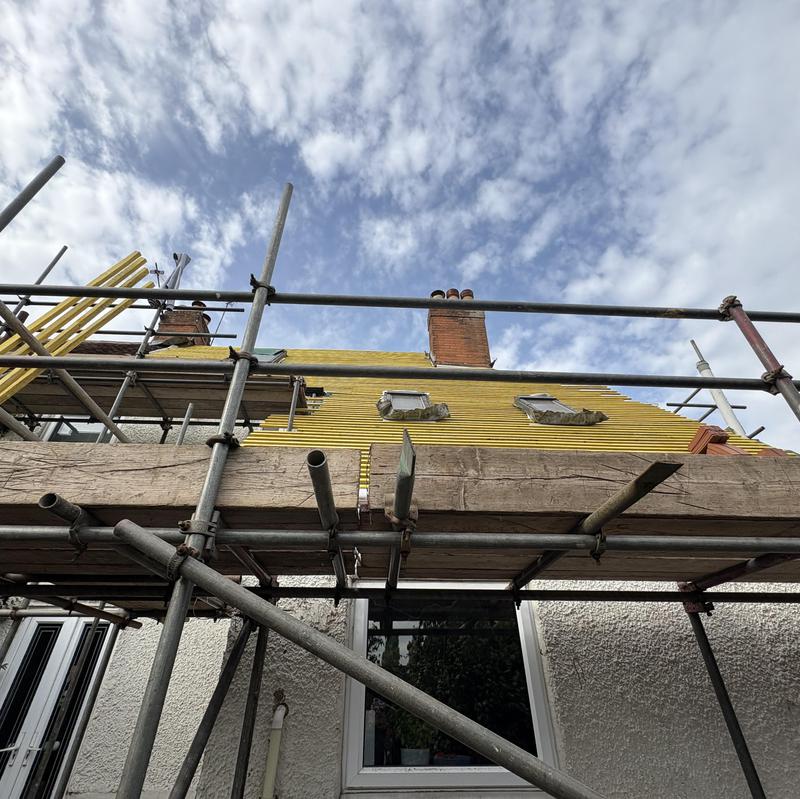
-
Image
67
- The side of the Roof had been covered with water proof membrane and treated Laths.
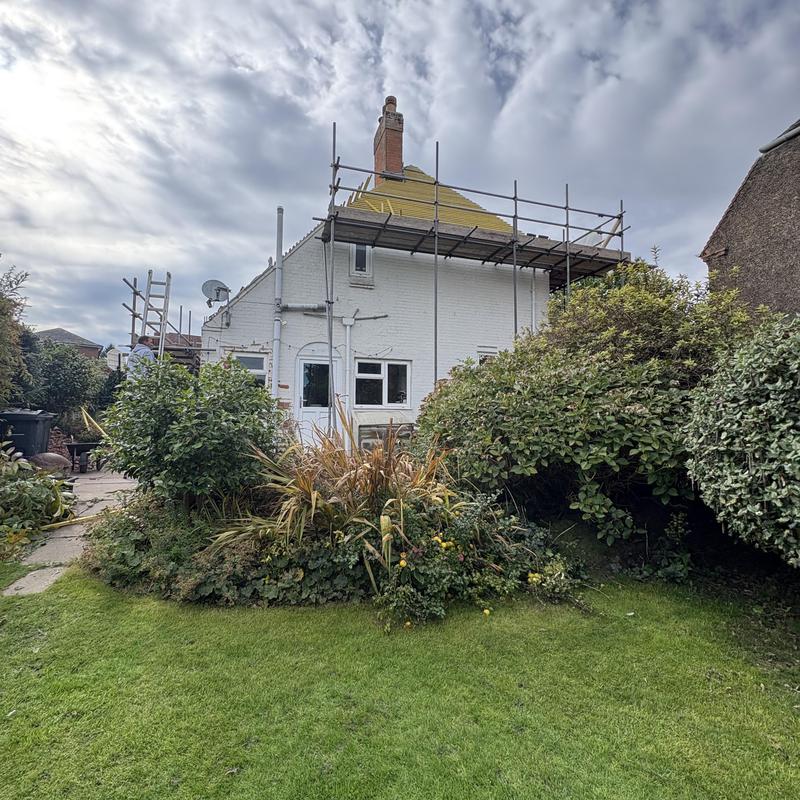
-
Image
68
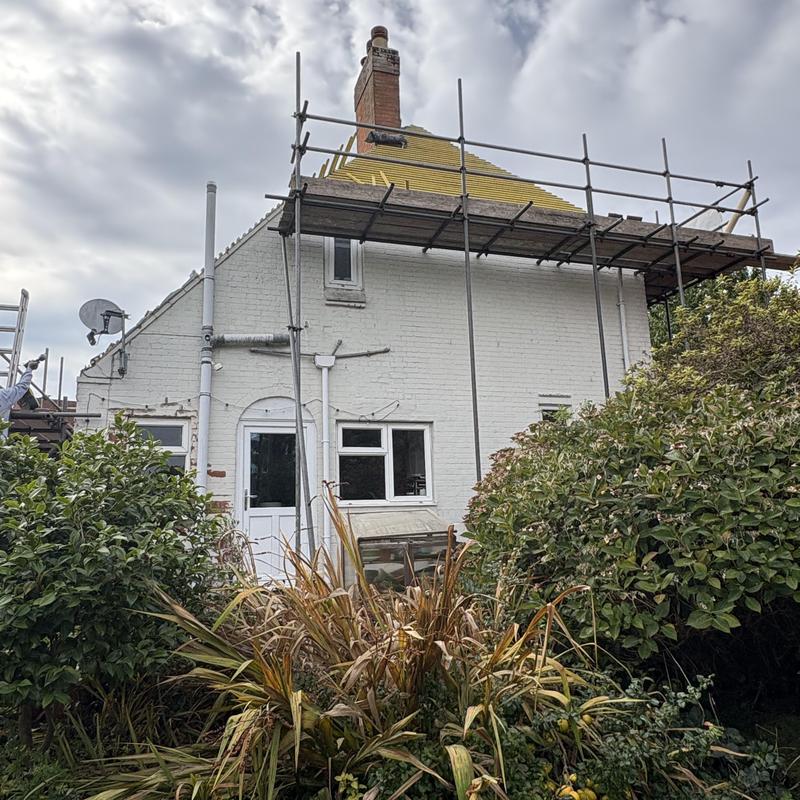
-
Image
69
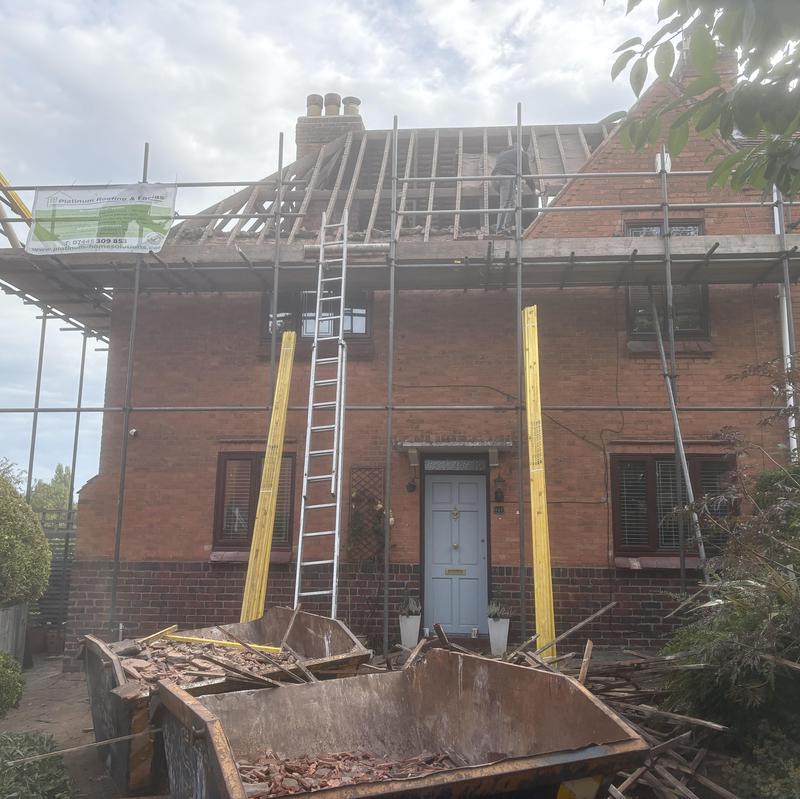
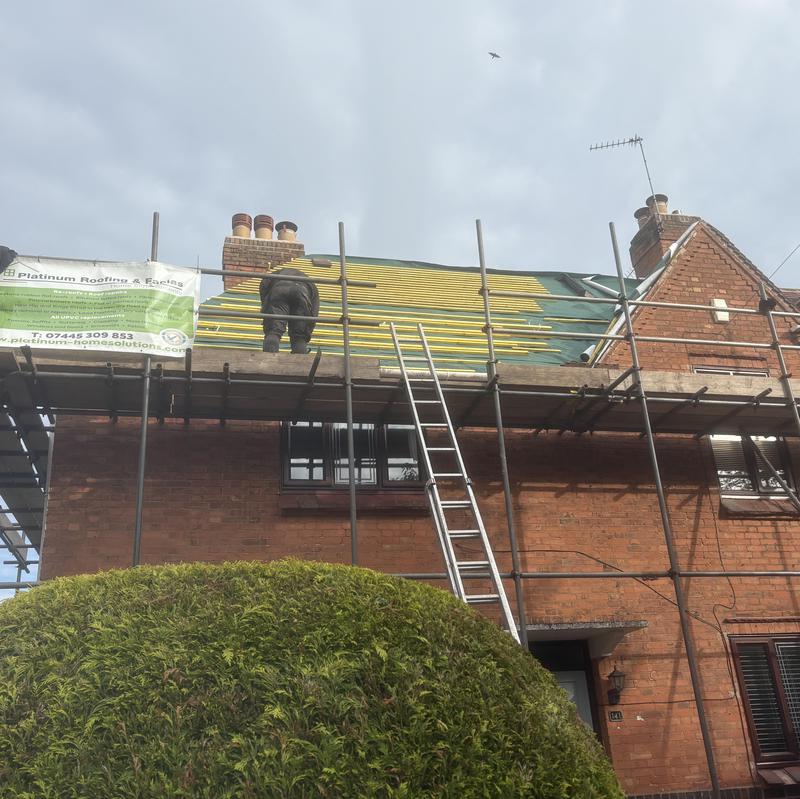
- Roof stripped down ready for new membrane and treated Laths.
-
Image
70
-
Image
71
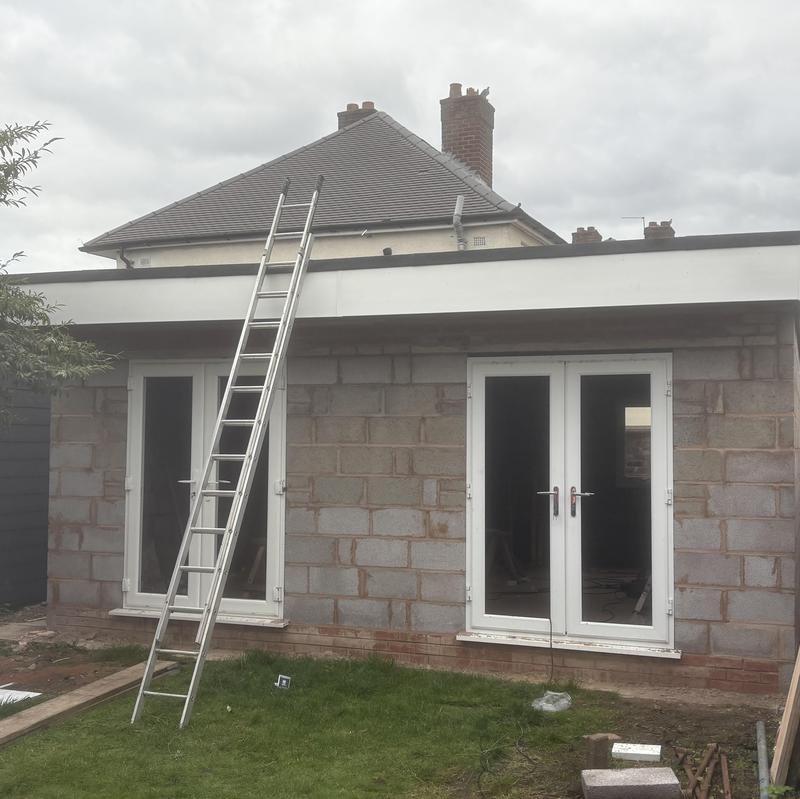
- Large felted flat roof we completed for Sophie, this is the second one we have completed for them this year.
-
Image
72
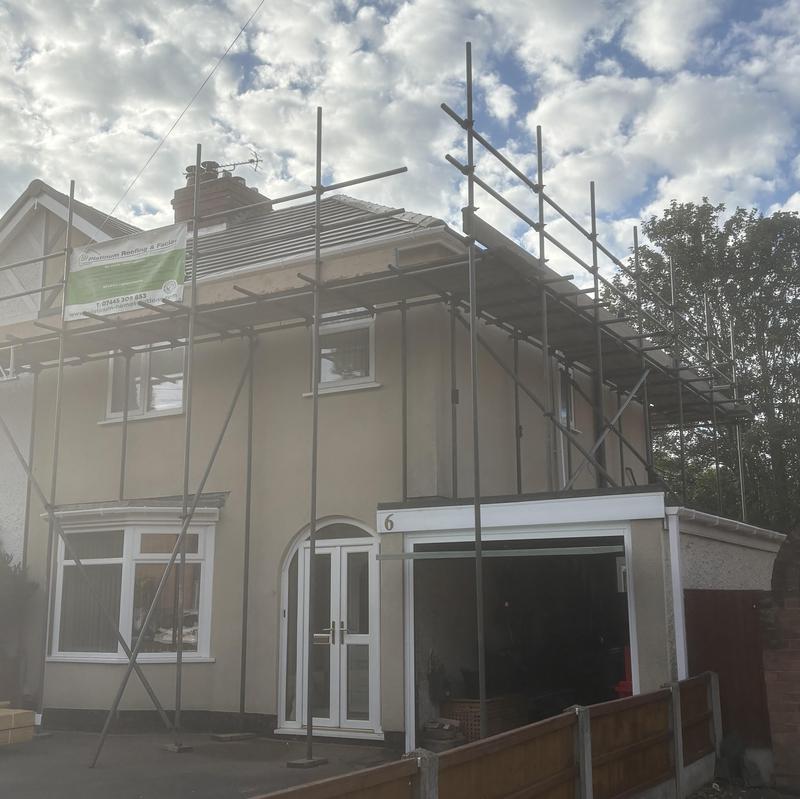
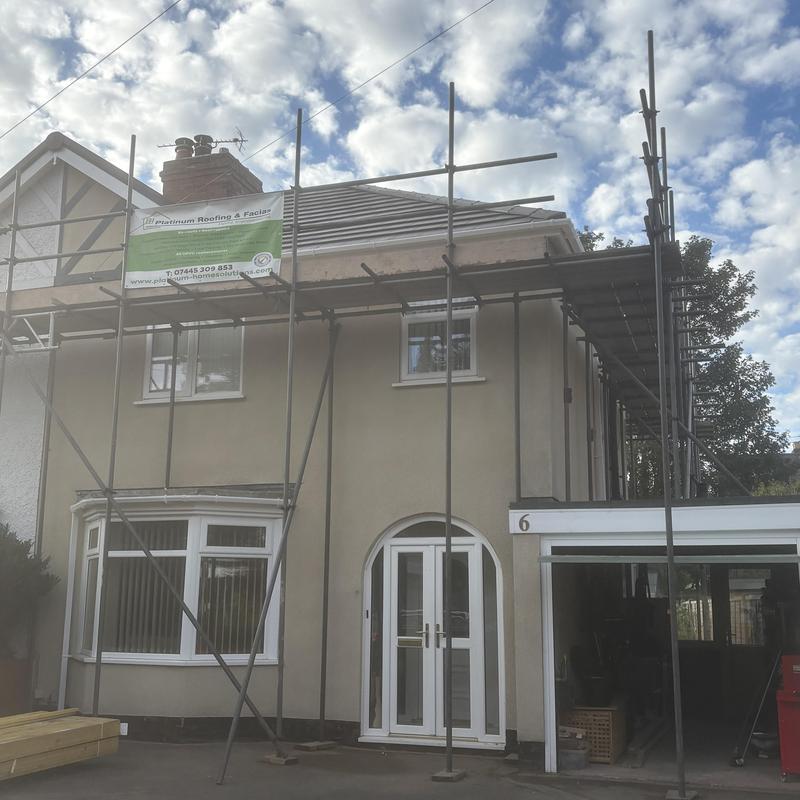
- Completed Re Roof here in Codsall for Tony also had new white Fascias, Soffits and guttering, very nice!
-
Image
73
- Completed.
-
Image
74
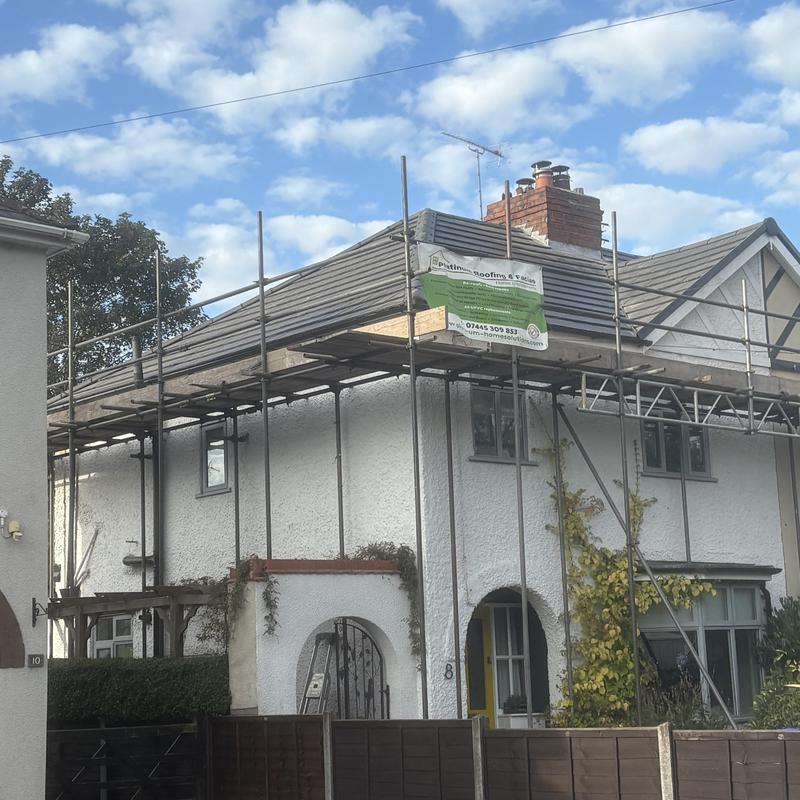
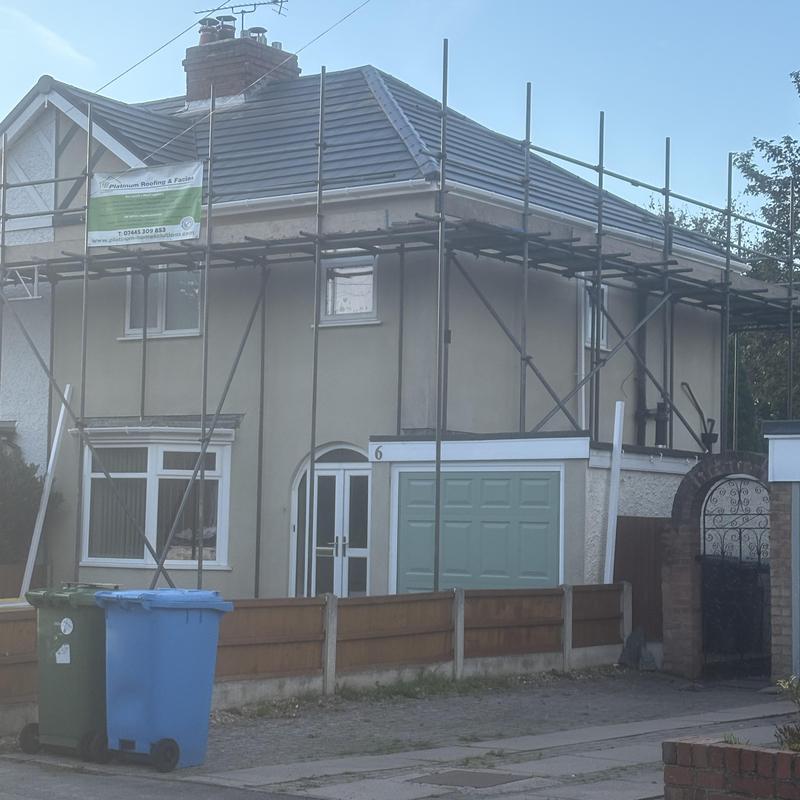
- We also completed the neighbours Roof next to Tony’s in Codsall with the same Roof tiles being Anthracite Modern Roof tiles.
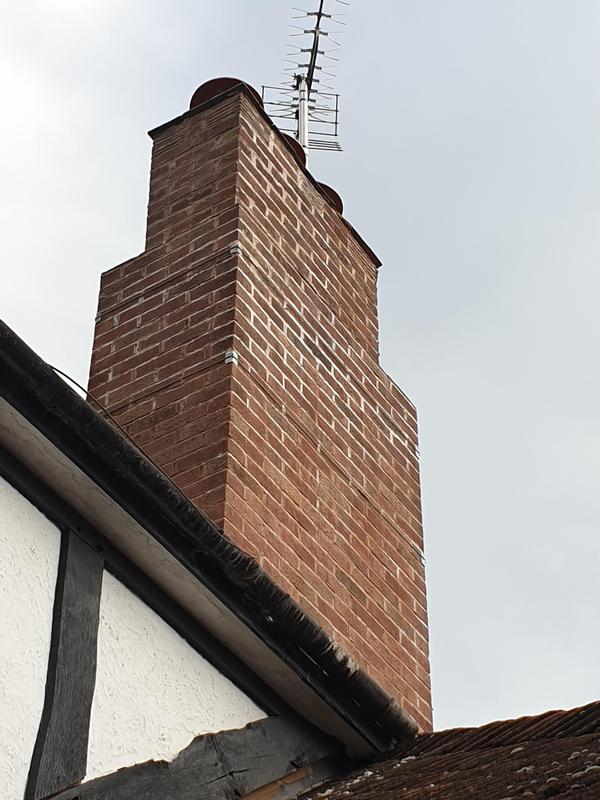
-
Image
75
-
Image
76
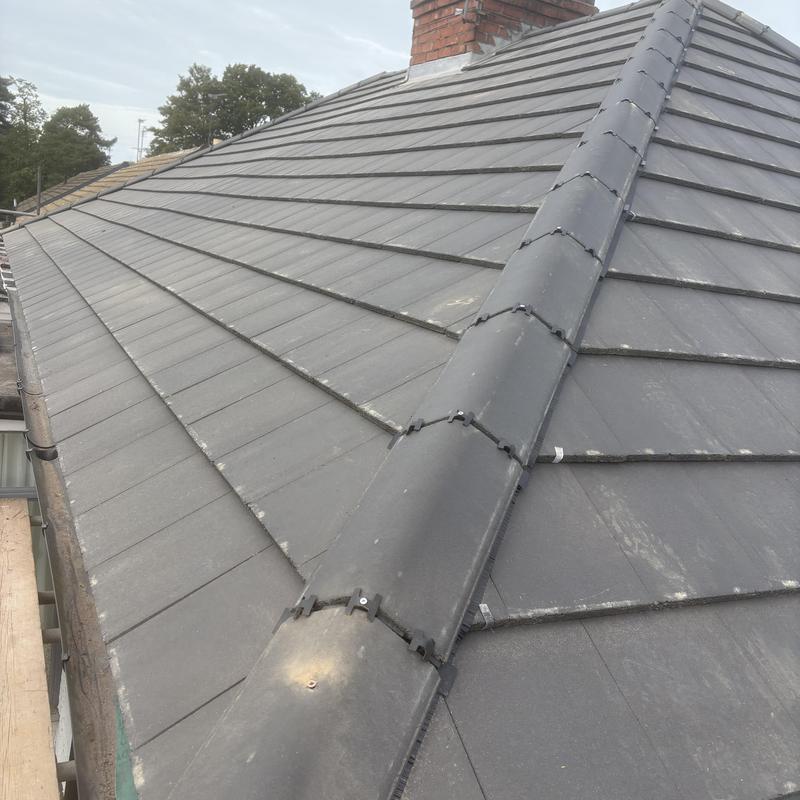
- The Ridge tiles fitted in the dry fix system.
-
Image
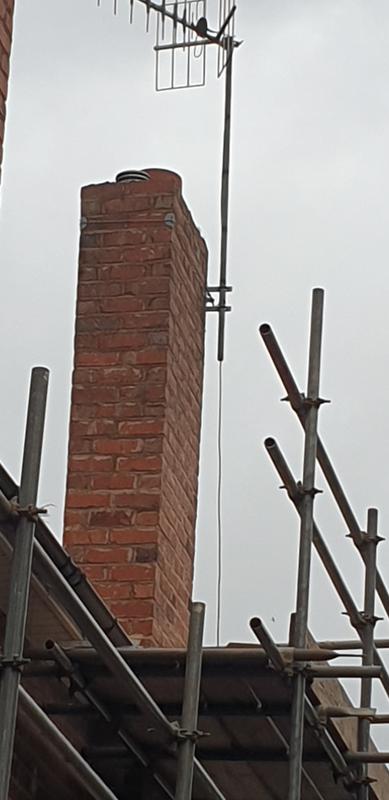
77
- Closer look at the Roof and our quality of work.
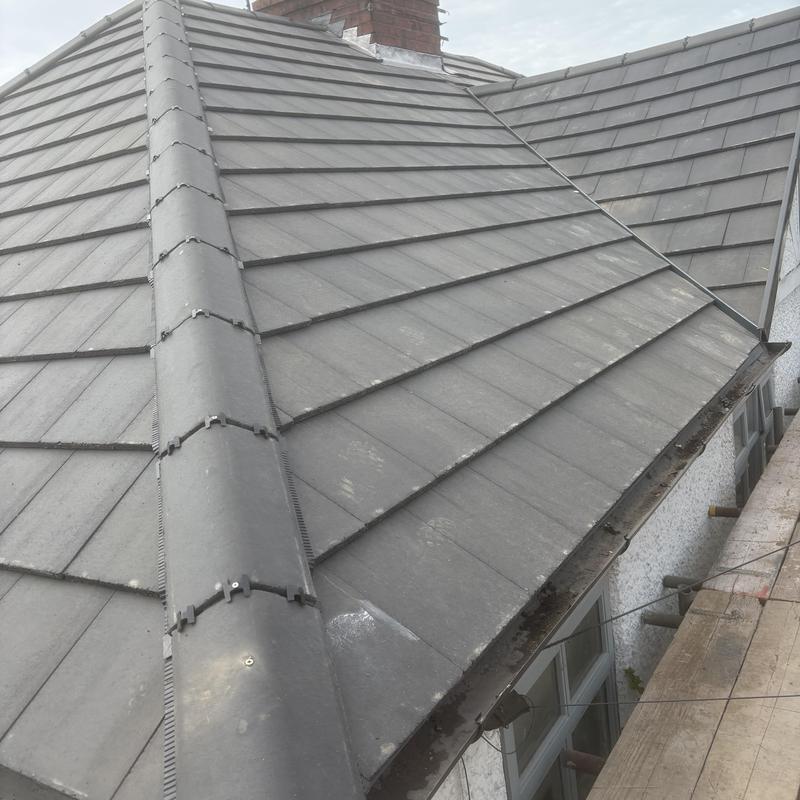
-
Image
78
- Another side of the Roof to look at closely.
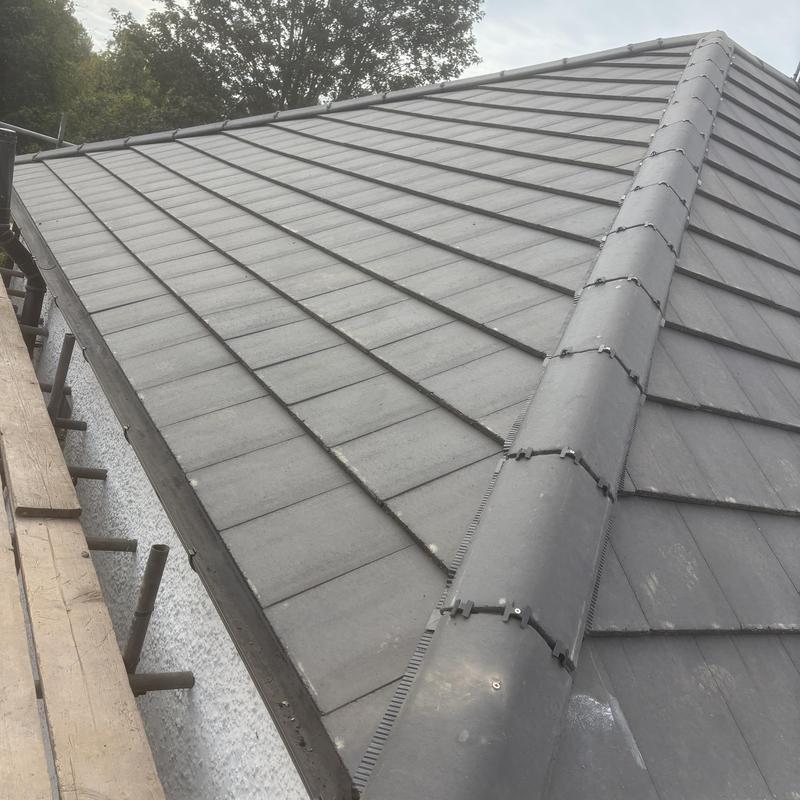
-
Image
79
- This is Ottos Roof we completed next to Tony’s in Codsall.
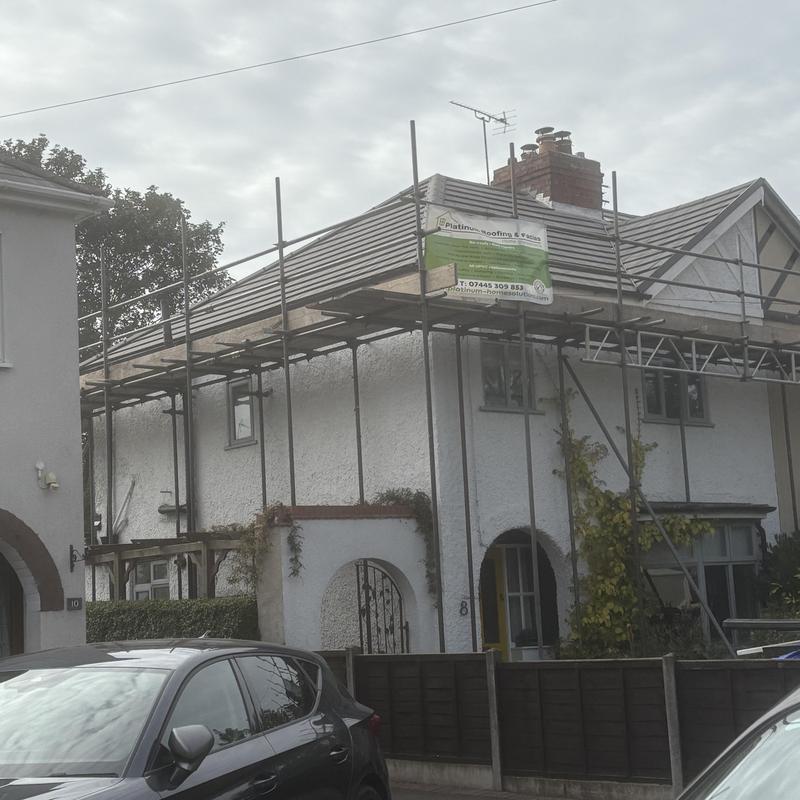
-
Image
80
-
Image
81
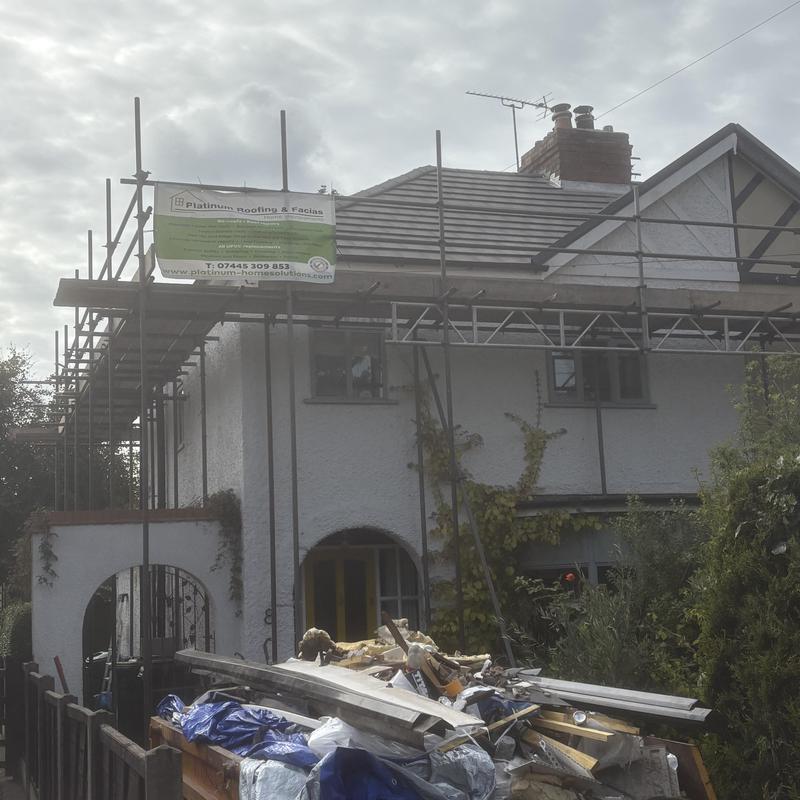
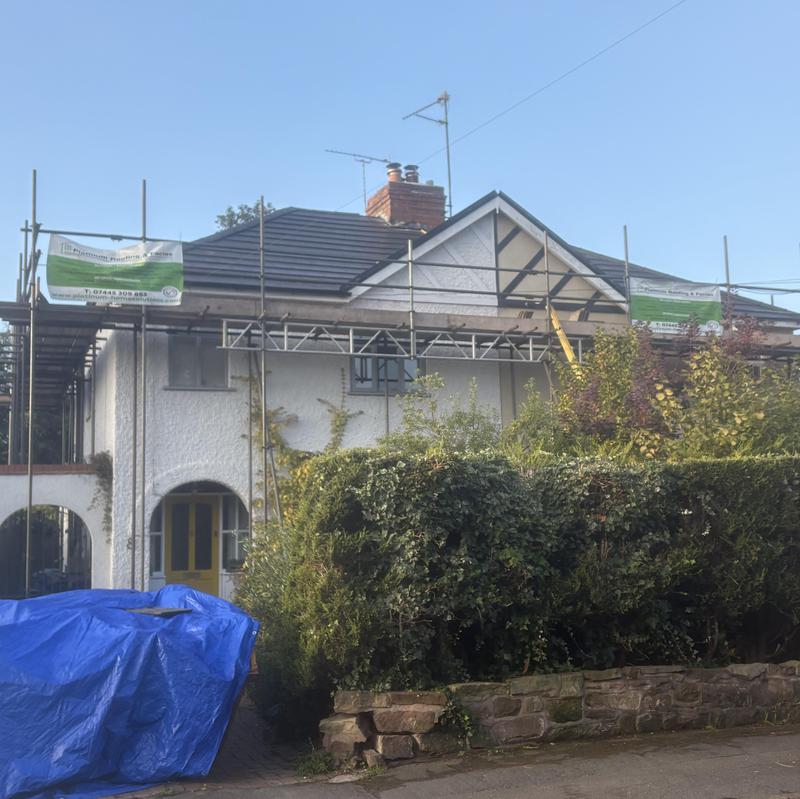
- Completed two houses next to each other using the same Roof tiles, very happy with this project.
-
Image
82
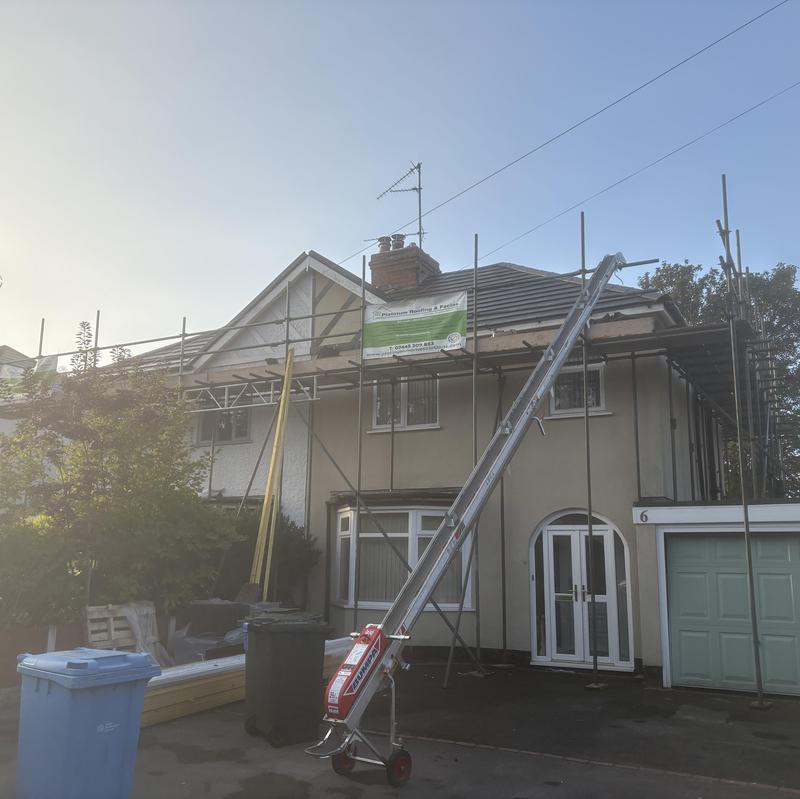
- I do hire a Bumper to help the Lads with the transportation of Roof tiles to the scaffolding.
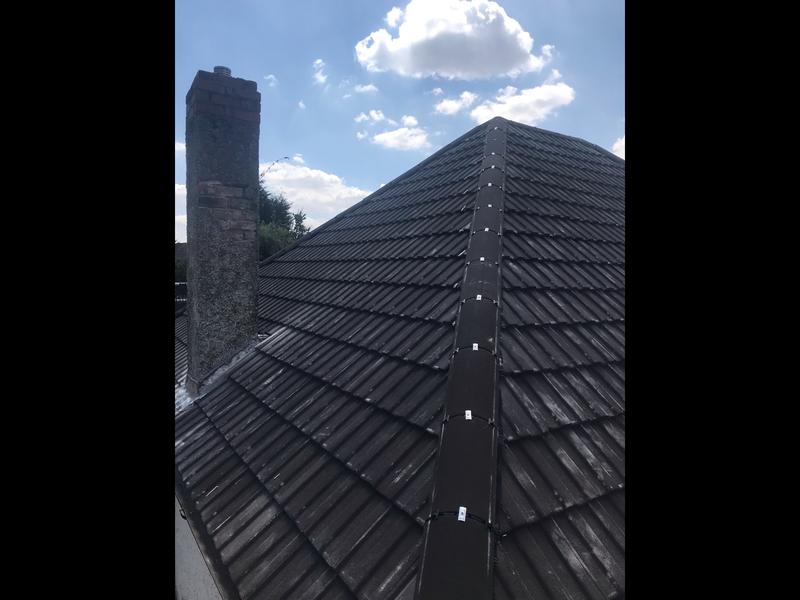
-
Image
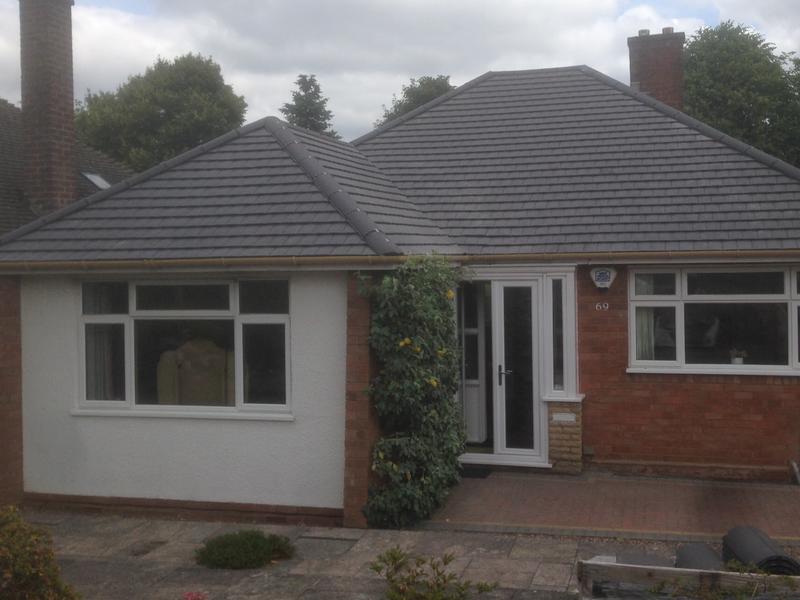
83
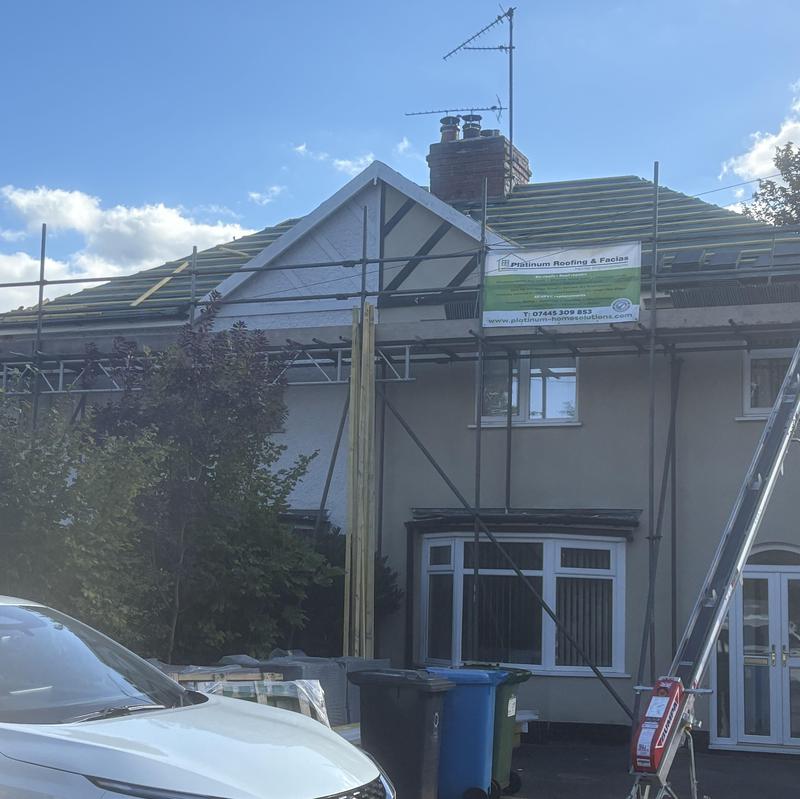
- I always take photos through the stages for future customers to look through.
-
Image
84
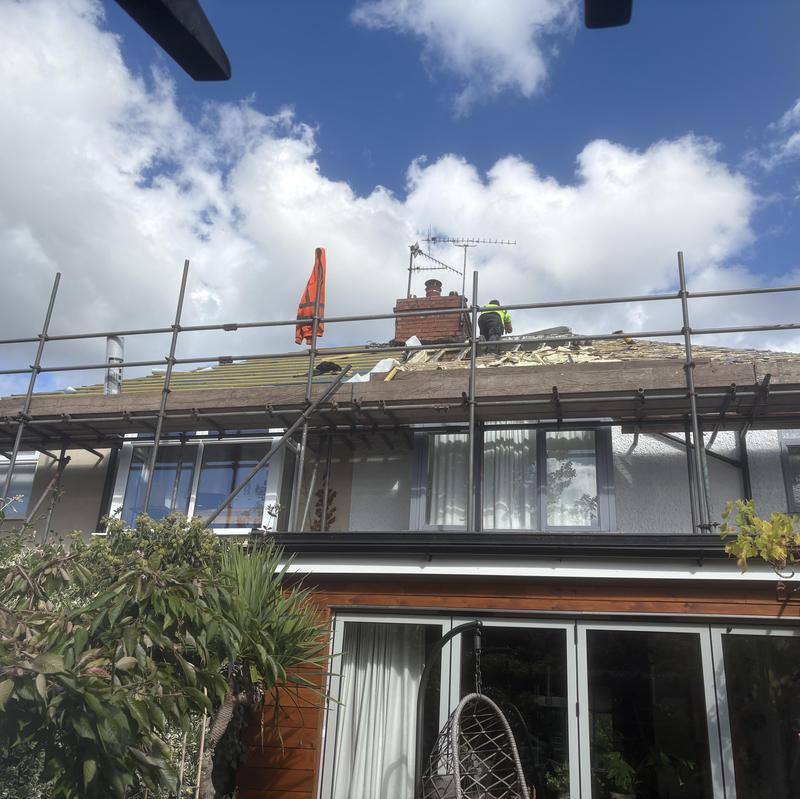
- The rear of the houses.
-
Image
85
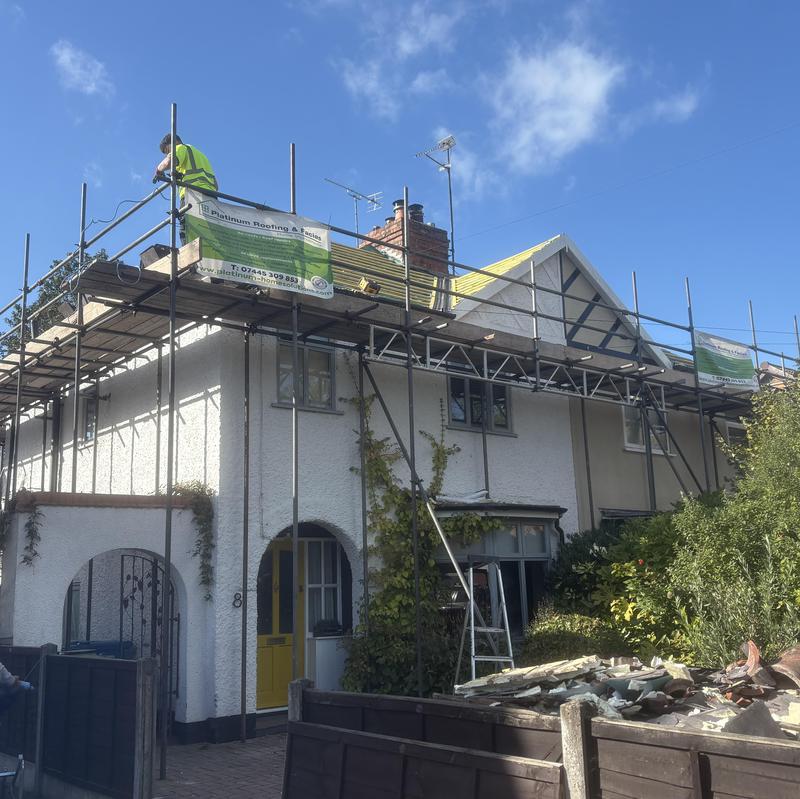
-
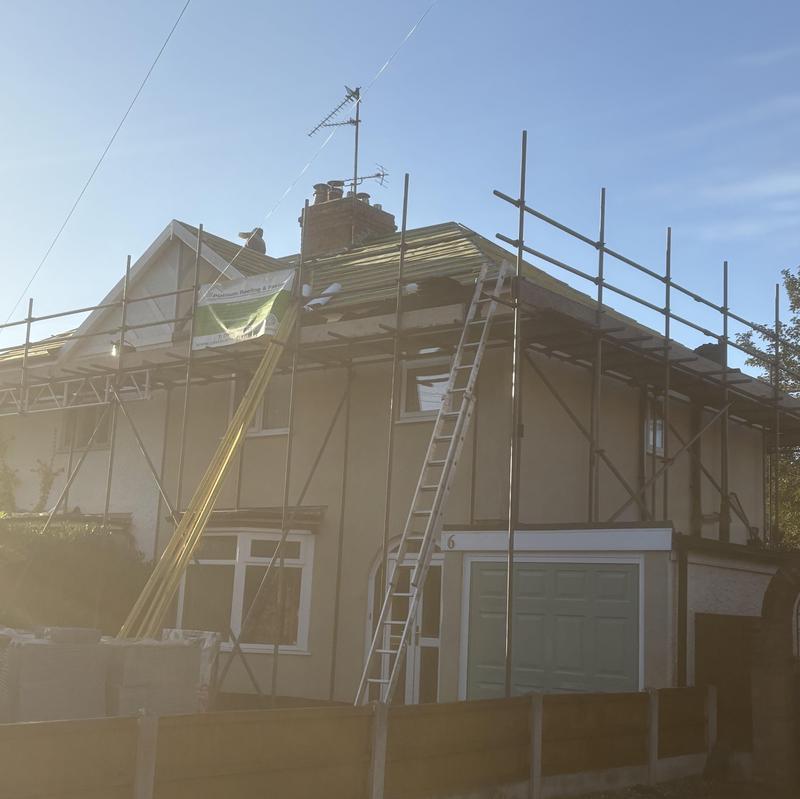
Image
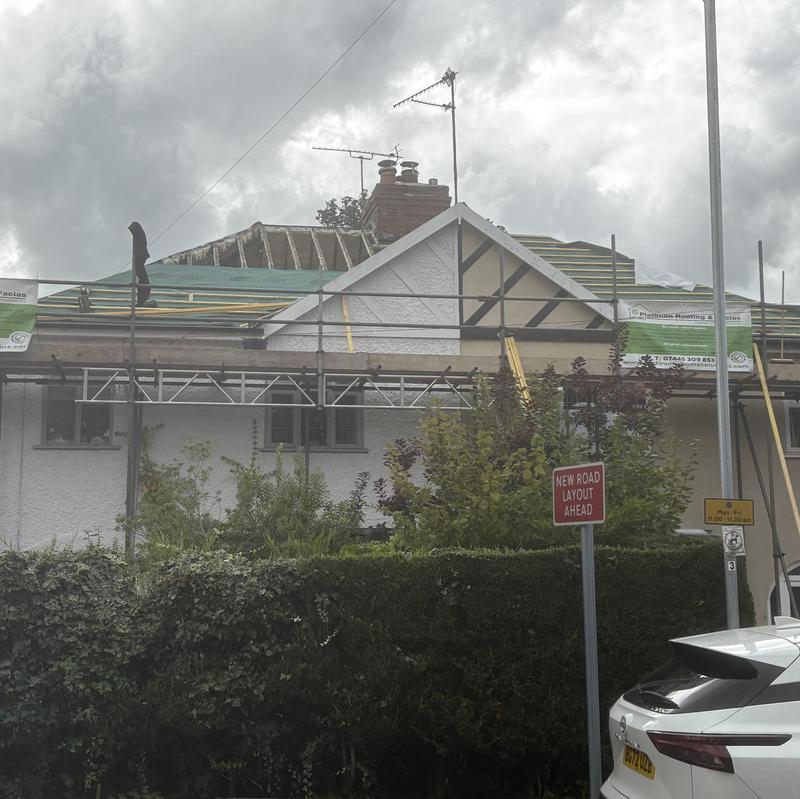
86
-
Image
87
-
Image
88
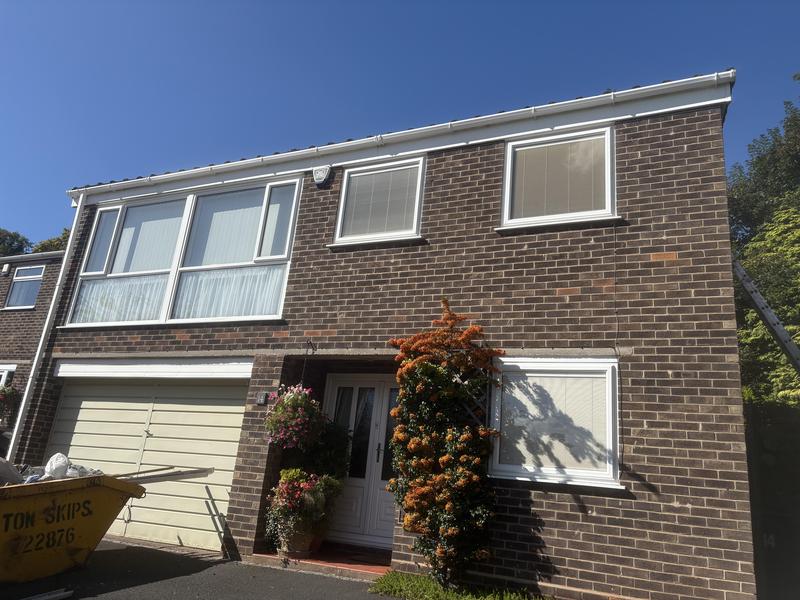
- Changed the guttering also for new to the front and rear of this house in Coven.
-
Image
89
- We also had to do a felt repair to this house in Coven after seeing the felt had diminished towards the end by the gutter.
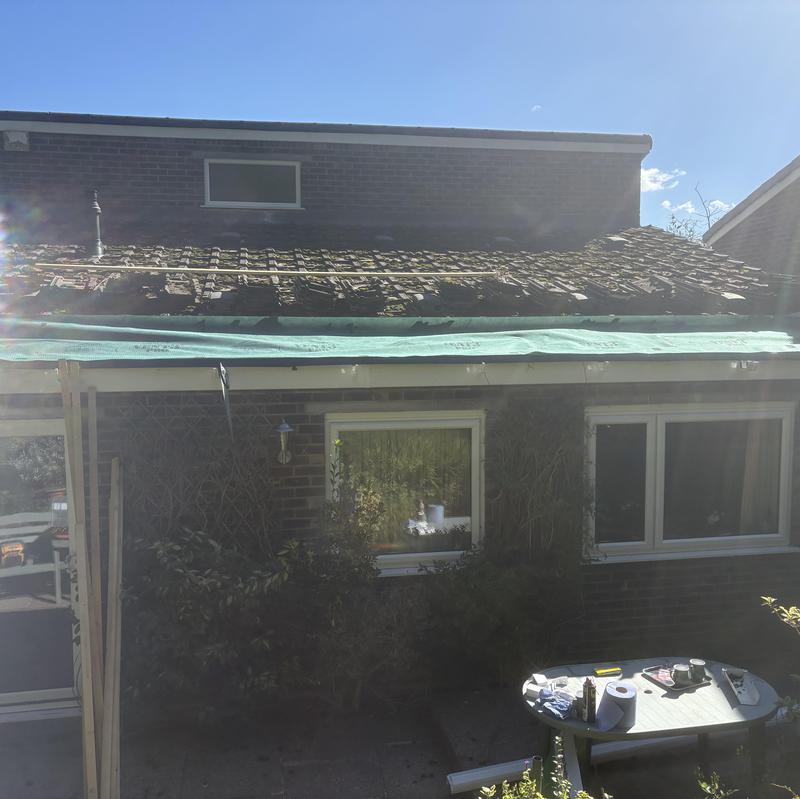
-
Image
90
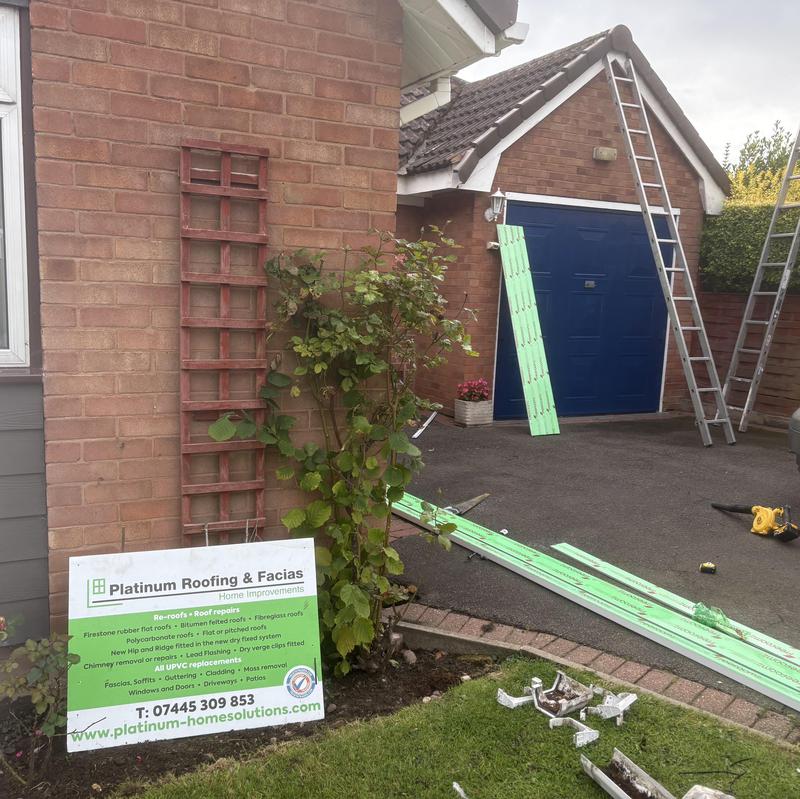
-
Image
91
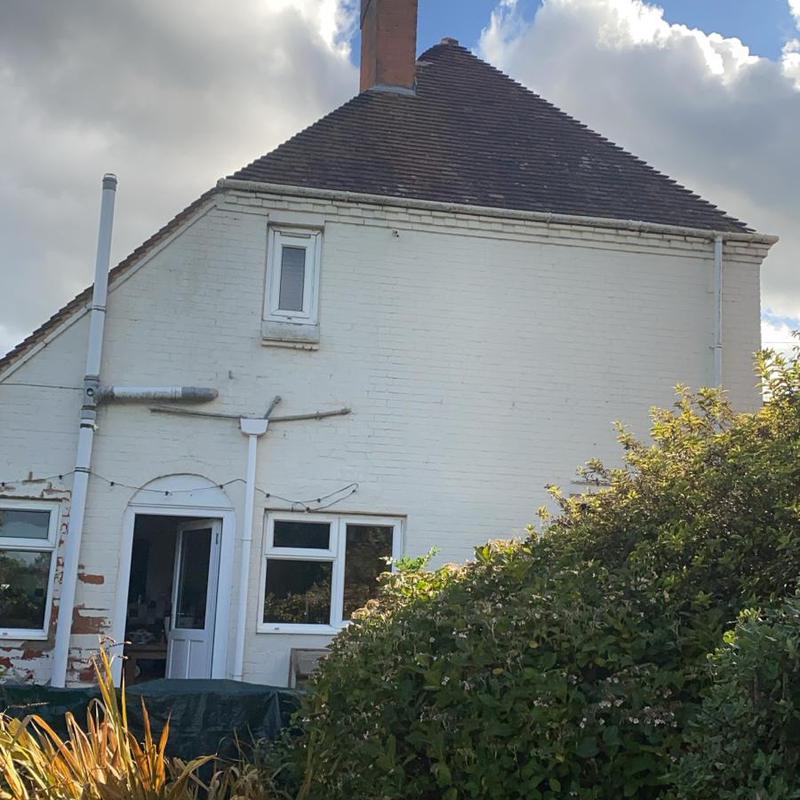
- Before photo to the side of the house for the Re Roof in Bournville
-
Image
92
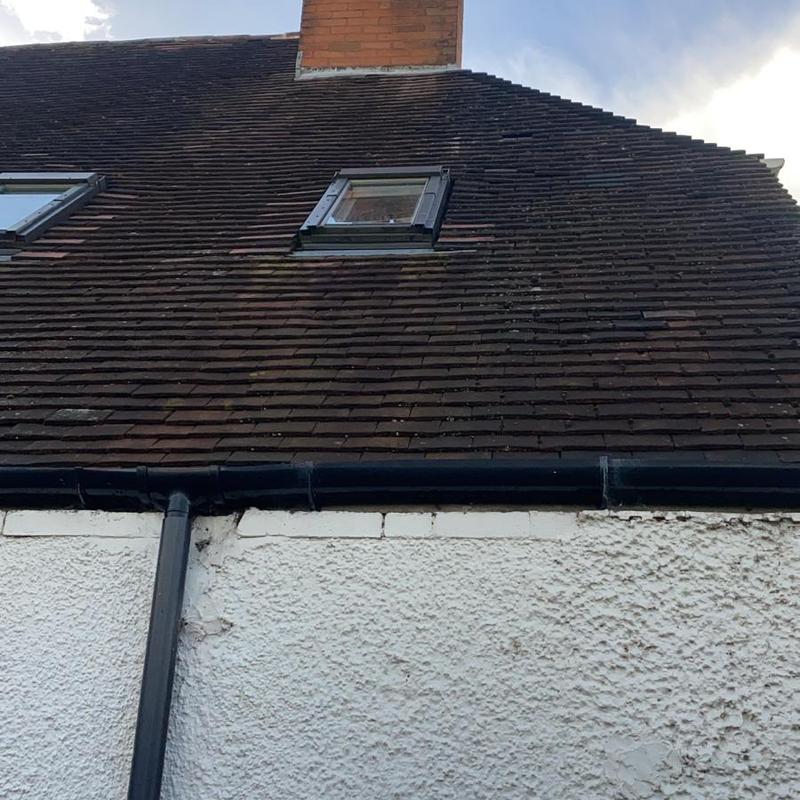
- To the rear of the house, before photo.
-
Image
93
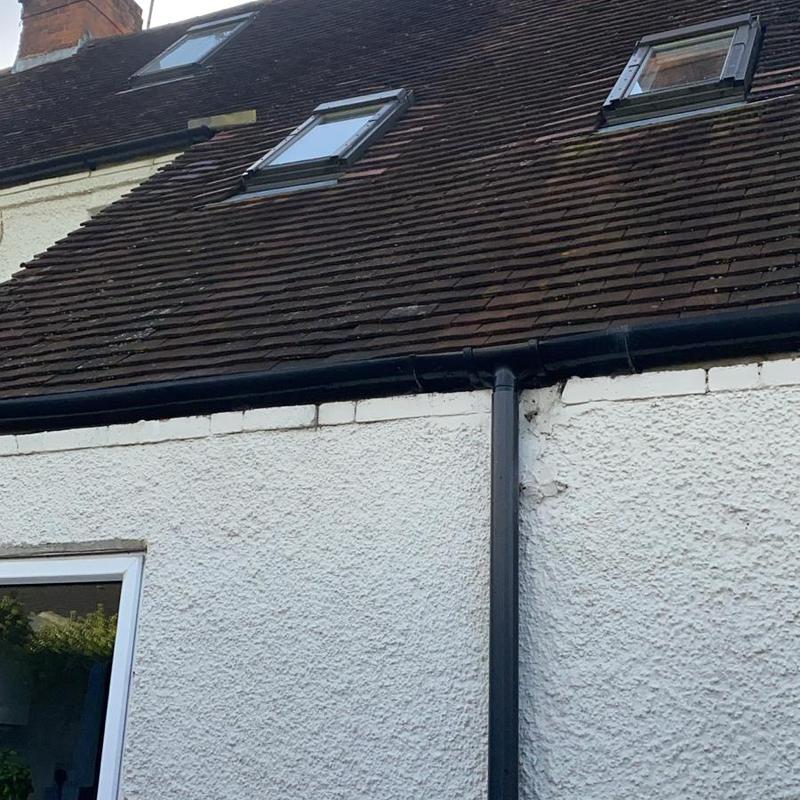
- Before photo.
-
Image
94
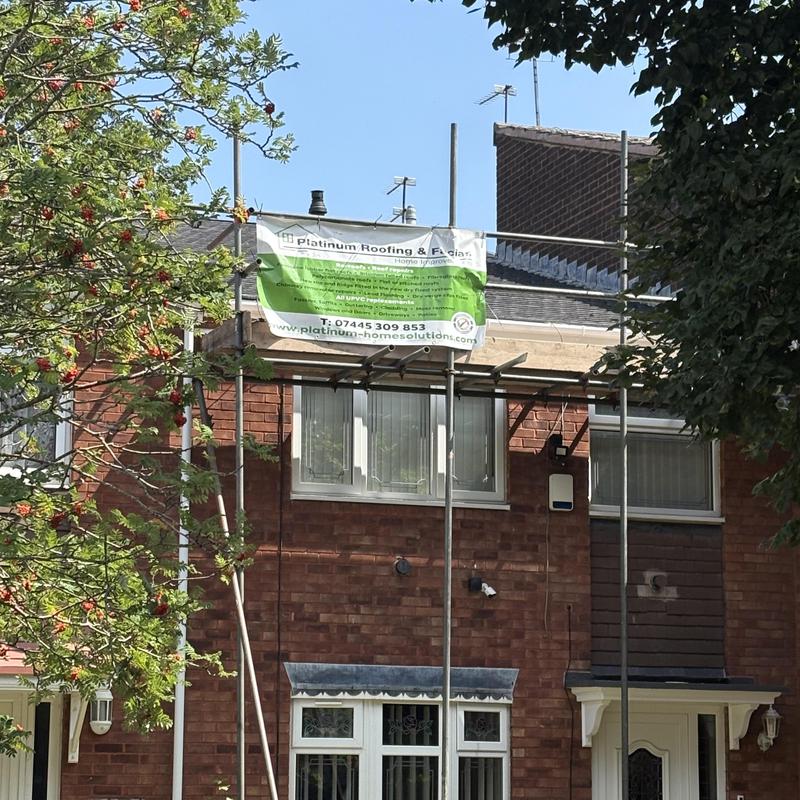
- Completed Roof here before the scaffolding went down in The Glades.
-
Image
95
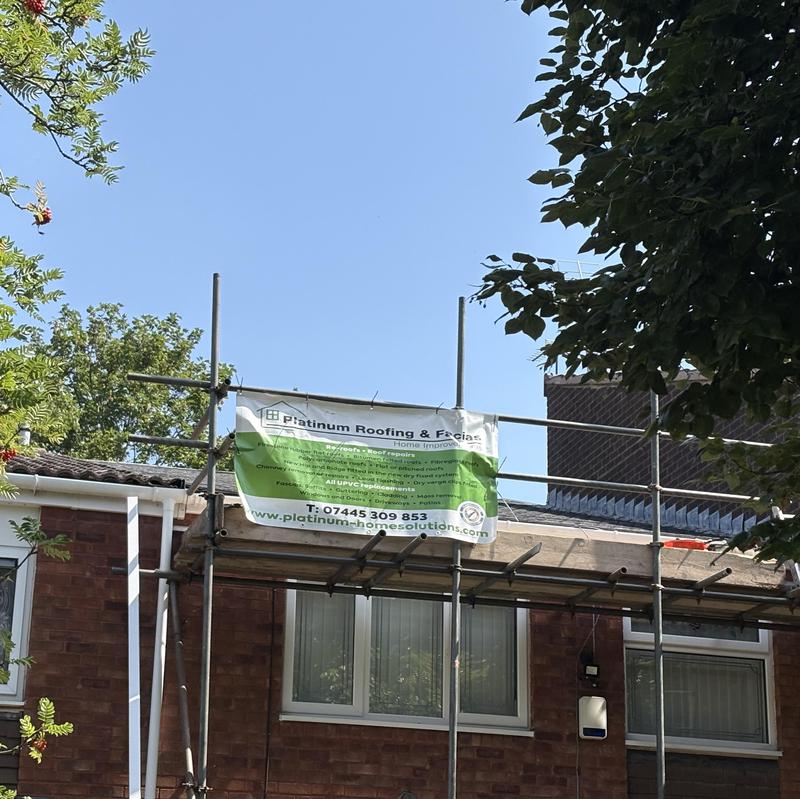
- Another angle of the Roof in Codsall.
-
Image
96
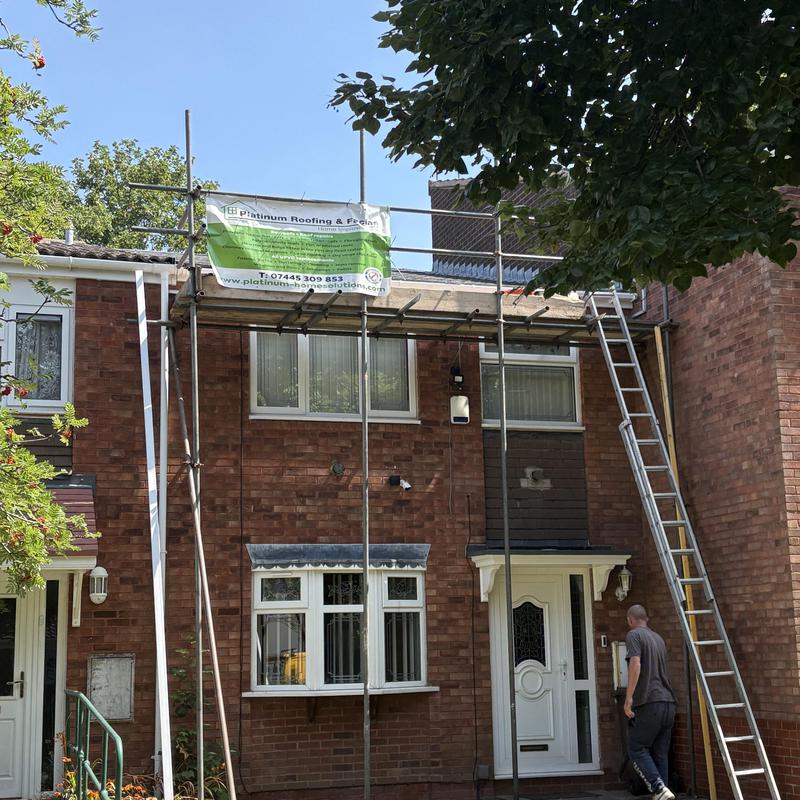
- Roof in Codsall.
-
Image
97
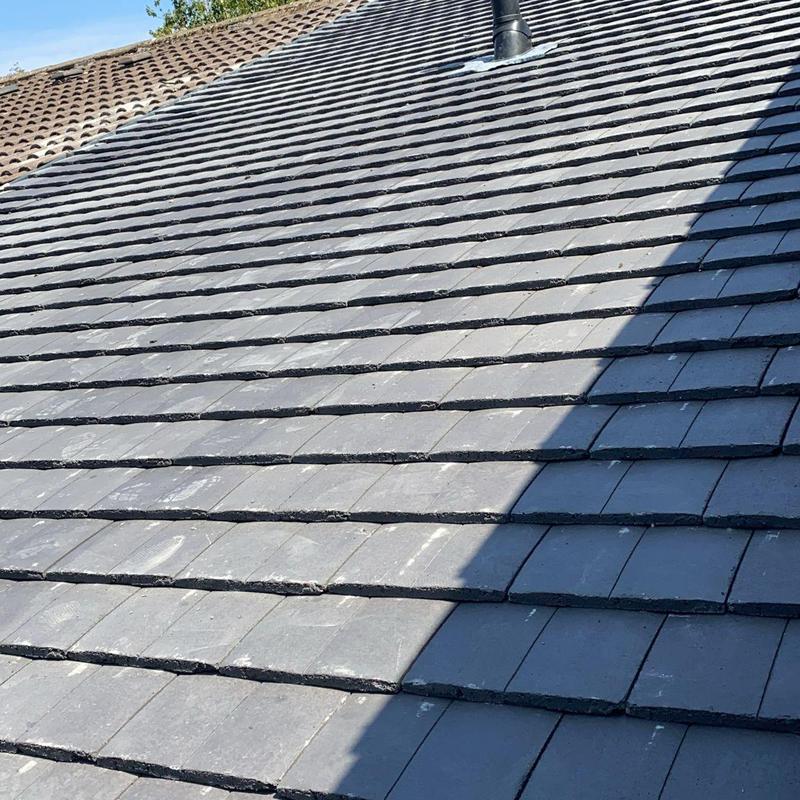
- Photo shot of the Roof close up.
-
Image
98
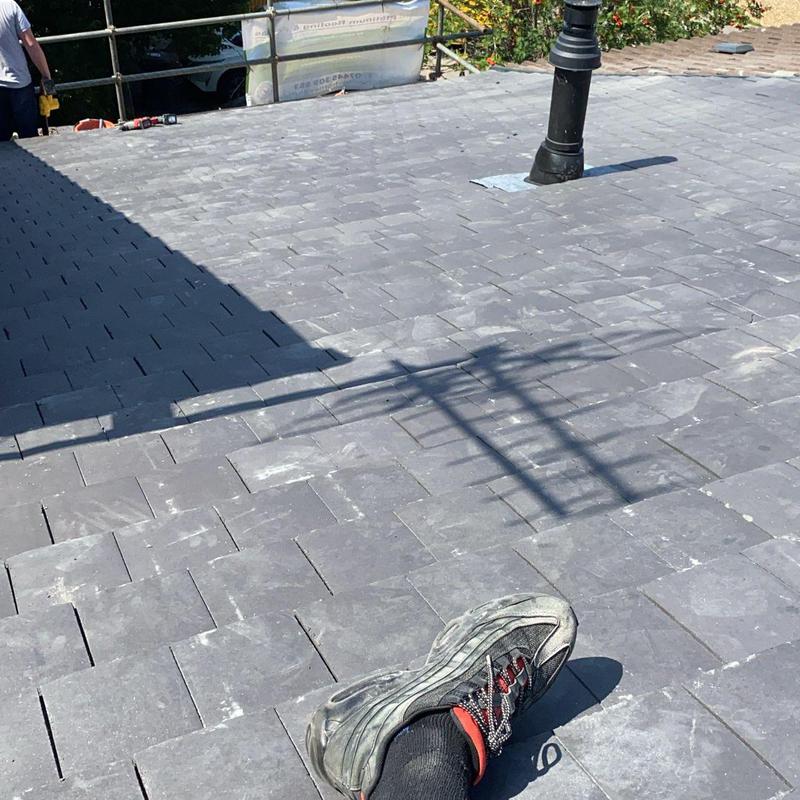
- Photo from the ridge tiles down in the Roof.
-
Image
99
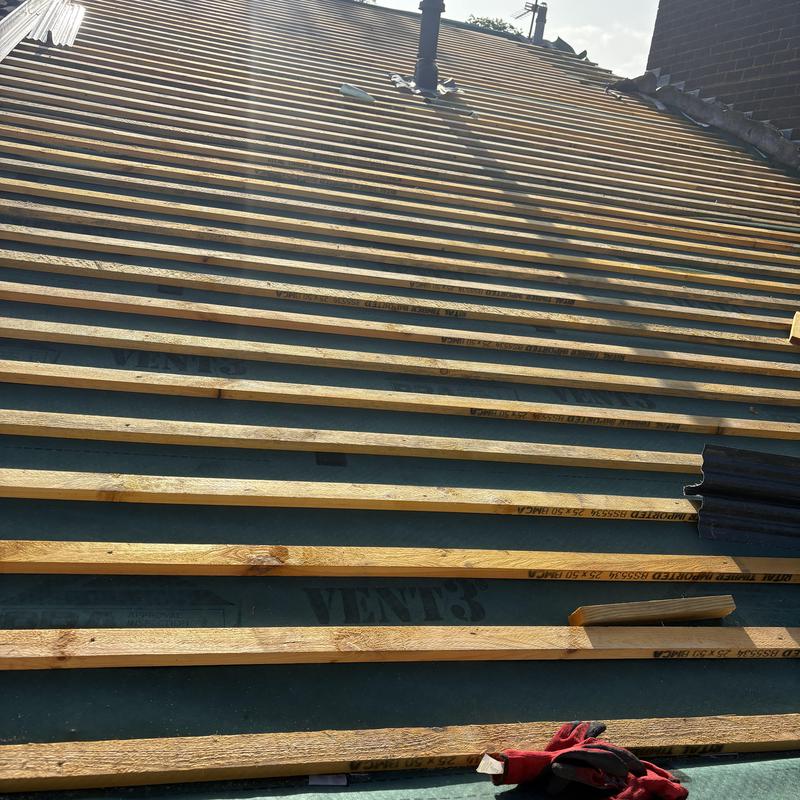
- Membrane and Laths fitted ready for the Roof tiles to be installed.
-
Image
100
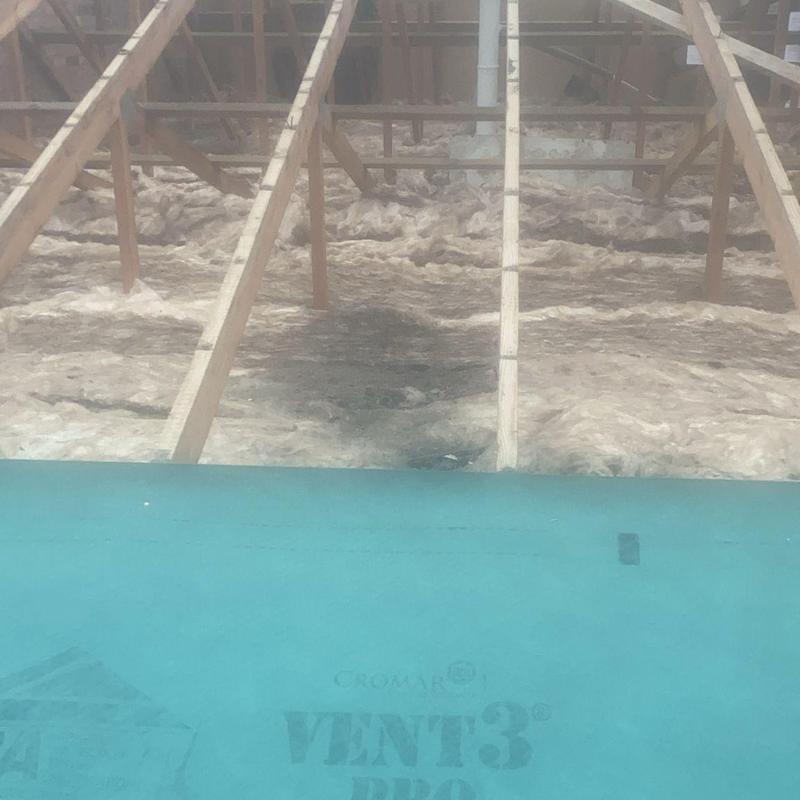
- Felt and batons completely removed, we also applied some more insulation before we applied the membrane.
-
Image
101
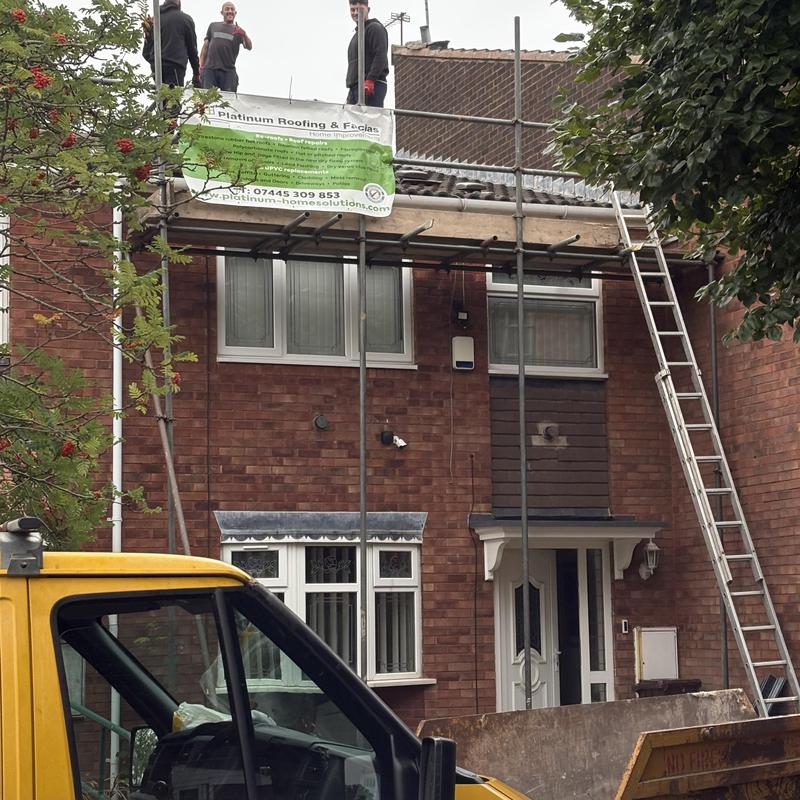
- Day one of the Re Roof.
-
Image
102
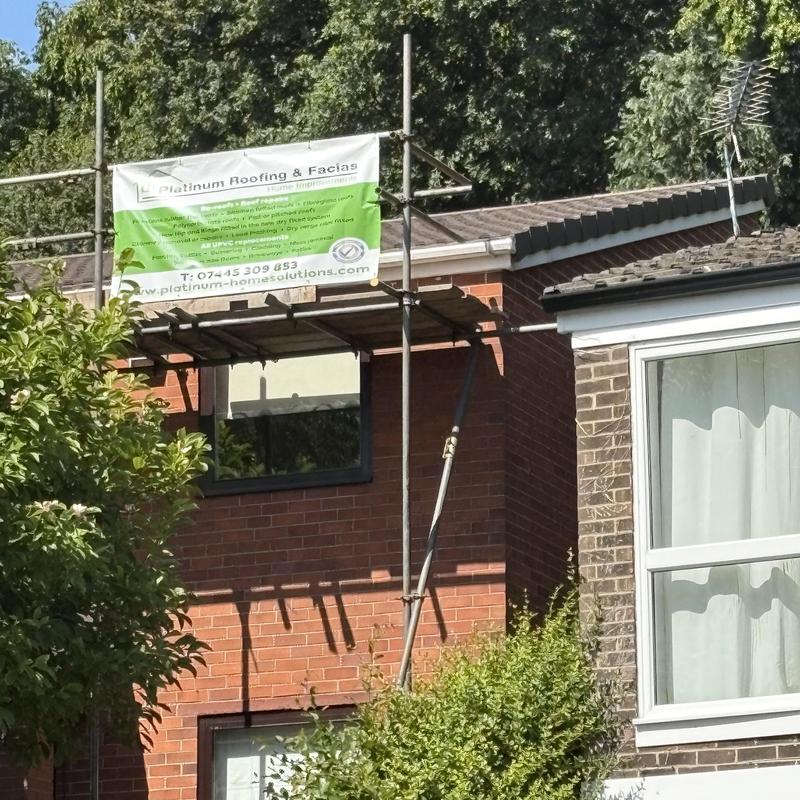
- Re Roof in Compton with brown Major Ludlows.
-
Image
103
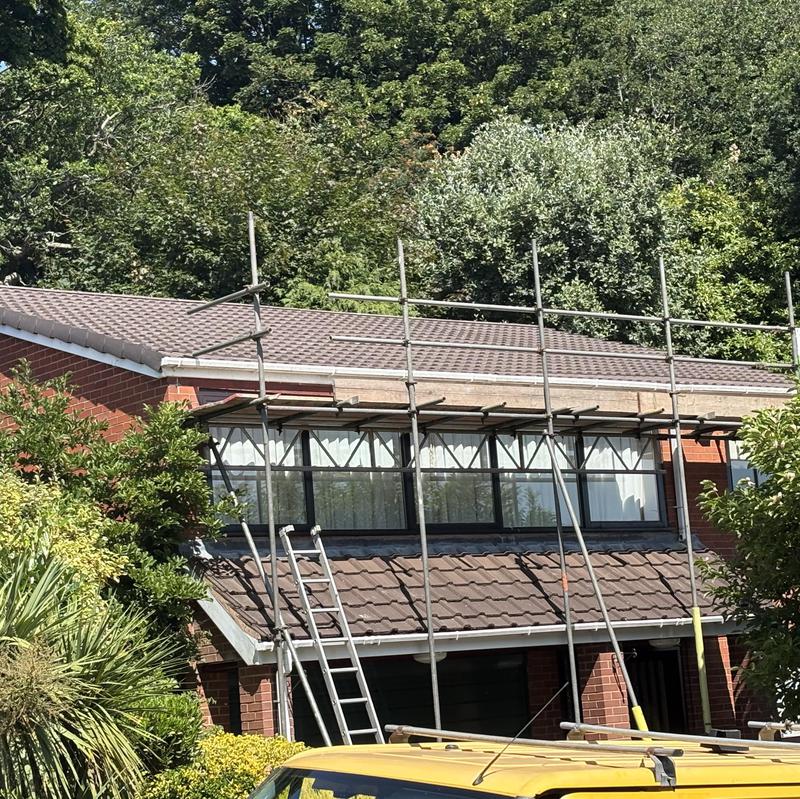
- Nice photo showing the completion of Imeldas Re Roof.
-
Image
104
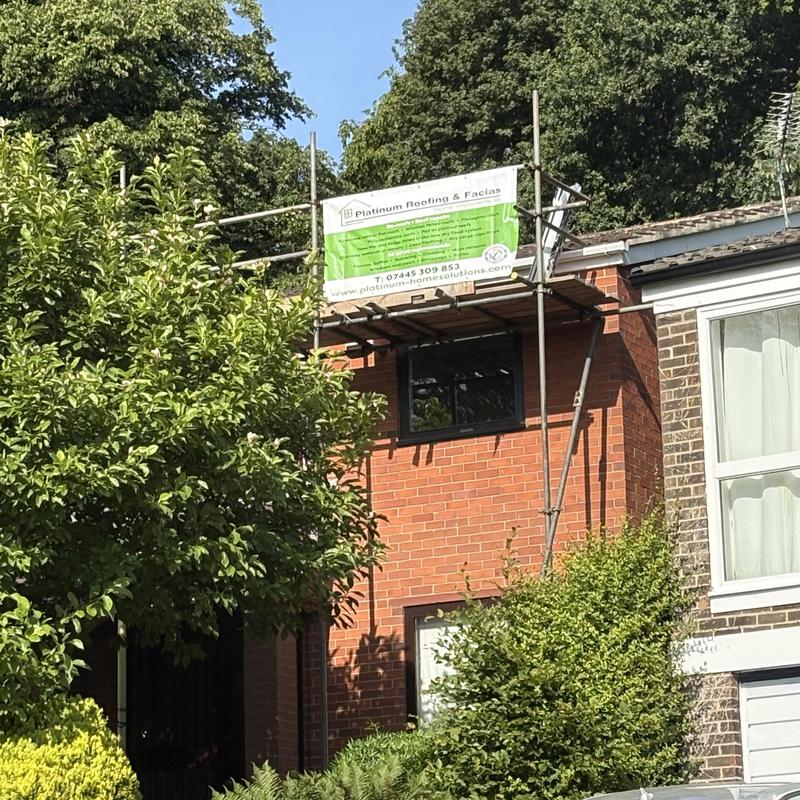
- Roof in High Meadows.
-
Image
105
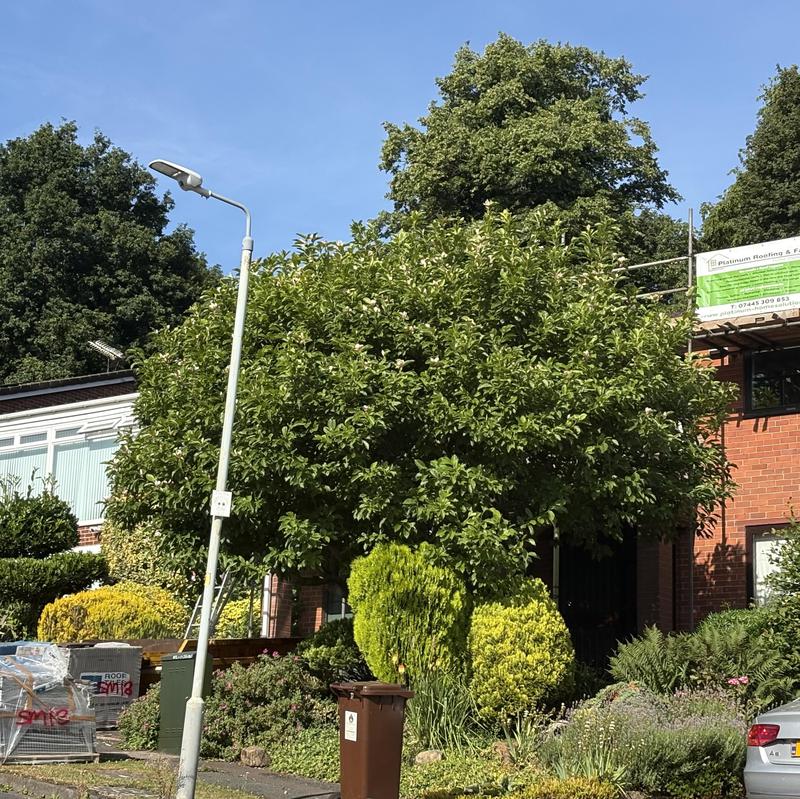
- Compton Re Roof.
-
Image
106
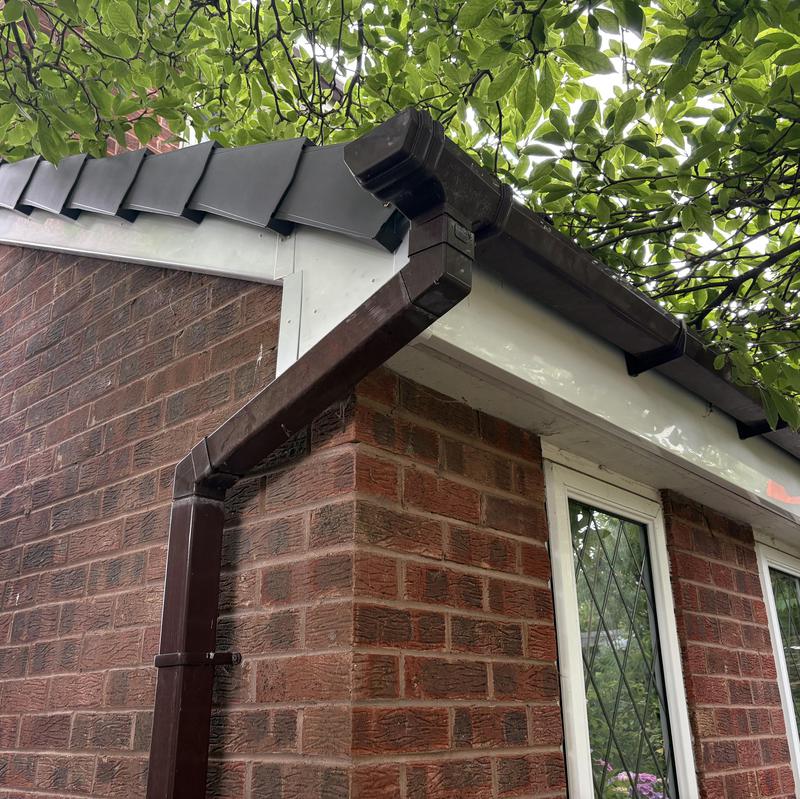
- Small repair job here on the rear Canopy, applied white Fascia and Brown dry verge clips.
-
Image
107
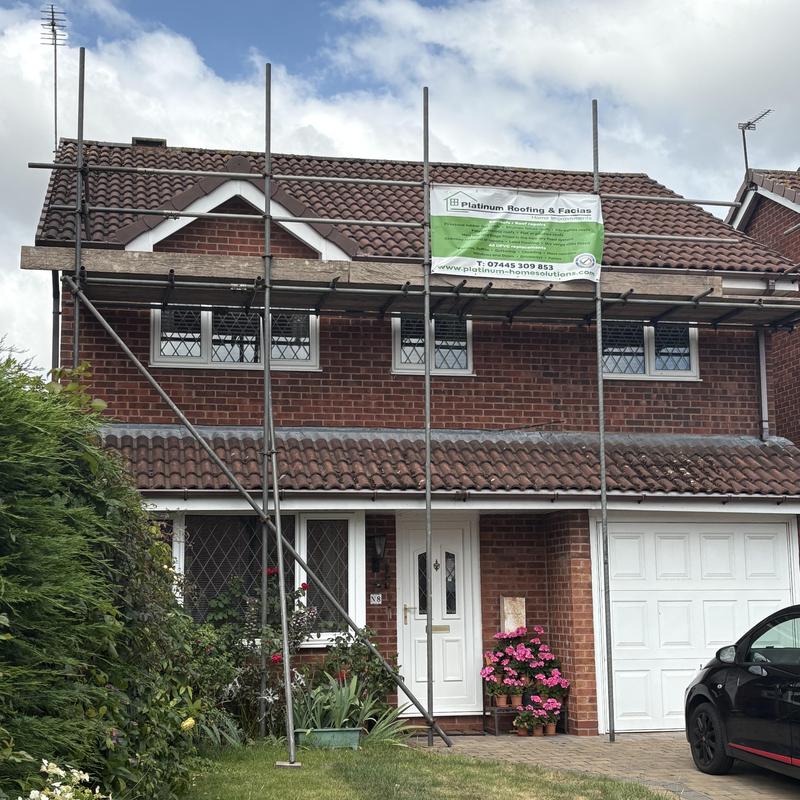
- Fitted there ridge tiles in the dry fix system in Perton.
-
Image
108
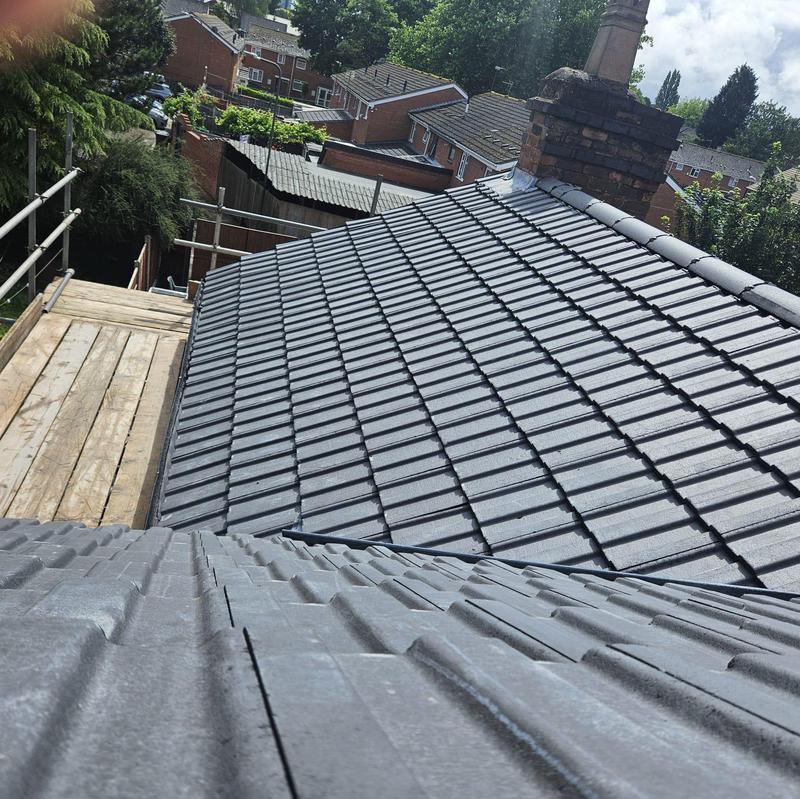
- The rear of the house where we also did a Re Roof here in Riches St.
-
Image
109
- Polycarbonate sheets removed first
-
Image
110
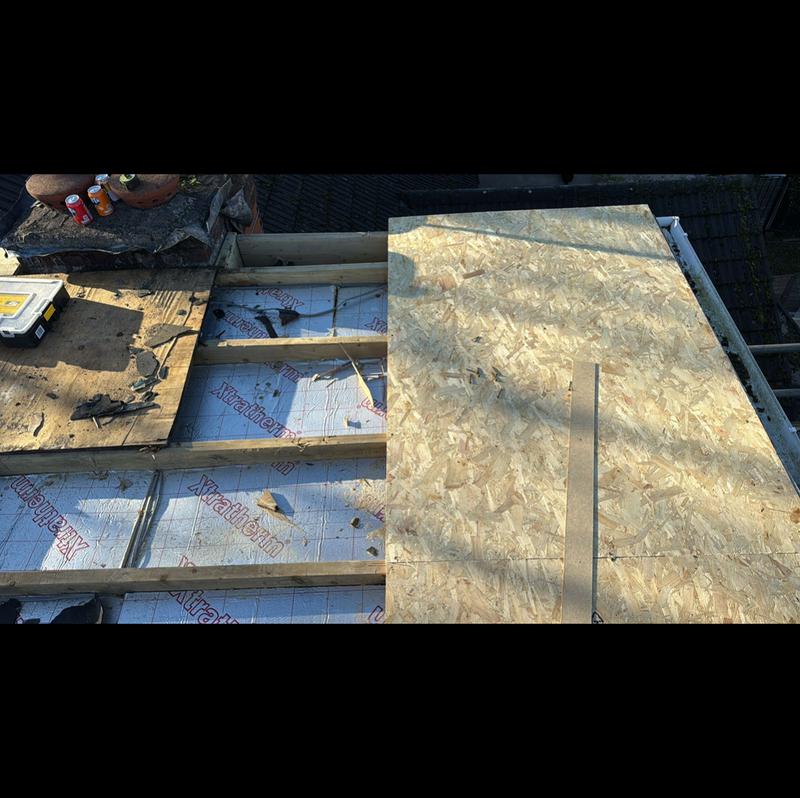
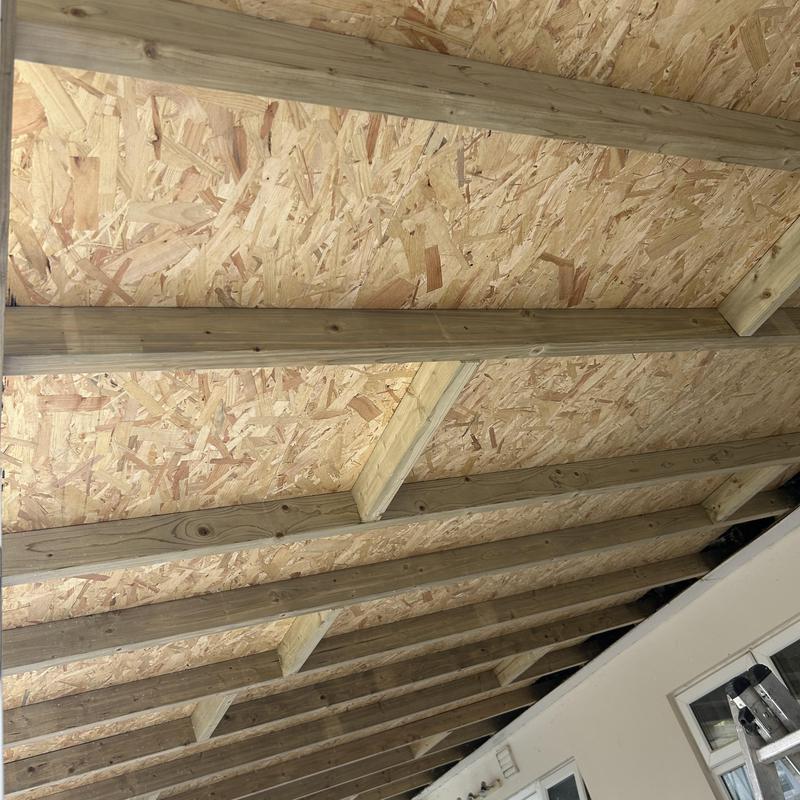
- New timber rebuild followed by 18ml Osb boards then fitted upon the new timber.
-
Image
111
- Osb boards fitted, we lay the Rubber on to the boards to rest before we apply the glue.
-
Image
112
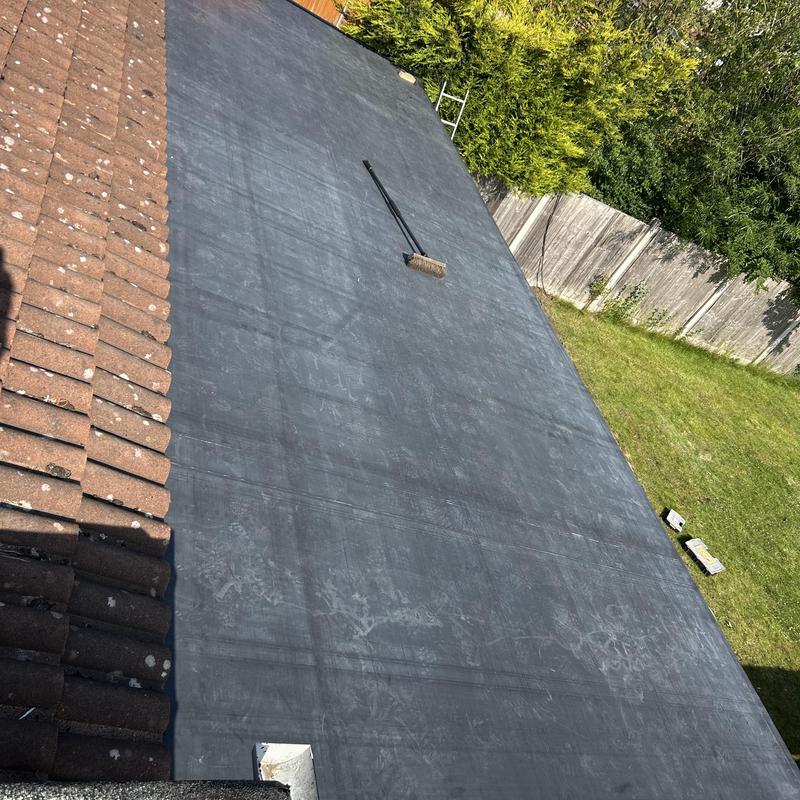
- Completed Rubber Roof.
-
Image
113
- Very happy with the outcome of this job.
-
Image
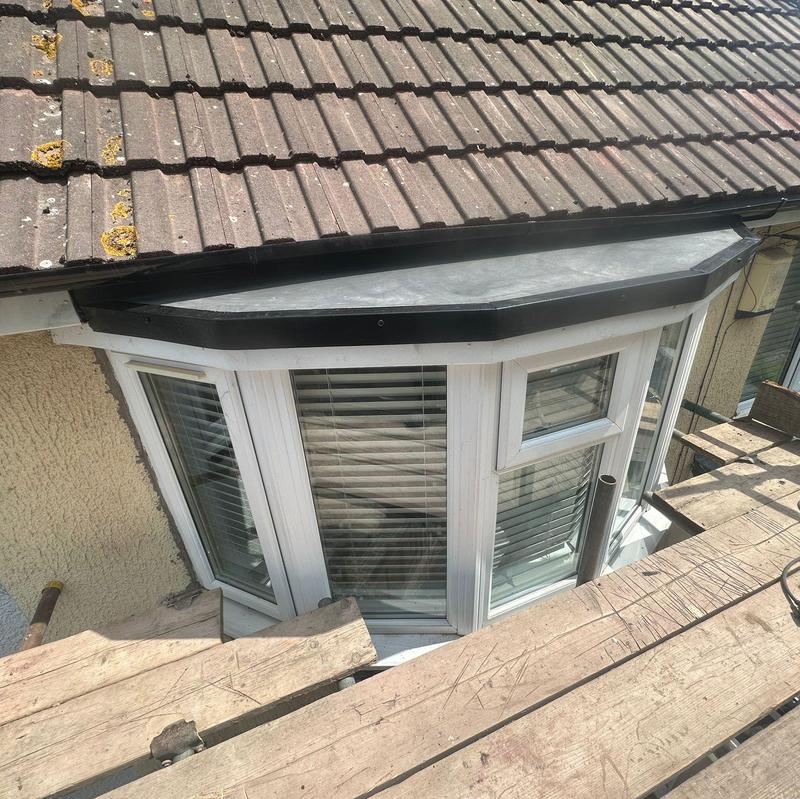
114
- Small bay Rubber Roof we completed too in WV10.
-
Image
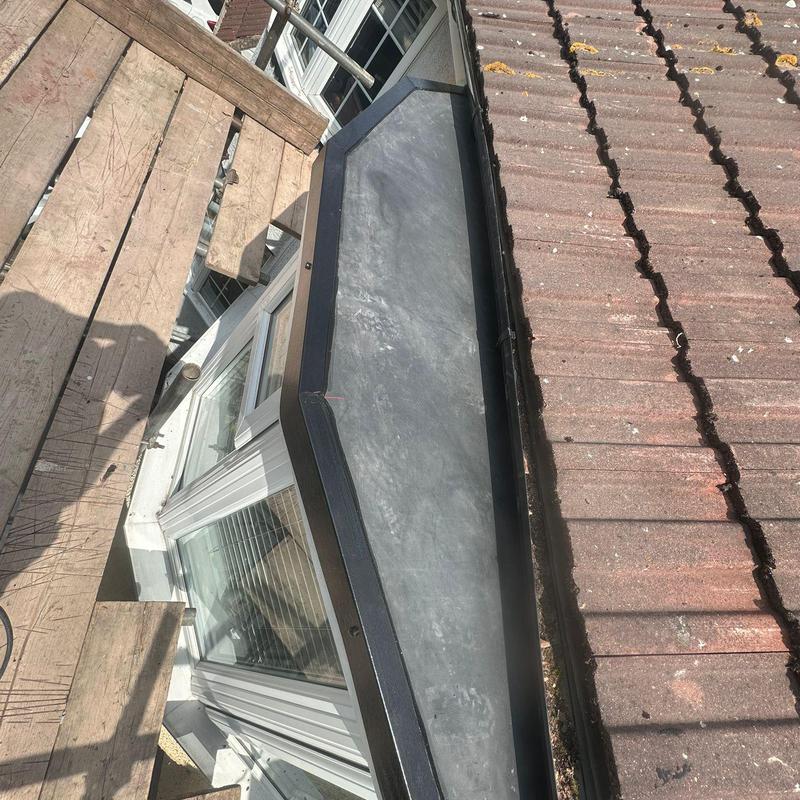
115
- Bay Rubber Roof.
-
Image
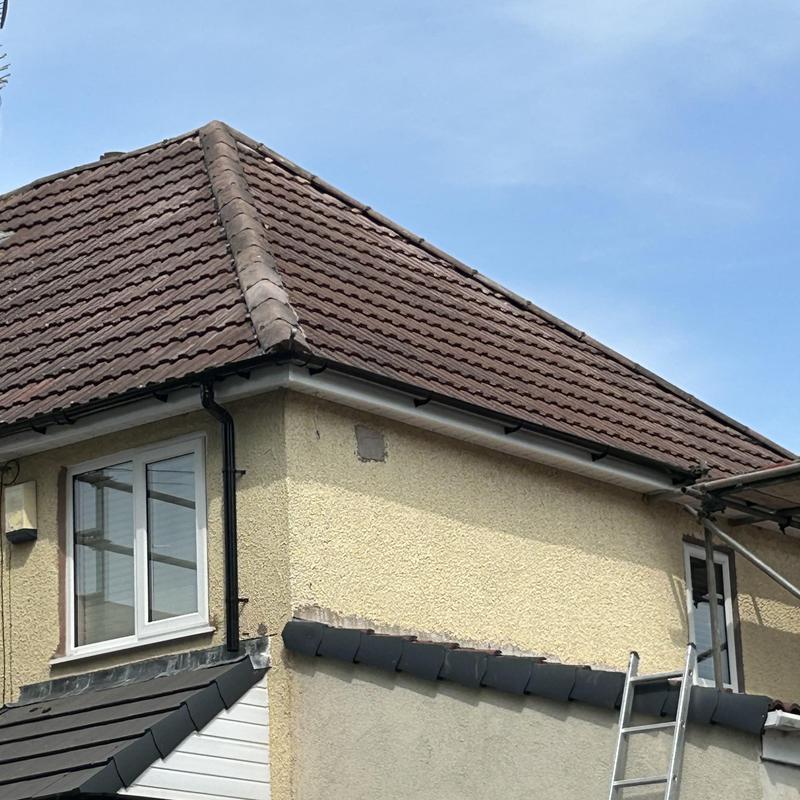
116
- Used there originally ridge tiles and installed them back on with the dry fix system.
-
Image
117
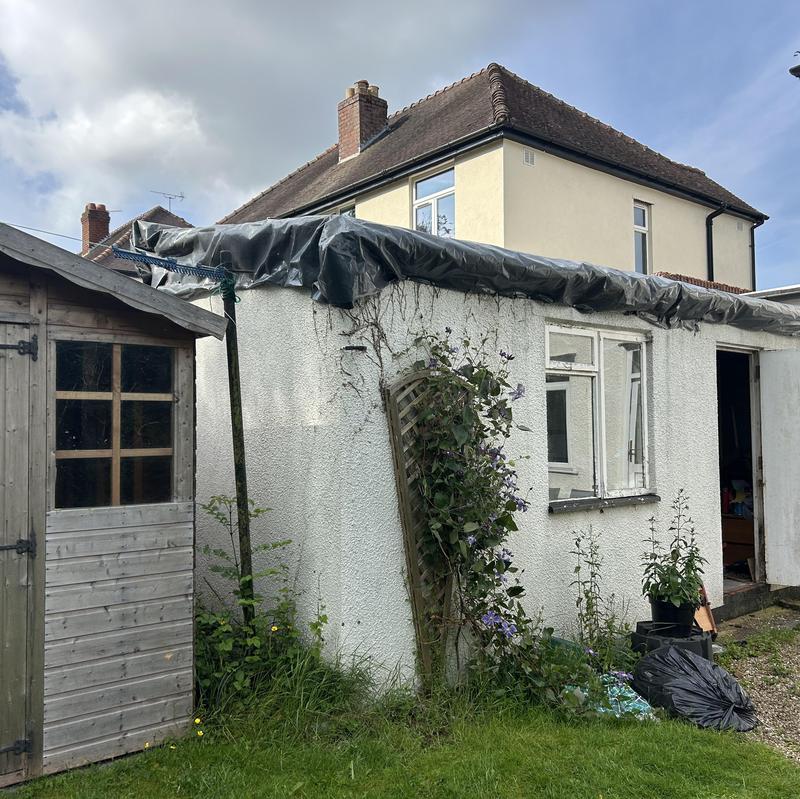
- Slight pitched Roof leaking in, we are to remove all tiles, membrane, batons, new timber followed by osb boards and Rubber.
-
Image
118
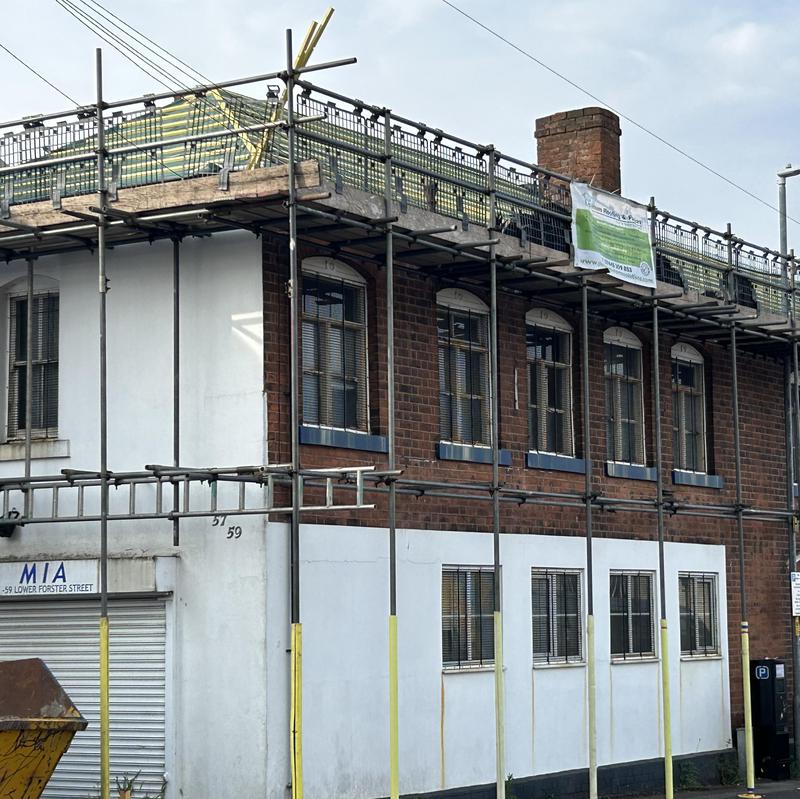
- Large Factory Roof we are to strip down and complete a new Re Roof here before here in Walsall
-
Image
119
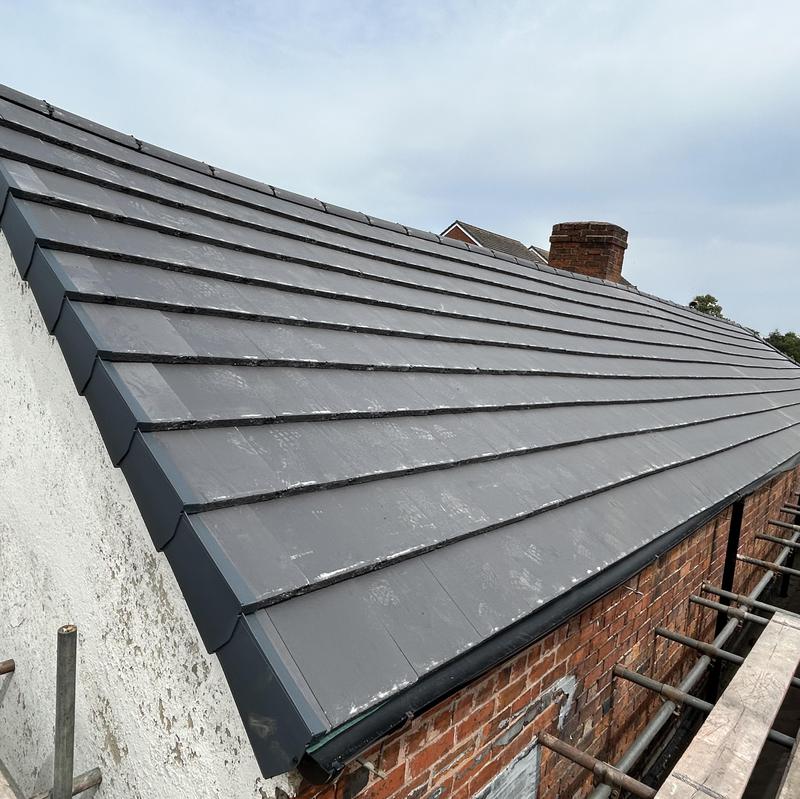
- Factory Roof in Walsall where we had Re Roofed, showing different angles.
-
Image
120
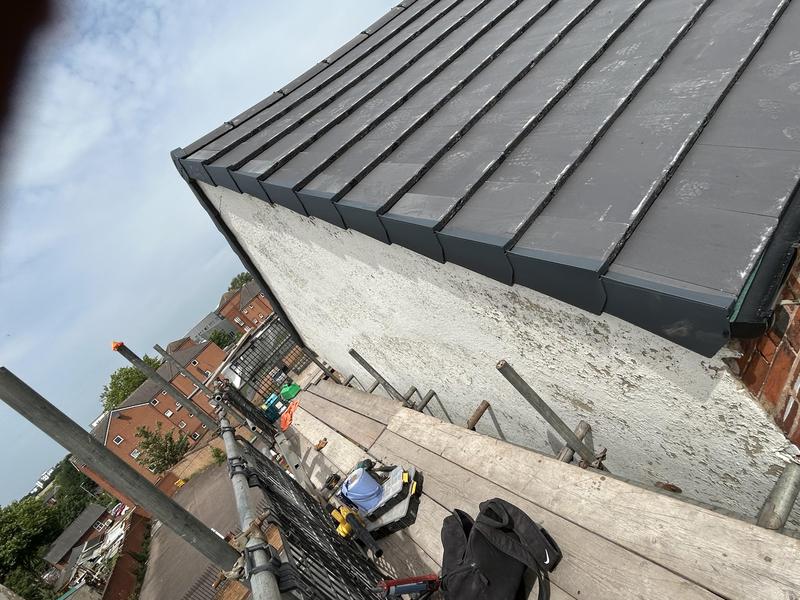
- Dry verge clips fitted to the one side of the Factory Roof.
-
Image
121
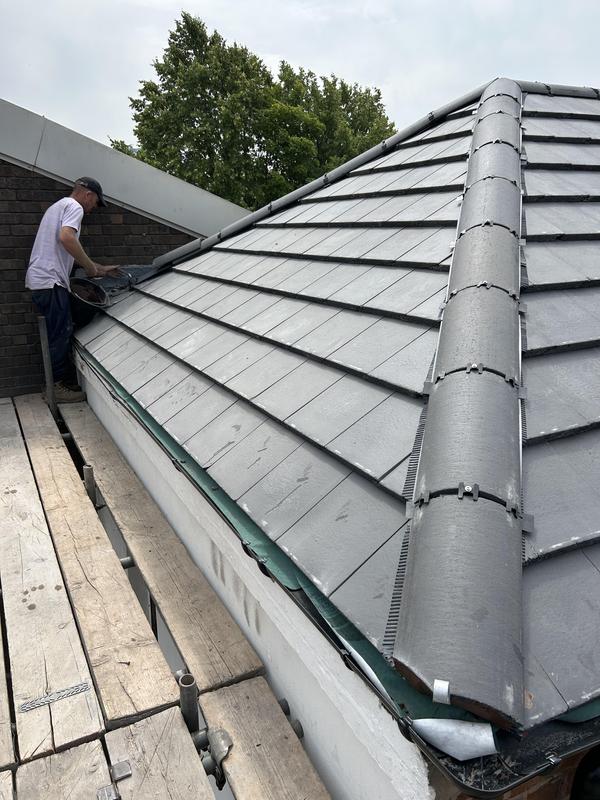
- Close shot of the ridge tiles fitted in the dry fix system.
-
Image
122
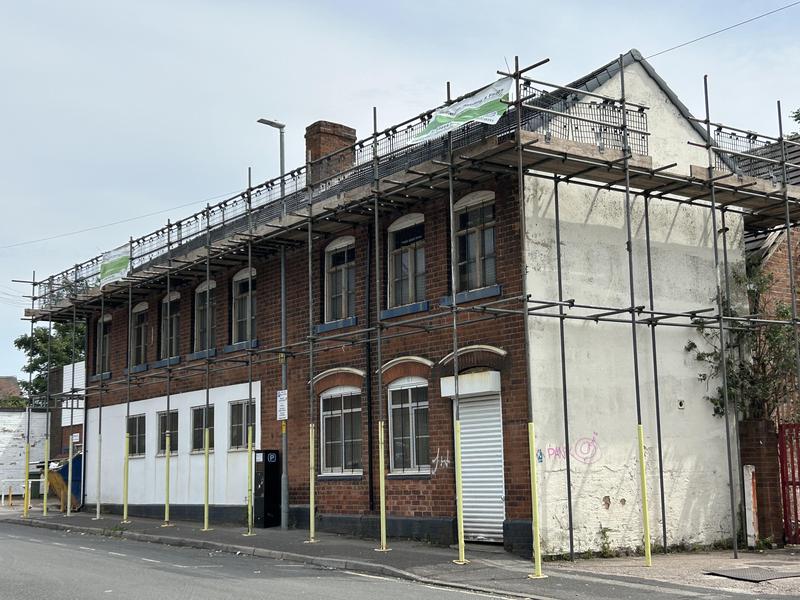
- Showing a photo of the large Factory we have stripped down.
-
Image
123
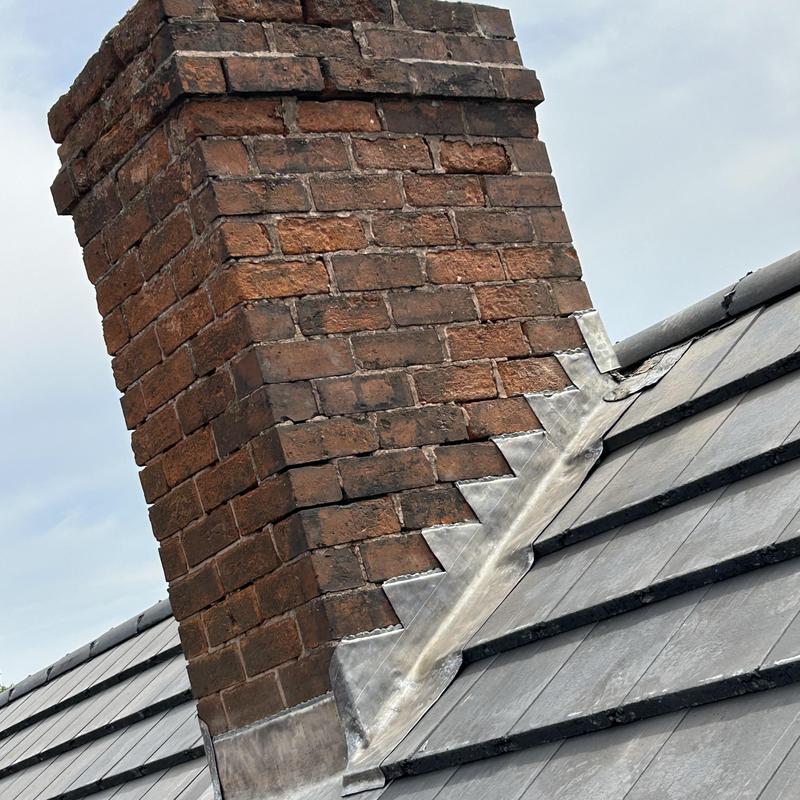
- Code four Lead fitted to the base of the Chimney.
-
Image
124
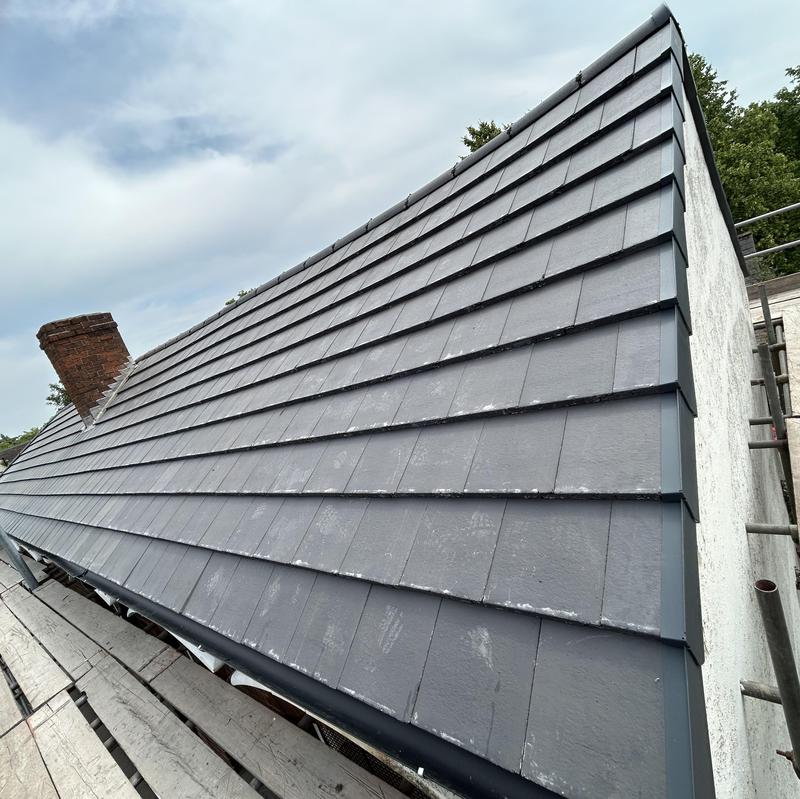
- Another angle of the large Factory Roof we completed.
-
Image
125
- Lovely completed Roof, gutters etc in Walsall.
-
Image
126
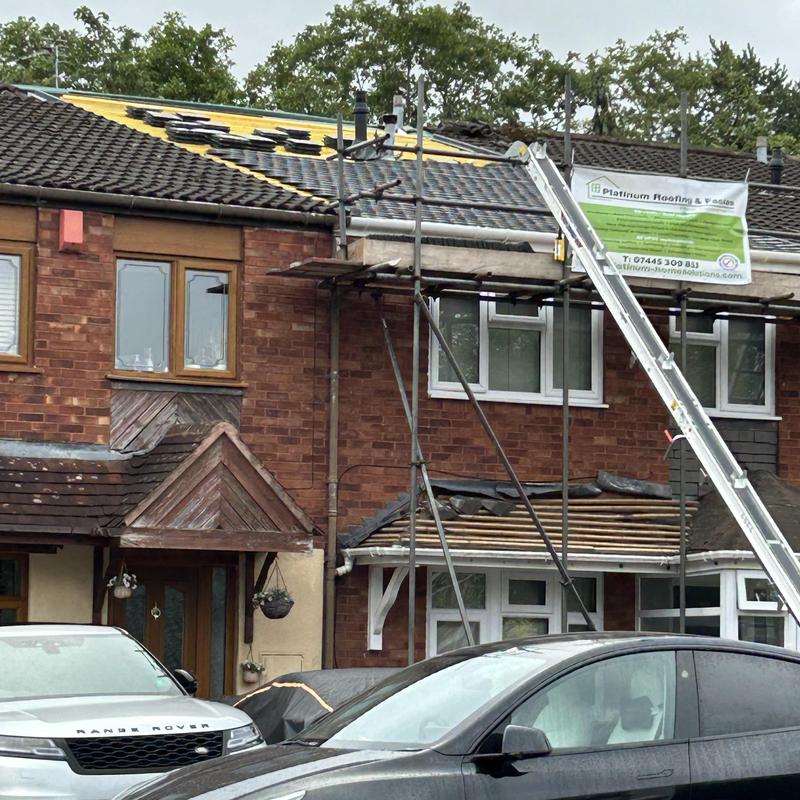
- Ashmore tiles we are fitting here for Jane in Codsall.
-
Image
127
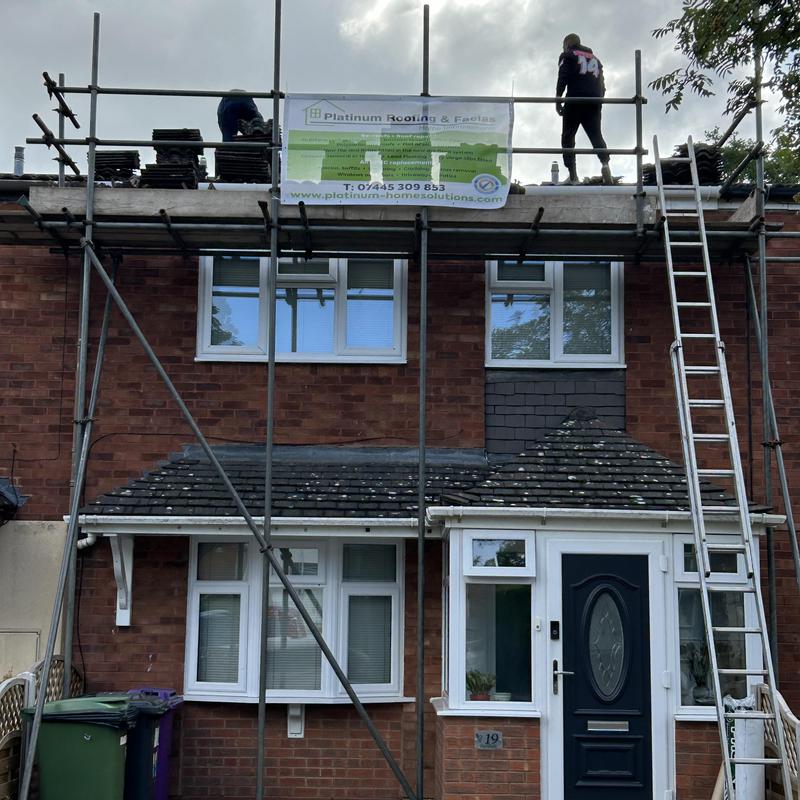
- Re Roof for Jane in Codsall where she liked the look of the Grey Ashmore Roof tiles.
-
Image
128
- Codsall Roof we are working upon.
-
Image
129
-
Image
130
- Working on Jane’s Roof in Codsall.
-
Image
131
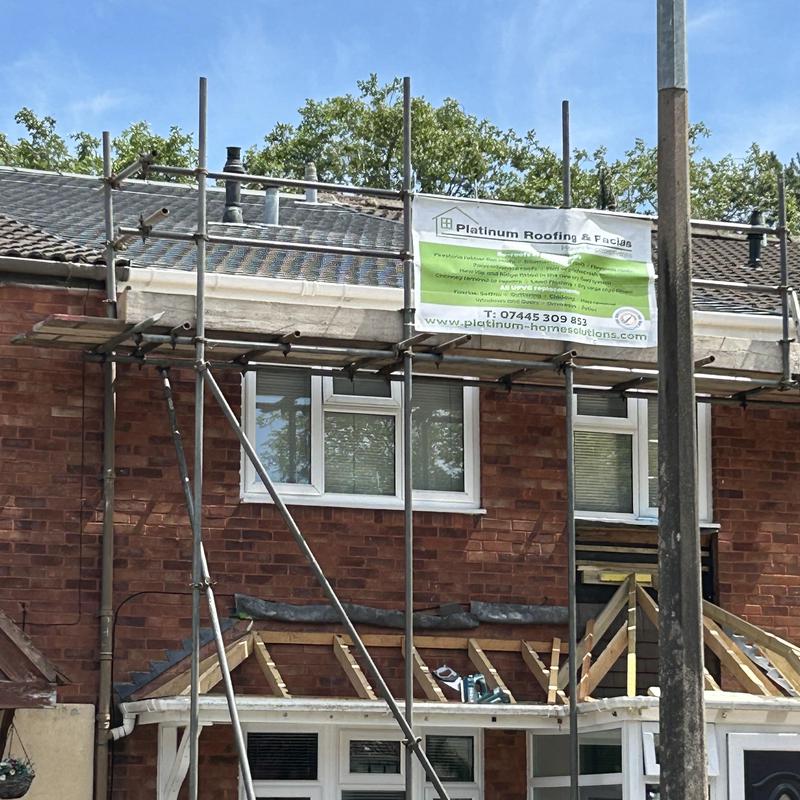
- Jane’s Roof completed now we are working on her Canopy to match.
-
Image
132
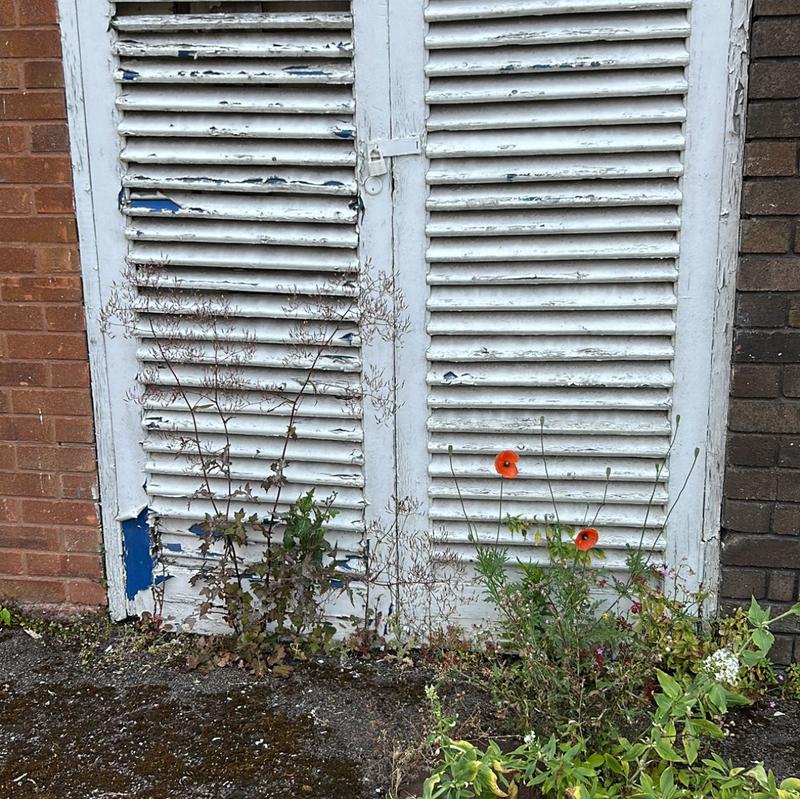
- These doors are also on the Factory that we removed and this area was bricked up, see other photos showing this.
-
Image
133
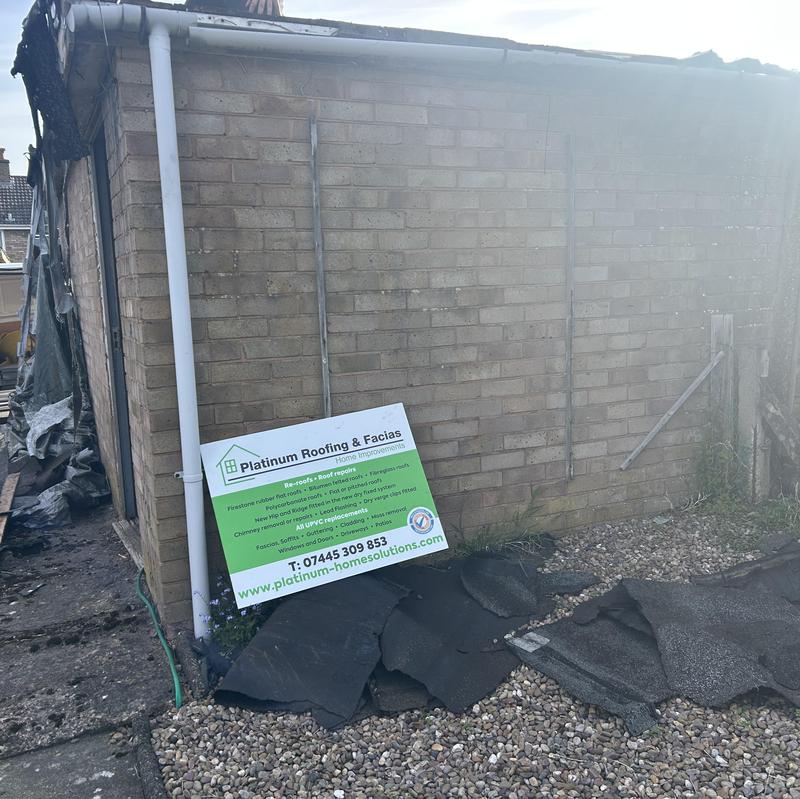
- This flat roof had rotten wood and needed a complete timber rebuild, Fascias before new Charcoal felted Roof torched upon.
-
Image
134
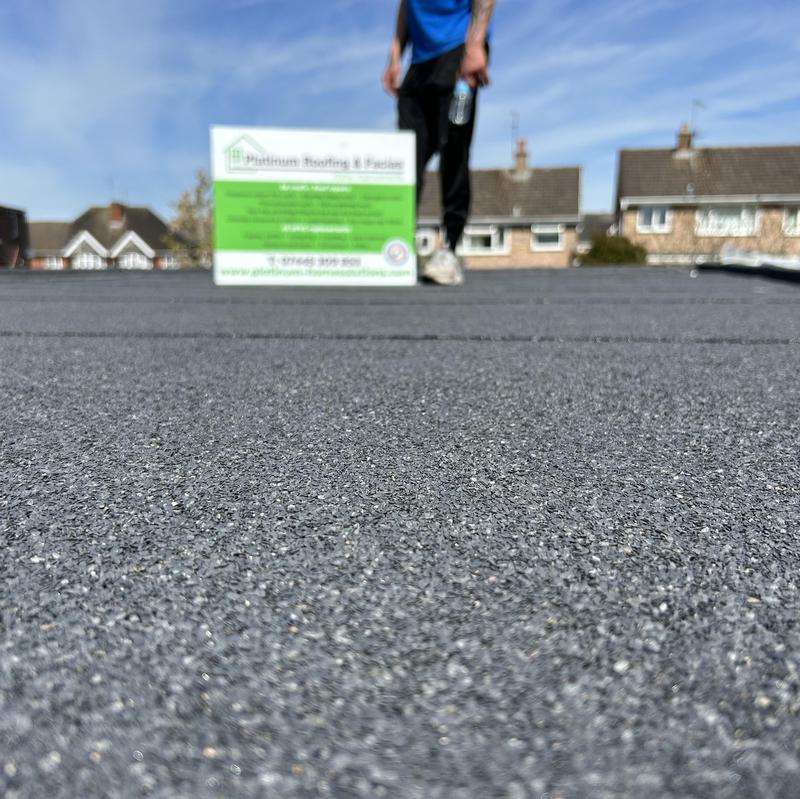
- Completed flat roof that had a timber rebuild followed by new Fascias and a Charcoal felted Roof torched on.
-
Image
135
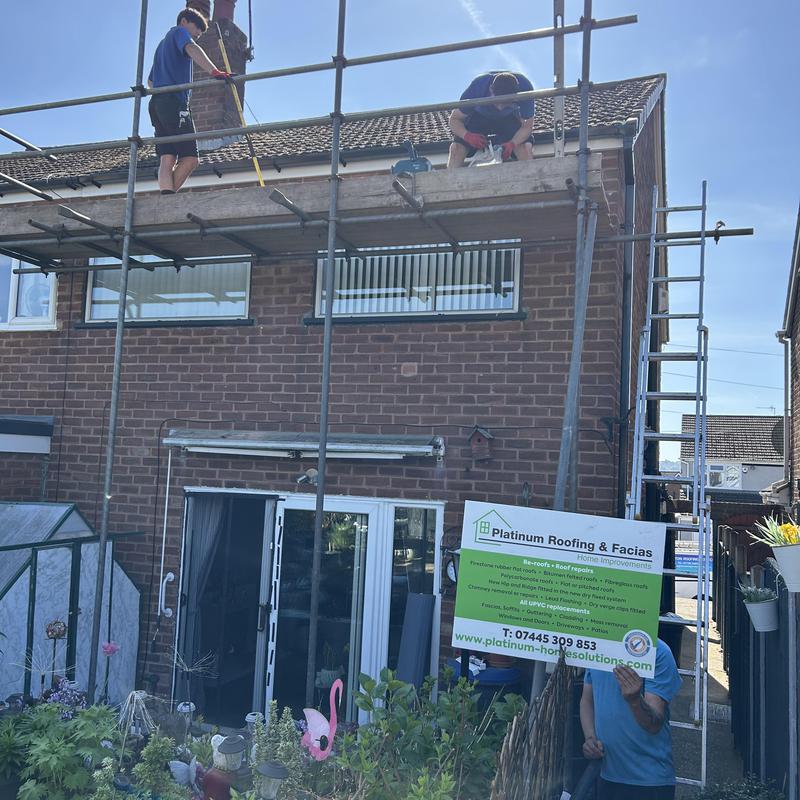
- White Fascias, guttering and a felt repair to the rear of the house only.
-
Image
136
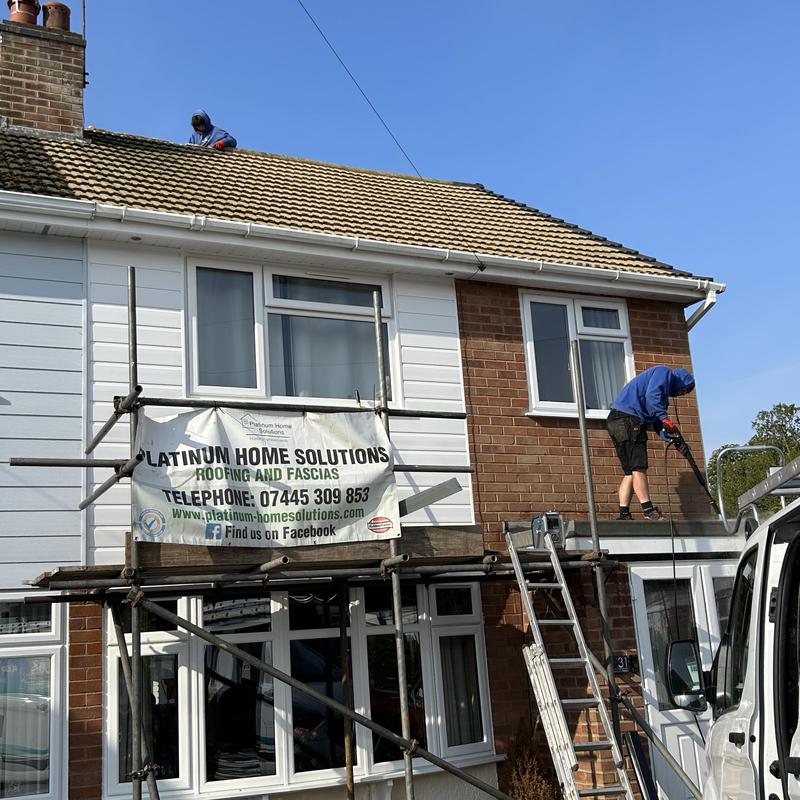
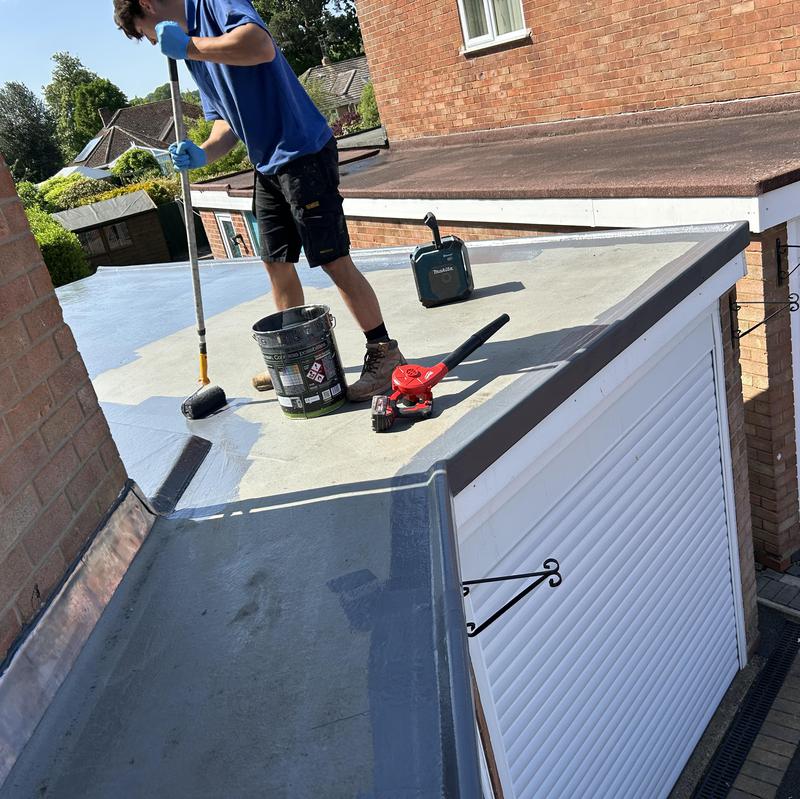
- We jet washed the garage flat roof then we completed a new coat of Fibre glass upon the garage roof.
-
Image
137
- As you see here a fresh coat of Fibre glass.
-
Image
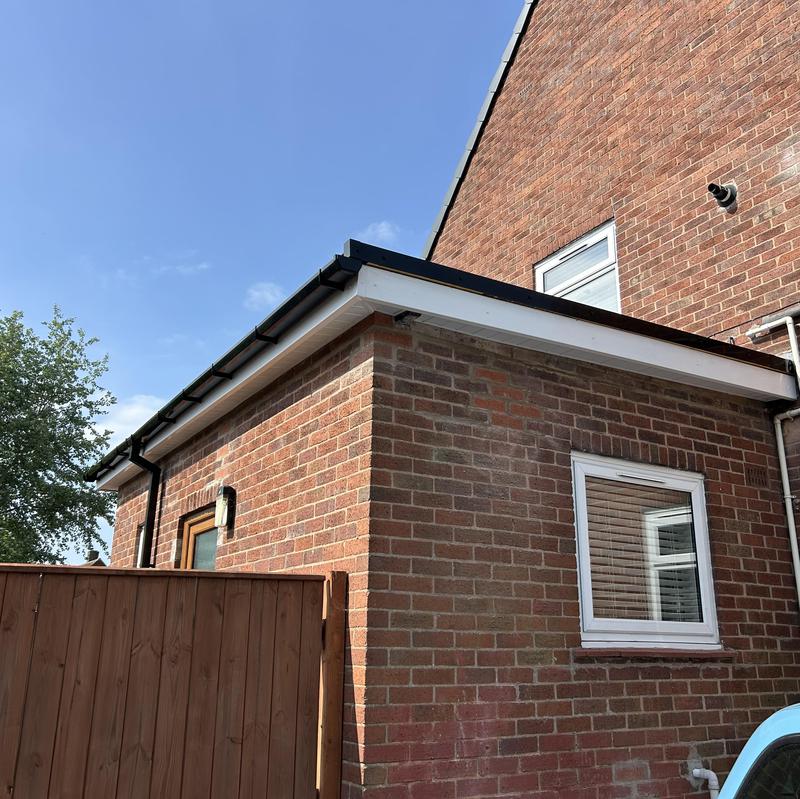
138
- New Rubber Roof completed here in Telford with new Fascias, guttering etc
-
Image
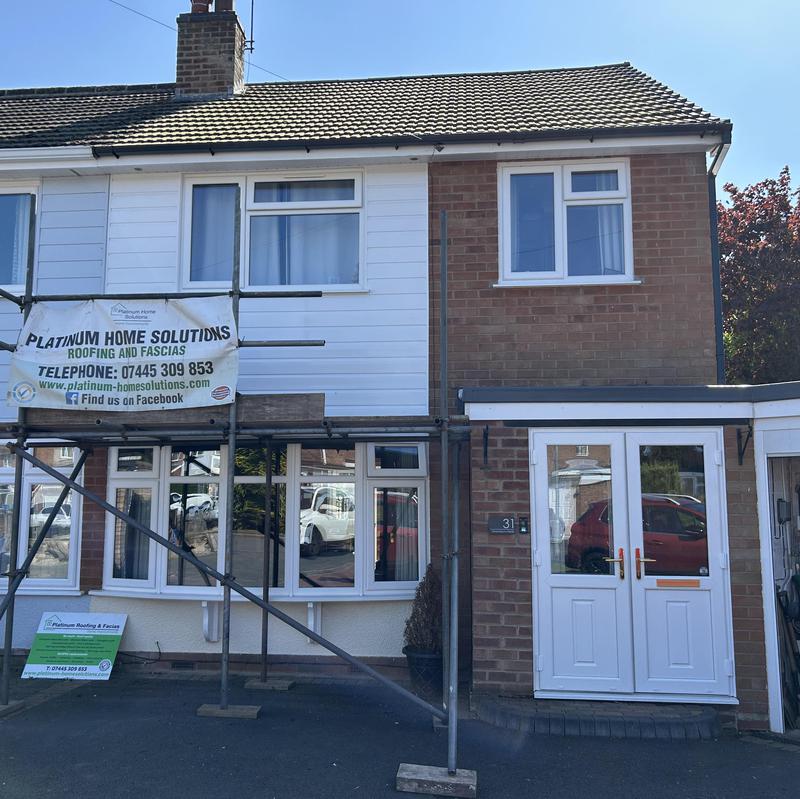
139
- White Cladding fitted here for Paul in Shifnal.
-
Image
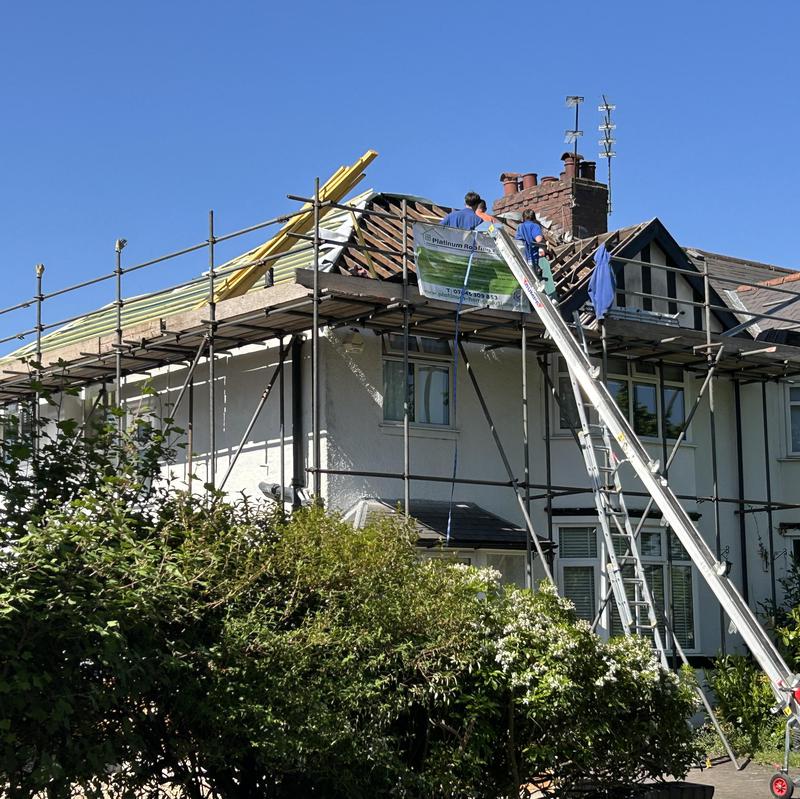
140
- Re Roof in Bradmore, Wolverhampton with a Velux window Aldo fitted to the front of the Roof.
-
Image
141
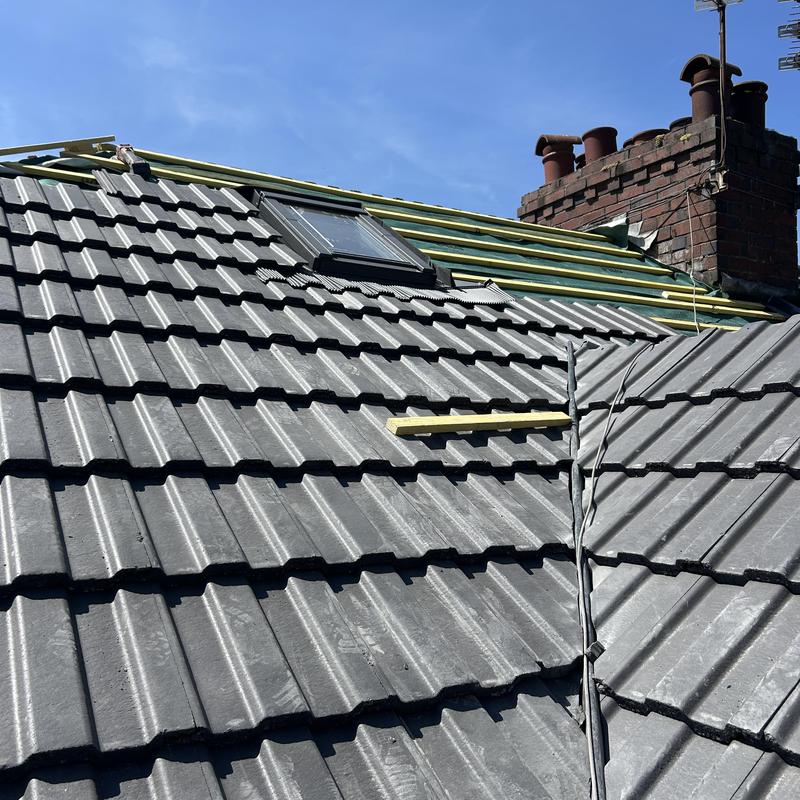
- Re Roof in Broad Lane showing the velux window
-
Image
142
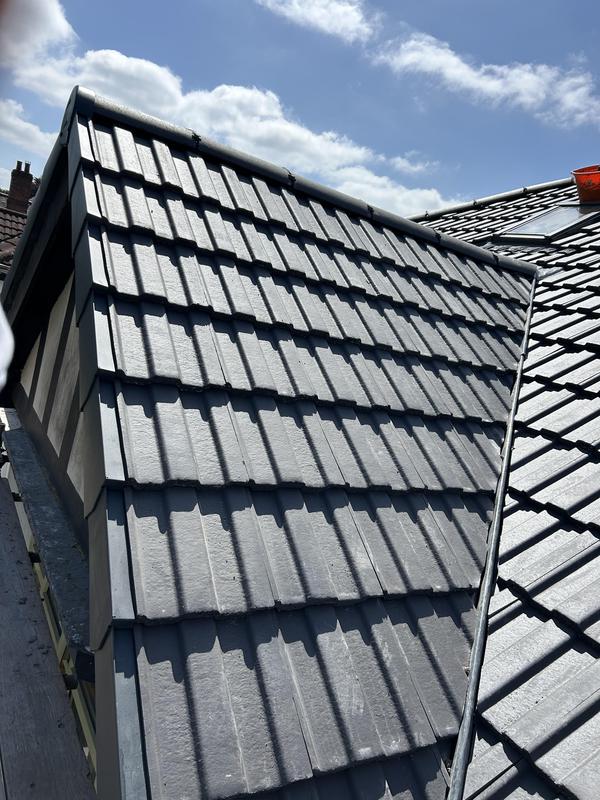
- Re Roof showing different angles of the Roof we completed.
-
Image
143
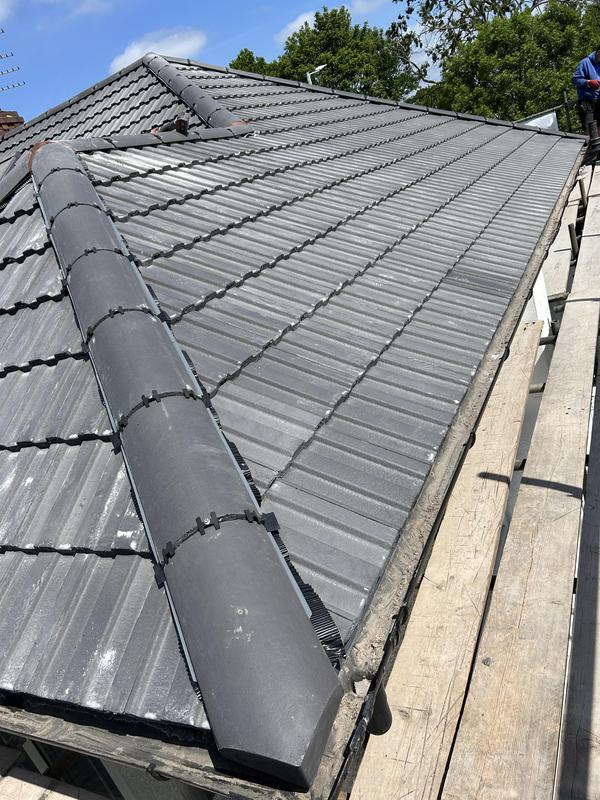
- Showing the new ridge tiles installed in the dry fix system.
-
Image
144
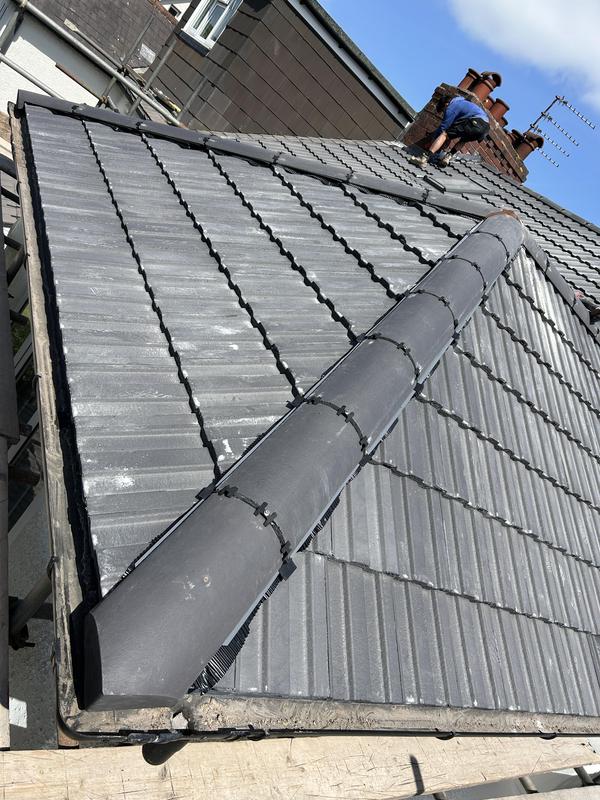
- Another angle of the dry ridges installed.
-
Image
145
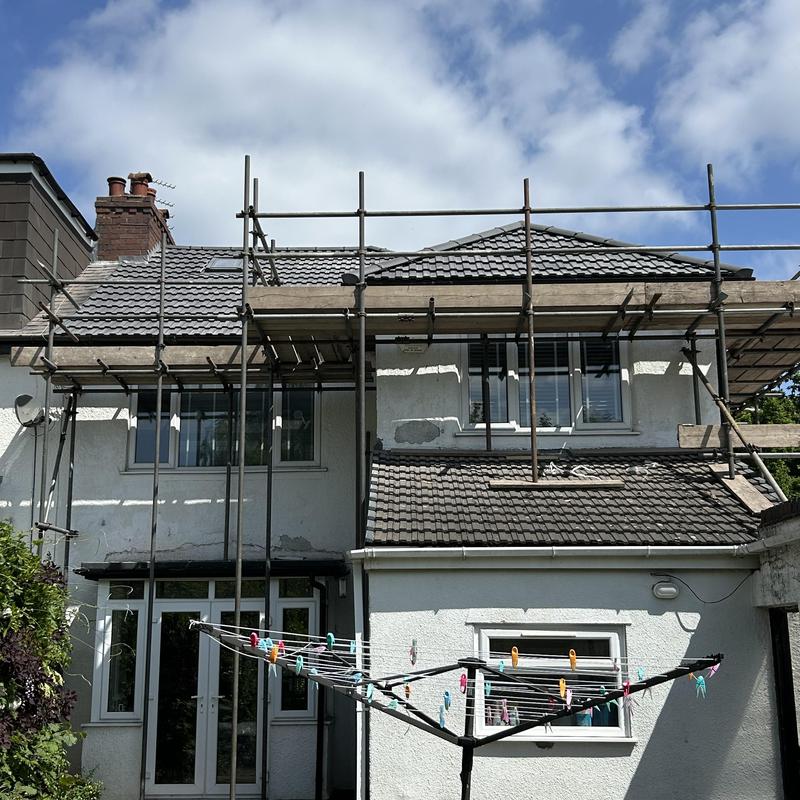
- The rear of the Roof completed.
-
Image
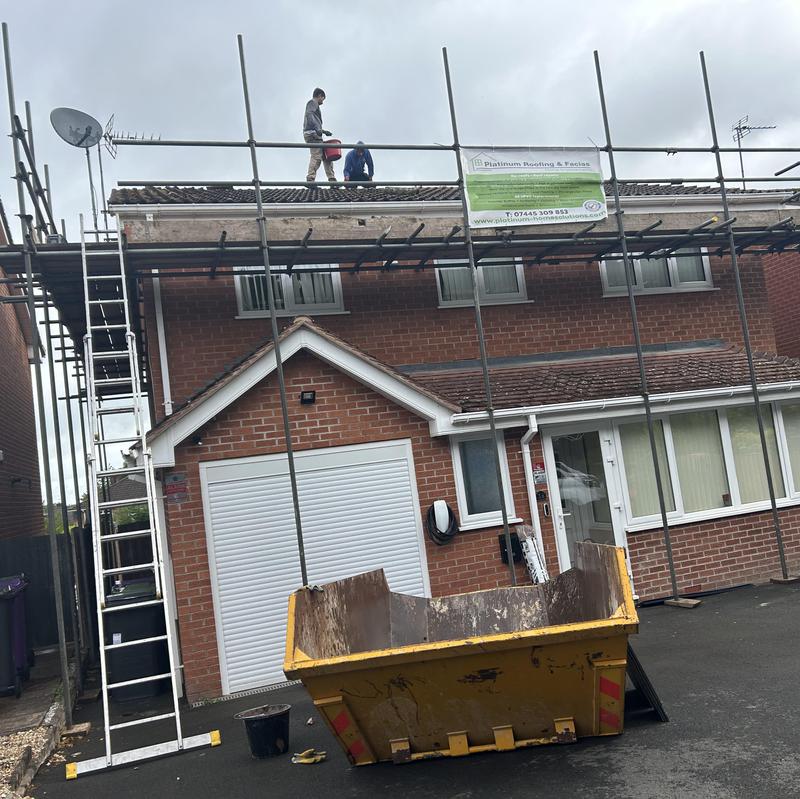
146
- Re Roof to be stripped down in Tettenhal.
-
Image
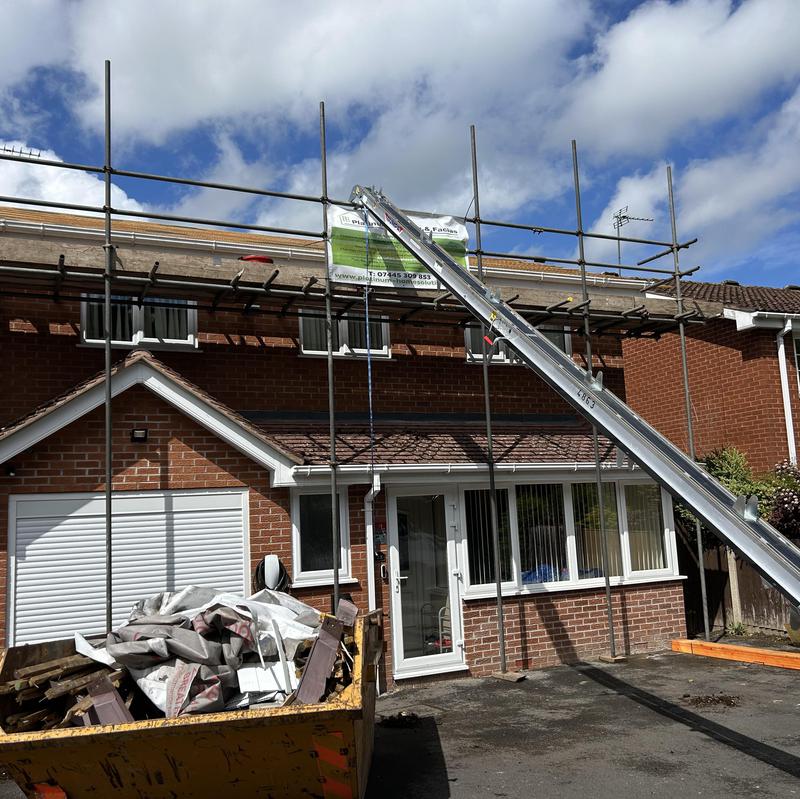
147
- Roof stripped, membrane and Laths applied, bumper ready to transport Slates up.
-
Image
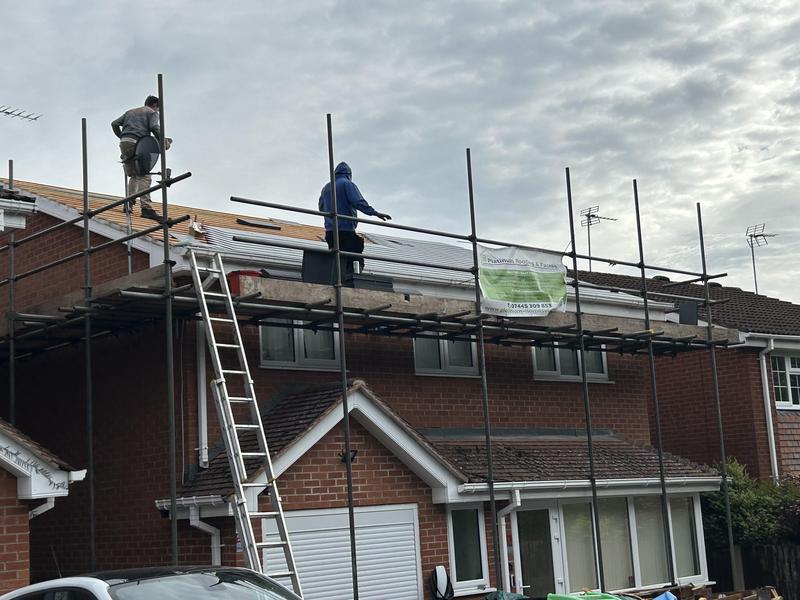
148
- In the process of a Re Roof in Tettenhal
-
Image
149
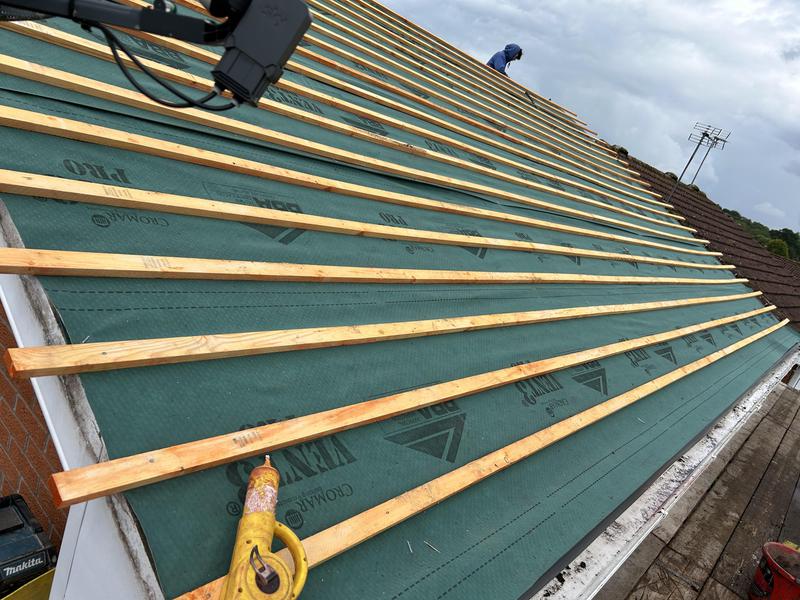
- Membrane and treated Laths ready for the Roof tiles.
-
Image
150
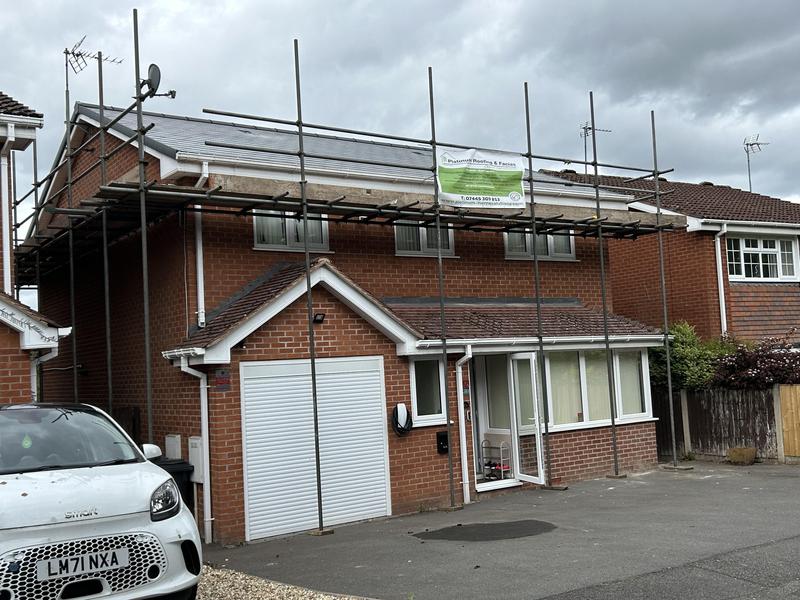
- Completed Roof with Synthetic Slates.
-
Image
151
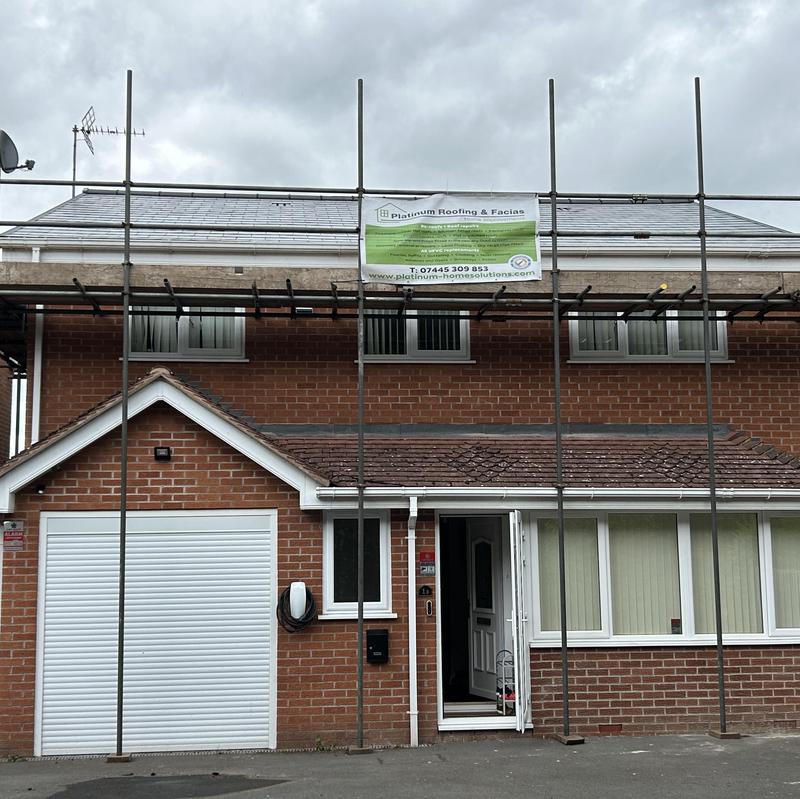
- Complete Roof in Synthetic Slates.
-
Image
152
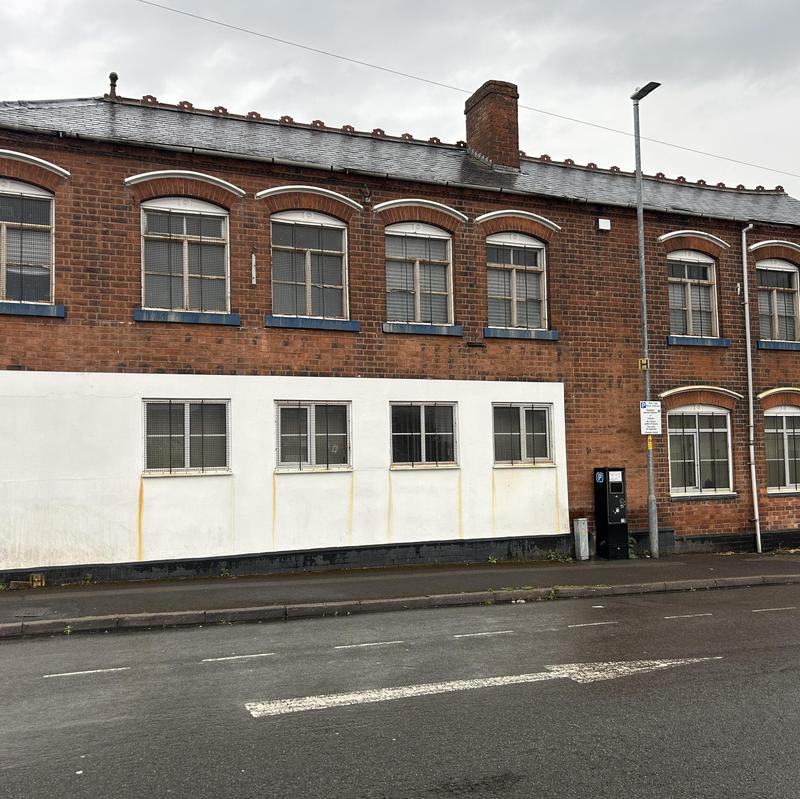
- Completed Factory Roof here in Walsall.
-
Image
153
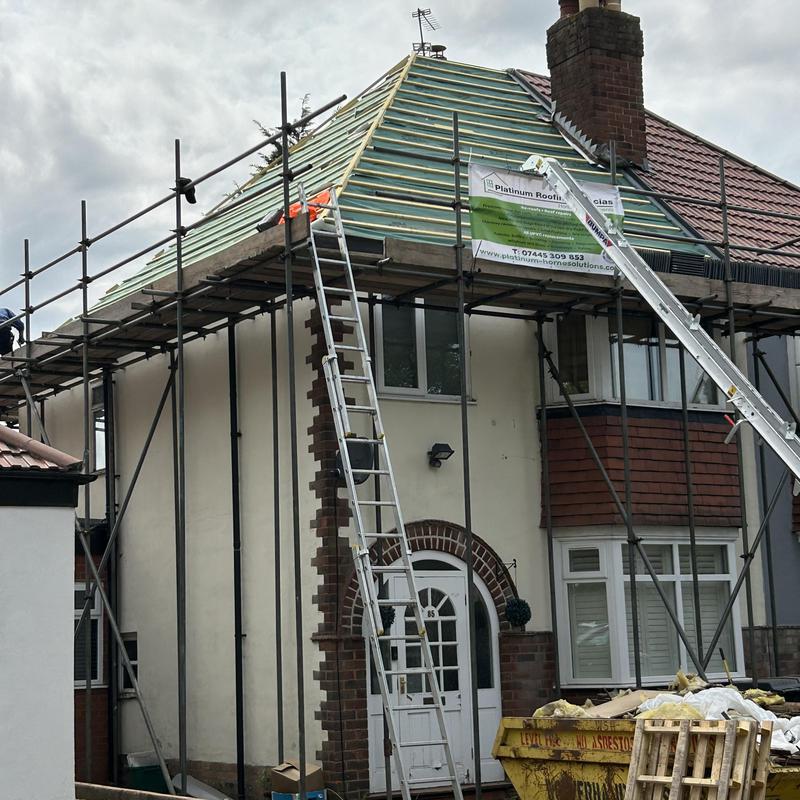
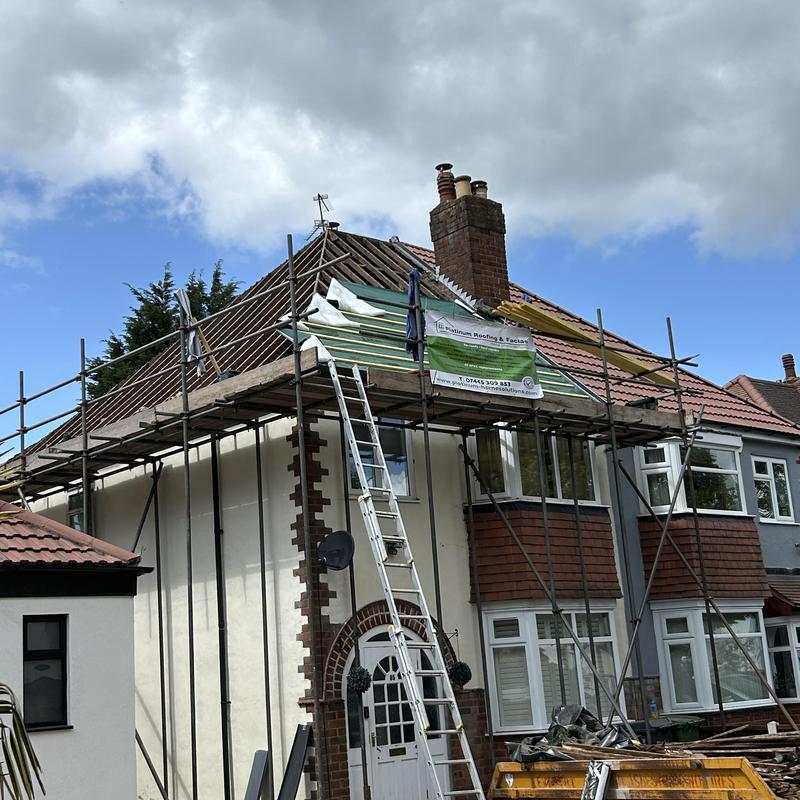
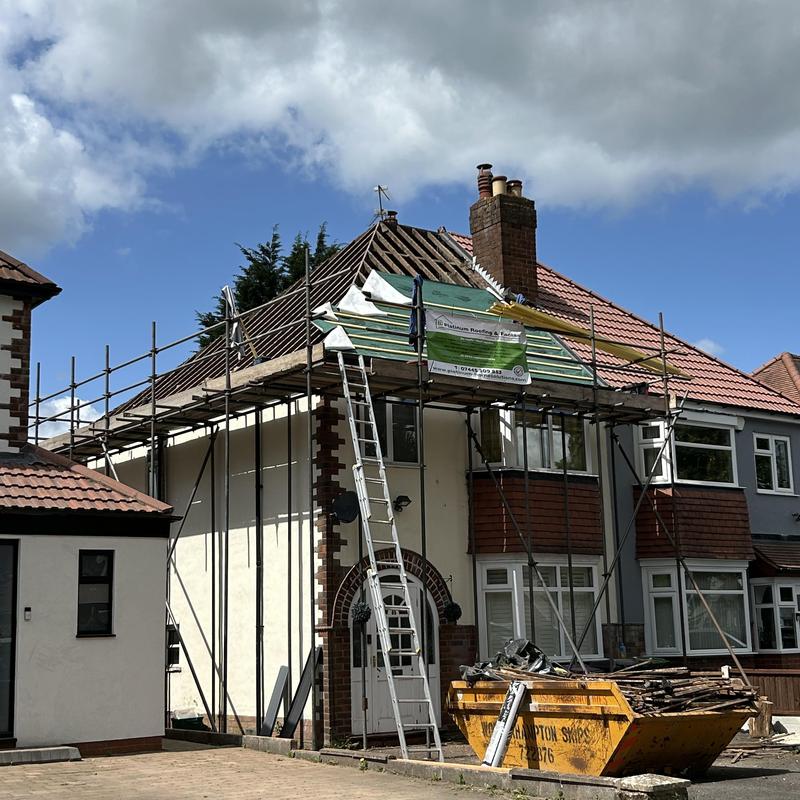
- Roof being fitted here in Hardon Road, Parkfields.
-
Image
154
-
Image
155
-
Image
156
-
Image
157
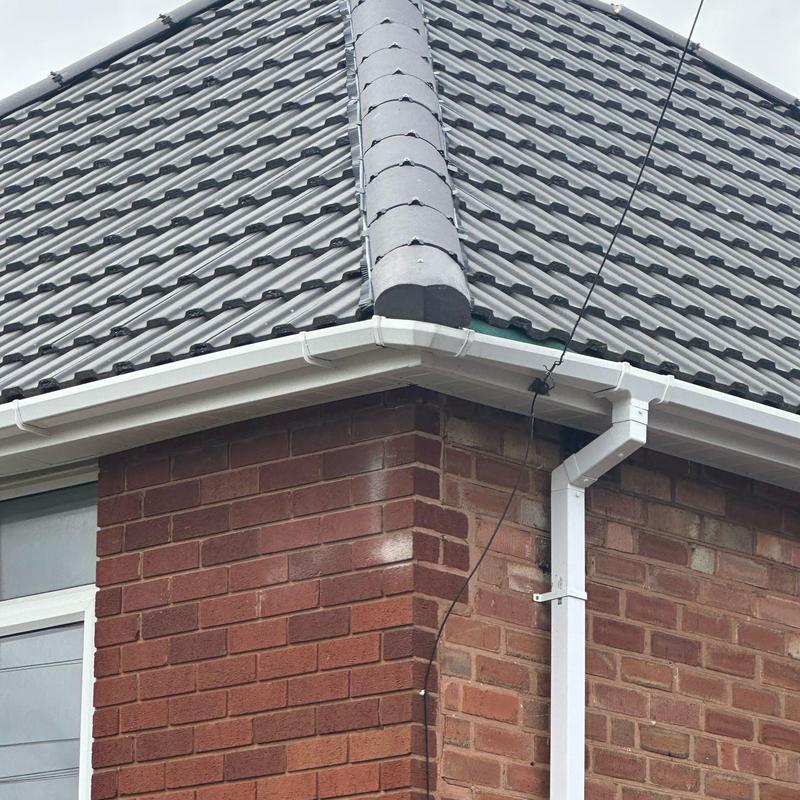
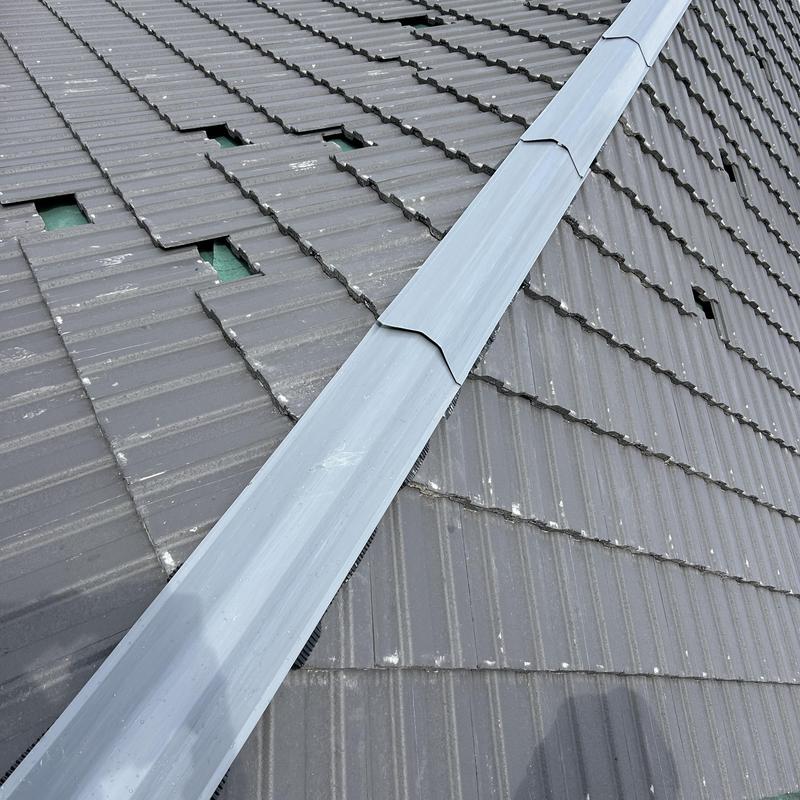
- Showing the hip trays that are used only on the hips before the ridge tiles are fitted.
-
Image
158
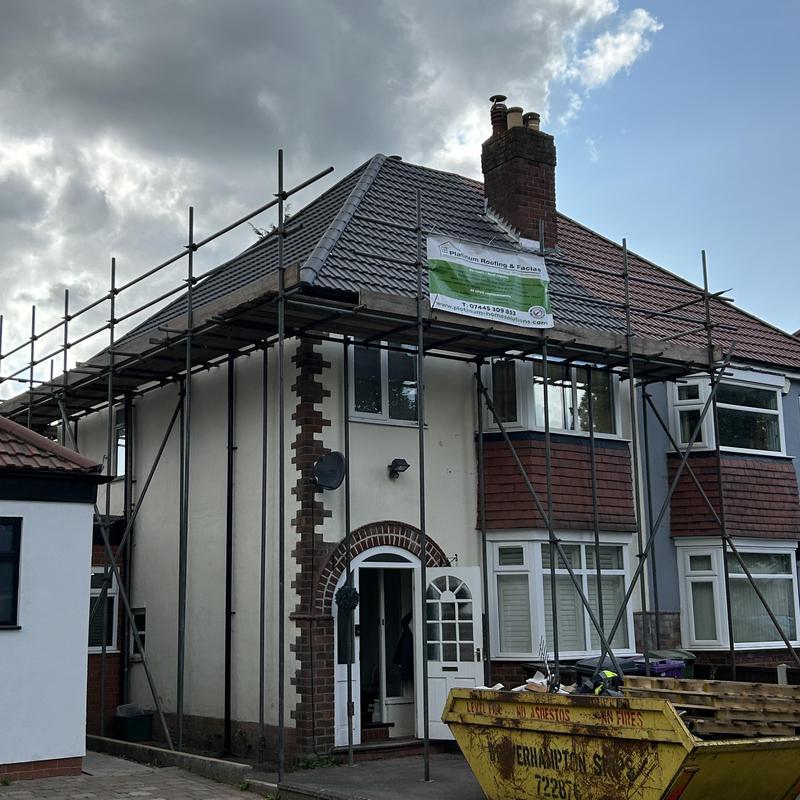
- Roof completed in Pinfold Lane, Penn.
-
Image
159
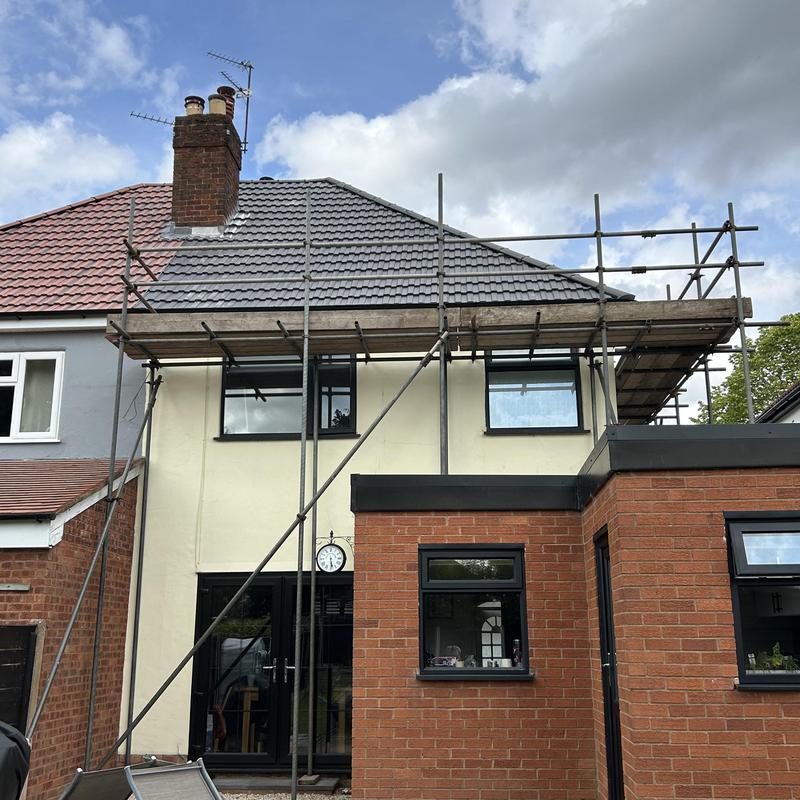
- Rear of the Roof in Pinfold Lane.
-
Image
160
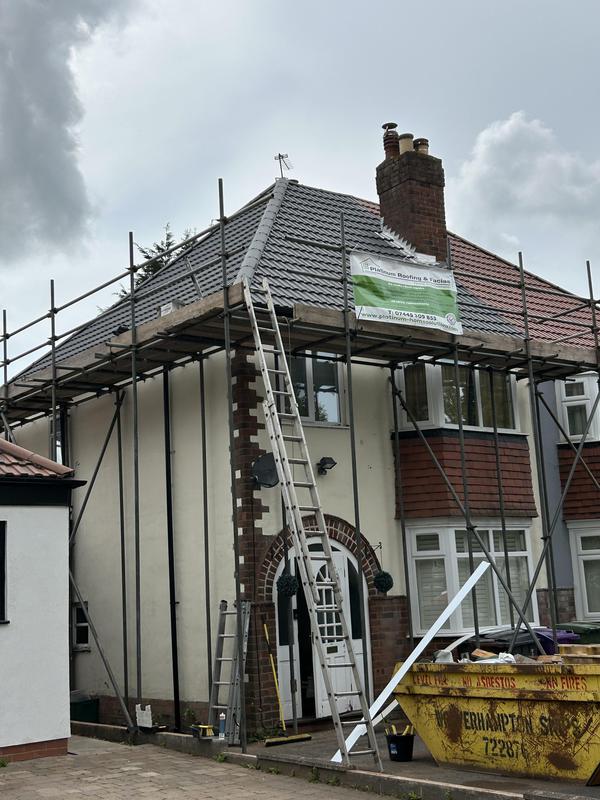
- Roof in Pinfold Lane being fitted.
-
Image
161
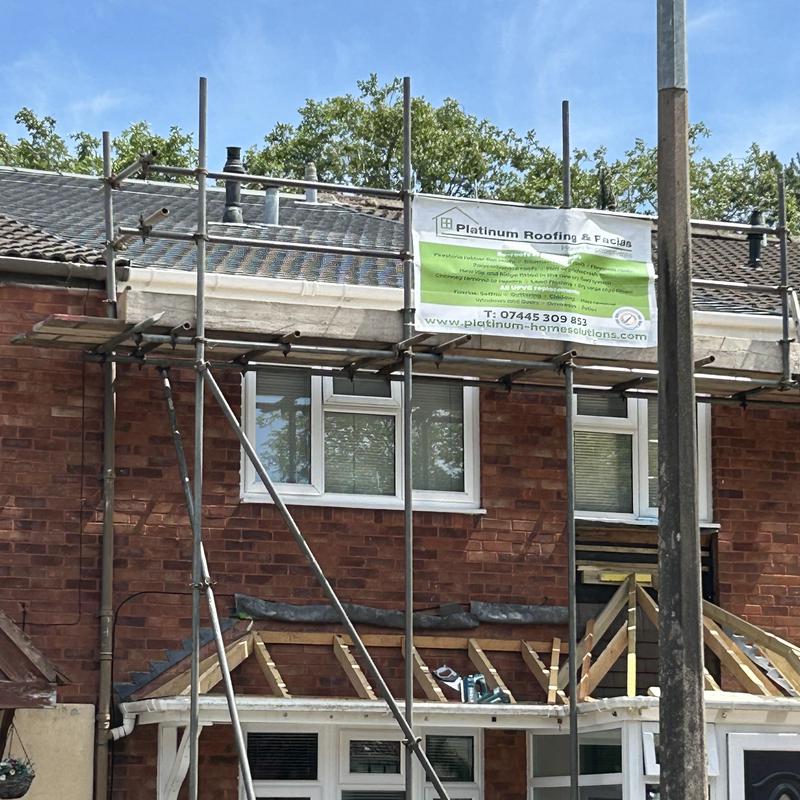
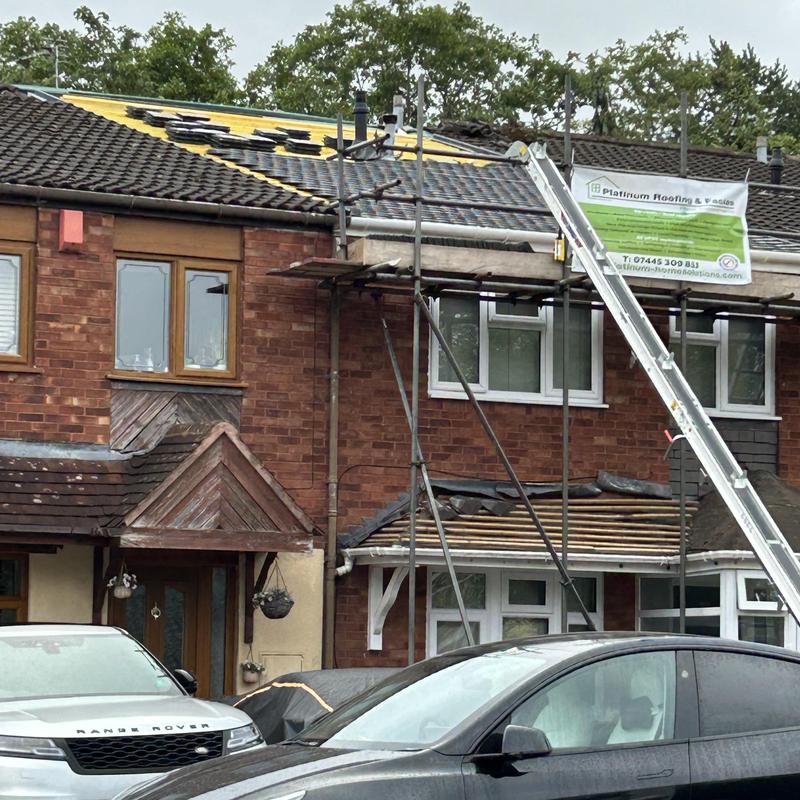
- Jane’s Roof completed before we started upon her Canopy
-
Image
162
- Jane’s Roof being fitted here in Codsall.
-
Image
163
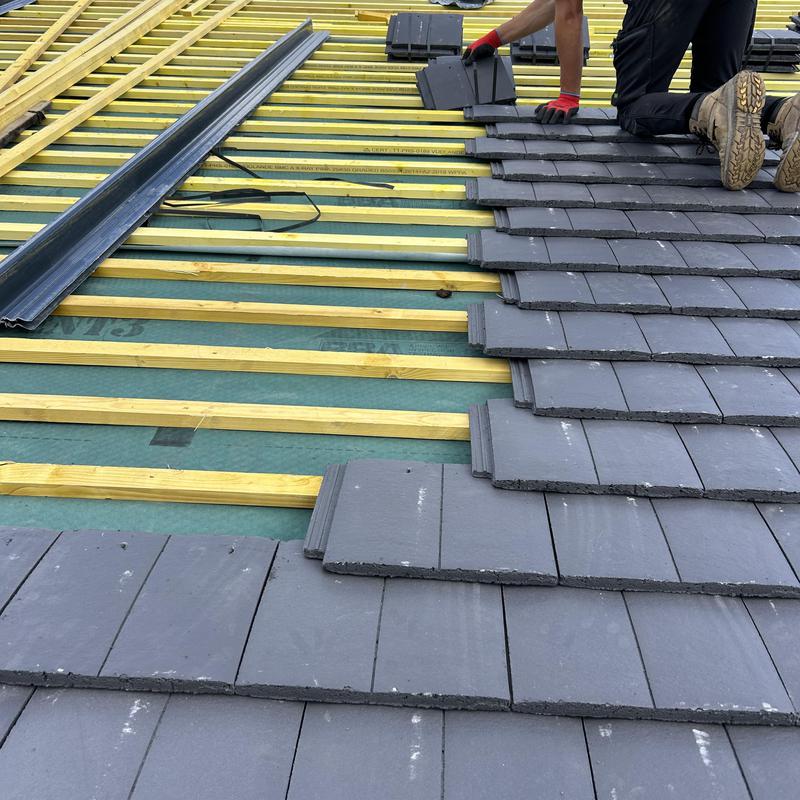
- Closer look at the Ashmore Roof tiles.
-
Image
164
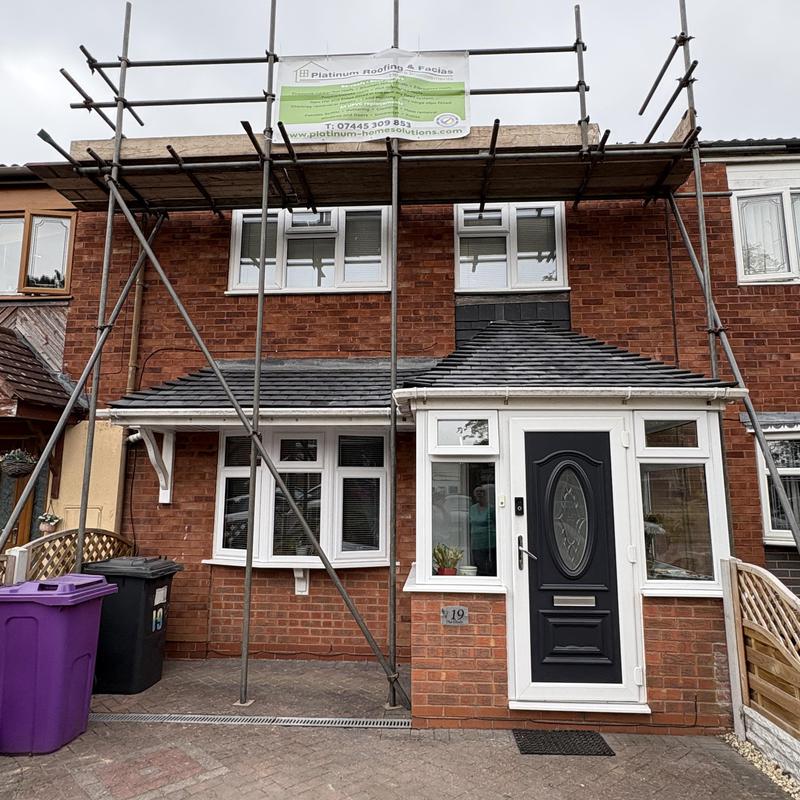
- Completed both Roofs before the scaffolding was removed.
-
Image
165
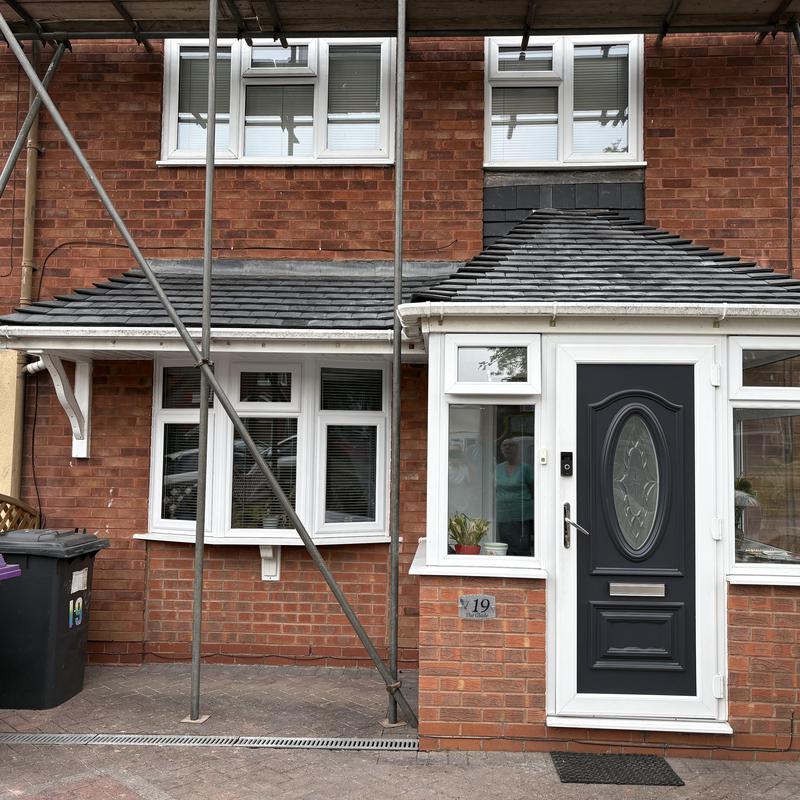
- Jane’s Canopy that we also completed for her after we completed the main Roof.
-
Image
166
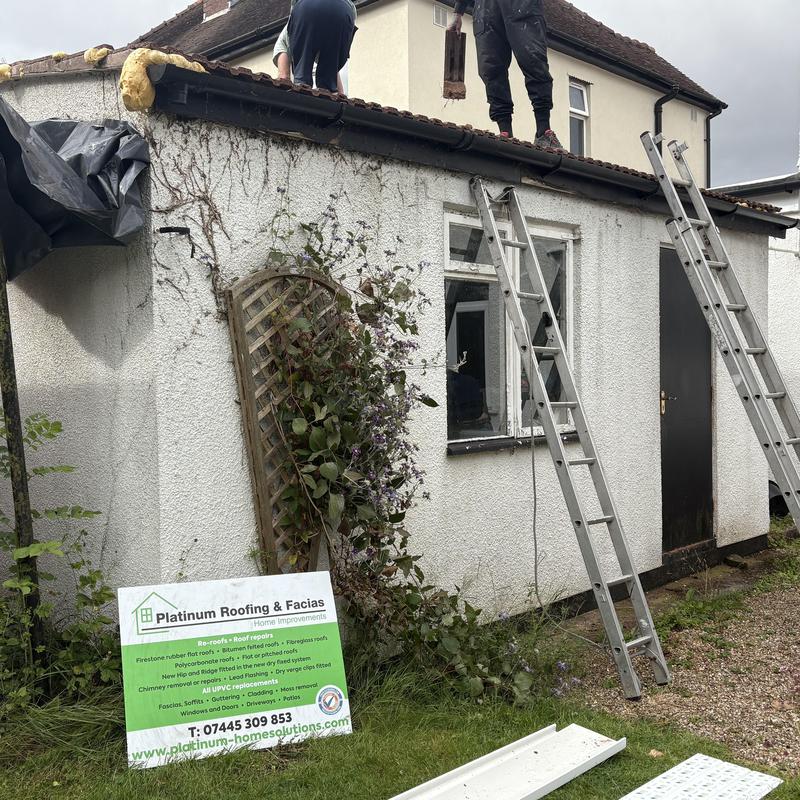
- Pitched Roof the Lads are stripping down.
-
Image
167
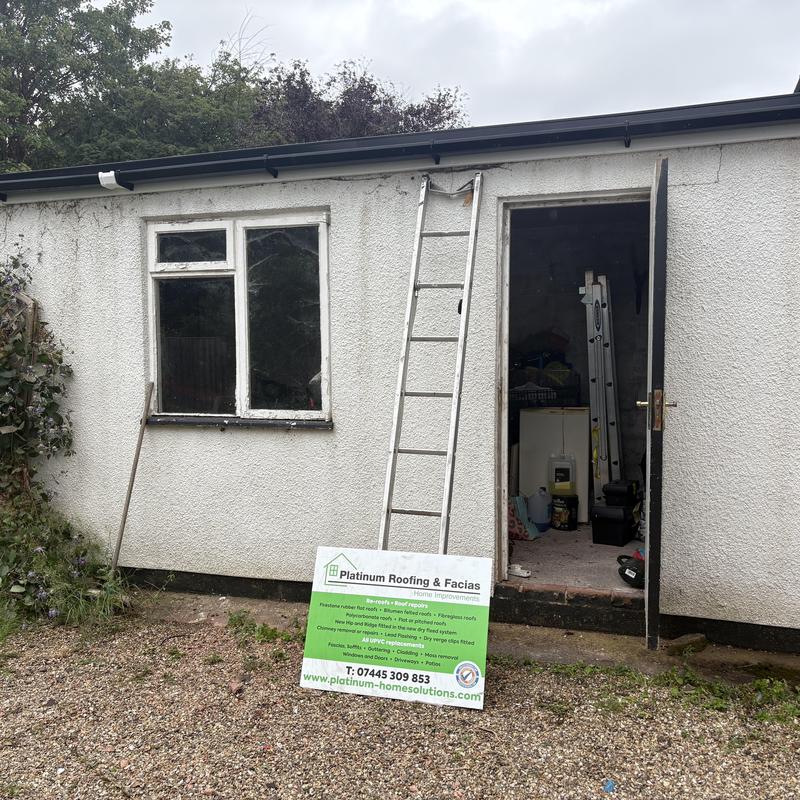
- Completed flat roof from Pitched, the Union (white) we went back to change.
-
Image
168
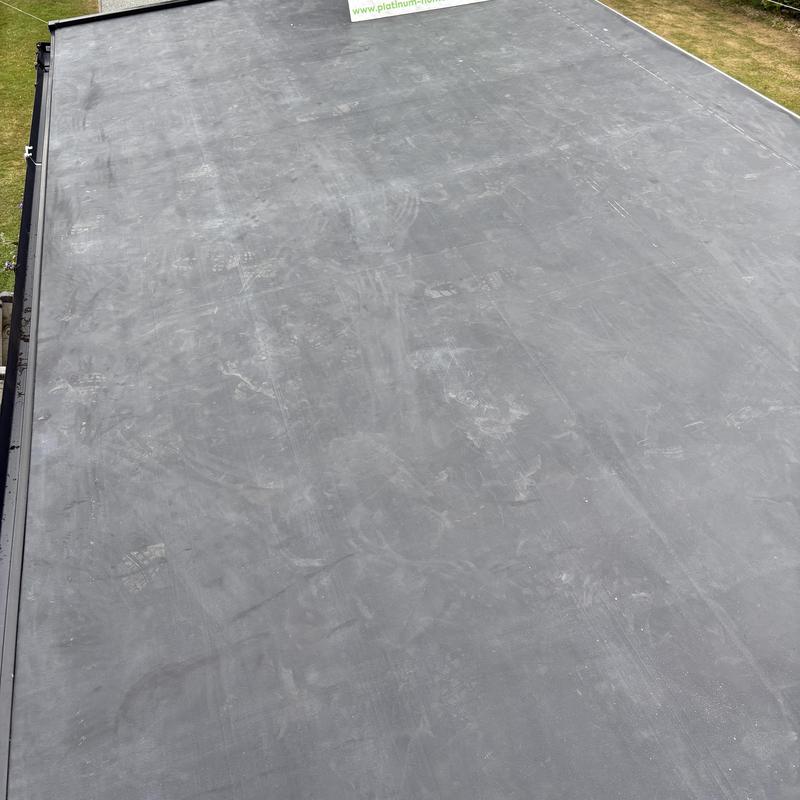
- Pitched flat roof changed to a Rubber roof.
-
Image
169
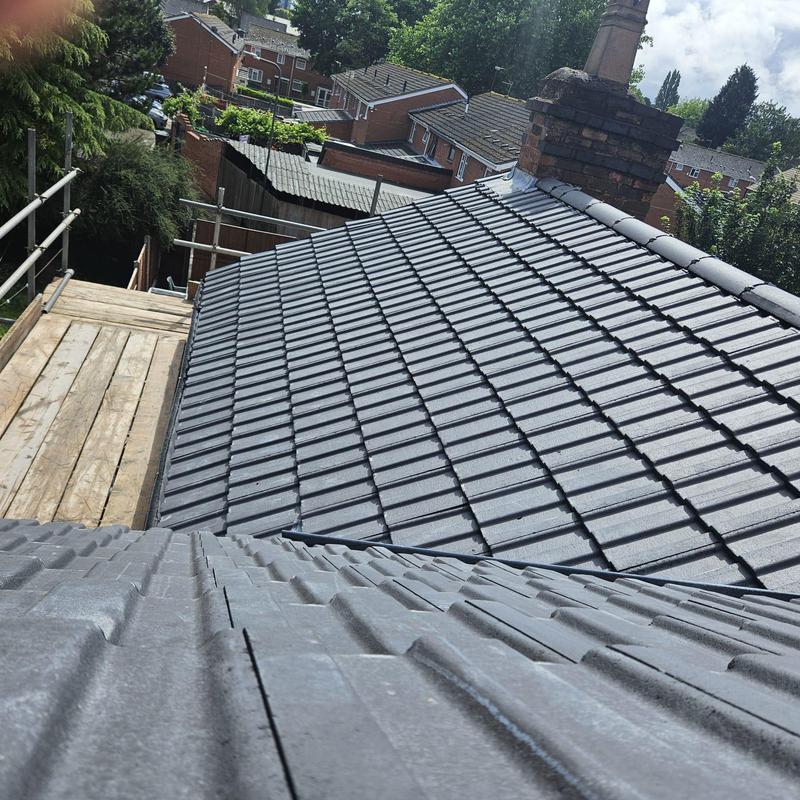
- The rear of the completed Roof for Raj.
-
Image
170
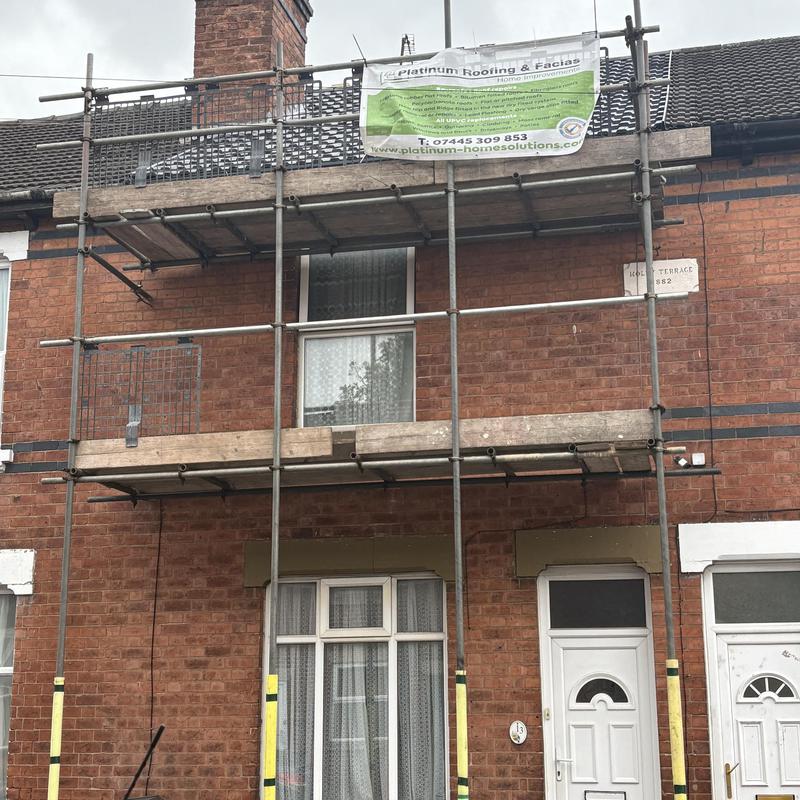
- Front of the Roof for Raj.
-
Image
171
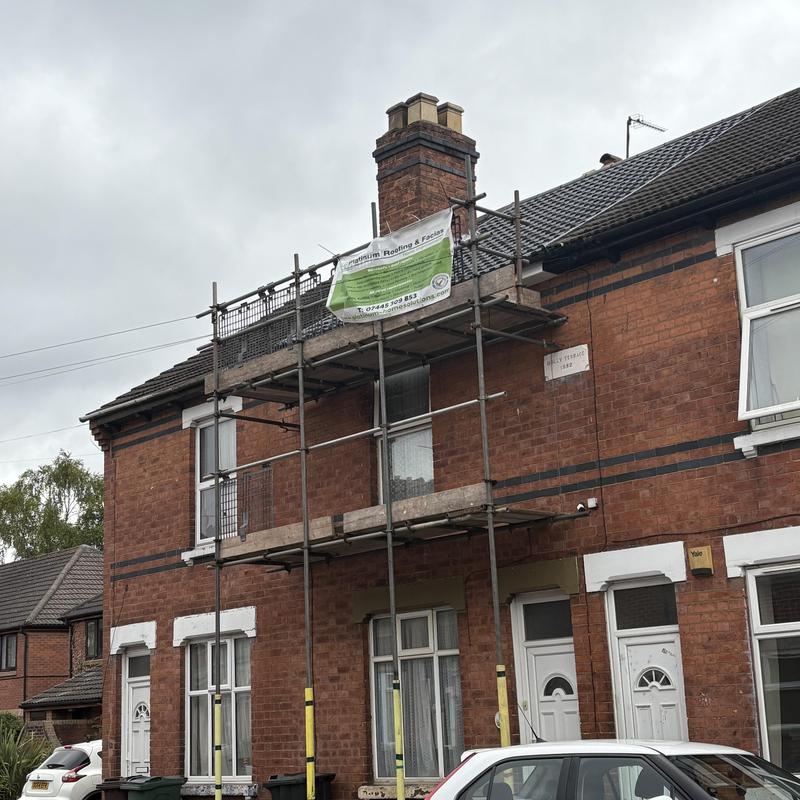
- Another photo of the front.
-
Image
172
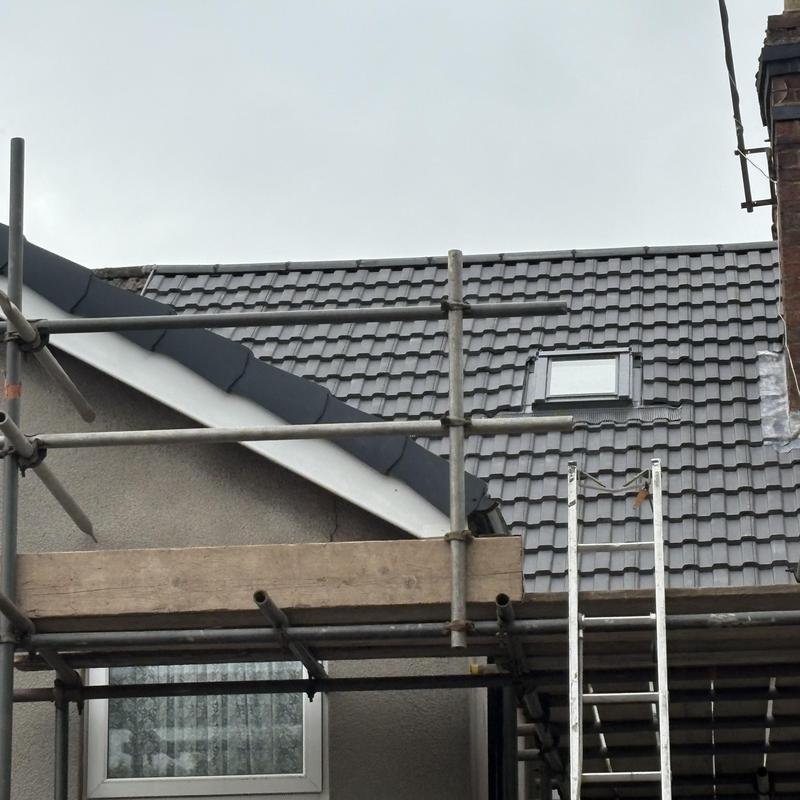
- Completed Re Roof to the rear for Raj with a velux window also fitted.
-
Image
173
- Finishing off this Roof here.
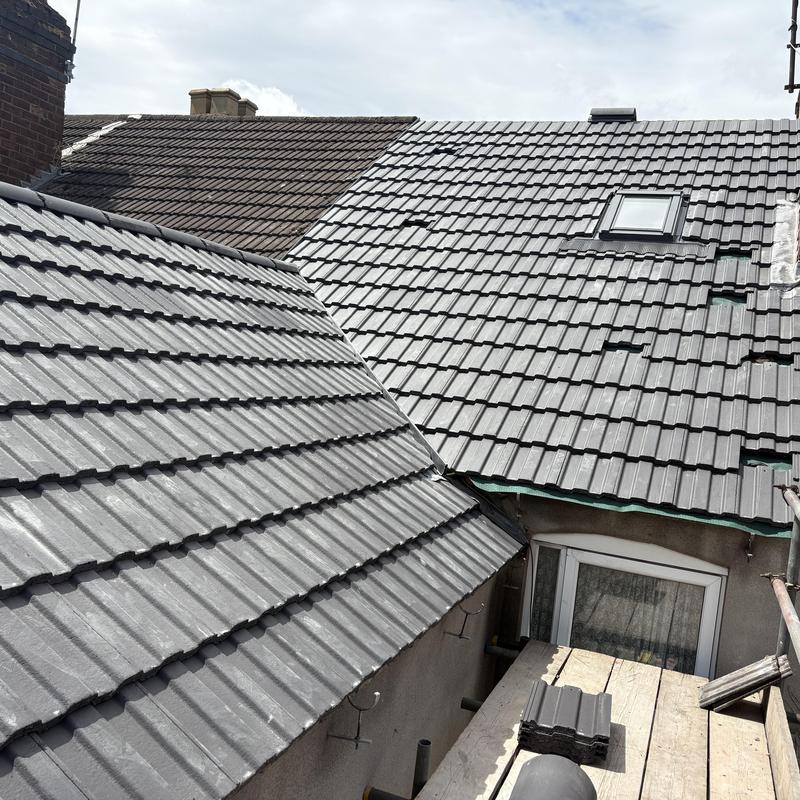
-
Image
174
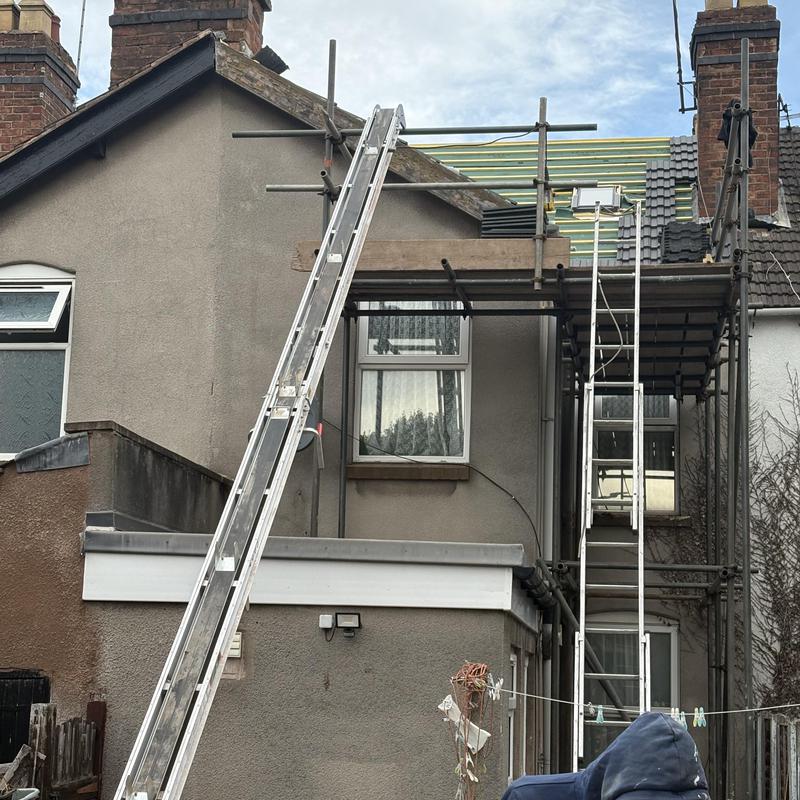
-
Image
175
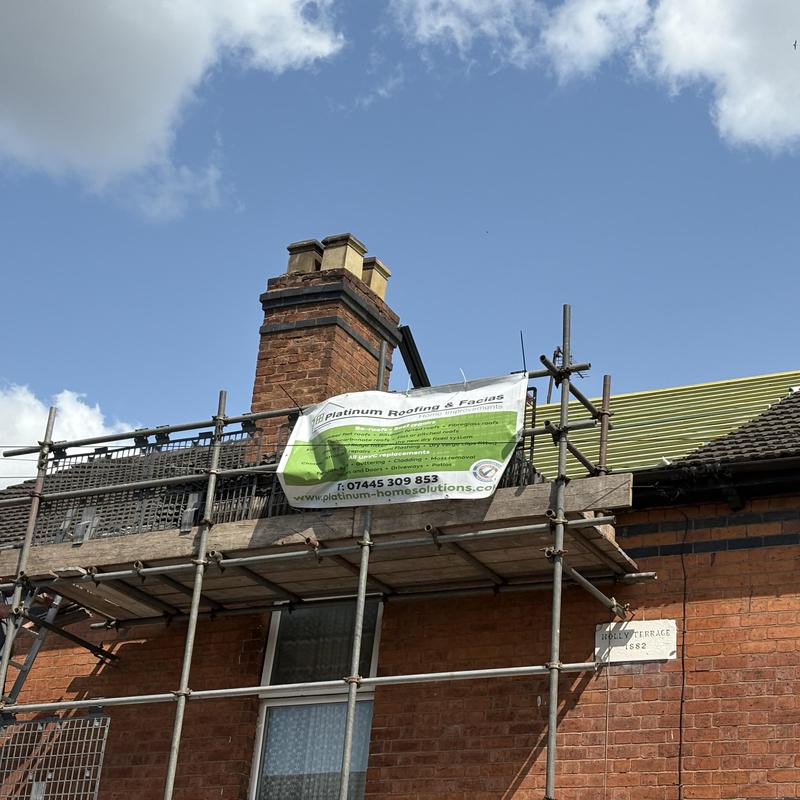
-
Image
176
-
Image
177
-
Image
178
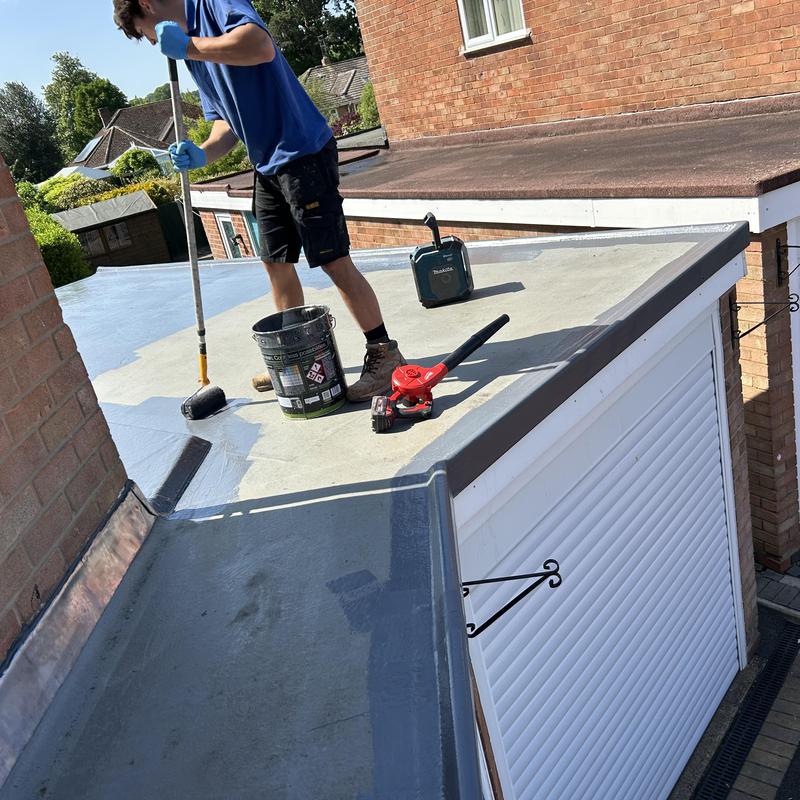
- You see the colour change from the tired Fibre glassed roof after we Jet washed it then now rolling on a new thick layer of new Fibre glass, lovely finish!
-
Image
179
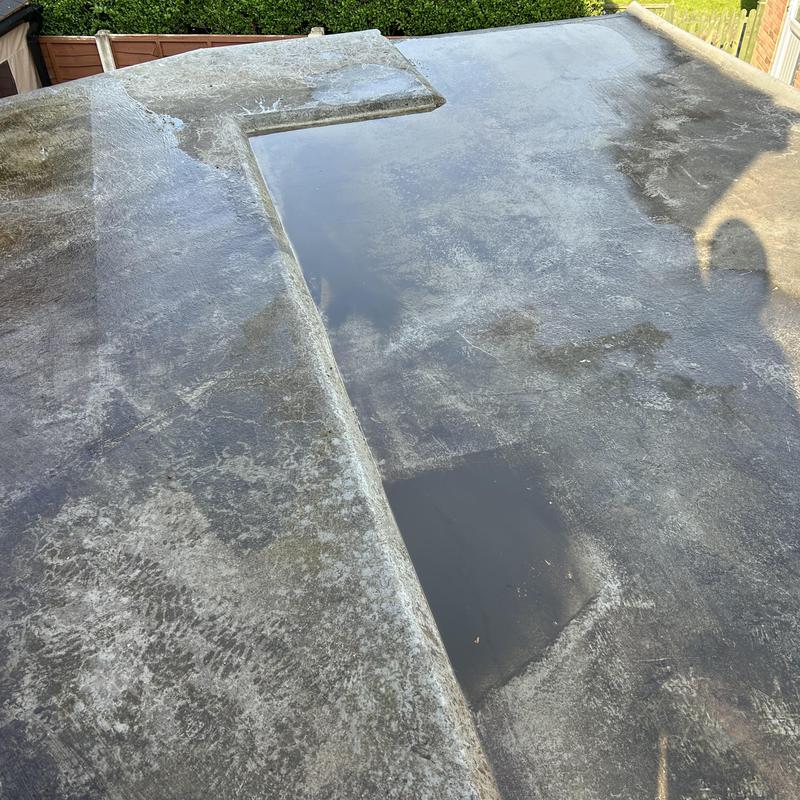
- Tired Fibre glass roof, we Jet washed it down from the moss
-
Image
180
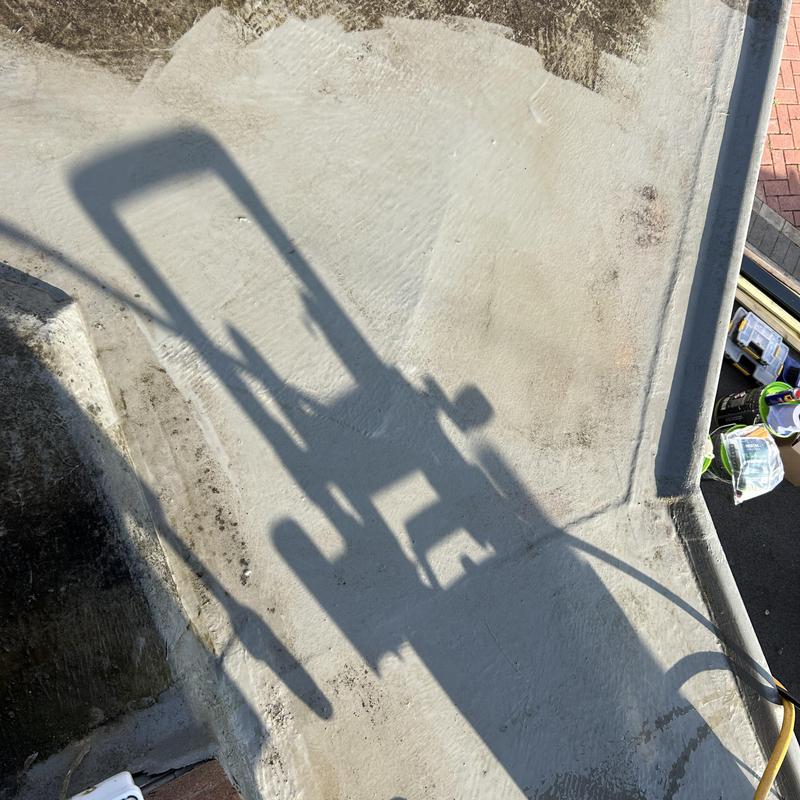
- You see here rhat we had to use the Jet washed, hose pipe just would t clean it down
-
Image
181
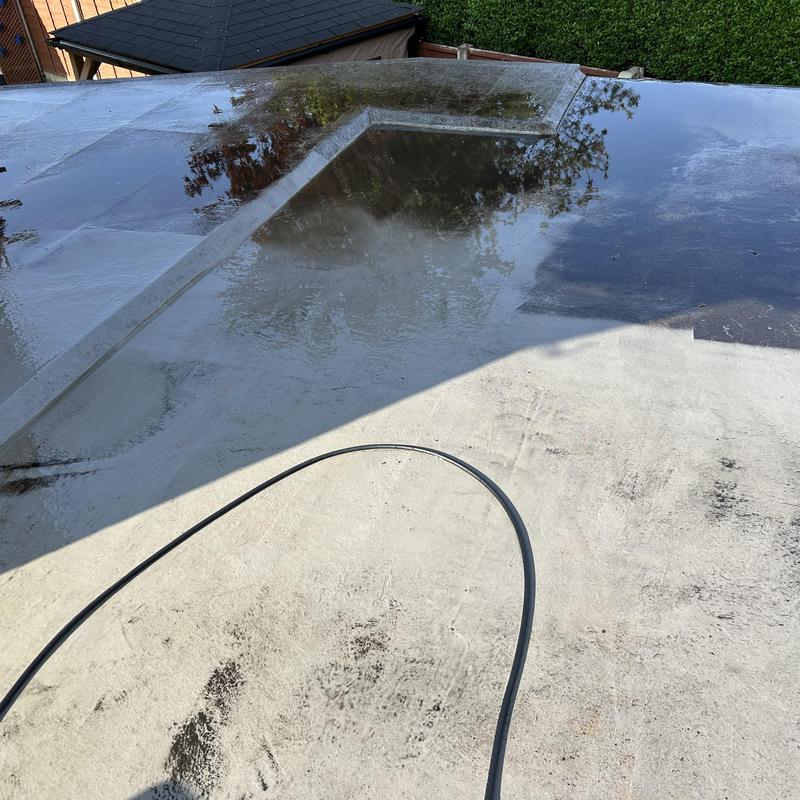
- We couldn’t apply new Fibre until the surface was clean for us to re apply
-
Image
182
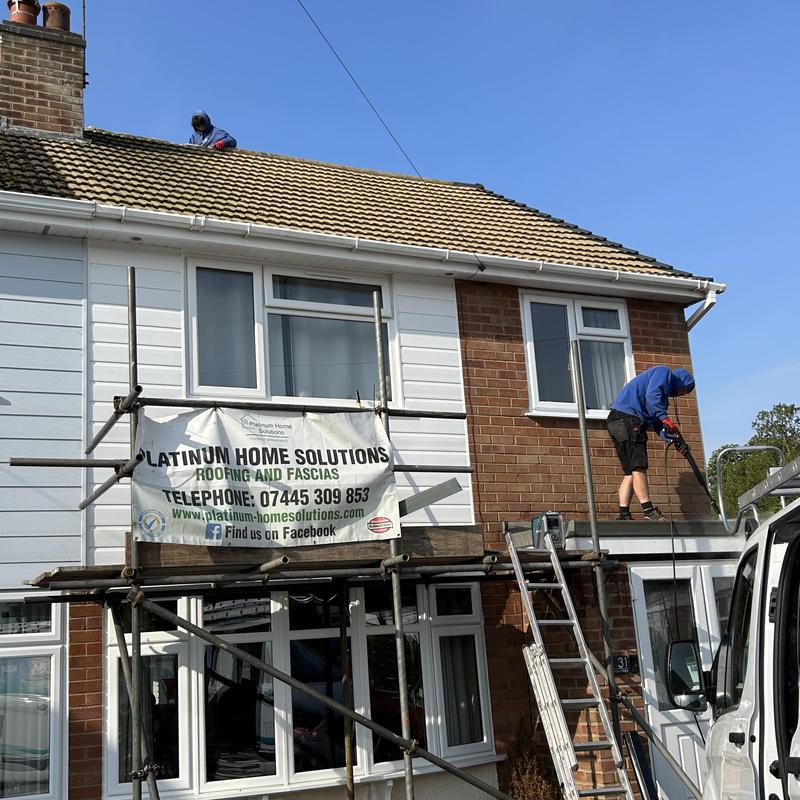
- You see Phil here Jet washing
-
Image
183
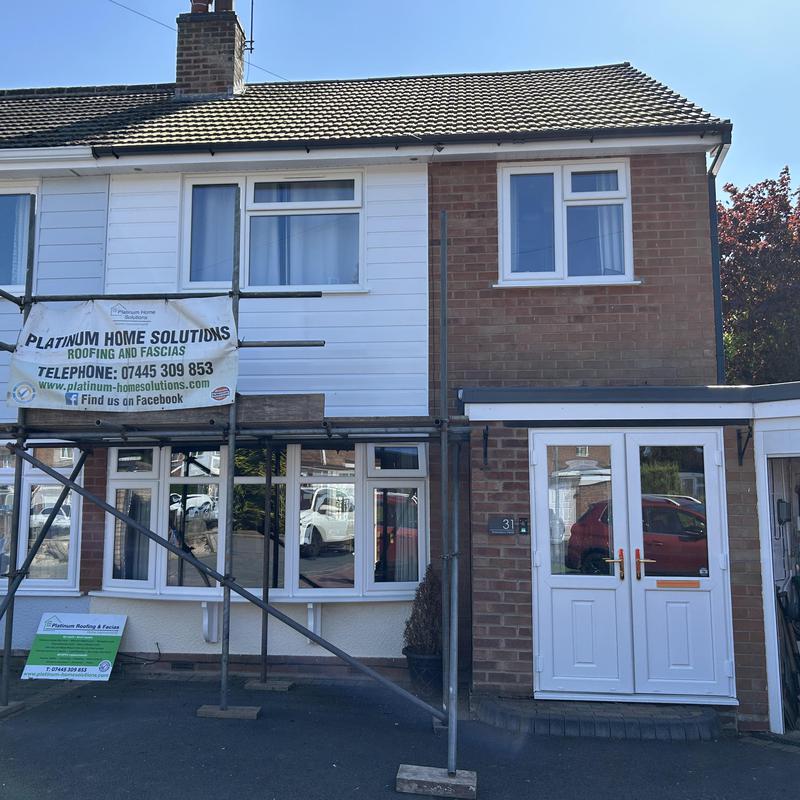
- Lovely colour, lovely finish, customer very happy.
-
Image
184
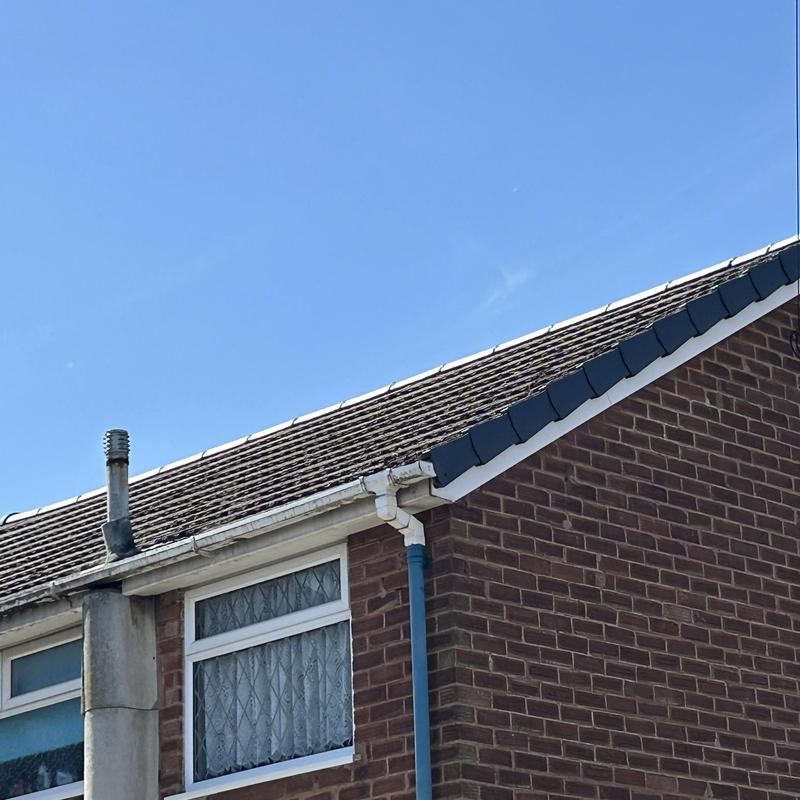
- Small job here for Kerry and Brian we removed the ridge tiles and fitted new grey ones in the dry fix system.
-
Image
185
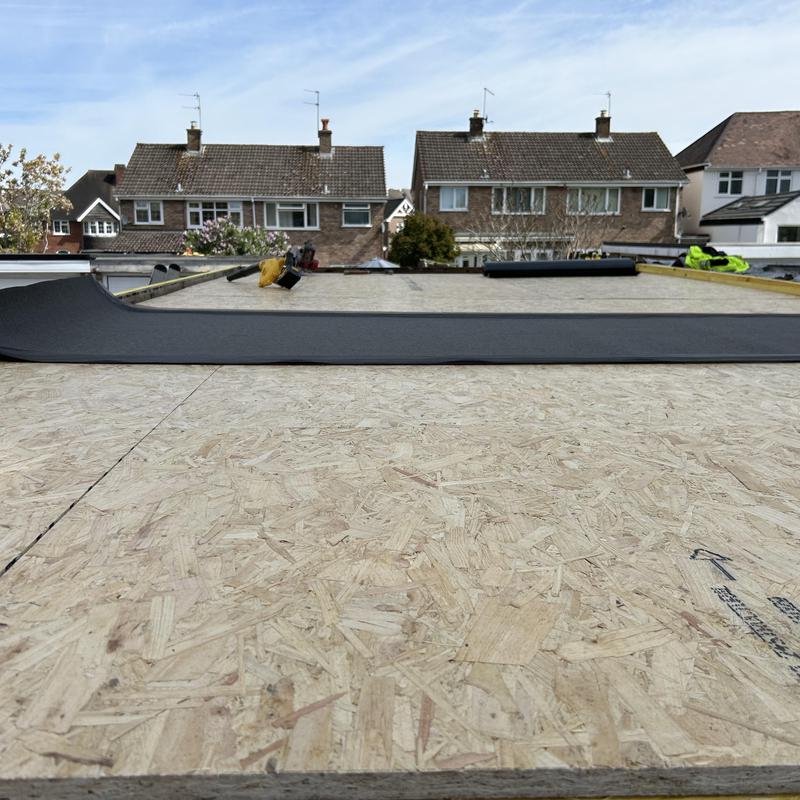
- Boards down ready for the underlay, hard strips, Welts then the Charcoal felt to cover the whole area.
-
Image
186
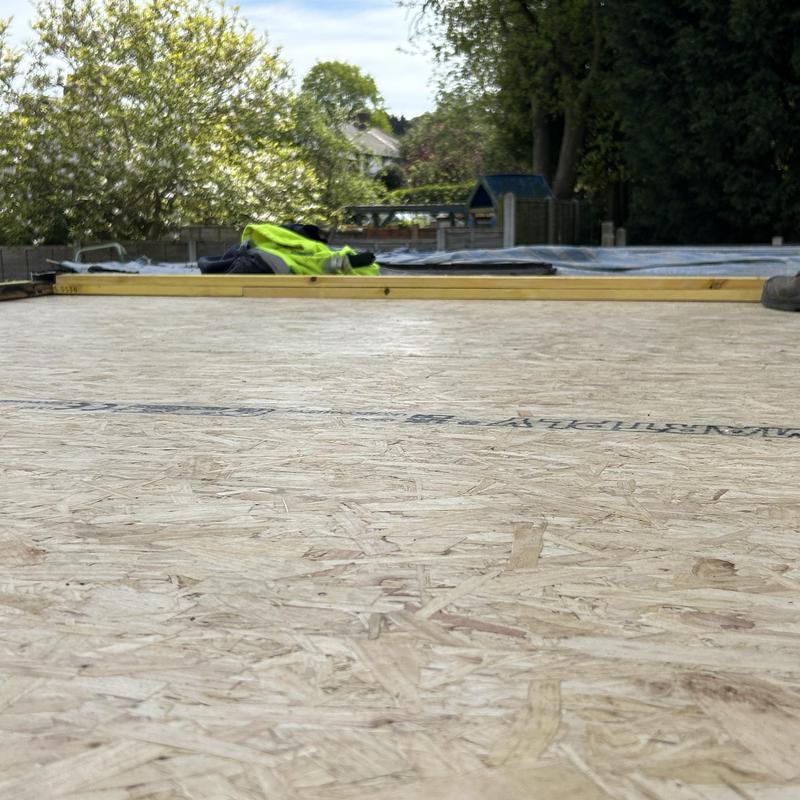
- We put an upstand here to seperate from the neighbours roof due to there’s being actually worse than the one we was fitting.
-
Image
187
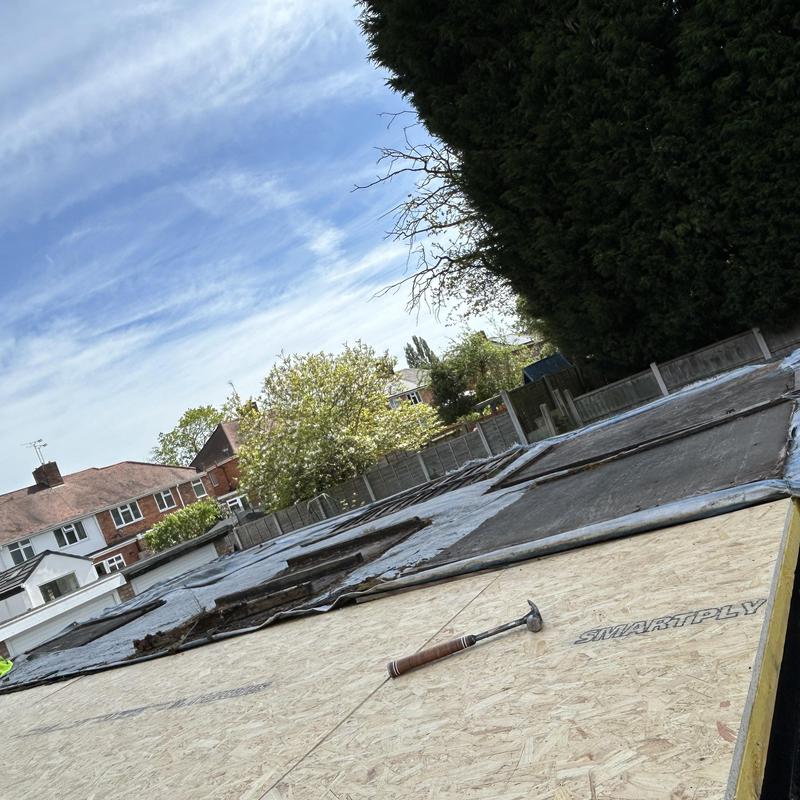
- New 18ml osb boards we fitted to cover the whole area of the roof.
-
Image
188
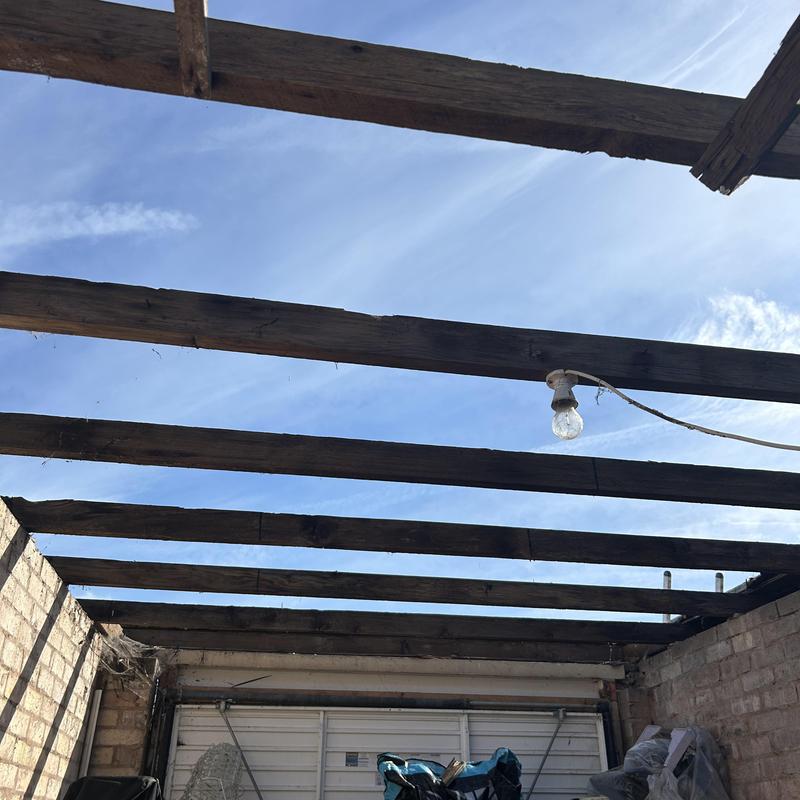
- We had to strip this roof completely down, the wood was rotten.
-
Image
189
- Completed
-
Image
190
-
Image
191
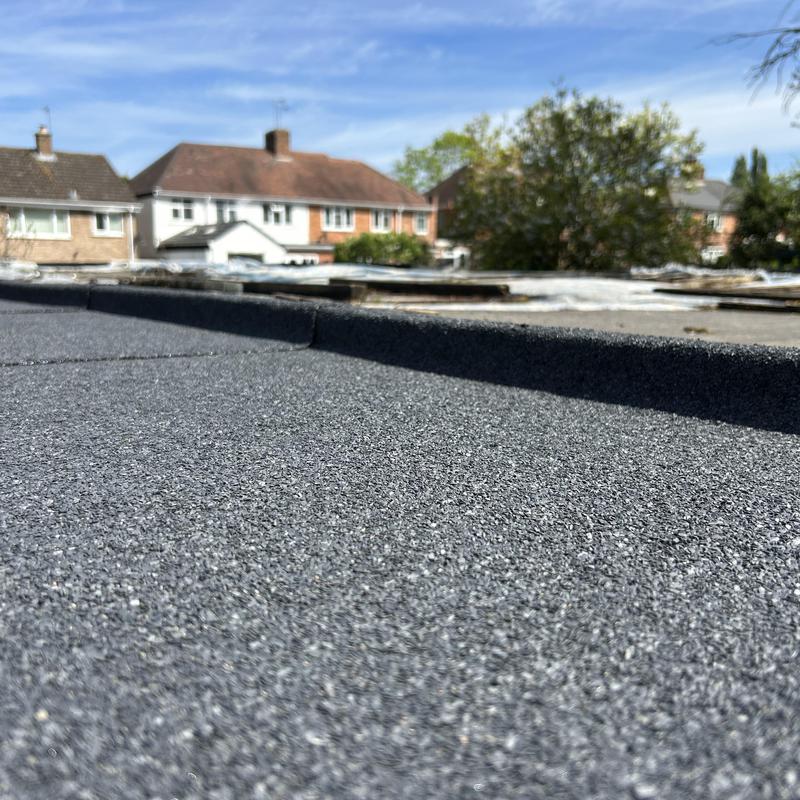
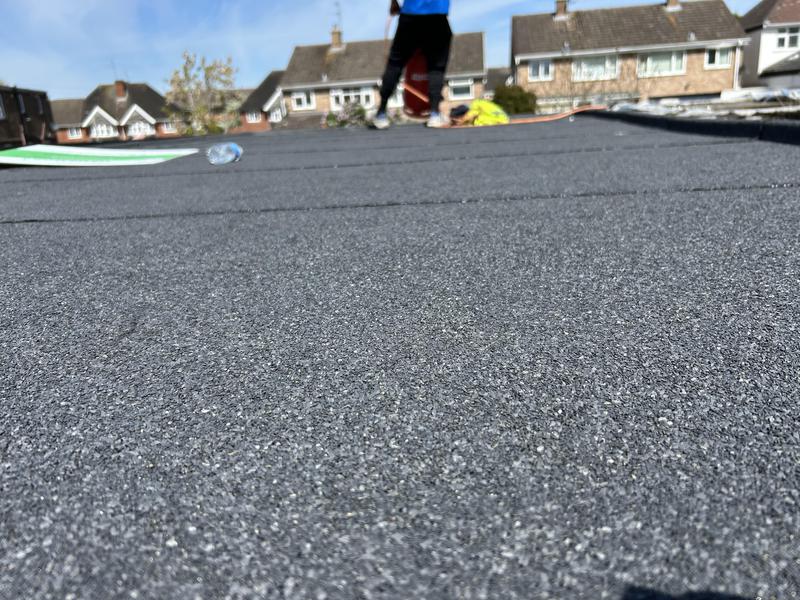
- Completed flat roof last week, in Charcoal felt.
-
Image
192
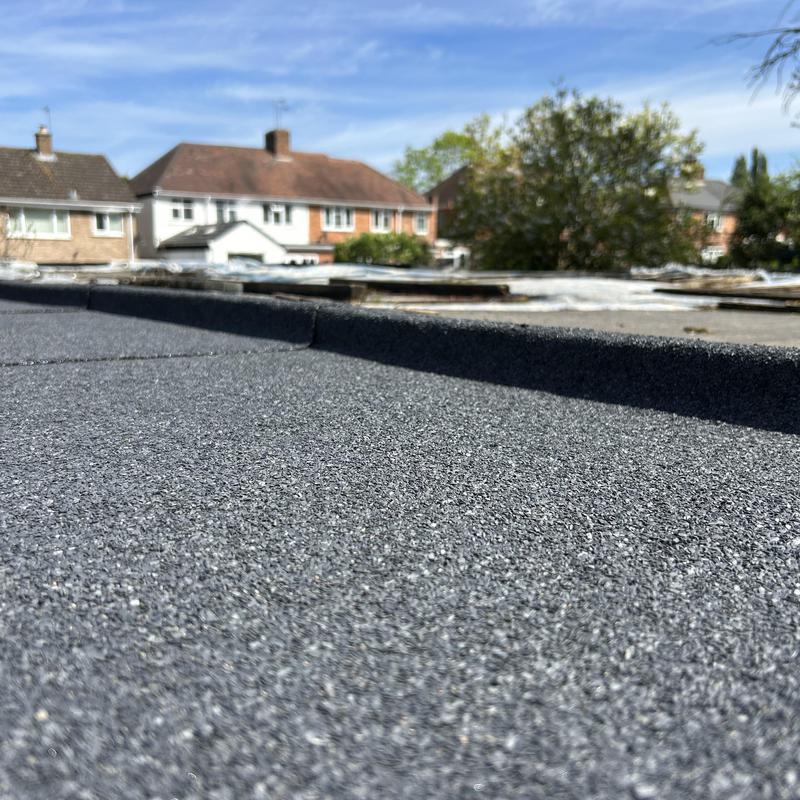
- Charcoal felt completed in WV4
-
Image
193
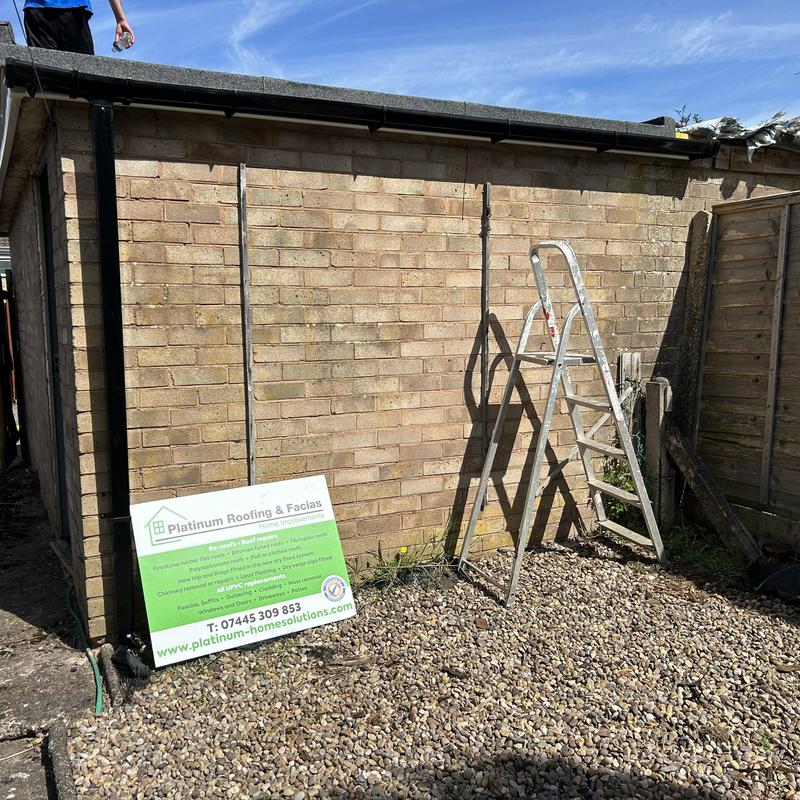
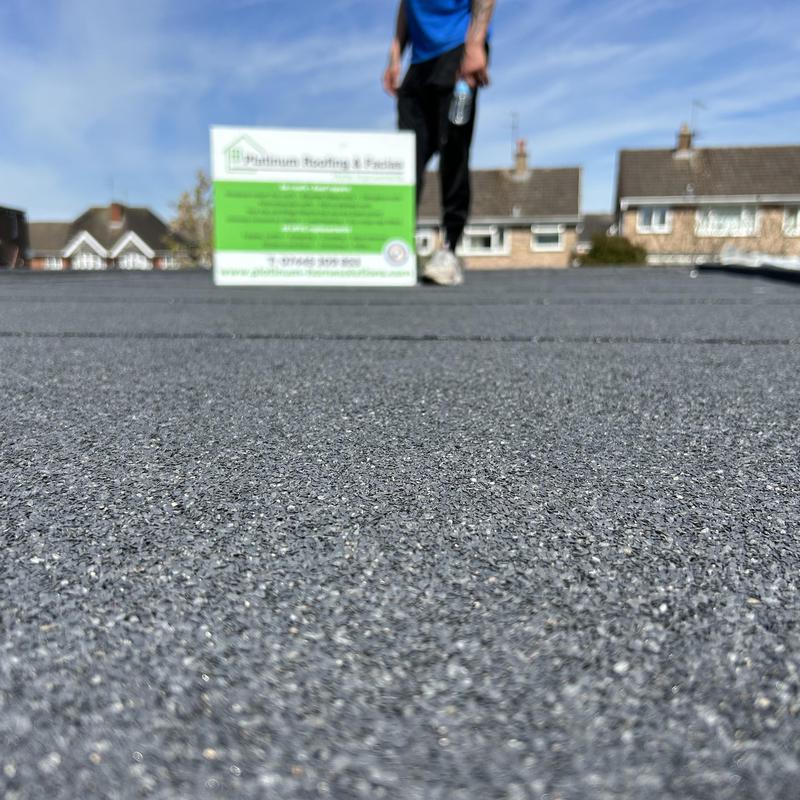
- Dec holding my new advert boards up for me to show this new roof off.
-
Image
194
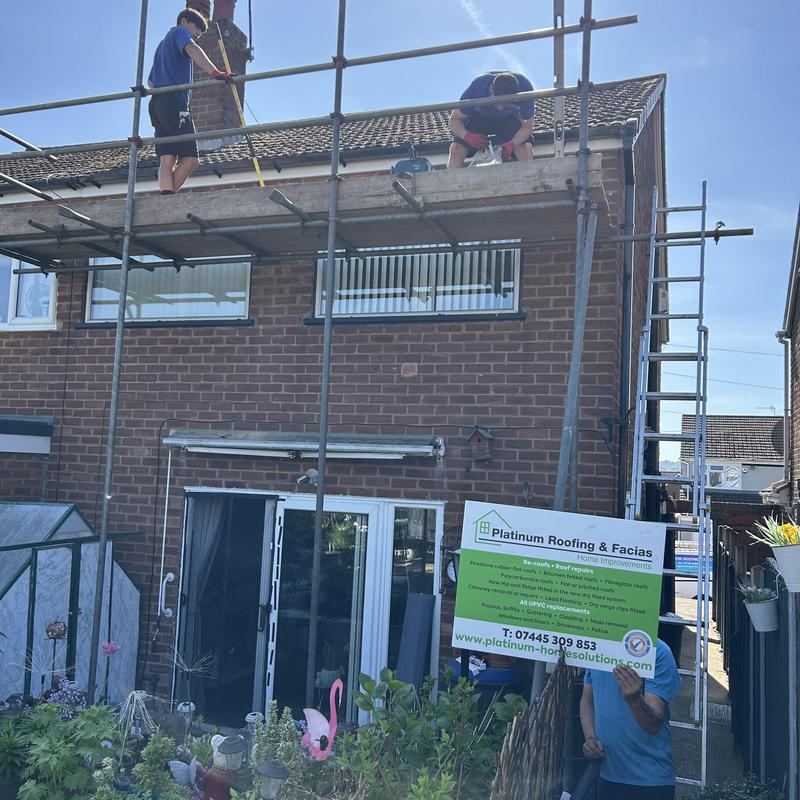
- Small felt repair here for Gordon in Tipton along with new white Fascias, black gutter and down pipe., to the rear only.
-
Image
195
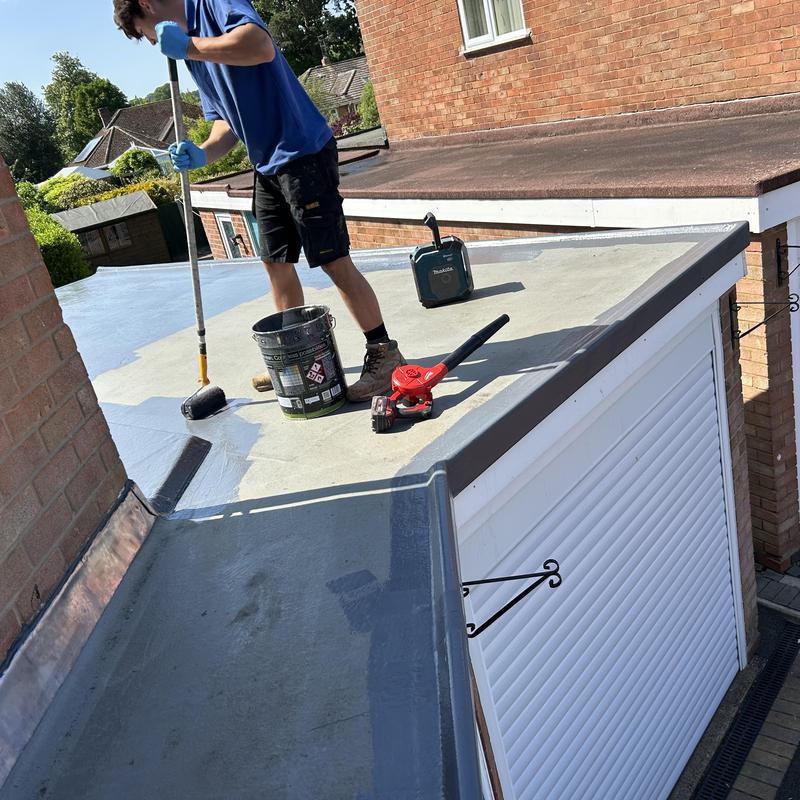
- You see here Callum coating the new Fibre on, you see the colour difference now with the new coat, few repairs then a thick layer rolled on, followed by code four Lead channelled into the wall.
-
Image
196
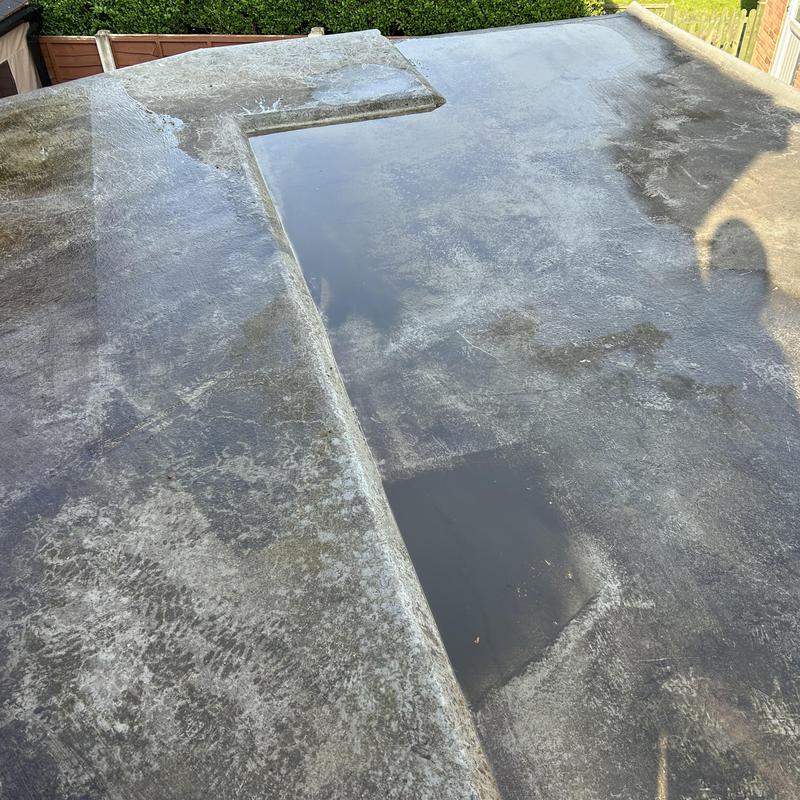
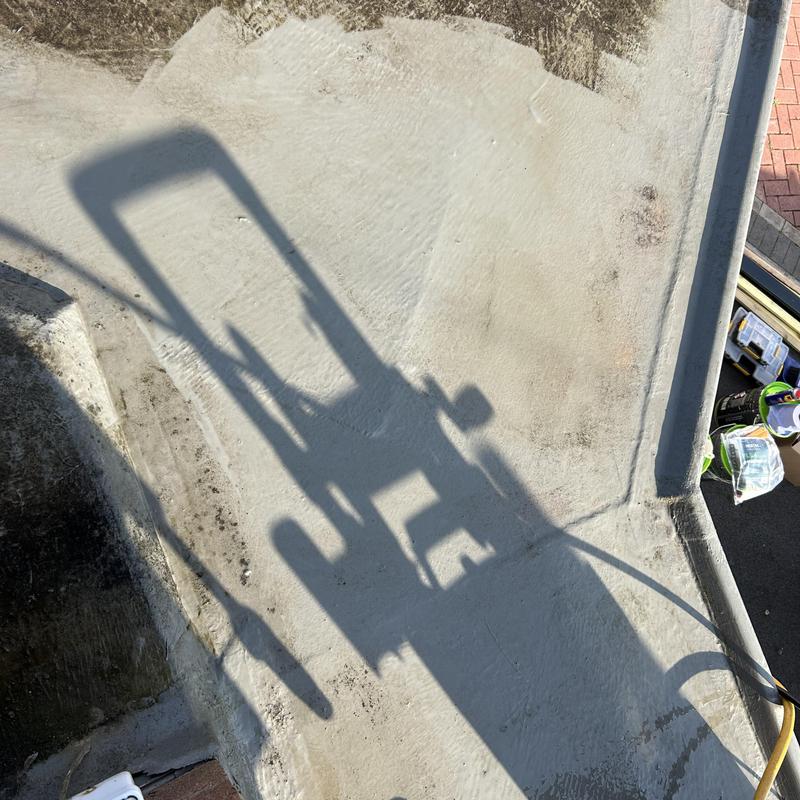
- 32sqm Fibre glass roof that requires a new coat, but it’s full of moss.
-
Image
197
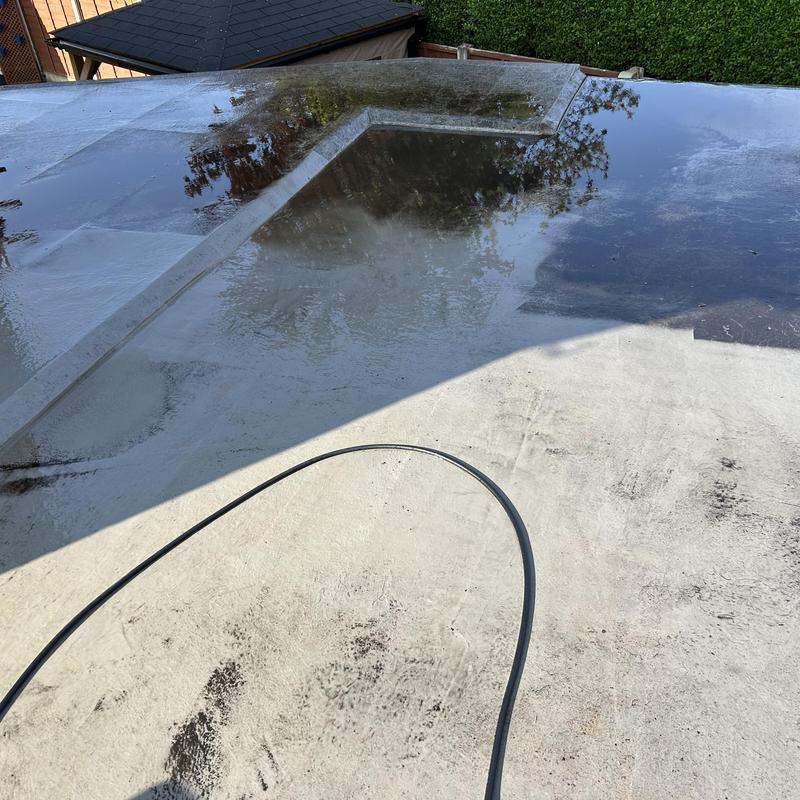
- I Jet washed the moss from the Fibre roof first .. cleaned it down.
-
Image
198
- If anyone wants a new coat of Fibre upon there roof, we would Jet washed it, clean it down, apply either a thick layer of Fibre glass or two coats, all roofs vary once looked at.
-
Image
199
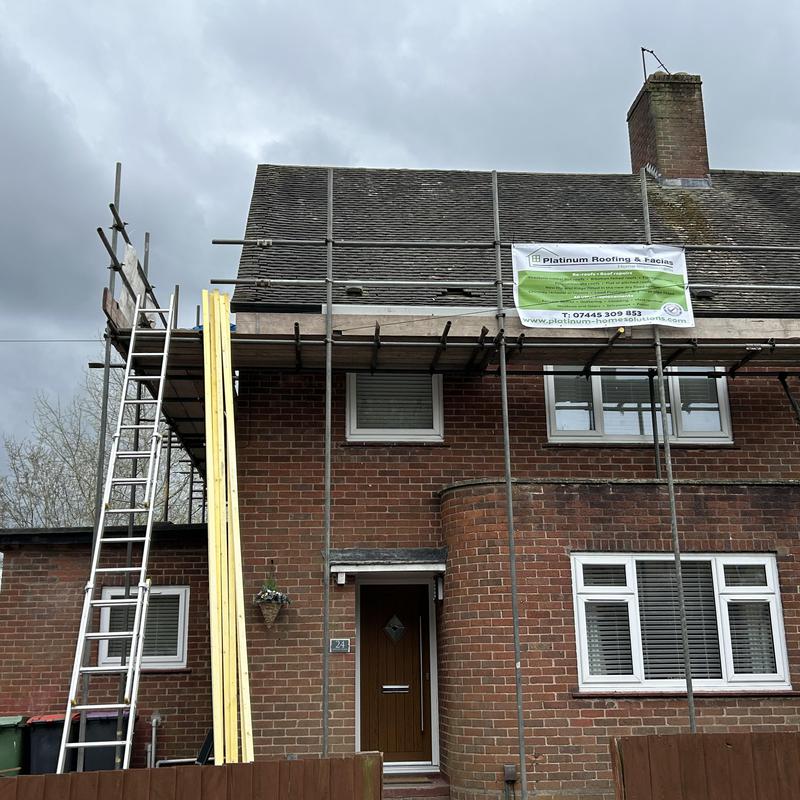
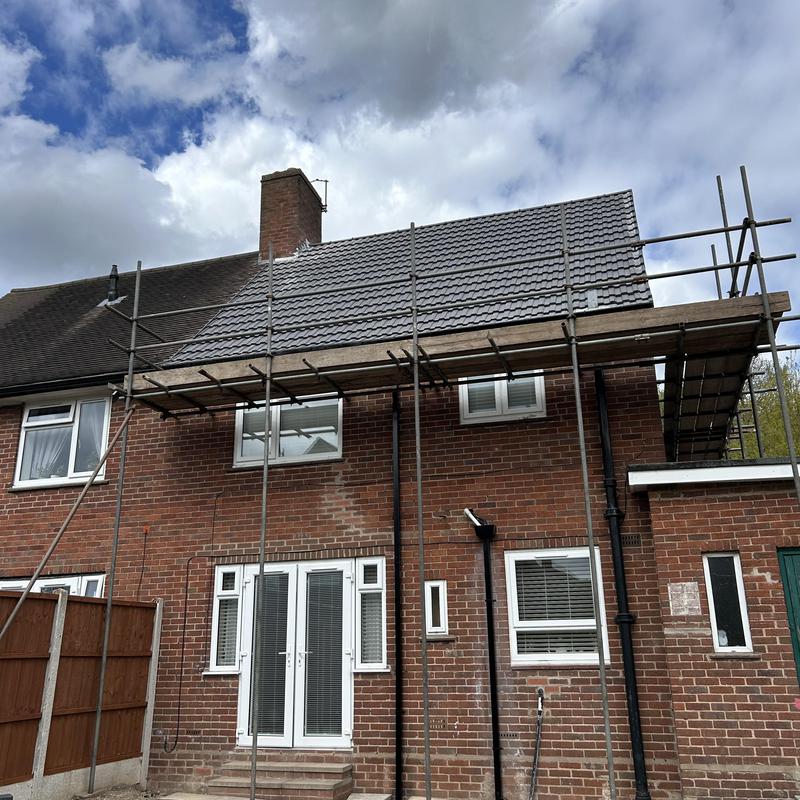
- Re roof that we started Monday 14th April and completed today 17th April 😀 see photos below.
-
Image
200
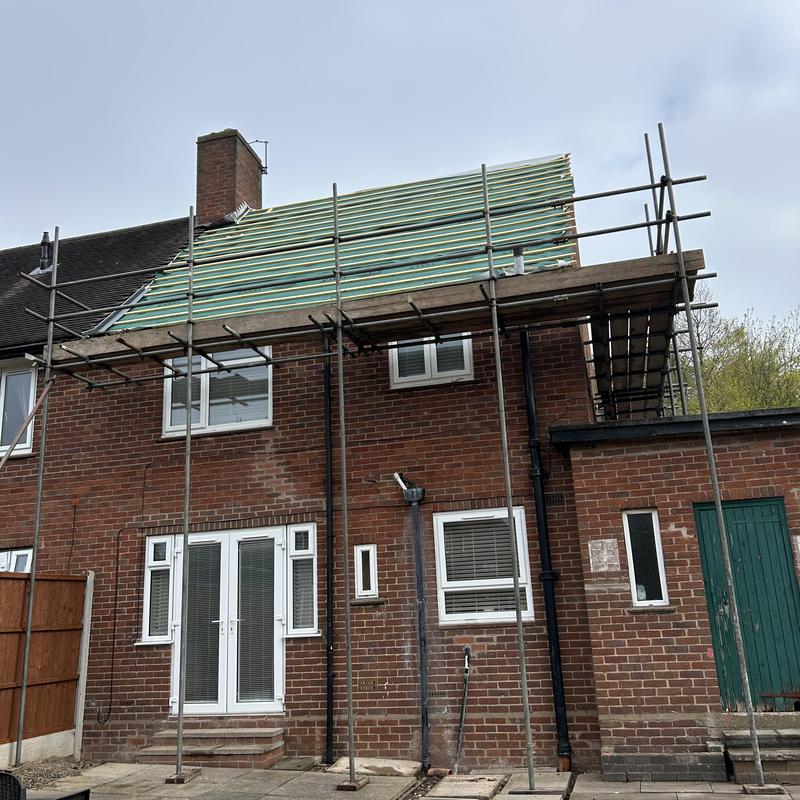
- The rear of the house in Telford that had been stripped and applied water proof membrane and treated Laths.
-
Image
201
- Re roof completed from the rear.
-
Image
202
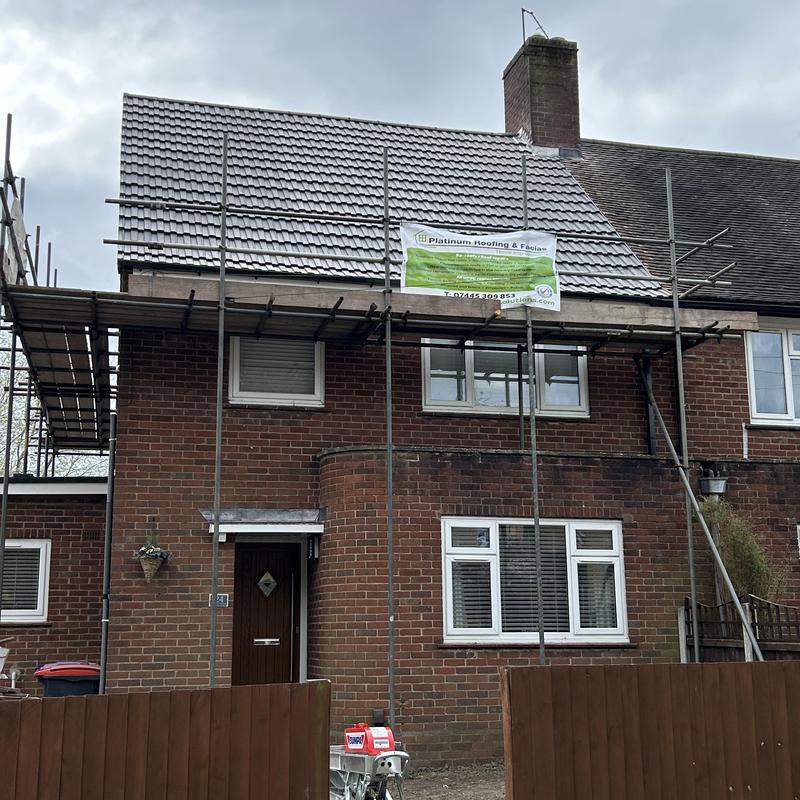
- Another re roof we completed today in Telford along with new Fascias, Soffits etc
-
Image
203
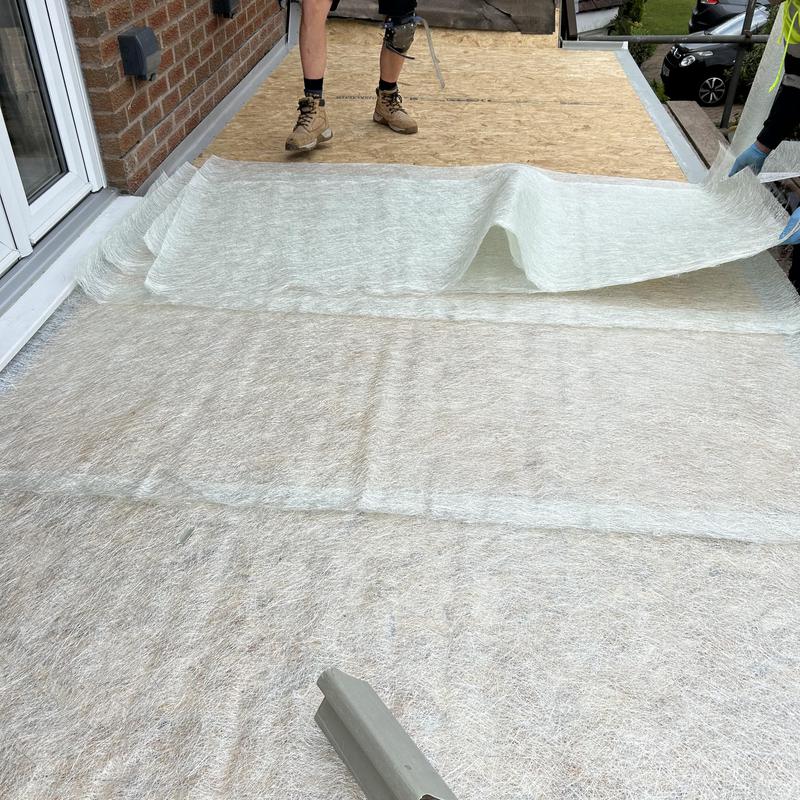
- New 18ml osb boards fitted down here followed by Fibre glass strips laid down ….
-
Image
204
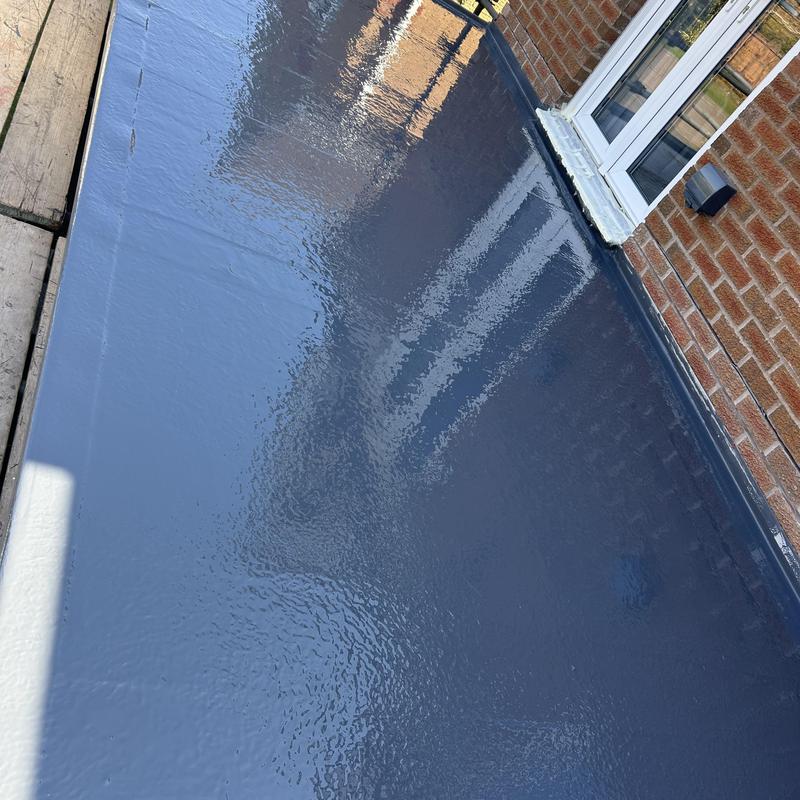
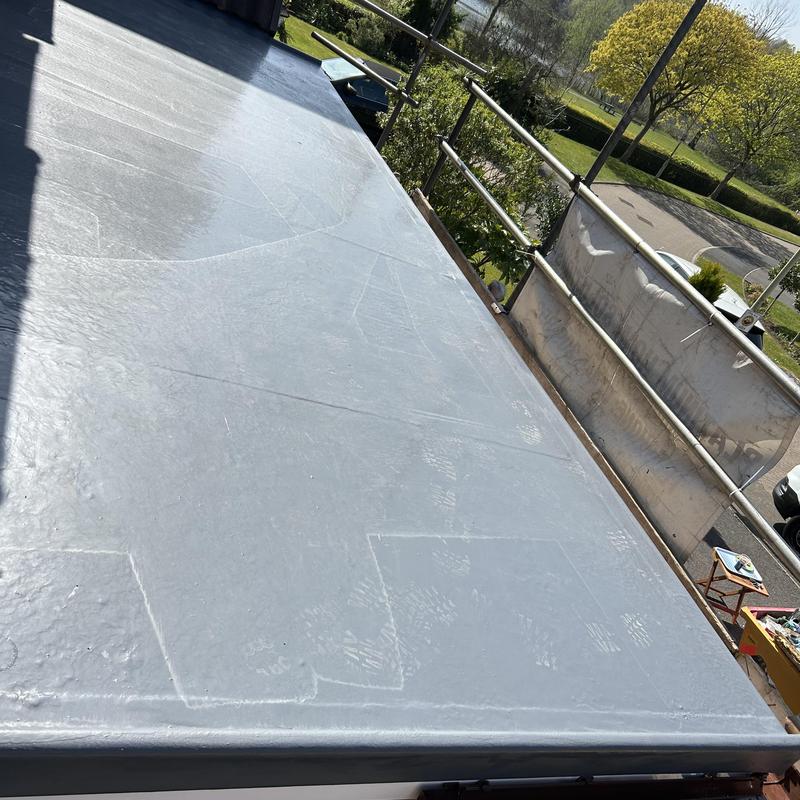
- Fibre glass roof completed, 3 coats we did over 2 days.
-
Image
205
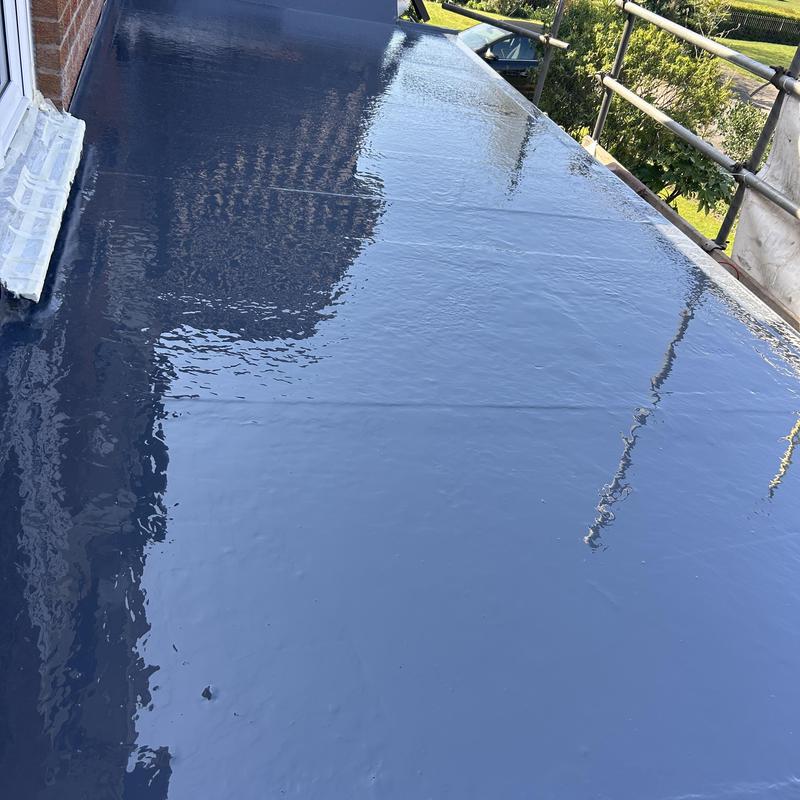
- Another angle of the balcony fibre glassed roof we completed in full, it took 3 days altogether.
-
Image
206
- Another angle from the re roofed fibre glassed roof balcony in Telford area.
-
Image
207
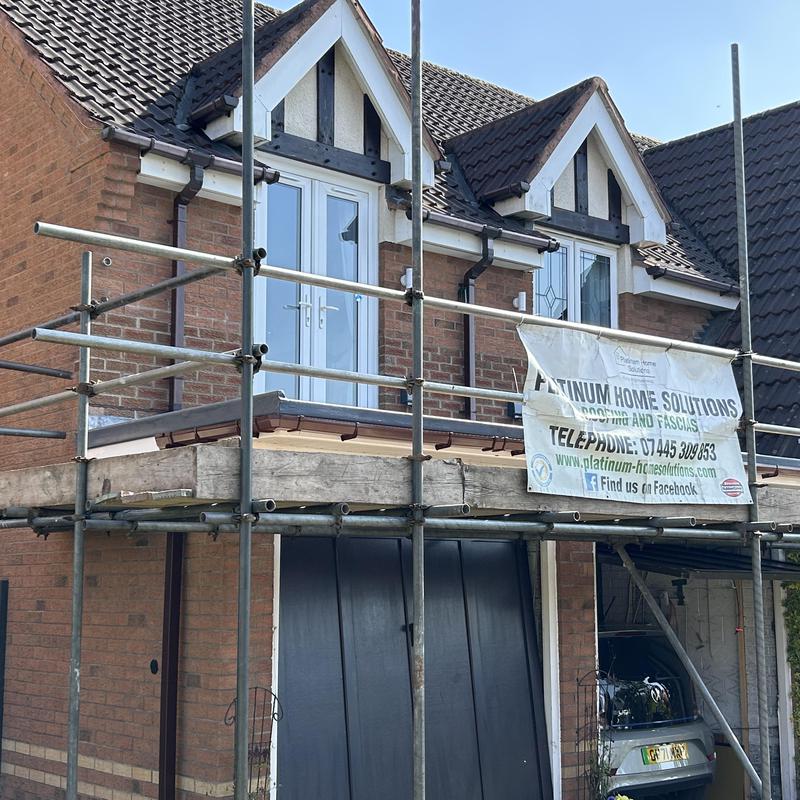
- Lovely finish, even though I say so myself, my review from Keith and Kim says exactly what they think of me and my team, very happy.
-
Image
208
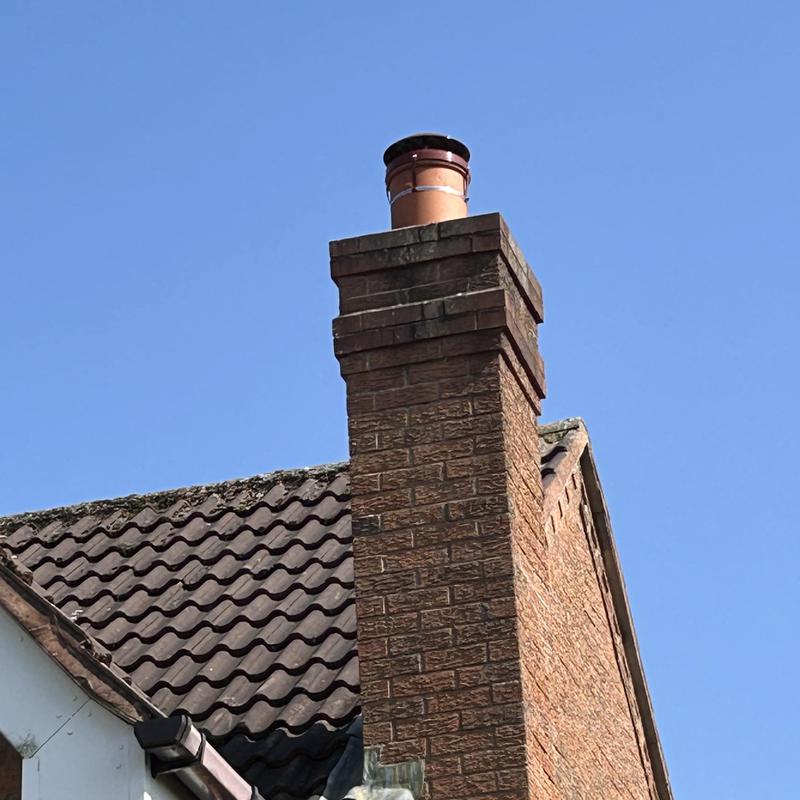
- Small repair here, fitted a new Chimney Cowl.
-
Image
209
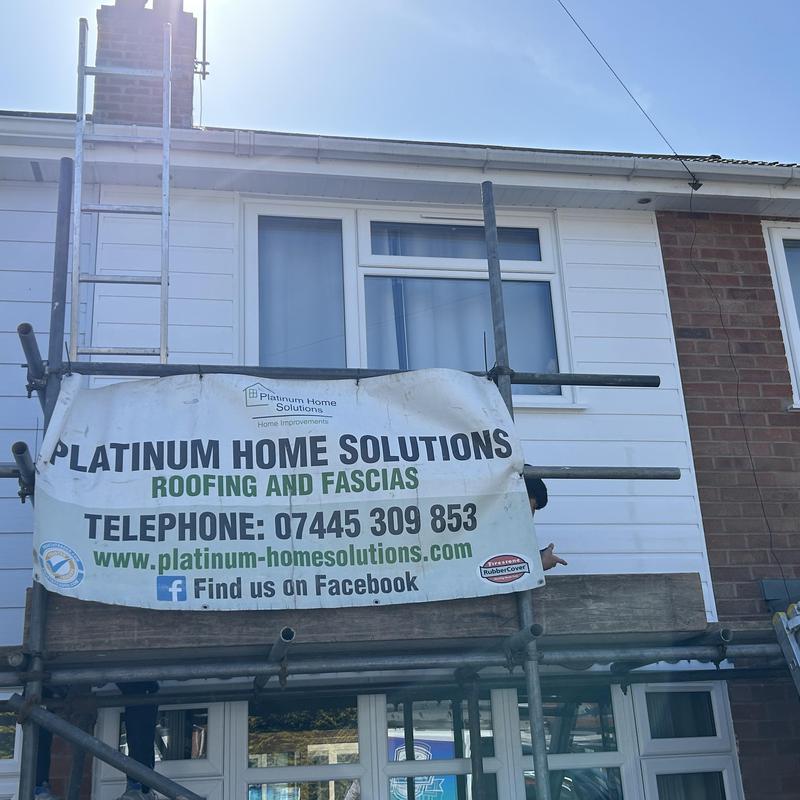
- Replaced here with Celetex followed by white Ship Lap cladding … lovely finish!
-
Image
210
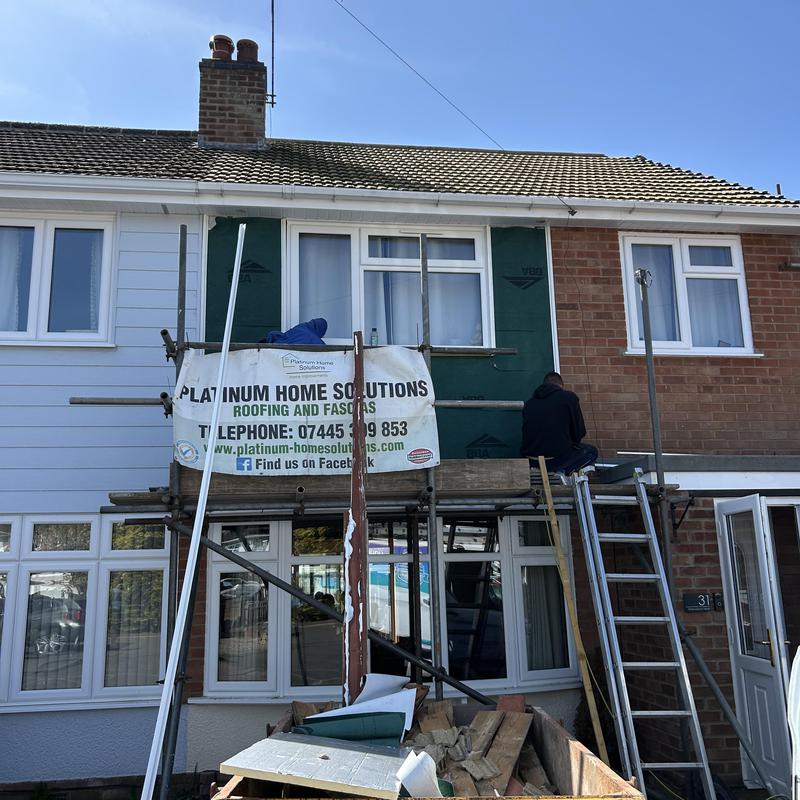
- Before photo of the old wooden cladding we removed and the replaced with the above ……
-
Image
211
- Flat roof completed now last week for Kam in Vodsall.

-
Image
212
- You can see the slight lift with our completed flat roof.

-
Image
213
- Lovely completed flat roof in Codsall.

-
Image
214
- We also fitted a gutter and down pipe to the front now we have lifted the flat roof higher to direct the water flow now towards the guttering.

-
Image
215
- Flat roof we were doing in Codsall, if needed lifting with firings.

-
Image
216
- Chimney re point for Kerry in Tipton.

-
Image
217
- Re roof completed in Hardon Road with scaffolding now down and the site tidy.

-
Image
218
- Progress of Hardon Road re roof we were happy to complete.

-
Image
219
- Re roof nearly completed.

-
Image
220
- Progress of the re roof in Hardon Road.

-
Image
221
- Stages of my recent re roof in Hardon Road.

-
Image
222
- Re roof we started in Hardon Road, it has Asbestos roof tiles on.

-
Image
223
- Fitted grey dry verge clips to the rear of this house in Tipton.

-
Image
224
- New ridge tiles fitted in the dry fix system.

-
Image
225
- Completed re roof in Castlecroft.

-
Image
226
- Re roof here in Parkfields with smooth grey Gemini roof tiles.

-
Image
227
- Re roof and Canopy completed in Castlecroft.

-
Image
228
- New ridge tiles fitted here in the dry fix system.

-
Image
229
- Re roof completed in Penn, Wolverhampton.

-
Image
230
- Completed re roof in Four Oaks, Sutton Coldfield.

-
Image
231
- Re roof that quite a few weeks to complete in Sutton Coldfield

-
Image
232
- New roof in Penn WV4

-
Image
233
- Dormer flat roof that was re felted

-
Image
234
- Dormer flat roof we re felted.

-
Image
235
- Felt repair

-
Image
236

-
Image
237

-
Image
238
- The Lads fitted new code four after removing the Lead that was split, lovely finish.

-
Image
239
- Cottage in Ackleton.

-
Image
240
- Lead split here.

-
Image
241
- Close up.

-
Image
242
- New Lead fitted all to the bottom of this area here to the cottage within Ackleton.

-
Image
243
- James in Perton wanted his ridge tiles fitted in the dry fix system.

-
Image
244
- Felt repair

-
Image
245
- We are to complete a re roof here along with white fascias, soffits, guttering

-
Image
246
- We are in Stourbridge

-
Image
247

-
Image
248
- Completed re roof

-
Image
249
- Membrane and Laths fitted

-
Image
250

-
Image
251
- Completed re roof in Stafford

-
Image
252
- Completed re roofing the process of fitting membrane and alaths

-
Image
253
- Chimney re point also

-
Image
254

-
Image
255
- Chimney re point

-
Image
256
- Canterbury in Penn starting a new re roof here

-
Image
257

-
Image
258
- Completed re roof 5o the rear

-
Image
259
- Very happy with this re roof tbh all completed

-
Image
260
- My customer chose red ridges to go with the grey roof tiles

-
Image
261
- Chimney re point

-
Image
262

-
Image
263
- Chimney re pointed

-
Image
264
- Ridge tiles are being re bedded here

-
Image
265

-
Image
266
- Ridge tiles are being re oointed

-
Image
267
- Re bedded the ridge tiles

-
Image
268

-
Image
269
- Flat roof completed in Wolverhampton with chippings on the top, lovely finish.

-
Image
270
- It was a large flat roof wrapping round there house

-
Image
271
- Before photos of the flat roof before we re fitted this in more felt once stripped down.

-
Image
272
- Another angle of the flat roof before we fitted new.

-
Image
273
- Spanish slates we had to install on this house in Walsall due to this being a conservation area.

-
Image
274
- Conservation area

-
Image
275
- Spanish slates installed

-
Image
276
- Roof stripped down.

-
Image
277

-
Image
278
- Spanish slates having to be fitted due to this being a conservation area

-
Image
279

-
Image
280

-
Image
281
- The Lads installing the Laths

-
Image
282
- Seeing me Lads fitting treated Laths.

-
Image
283
- We are to install new Spanish Slates due to this s being a Conservation area.

-
Image
284
- Above re roof we are currently doing in Walsall

-
Image
285
- New tiles fitted here to the front of the bungalow.

-
Image
286
- Along with the new tiles fitted here, we also fitted new grey dry verge clips to the left side of the property, it completes to roof we think.

-
Image
287
- Photo to the rear with new roof tiles, just waiting for the windows to be fitted 17th July we can then re attend to complete the vertical tiles.

-
Image
288
- Complete a new re roof also with smooth grey double Roman tiles…..

-
Image
289
- Bungalow to the rear.

-
Image
290
- New membrane and treated Laths fitted to the bungalow.

-
Image
291
- Fitted new water proof membrane along with treated Laths.

-
Image
292
- Removed all of the old felt and Batons.

-
Image
293
- Another completed re roof in Wombourne for Mr and Mrs Clemente, very happy with this.

-
Image
294
- Rear of the house completed along with the chimney re pointed also.

-
Image
295
- Finishing of the front of the house..

-
Image
296
- Another close up to the rear of the house.

-
Image
297

-
Image
298

-
Image
299
- There was a small flat roof over the front bedroom that was unfortunately in need of changing while we were completing the re roof.

-
Image
300
- Flat roof here upon the garage had callapsed through so we stripped the remaining wood etc down.

-
Image
301
- We then completed a timber rebuild for Madge.

-
Image
302
- Followed by installing a new rubber roof along with fascias etc

-
Image
303
- Small repair job here for Kylie, re bedding the ridge tile, unfortunately we came across holes within the roof felt, so we are now to go back.

-
Image
304
- This chimney next door to the bungalow we are working upon, we removed flash band and fitted new code four Leading to the base of their David’s Chimney.

-
Image
305
- Completed the new Leading around the base of the Chimney for David.

-
Image
306
- Here we re pointed the Chimney for Cynthia in Wombourne.

-
Image
307
- Completed the flat roof with new osb boards and then rubber and tr8ms installed here.

-
Image
308
- Completed the new what’s fascias and black guttering to Indy’s property in Wolverhampton.

-
Image
309
- We are here doing a felt repair along with new white fascias and black round gutter for Indy.

-
Image
310
- Church in Stafford had some cracks within the Leadwork and unfortunately leaking in to the organ.

-
Image
311
- We removed the old and cracked Leading and replaced this all with new code four Lead.

-
Image
312
- There were two sides of the front entrance that we attended too.

-
Image
313
- Scaffolding towers were required for the safety of the Lads to attend and to remove the cracked Leading.

-
Image
314
- Work in progress.

-
Image
315
- New leading applied.

-
Image
316
- New flat roof also completed here within this photo.

-
Image
317
- Charcoal felt applied along with underlay.

-
Image
318
- Another job for Tim in Shrewsbury for his second chimney.

-
Image
319
- We changed the leadwork around the base of his Chimney.

-
Image
320
- We also did a small felt repair for Tim to the rear of the chimney due to Tim having some unfortunate leaks.

-
Image
321
- Tim’s Chimney in Shrewsbury.

-
Image
322
- 84 sqm flat roof that needed re doing due to leakage.

-
Image
323
- We stripped all of the Fibre glass off first before removing the dead wood, rotten wood, then replacing these few boards with new 18ml osb boards,

-
Image
324
- Fibre glass removed.

-
Image
325
- New 18ml boards fitted before we then re covered the whole area again with another 29, 11ml osb boards on top of the 18ml boards.

-
Image
326
- Photos here showing the underlay was laid first on top of all of the 11ml osb boards.

-
Image
327
- Underlaid here.

-
Image
328
- Hard strips fitted all around the 84 sqm flat roof before we continued with the top layer of felt.

-
Image
329
- Another photo of a 84sqm flat roof completed in charcoal felt.

-
Image
330
- Another photo here, just about see my advert board due to the flat roof being so large.

-
Image
331
- End result and a very Happy customer with our work seen within all reviews.

-
Image
332
- Photo to the rear of the re roof we completed in the West Bromwich area this year.

-
Image
333
- Complete re roof we completed in April, new Synthetic slates fitted to this house in West Bromwich.

-
Image
334
- Re roof we completed in West Bromwich.

-
Image
335
- Photo showing the three top ridges removed.

-
Image
336
- Completion photo.

-
Image
337

-
Image
338
- Photos here of the felt repair that we had to do also due to the leaks and damp issue within the property that hindered us with the decoration.

-
Image
339
- Felt repair also showing the EPS trays that was also fitted for a double protection to the roof and membrane.

-
Image
340

-
Image
341
- This was a big job where as we fitted new fascias, soffits, guttering, down pipes, high level and low level, painted window frames and a repair upon the fencing.

-
Image
342
- Felt repair here also in Perton.

-
Image
343
- Couple of cracked tiles.

-
Image
344
- Another photo of Mary’s dormer that we were working on in Wolverhampton.

-
Image
345
- Completed work for Mary and her dormer that had been leaking in so we changed the wood and fitted Firestone rubber along with trims.

-
Image
346
- Mary’s dormer that we fitted a new flat roof too in rubber just before Xmas last year.

-
Image
347
- New white fascias etc was fitted here for Lorraine in Wolverhampton.

-
Image
348

-
Image
349
- Rubber roof completed after the Timber rebuild.

-
Image
350
- Timber rebuild.

-
Image
351
- Timber rebuild, we then were recommended to complete her moms (Madge) garage with rubber and a timber rebuild, another happy customer.

-
Image
352
- This was a large rubber roof fitted in Albrighton.

-
Image
353
- Large rubber roof installed here in Albrighton.

-
Image
354
- The re roof in Wombourne all completed as of yesterday 13th Nov, customer Andy very happy with this.

-
Image
355
- Completed re roof in Wombourne.

-
Image
356
- Photo to the rear of the house in Wombourne.

-
Image
357
- You see we also fitted dry verge clips in grey to go with the Anthracite tiles on the re roof.

-
Image
358
- Re roof in Wombourne currently fitting new water proof membrane.

-
Image
359
- Rear of the house while in process of a complete re roof.

-
Image
360
- Felt and batons have been removed from the frontage.

-
Image
361
- High level and low level fitted with white fascias, white soffit and guttering with down pipes.

-
Image
362
- Also to the rear of the property in Wolverhampton.

-
Image
363
- Lovely photo of the Canopy that was fitted too with new fascias etc

-
Image
364
- Old felt removed from this re roof in Wombourne, you see the blue, this is water proof membrane fitted.

-
Image
365
- Rear of the property in Wombourne.

-
Image
366
- Re roof being done in Wombourne.

-
Image
367
- New fascias and guttering fitted here.

-
Image
368
- New fascias, soffits, guttering, down pipes fitted, garage door, front door painted, windows painted, all completed by ourselves.

-
Image
369
- Windows to the rear have been painted, being wooden.

-
Image
370
- Garage door painted here by us.

-
Image
371
- The re roof in Wombourne too.

-
Image
372
- This is the house before I started the re roof in Wombourne, sorry the photos are jumbled.

-
Image
373
- Telford job were we fitted new white fascias, soffits, black guttering and down pipes to the three sides.

-
Image
374
- Black square gutters fitted.

-
Image
375
- Black gutter and white fascias fitted here in Telford.

-
Image
376
- White soffits fitted.

-
Image
377
- White fascias fitted.

-
Image
378
- Soffits, fascias, gutters, down pipes.

-
Image
379

-
Image
380

-
Image
381

-
Image
382
- Completed re roof for Sarah completed in September in Dutton Coldfield.

-
Image
383
- Completion of a re roof in the Sutton Coldfield area for Sarah.

-
Image
384
- Osb boarding a flat roof.

-
Image
385
- Rubber roof fitted in the Wolverhampton area for Emily.

-
Image
386

-
Image
387

-
Image
388

-
Image
389

-
Image
390

-
Image
391

-
Image
392

-
Image
393

-
Image
394

-
Image
395

-
Image
396
- Flat roof we fitted in the Pattingham area.

-
Image
397
- Chimney reduction for Steve in Dudley.

-
Image
398
- For Steve we reduced his chimney because it was leaning.

-
Image
399
- Osb boards first fitted, water based glue followed by rubber fitted here in Pattingham.

-
Image
400
- Steve in Dudley with his Chimney, to be reduced.

-
Image
401
- An American style bungalow, wooden, we completed a re roof for Christine.

-
Image
402
- Completed re roof here for Christine in the Northfield area.

-
Image
403
- In the middle of completing a re roof for Christine here in blue/black slated tiles.

-
Image
404
- The roof in Sutton Coldfield before we started the re roof upon this.

-
Image
405
- Fascias, soffits, gutters, down pipes in Perton for Mark.

-
Image
406
- This is also the small flat roof that we fitted with the re roof to the bungalow in Northfield.

-
Image
407
- Another fascia

-
Image
408
- A new rubber roof here we fitted for Christine.

-
Image
409

-
Image
410

-
Image
411

-
Image
412
- We also completed this house in Perton with new white fascias, Sofitts in June.

-
Image
413
- Re roof here along with new fascias, soffits etc fitted in Regent road.

-
Image
414
- You see the re roof we where installing along with neighbours Alan, both had the same tiles upon there re roof along with fascias, soffits etc

-
Image
415
- Finished result of both properties completed together, lovely people and a lovely job we completed on this.

-
Image
416
- Neighbours in Renet road, Alan’s re roof along with fascias etc

-
Image
417

-
Image
418
- Completed and scaffold removed.

-
Image
419
- New white fascias, soffits, guttering etc fitted to the rear of this property in Walsall. We are to fit new Rubber roof too after the Fascias have been installed.

-
Image
420
- Frontage showing the new white fascias high and low level.

-
Image
421
- Completed home with Fascias, soffits front, rear, high and low level along with two flat roofs to the side and rear of this property.

-
Image
422
- Lovely completed photo.

-
Image
423
- Firestone rubber completed roof for Dee.

-
Image
424
- Chimney here in Kingswinford, firstly we have installed a slab upon the top, then we flaunched it.

-
Image
425
- This then is the first course of rendering.

-
Image
426
- Second course of rendering, awaiting for this to dry out before we then paint it for Rob.

-
Image
427
- Completed lovely job after it having two coats of complete render.

-
Image
428
- Rubber roof in Telford.

-
Image
429
- New white fascias, soffits with black OG guttering .

-
Image
430
- Lovely completed re roof we done for Sarah in Wolverhampton, Smooth grey Major Ludlow tiles.

-
Image
431
- Side photo of the roof.

-
Image
432
- Very happy with this job tbh especially with the new white fascia system we also fitted for them, the both compliment each other.

-
Image
433
- Photo to the rear of the property, we also pointed some of the chimney up and re leading around the base of the chimney.

-
Image
434
- Here you see my lads in the process of fitting new treated Laths.

-
Image
435
- Roof here stripped down, new membrane and treated Laths fitted, all ready to be tiled.

-
Image
436
- Sarah’s roof here where fitted new white fascia, we shall be fitted a new roof for them over the next few weeks, you shall have these photos attached.

-
Image
437
- Customer here wanting new white fascias etc in Telford

-
Image
438
- Here is the end result after the fascias, guttering and Down pipes fitted.

-
Image
439
- Unfortunately to the rear, the wooden fascia boards where completely rotten so we had to change that first before we could fit the fascias, guttering and Down pipes

-
Image
440
- A re roof we started here in December 22 on the Lickey hills, being the second one on the same street, please check all photos of the work we carried out.

-
Image
441
- New white cladding also to the front gable with grey dry verge clips to finish this off nicely

-
Image
442
- To the rear of the property there where two flat roofs that we also changed and installed Firestone rubber upon them both.

-
Image
443
- The second re roof we completed on the Licky Hills, Birmingham in December 22

-
Image
444
- We also fitted new white fascias, soffits etc

-
Image
445
- Flat roof here in Wolverhampton that we also fitted with the Firestone rubber

-
Image
446
- Completed roof with the rubber fitted.

-
Image
447
- Displayed my advert board showing you and others our flat roof we fitted and a lovely review received from Emily, thank you.

-
Image
448
- Also the fascia on the top gable was changed to Rosewood to match the rest of the house.

-
Image
449
- Once wood was removed, we installed the Rosewood soffits too and bottom.

-
Image
450
- We also added some insulation to the top area because there wasn’t any there, then fitted Rosewood soffits, trims etc all to complete this for John.

-
Image
451
- Diane’s bungalow here, we had quite a few jobs to do, all from a previous Cowboy that had deliberately concocted things to go wrong upon her bungalow.

-
Image
452
- New Ridges installed with the Dry fix system for Peter.

-
Image
453
- Looks so much better than the mortar, as this is a little dated now, dry fix lasts a lot longer for the customers.

-
Image
454
- Lovely completed re roof in the Firestone rubber.

-
Image
455
- Showing the completed job here along with wall trim, edging trims.

-
Image
456
- Lovely completed photo to the front of Rory’s property with the scaffolding now removed.

-
Image
457
- Completed photo here to the rear of the property now the scaffolding is down.

-
Image
458
- Further photos will follow.

-
Image
459
- Photos are a little dark due to the weather.

-
Image
460
- Rory contacted me via Trustatrader wanting a new roof, as it was 1927 built, we discussed prices and difference in tiles, this is the before photo.

-
Image
461
- Work in progress here, using a Bumpa heist to help the lads transport the tiles upon the scaffolding rather than carry them up.

-
Image
462
- Work in progress here to the rear, Laths and membrane has been fitted so far.

-
Image
463
- As you see we fitted Firestone rubber upon the roof, makes it look a lot better.

-
Image
464
- The after photo here once the Firestone rubber fitted with wall trim, corners etc to complete this in full.

-
Image
465
- But as you see, we completely transformed it , and the customer happy with all three roofs completed by me and my team.

-
Image
466
- Flat roof in Telford that we removed the old felt from for Kully.

-
Image
467
- And here you will see the Firestone rubber that we fitted for her along with wall trims, edging trims etc to complete the job in hand.

-
Image
468
- End result, photo out of the neighbours bathroom window, thanx to Chris the neighbour, who we also did some work for.

-
Image
469
- The final part of the house below, Firestone rubber fitted to the roof on the right, happy with the results.

-
Image
470
- Second job here for Cliff in Telford after fitting new fascias for him, we are installing a new driveway for him and Lorraine’s also here.

-
Image
471
- These blocks where specially chosen by Lorraine and Cliff

-
Image
472
- Lovely completed photo of the new driveway now, they are so pleased with this, it looks so much nicer, and bigger.

-
Image
473
- Lovely completed photo to the rear of the property, me and the lads where very happy with the outcome of this bungalow and the transformation.

-
Image
474
- Photo here where we removed the old round gutters and down pipe to the front of the bungalow.

-
Image
475
- Before photo to the rear of the bungalow.

-
Image
476
- Showing the side of the semi detached bungalow, lovely white fascias with Tongue and groove soffits fitted right done the side.

-
Image
477
- Showing a lovely completion job from ourselves here, also under the canopy area by the front door, this stands out so much.

-
Image
478
- Full frontal photo of the bungalow completed, awaiting a lovely review back from Patricia.

-
Image
479

-
Image
480
- Showing here the installation of a new re-roof for Lindon based in Wolverhampton. We pride ourself to fit the new ridges in the dry fix system rather than mortar.

-
Image
481
- Full new re-roof we completed here for Lindon in Wolverhampton, installed smooth grey Major Ludlow tiles, breathable membrane, new treated Laths.

-
Image
482
- To the rear of the property, the finished work from Platinum home solutions. I shall drop by to take a photo now the scaffolding has come down.

-
Image
483
- My team installing new white fascias, soffits, guttering and down pipes.

-
Image
484
- Completion of the white fascias, white Tongue and groove soffits, square white guttering along with white square down pipes, lovely end result, and a happy customer

-
Image
485
- another job we were asked to do for Liz, a complete re-roof.

-
Image
486
- Phot at the back of the property while installed new smooth grey Major Ludlow plus tiles.

-
Image
487
- We also fitted to the both sides of her bungalow, new grey dry verge clips, this finishes the bungalow off nice.

-
Image
488
- Completed photo showing the whole of the property to the back, completed, customer very happy.

-
Image
489
- Completed photos to the front off the property also showing our work, once Skip and scaff have been removed I shall update a further photo.

-
Image
490
- Close up from the completion we achieved this week for Liz and her bungalow.

-
Image
491
- Before we fit new fascias etc

-
Image
492
- All materials laid out and ready for the installation.

-
Image
493
- Finished photo showing the back of the property, please check my reviews out.

-
Image
494
- To see my lads working on the job in hand installing the fascias etc

-
Image
495
- Finished photo of the new Fascias, soffits, guttering, down pipes, high and low level, along with hedgehog installed in the guttering to prevent leaves from the tree over hanging the property.

-
Image
496
- Richard in Stourbridge wanted new fascias installed, to the back, front and side of his home.

-
Image
497
- We have Harun’s extension to the back of his property, he wants new ridges fitted.

-
Image
498
- We also cleaned all the moss from the tiles upon the extension.

-
Image
499
- The end result once we installed new ridges with the dry fix system upon the ridges.

-
Image
500
- Photo to the right side showing off the new ridges that have been fitted in the dry fix system, no more mortar, membrane, batons, ridges then mechanically fitted down.

-
Image
501
- A new Velux window installed to the back of his roof within the Wolverhampton area.

-
Image
502
- Lovely photo of the Firestone rubber roof we installed in Albrighton

-
Image
503
- Extension we re-roofed with the dry fixed ridges, now the scaffolding is completely down.

-
Image
504
- Lovely photo of the back of the extension now scaffolding is down.

-
Image
505
- We have an extension here in Walsall to re roof with Red Rosemary small tiles, followed by new guttering to the extension and the house along with down pipes.

-
Image
506
- We removed the old batons, installed new breathable membrane and Laths, along with new eps trays.

-
Image
507
- Photo to the back of the property, showing tiles have been installed, awaiting to fit the dry fix system to the hips along with hip trays before the new ridges are installed.

-
Image
508
- A lovely completed photo here of the front of the extension, we also fitted new black guttering and down pipe to the extension after the re-roof.

-
Image
509
- Another completed photo to the front right, we shall update a photo once the scaffolding has been taken down.

-
Image
510
- Close up photo here showing the new ridges that have been installed in the dry fix system.

-
Image
511
- You can in this photo the end result of all the work we completed on Karen’s house. White fascias all round, new ridges in the dry fixed system, cleaned moss from the roof, and fitted two brand new gardens to the left/right of the house.

-
Image
512
- Once the membrane and Laths have been installed, we shall then install new leading to all sides of the extension, using code three and code four leading.

-
Image
513
- New white fascias etc fitted to the back and side of the property..

-
Image
514
- Here is a nice side view of the property we completed in full.

-
Image
515
- Here showing the new fascias and soffits installed.

-
Image
516
- A little dark on the photo because of the time we completed this yesterday.

-
Image
517
- Anita’s property in Birmingham, installing new membrane and Laths.

-
Image
518
- New breathable membrane and Laths installed for Anila.

-
Image
519
- We installed new breathable membrane and Laths, we then installed the original tiles back on for Anila

-
Image
520
- Pre photo of the chimney we are about to remove in full in the Bilston area.

-
Image
521
- Completed photo of the house in Griffith drive, just awaiting for scaffolding to be removed.

-
Image
522
- Back of the property in Griffith drive, completed roof and new fascias

-
Image
523
- Front of the property before we stripped it down ready for a new installation.

-
Image
524
- Front of the property installing this with new Old English red Marley modern tiles, all to match next doors to the left, after we fitted Dereks too.

-
Image
525
- The chimney here upon one of the roofs we completed in Griffith drive, we did a part re build and then re pointed it, big difference with this, and a very happy customer.

-
Image
526
- The first property in Griffith drive we installed a new roof for Martin, we also part re built his chimney followed by re pointing the other part of the chimney.

-
Image
527
- This is the second re-roof we completed in Griffith Drive, Wolverhampton. Customer choice the Old English red Marley Modern flat large tiles.

-
Image
528
- On this photo we did have to use the neighbours driveway for the Bumpa heist, which helps transport the tiles to the top of the scaffolding, luckily I had also sold to the neighbours and will commence with their roof 15th Aug.

-
Image
529
- The back of Johns property, third re roof we completed in Griffith drive

-
Image
530
- Another photo to the front of Johns house, completing the font of his house before we installed the fascias too.

-
Image
531
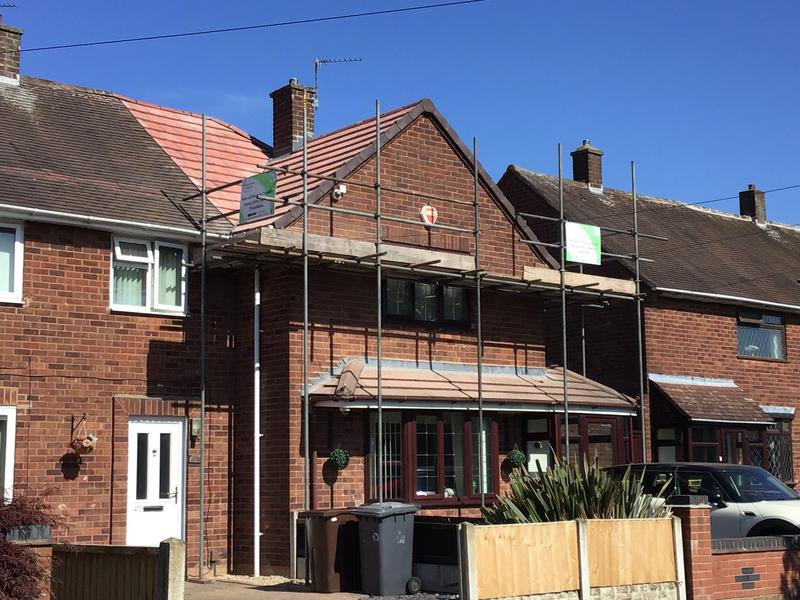
- Photo to the side of the property, dry fixed ridges also fitted, along with new leading around all four sides of their chimney.
-
Image
532
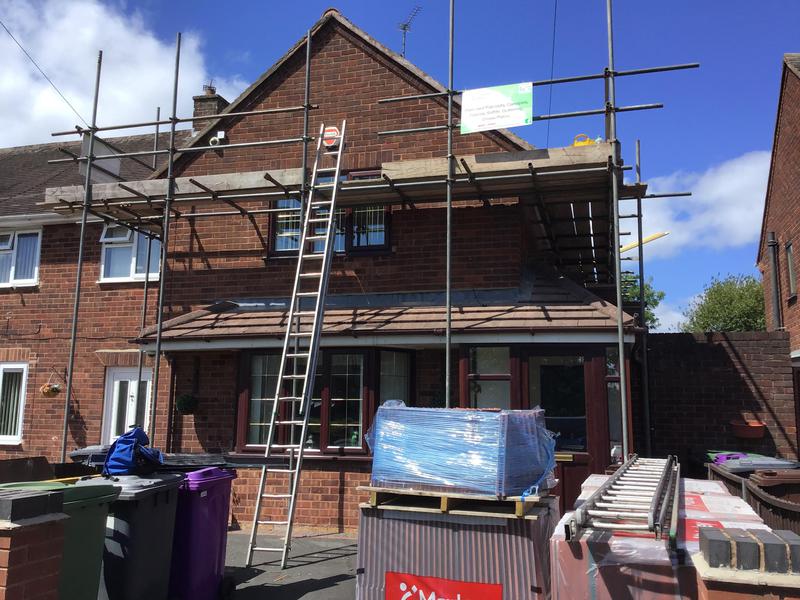
- Scaffolding, materials, skip, all ready to commence the work required.
-
Image
533
- First pictures of the property we are about to strip down and complete a new re-roof.

-
Image
534
- Photo to the back of the property, pre-instalment.

-
Image
535
- Here if the end result of the chimney we also completed for the customer with re build and re point when re -roofing his home.

-
Image
536
- Back of the house showing new fascias etc.

-
Image
537
- The end result, after we removed the large chimney for Leighton, sealed this back up with new membrane, Laths and purchased new tiles.

-
Image
538
- We fitted new fascias, soffits, guttering to Anita’s home, if you looked closely to this photo you will see that we came across the wooden fascias starting to rot.
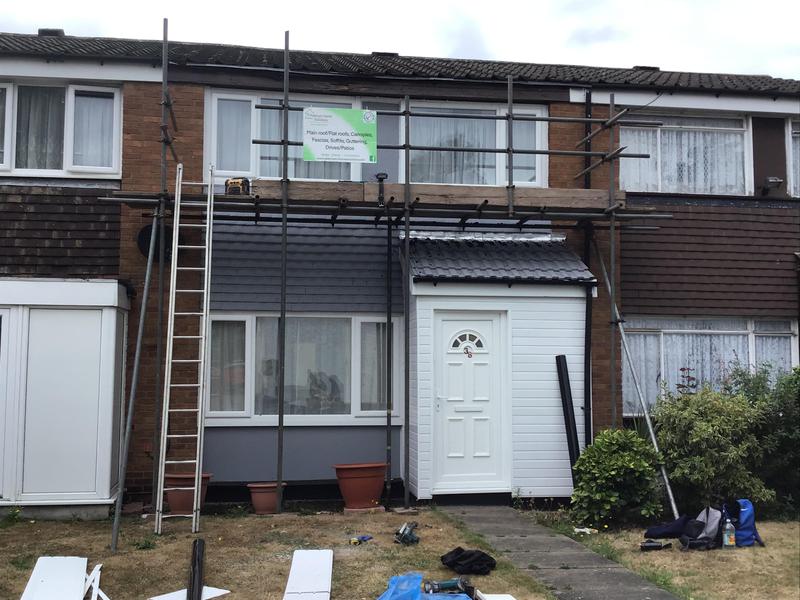
-
Image
539
- Another photo of the fascias being installed

-
Image
540
- Here we had a very large chimney to be removed in Bilston .

-
Image
541
- Side photo of the completed re roof within the Wolverhampton area.

-
Image
542
- Lovely photo of the completion of the new re-roof we completed within Wolverhampton, along with the chimney being part re built then re pointed and new leading around the base of the chimney.

-
Image
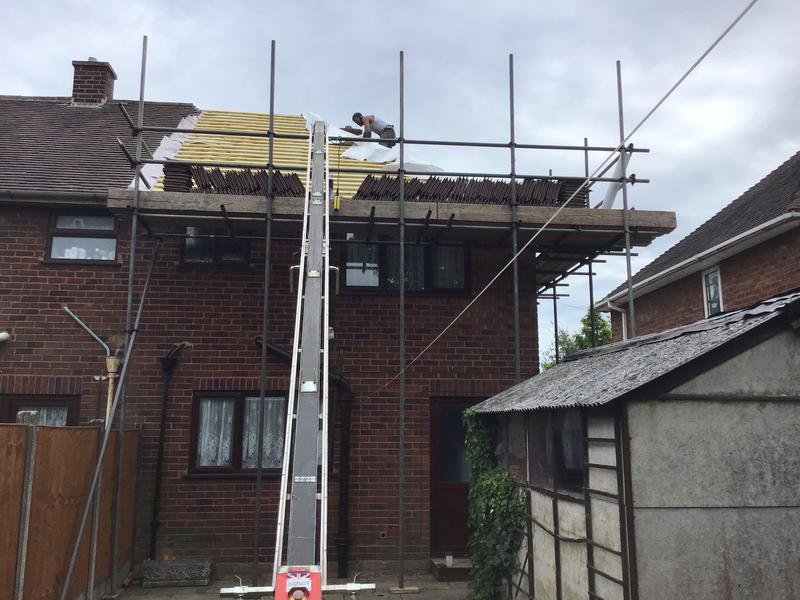
543
- Tiles on the scaffolding ready to be installed followed by the membrane and Laths.
-
Image
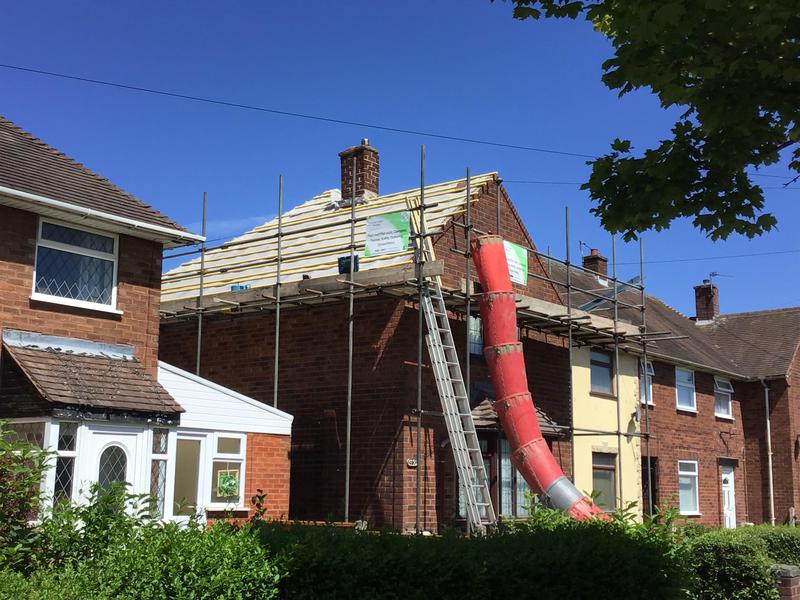
544
- Photo from the side of the property upon installation.
-
Image
545
- We shall install also valleys and bonding gutters within the installation.

-
Image
546
- A re-roof we shall be installing within the Wolverhampton area.

-
Image
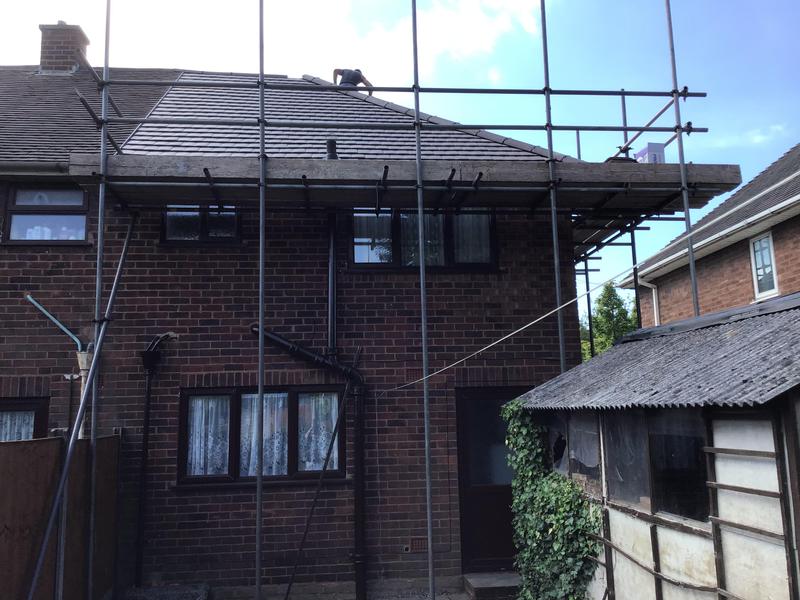
547
- We have installed smooth brown Gemini tiles to the customers choice.
-
Image
548
- A re- roof we started to install in June in the Stourbridge area.

-
Image
549
- Old English red tiles the customer choice for her roof.
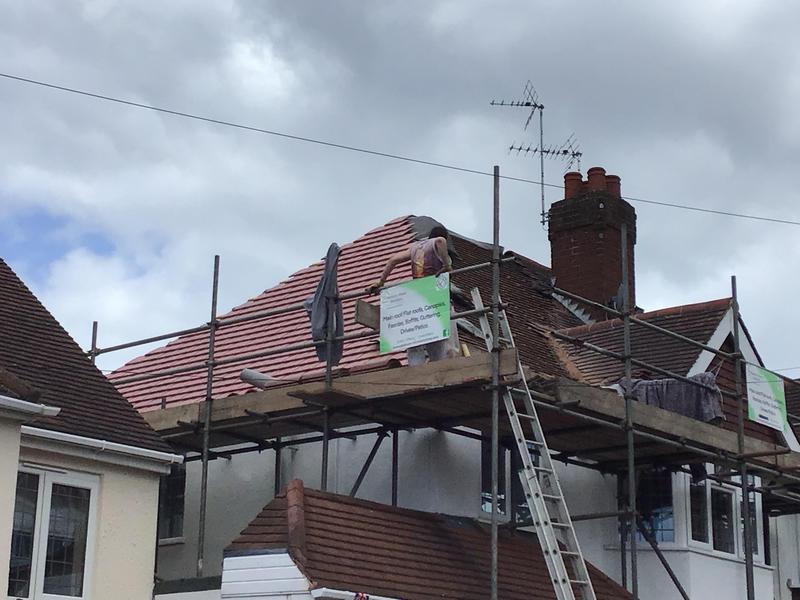
-
Image
550
- Completed re-roof before we removed the scaffolding where we shall attach a further photo to my customers review.

-
Image
551
- The completed photo of the re-roof we installed in the Stourbridge area in June .

-
Image
552
- We installed Old English red tiles to the semi detached house here.
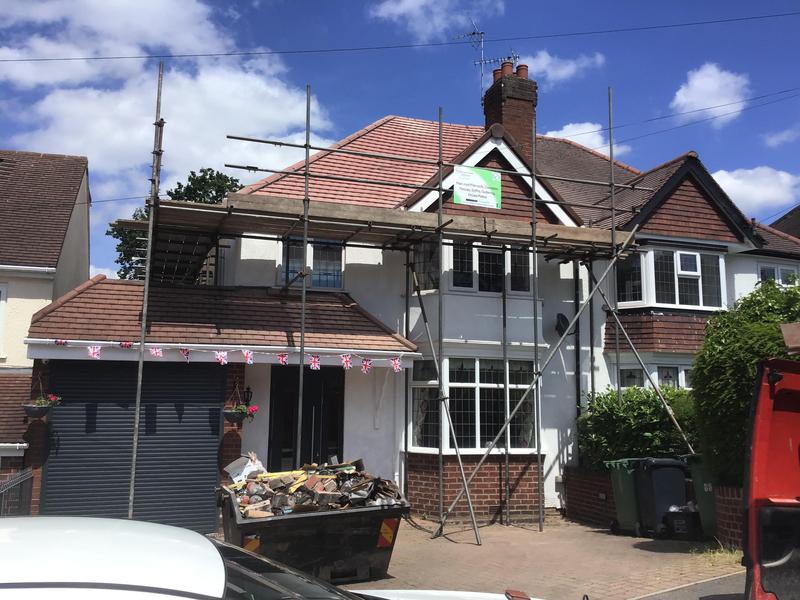
-
Image
553
- Photos as we are going through each day with our installation.

-
Image
554
- New re-roof in Stourbridge we commenced in June

-
Image
555
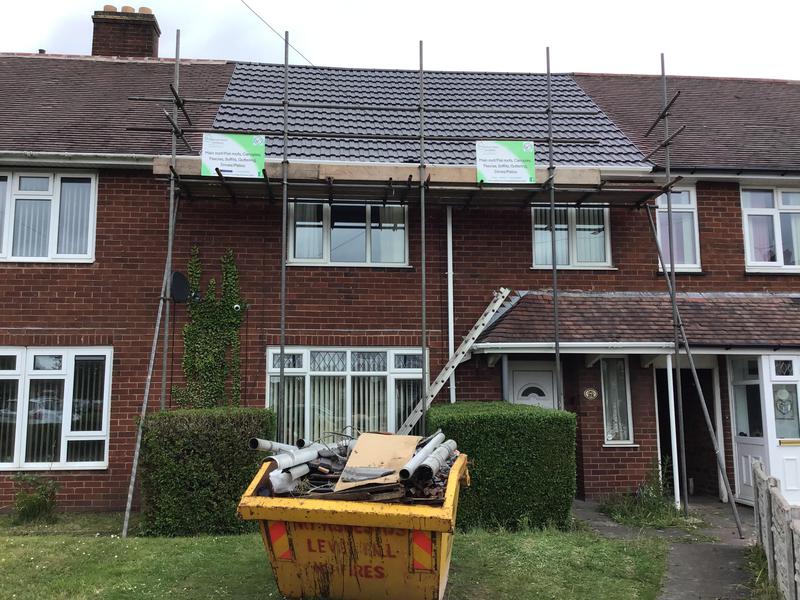
- New roof just completed here along with white fascia, soffits, guttering and down pipes.
-
Image
556
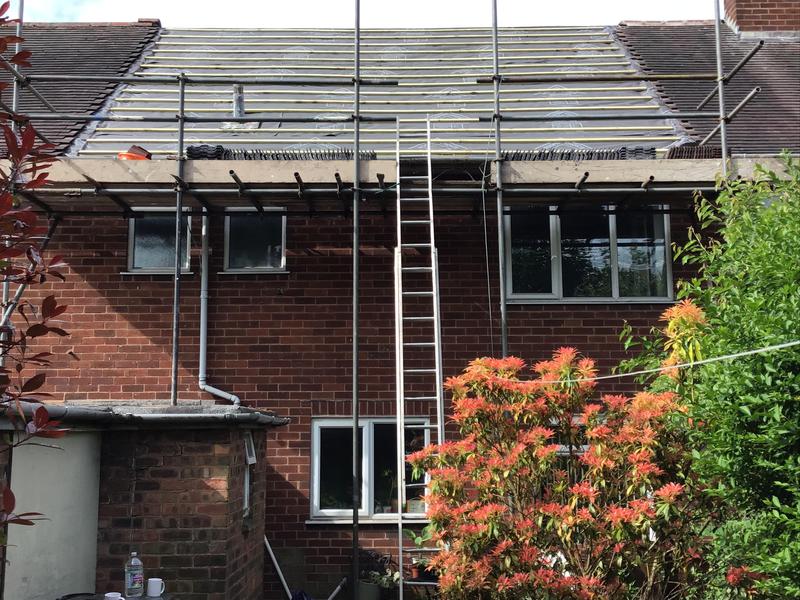
- Photo to the back of the house before we installed the tiles, chimney has been removed.
-
Image
557
- We started the back of the property first, because we also removed the chimney.

-
Image
558
- Lovely photos of the end results, where as we installed new Antique ridges in the dry fix system.
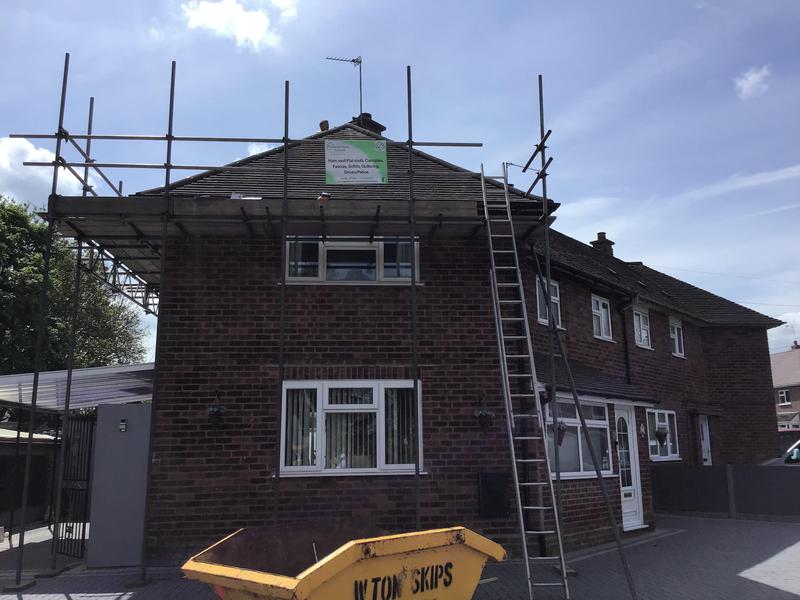
-
Image
559
- Photo after the scaffolding had been removed, all ridges replaced and installed in the dry fix system.

-
Image
560
- Lovely finished result here, replaced wooden fascias to the front only along with new fascias, soffits, guttering and all down pipes, front, back and the porch.

-
Image
561
- Photo taken today after the scaffolding has been removed from the re-roof we completed in the Albrighton area.

-
Image
562
- Property at the back before the re-roof

-
Image
563
- Lovely photo of smooth brown Major Ludlow tiles installed upon the roof, along with the ridges in the dry fix system, awaiting scaffolding to go down to take a full on photo

-
Image
564
- Before photo, we are going to install new ridges in the dry fix system, also new leading on the four sides at the base of the chimney.

-
Image
565
- The finished result … the guys did an excellent job on re roofing this large house in the Wolverhampton area.

-
Image
566
- Another lovely job in Wolverhampton, bungalow here we installed the new dry fix system to the seven hips and three tops … the canopy to the front is being completed Tuesday.

-
Image
567
- Hardcore down, sand down, we had used the wacka plate upon the sand before the lads then started by laying the blocks in the 45 degrees herringbone style driveway to the customers requirement.

-
Image
568
- A completed driveway 17th October ….. we installed Marigold blocks the customers choice in colour, very happy with this and off course our customer .. a review will follow this, pictures below are the stages of the driveway.

-
Image
569
- We used the whacka plate again after laying the sand upon the completed driveway.

-
Image
570
- Finished photo of the work we completed on Johns home, he contacted us thro Trustatrader, scaffolding down, awaiting skip removal, I shall take further photos on this home from completion.

-
Image
571
- Cutting in the blocks.

-
Image
572
- Sand ready to be levelled out then we shall use the whacka plate, as you see within picture, this is now getting it all ready for the blocks to be finally laid.

-
Image
573
- It took a few days digging the actual driveway out because of the amount of concrete we came across.

-
Image
574
- This is the second job we have done for Huw, previously we did his ridges and re-pointed half of his chimney, please see his reviews.

-
Image
575
- Big job we started here in the Wolverhampton area.

-
Image
576
- New cladding that was installed underneath along with new all new fascias, soffits, guttering and down pipes.
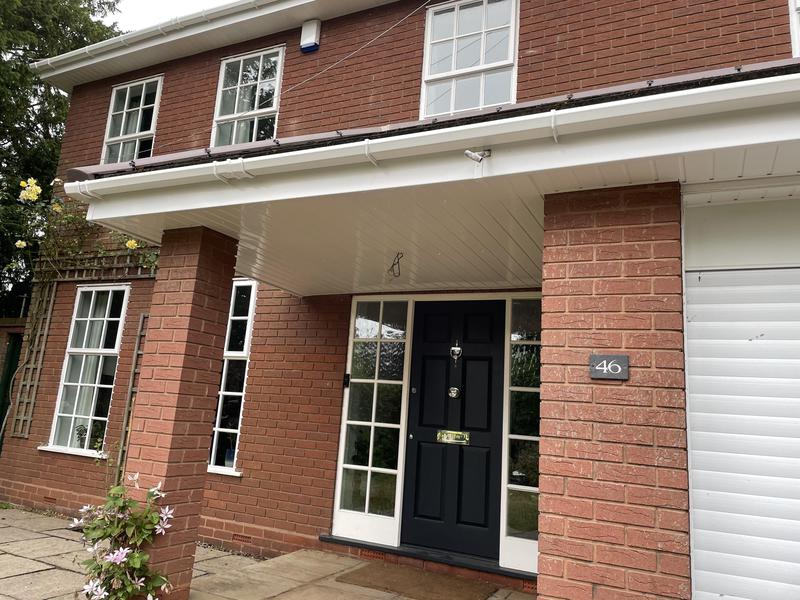
-
Image
577
- The customer in question is happy with our work and now requires us to install five flat roofs in all, pictures will follow with the end results.

-
Image
578
- Picture from the back of the house, completed with a new roof, chimneys removed, the extension didn’t have new tiles because it had been done previously.

-
Image
579
- Completed job today on the house for Johnathan, TrustaTrader customer.

-
Image
580
- Above the Canopy/Porch area are also two flat roofs that we shall be installing once the scaffolding is down, we are to install them with the Firestone rubber, photos are in my TrustaTrader account, please view all my photos.

-
Image
581
- Large house here, we are installing new ridges in the dry fix system, along with new fascias, Soffitts, guttering and down pipes, I also got the lads to clean the moss from the roof and remove the unwanted Ariel’s, all for Johnathan and Jess.

-
Image
582
- Installation of a new slated roof in Codsall for Margaret, we removed the old slate, they wanted to keep it in line with the other houses on the street, also having Slated roofs.

-
Image
583
- These two large chimneys were repointed for Rob along with new leading.
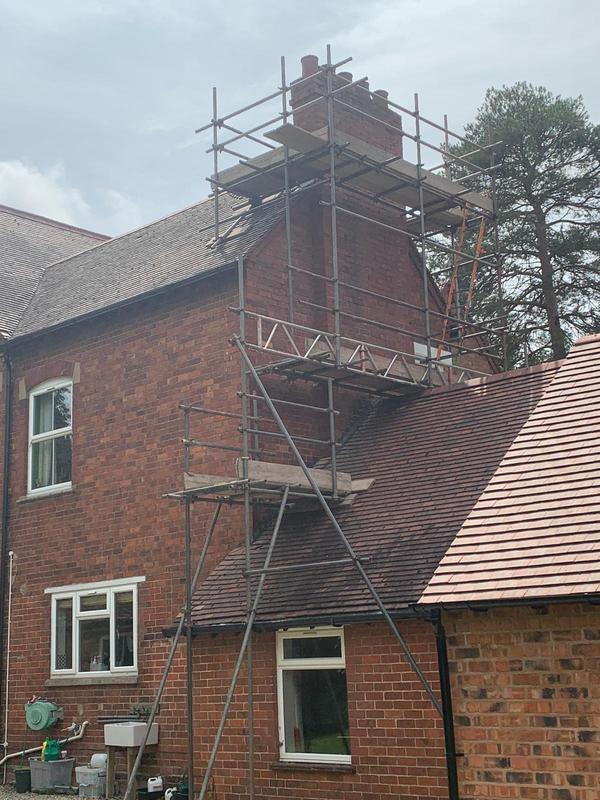
-
Image
584
- Repointed large chimneys in Stourton for Rob.

-
Image
585
- Chimney completed in 2 days with new engineering bricks installed.
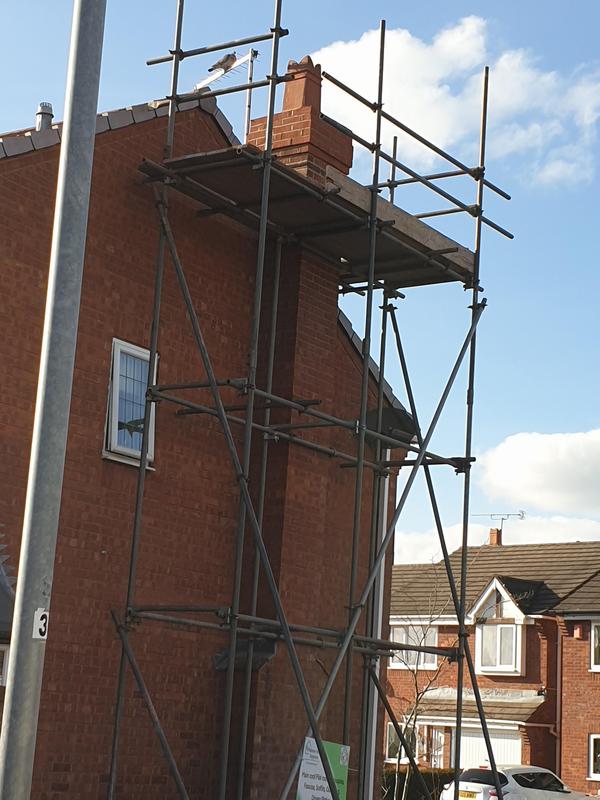
-
Image
586
- Chimney re pointed and lead flashing was completed for Rob in Stourton.
-
Image
587
- The end result of the new old English red tiles installed to the back of the house.

-
Image
588
- Lovely end result of the front of the house, we installed customer was very happy.

-
Image
589
- Chimney in need of a new re furb

-
Image
590
- Re furbed chimney in full.
-
Image
591

-
Image
592
- A picture showing customers the difference between wet fix and dry fix.

-
Image
593
- Detached property completed with new a roof, membrane and Lathe, all materials provided by us and fitted along with new soffits, fascia and guttering which completes the roofline of the property.

-
Image
594
- Large detached home installed with the smooth grey Ludlow tiles in dry verge not the wet fix.

-
Image
595
- Smooth grey Ludlow tiles installed with dry verge stystem rather than wet fix.
-
Image
596
- Photos of this bungalow has sold many other roofs to various customers to be honest, because of how lovely the overall picture looks with the smooth grey small tile, any questions please ask us.
Platinum Roofing and Fascias (Home Improvements)
- Identification checked
- Company address verified
- Customer references checked
- Agreed to TrustATrader's high standards
- Agreed to complaints procedure
Staffordshire
Insurance details
| Provider | Simply Business Insurance |
|---|---|
| Verified | 27th November 2025 |
Associations

Reviews (458)
-
Average rating: 5.0 out of 5
Review by Bob King
on 11th September 2026
"Marie and her team work with confidence and good trade skills, they finished the job to an excellent finish. I would recommend them to my friends and family with confidence that they will do very good work."
- Initial impression Initial impression: 5 out of 5.0
- Punctuality Punctuality: 5 out of 5.0
- Cleanliness Cleanliness: 5 out of 5.0
- Quality Quality: 5 out of 5.0
- Value Value: 5 out of 5.0
- Overall opinion Overall opinion: 5 out of 5.0
-
Average rating: 5.0 out of 5
Review by Anthea & John
on 24th August 2026
"This is the second job now carried out by Marie and her team, very happy with how she and her team works!"
- Initial impression Initial impression: 5 out of 5.0
- Punctuality Punctuality: 5 out of 5.0
- Cleanliness Cleanliness: 5 out of 5.0
- Quality Quality: 5 out of 5.0
- Value Value: 5 out of 5.0
- Overall opinion Overall opinion: 5 out of 5.0
-
Average rating: 5.0 out of 5
Review by Don Newton
on 15th August 2026
"It was an absolute pleasure to have Marie and her team at our house. They always took on board all we asked. Their work was a credit to them. So so pleased with the results of all their efforts. Thank you all. Don & Eileen"
- Initial impression Initial impression: 5 out of 5.0
- Punctuality Punctuality: 5 out of 5.0
- Cleanliness Cleanliness: 5 out of 5.0
- Quality Quality: 5 out of 5.0
- Value Value: 5 out of 5.0
- Overall opinion Overall opinion: 5 out of 5.0
-
Average rating: 5.0 out of 5
Review by Mr & Mrs Perry
on 3rd August 2026
"Great price, great service and thank you."
- Initial impression Initial impression: 5 out of 5.0
- Punctuality Punctuality: 5 out of 5.0
- Cleanliness Cleanliness: 5 out of 5.0
- Quality Quality: 5 out of 5.0
- Value Value: 5 out of 5.0
- Overall opinion Overall opinion: 5 out of 5.0
Feeling social?
See more of what we do and give us a follow on our social media.