
Platinum Home Solutions
Chimney Repairs. Platinum Home Solutions has been vetted and approved by TrustATrader. Covering Wolverhampton, Willenhall, Bilston, Tettenhall, Codsall, Perton, Walsall, Albrighton, Halesowen, Kidderminster, Stourbridge, Dudley, Telford, Cannock, Stafford, Shrewsbury, Bridgnorth, Worcester, Stourbridge, Kingswinford, Halesowen, Great Barr, Sutton Coldfield and all the Birmingham area
Membership number TT18377
Don't forget! Please mention TrustATrader when you contact any of our trusted traders.
All TrustATrader members are checked and vetted!
Get extra peace of mind and cover your next agreed job with this trader for free by registering for the TrustATrader Guarantee. Find out more
Register GuaranteeAbout Platinum Home Solutions, Wolverhampton, WV6 7TF
Based in Wolverhampton, Platinum Home Solutions covers the surrounding areas such as: Willenhall, Dudley, Bilston, Albrighton, Telford, Walsall, Cannock, Stafford, Tettenhal, Perton, Codsall, Bridgnorth, Shrewsbury, Kingswinford, Stourbridge, Halesowen, Kidderminster, Worscester, Sutton Coldfield, Great Barr, and the surrounding Birmingham area.
We are a professional, reliable roofing company with unrivalled expertise in the industry. Drawing on over fifteen years’ experience, we focus on providing all varieties of roofing, repairs, maintenance, any roofline jobs considered, fitted, giving each customer an outstanding quality service and the highest finish which is made to last.
Whether you are looking for a full re-roof, minor repairs or general maintenance, any home improvements jobs needed, we have a selection of all work carried out by our teams, a various selection of pictures applied below, please take time to look through my gallery of work we have completed over the years. We do apply the same standards to all of our work no matter how big or small the job. We believe that everyone should receive a great service that will protect their property for many years to come.
Me and my team offer a comprehensive range of services including:
- Complete installation of re-roofs or roof repairs.
- New or current ridges installed with the new dry fix system, or new mortar.
- Dry verge clips fitted to gable ends etc.
- Chimney re-point, chimney removals.
- Any lead work required to be changed upon the chimneys etc.
- New fascia, soffits, guttering and down pipes fitted.
- Firestone rubber flat roofs fitted
- Polycarbonate or Fibreglass roofs fitted.
- Cladding installation.
- Moss removals.
- Re-pointing chimneys etc
- new windows and doors supplied and fitted.
- Driveways and Patios also.
- All work considered.
Our skilled team are on hand to help with any queries that you may have. We are happy to help and offer free advice, non-obligatory quotes and estimates.
Please see face book link below, and please look at my website showing a gallery of completed work, thank you.
Please mention Trustatrader when calling.
Photo gallery
-
Image
1

-
Image
2

-
Image
3

-
Image
4

-
Image
5

-
Image
6

-
Image
7

-
Image
8

-
Image
9

-
Image
10

-
Image
11

-
Image
12

-
Image
13

-
Image
14

-
Image
15

-
Image
16

-
Image
17

-
Image
18

-
Image
19

-
Image
20

-
Image
21

-
Image
22

-
Image
23

-
Image
24

-
Image
25

-
Image
26

-
Image
27

-
Image
28

-
Image
29

-
Image
30

-
Image
31

-
Image
32

-
Image
33

-
Image
34

-
Image
35

-
Image
36

-
Image
37

-
Image
38
- The re roof in Wombourne all completed as of yesterday 13th Nov, customer Andy very happy with this.

-
Image
39
- Completed re roof in Wombourne.

-
Image
40
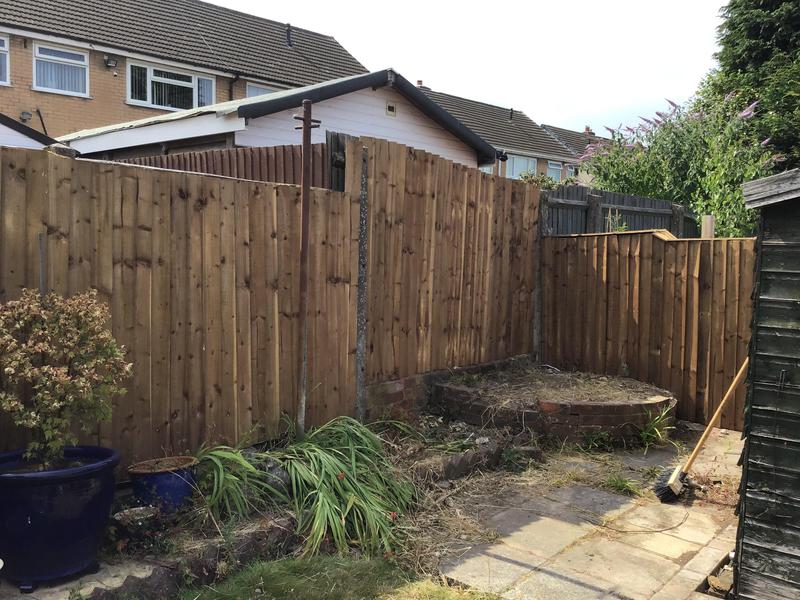
- Photo to the rear of the house in Wombourne.

-
Image
41
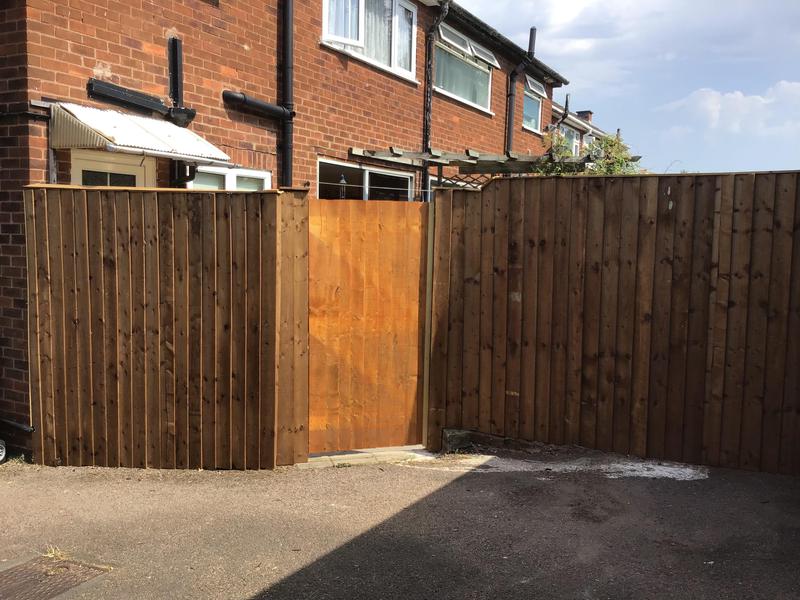
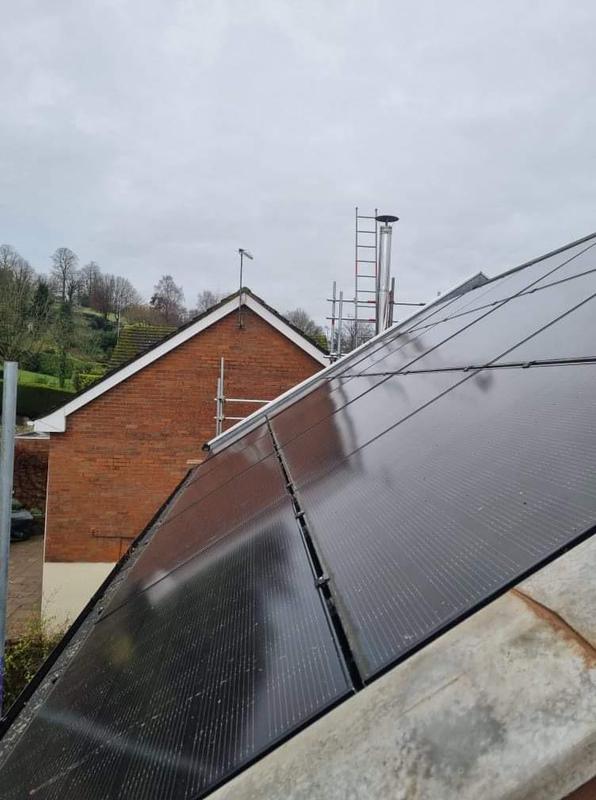
- You see we also fitted dry verge clips in grey to go with the Anthracite tiles on the re roof.

-
Image
42
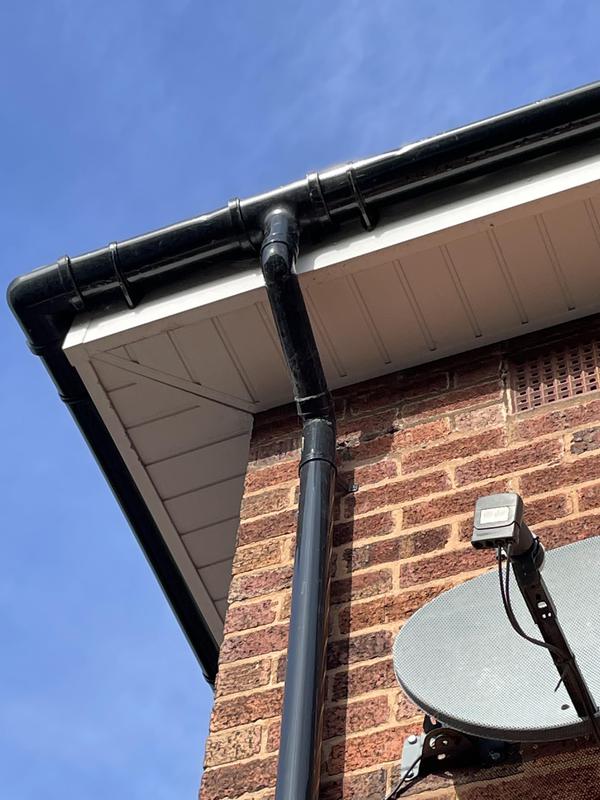
- White fascias fitted in Telford.

-
Image
43
- New fascias etc in Telford.

-
Image
44
- New fascias in Telford

-
Image
45
- All photos here showing the white fascias, soffits and black guttering fitted in the Telford area.

-
Image
46
- New fascias

-
Image
47
- Black square guttering.

-
Image
48
- Completion of the semi detached house fitted with new fascias etc

-
Image
49
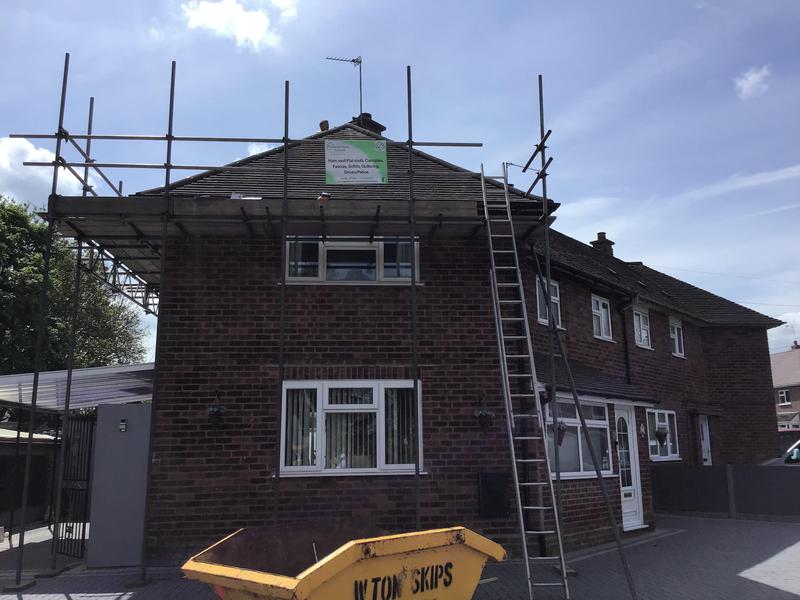
- Re roof in Wombourne currently fitting new water proof membrane.

-
Image
50
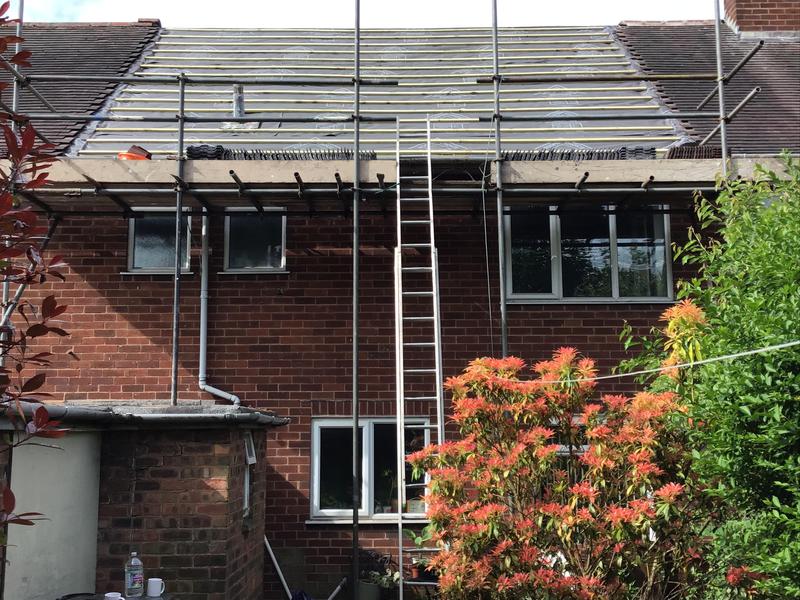
- Rear of the house while in process of a complete re roof.

-
Image
51
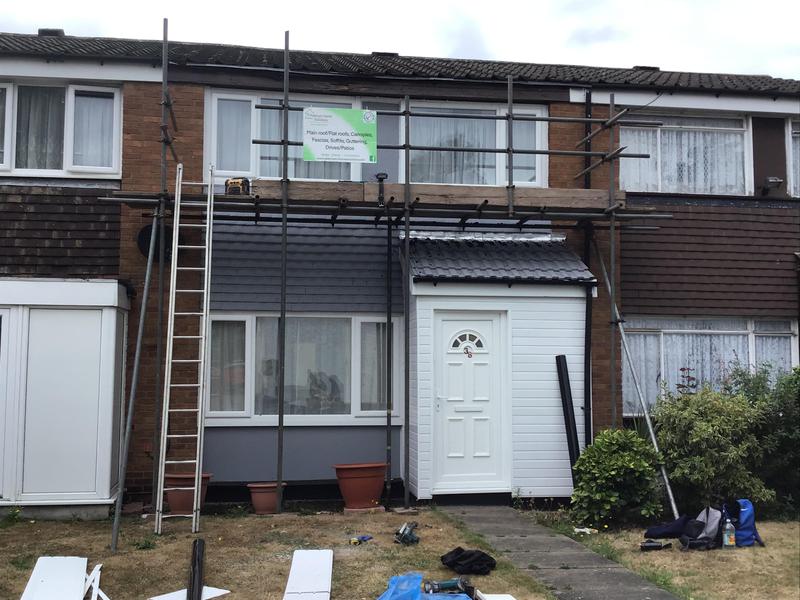
- Felt and batons have been removed from the frontage.

-
Image
52
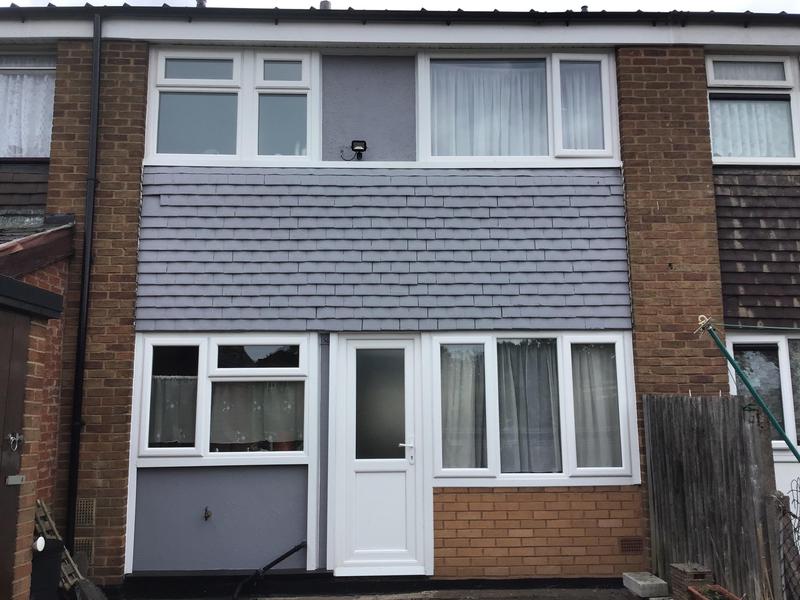
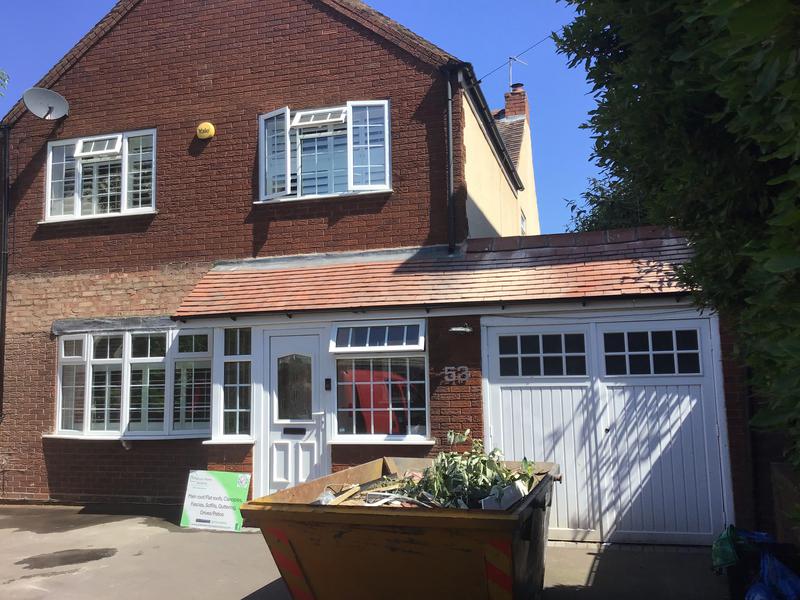
- High level and low level fitted with white fascias, white soffit and guttering with down pipes.

-
Image
53
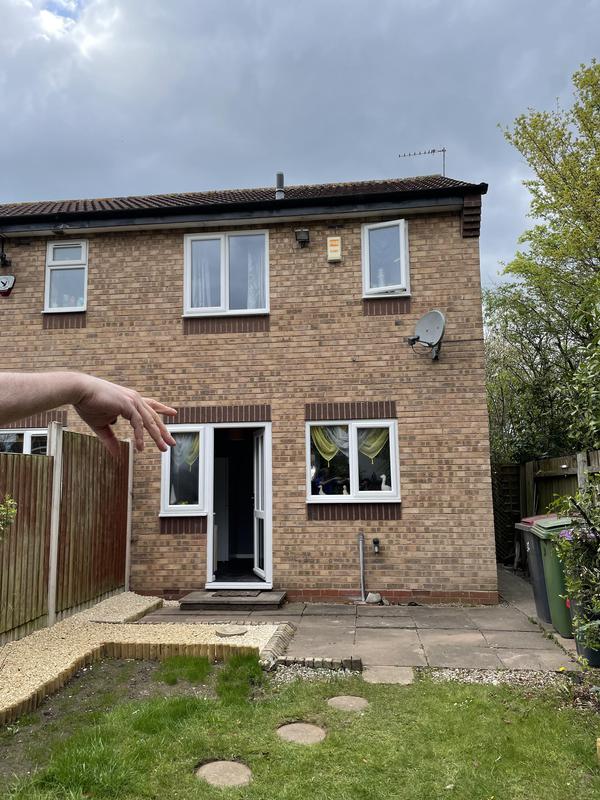
- Also to the rear of the property in Wolverhampton.

-
Image
54
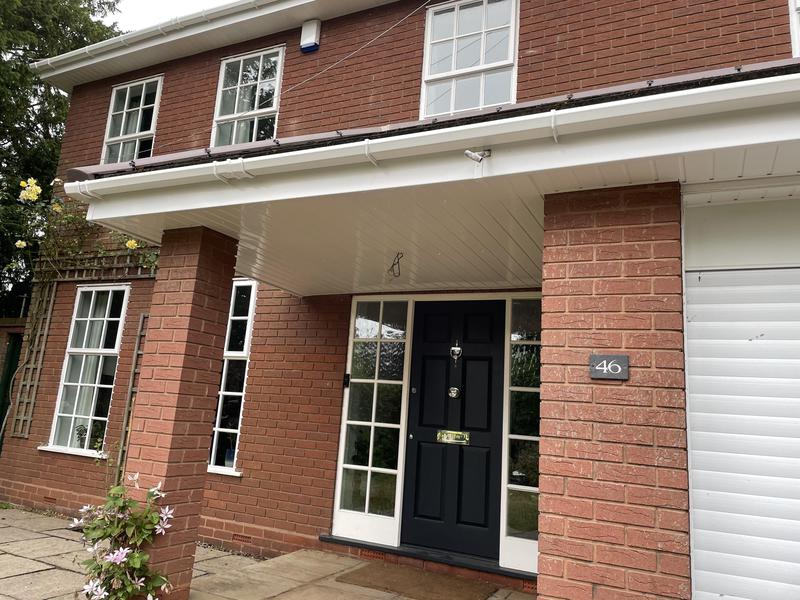
- Lovely photo of the Canopy that was fitted too with new fascias etc

-
Image
55
- Windows upon this property also painted.

-
Image
56
- With this house we fitted EPS trays and new ridges in the dry fixed system.

-
Image
57
- Garage door before we painted the in green.

-
Image
58
- Front door also painted.

-
Image
59
- Another house in the Birmingham area where we fitted new white fascias and guttering only to the front of the house.

-
Image
60
- To the rear we only fitted new white guttering for the customer in Birmingham.

-
Image
61
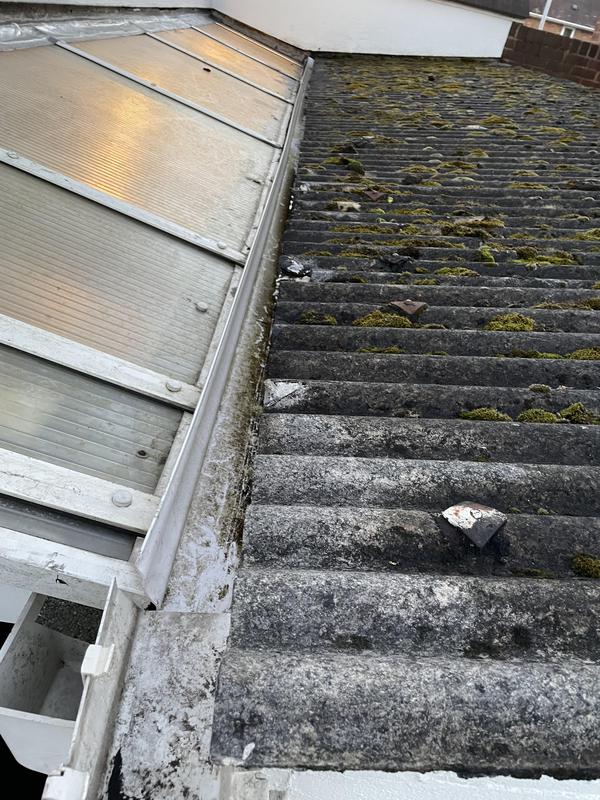
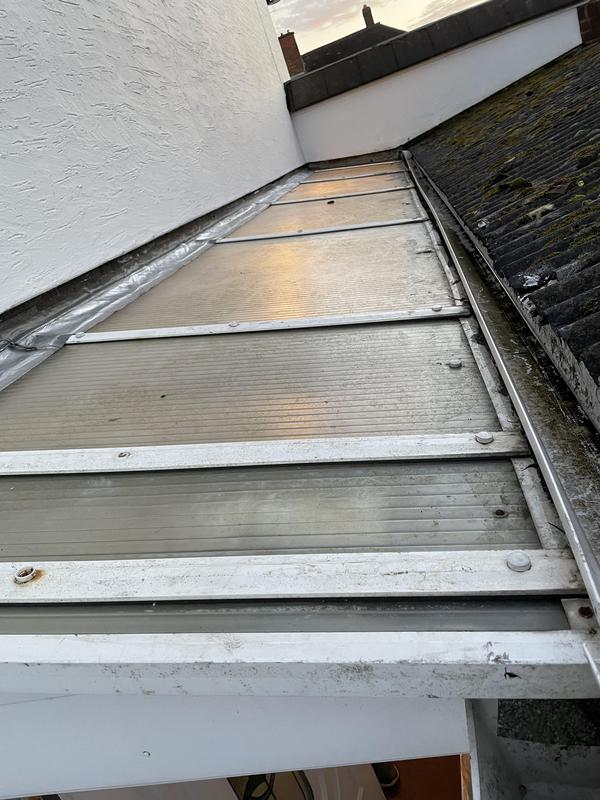
- A repair we had to carry out here to the rear of his conservatory.

-
Image
62
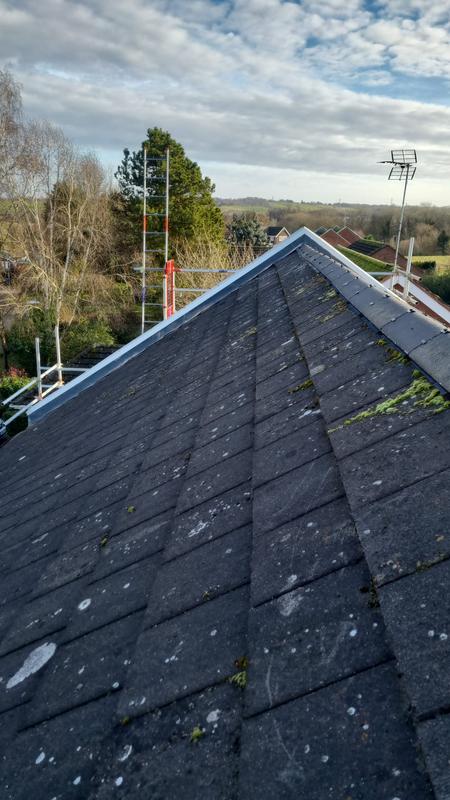
- EPS trays were fitted here to either side of the front gable due to a leak, further needed.

-
Image
63
- Repair to the lead.

-
Image
64
- New eave tiles needed here.

-
Image
65
- Leading also needed addressing.

-
Image
66
- You can see here where it is damp

-
Image
67
- Morterted.

-
Image
68

-
Image
69
- Old felt removed from this re roof in Wombourne, you see the blue, this is water proof membrane fitted.

-
Image
70
- Rear of the property in Wombourne.

-
Image
71
- EPS trays o be fitted here and the gutter alignment.

-
Image
72
- EPS trays and gutter alignment to the rear.

-
Image
73
- New Antique brown ridges fitted in the dry fixed system.

-
Image
74
- Re roof being done in Wombourne.

-
Image
75
- New fascias and guttering fitted here.

-
Image
76
- New fascias, soffits, guttering, down pipes fitted, garage door, front door painted, windows painted, all completed by ourselves.

-
Image
77
- Windows to the rear have been painted, being wooden.

-
Image
78
- EPS trays fitted here with gutter alignment and a new Union.

-
Image
79
- Garage door painted here by us.

-
Image
80

-
Image
81

-
Image
82

-
Image
83

-
Image
84
- Photo of before in Wolverhampton for new fascias.

-
Image
85

-
Image
86

-
Image
87

-
Image
88
- House in Wombourne that needed a re roof once we come across all these holes within the felt

-
Image
89

-
Image
90

-
Image
91

-
Image
92

-
Image
93

-
Image
94

-
Image
95

-
Image
96

-
Image
97

-
Image
98

-
Image
99
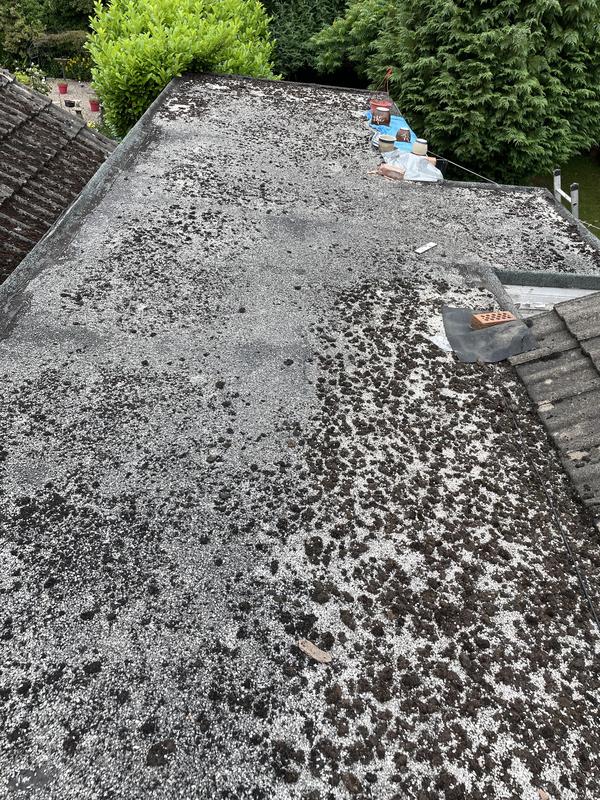
- Flat roof here to be changed along with a new Dome to be fitted once the old one that leaks has been removed.

-
Image
100
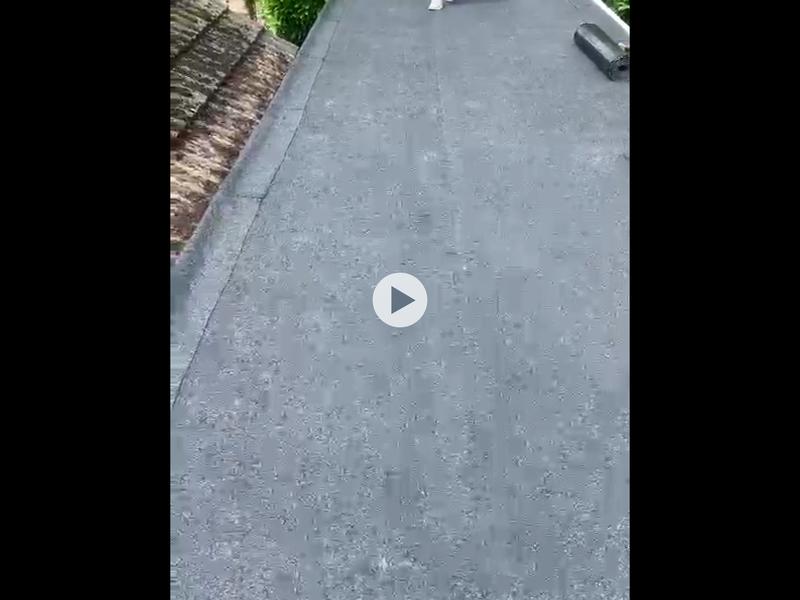
- Flat roof to be changed with a rubber roof.

-
Image
101
- Flat roof to be changed here with the old Dome.

-
Image
102

-
Image
103
- The re roof in Wombourne too.

-
Image
104
- This is the house before I started the re roof in Wombourne, sorry the photos are jumbled.

-
Image
105
- Walls painted for Pam along with plaster boards fitted to the ceiling, wall peppered.

-
Image
106
- Soffits fitted to the front.

-
Image
107
- Painted all the walls, ceilings etc and changed the five doors to the top of the stairs, all addressed for Pamela.

-
Image
108
- EPS trays fitted here for Sharon.

-
Image
109
- French doors also fitted here for Pam in Wolverhampton.

-
Image
110
- Telford job were we fitted new white fascias, soffits, black guttering and down pipes to the three sides.

-
Image
111
- Black square gutters fitted.

-
Image
112
- Black gutter and white fascias fitted here in Telford.

-
Image
113
- White soffits fitted.

-
Image
114
- White fascias fitted.

-
Image
115
- Soffits, fascias, gutters, down pipes.

-
Image
116

-
Image
117

-
Image
118

-
Image
119

-
Image
120
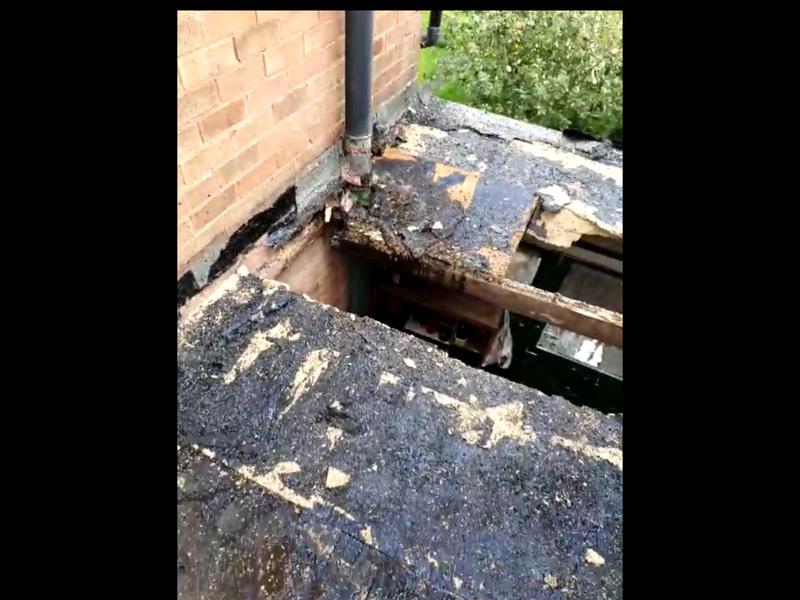
- You see what we came across with this flat roof that we stripped down and fitted rubber upon this.

-
Image
121
- Flat roof in Wombourne before we stripped it down and fitted a new rubber roof along with new wood etc

-
Image
122
- Completed re roof for Sarah completed in September in Dutton Coldfield.

-
Image
123
- Completion of a re roof in the Sutton Coldfield area for Sarah.

-
Image
124
- Rosewood cladding was fitted here to a house in Bewdley fro Simon.

-
Image
125
- Another photo of this flat roof in Wombourne.

-
Image
126
- Bewdley property that was fitted with Rosewood cladding and white fascias front and rear.

-
Image
127
- Photo to the rear of the house in Bewdley for Simon.

-
Image
128
- House in Tettenhal where we repaired there felt upon the main roof.

-
Image
129
- Osb boarding a flat roof.

-
Image
130
- Rubber roof fitted in the Wolverhampton area for Emily.

-
Image
131

-
Image
132

-
Image
133

-
Image
134

-
Image
135

-
Image
136

-
Image
137

-
Image
138

-
Image
139

-
Image
140

-
Image
141

-
Image
142

-
Image
143

-
Image
144

-
Image
145

-
Image
146

-
Image
147

-
Image
148

-
Image
149
- Flat roof we fitted in the Pattingham area.

-
Image
150
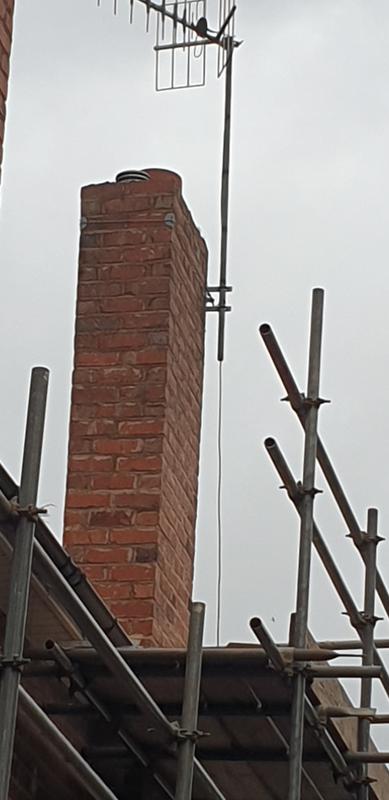
- Chimney reduction for Steve in Dudley.

-
Image
151
- For Steve we reduced his chimney because it was leaning.

-
Image
152
- Osb boards first fitted, water based glue followed by rubber fitted here in Pattingham.

-
Image
153
- Steve in Dudley with his Chimney, to be reduced.

-
Image
154
- Some guttering and down pipes fitted here along with lead work to be addressed upon the roof.

-
Image
155
- We fitted the roof with new slates.

-
Image
156
- An American style bungalow, wooden, we completed a re roof for Christine.

-
Image
157
- Completed re roof here for Christine in the Northfield area.

-
Image
158
- Another job for pam, front door fitted.

-
Image
159
- Another door for Pam in Wolverhampton.

-
Image
160
- Back door fitted also for Pam.

-
Image
161
- This is the fourth door we fitted for Pam, all four fitted together.

-
Image
162
- In the middle of completing a re roof for Christine here in blue/black slated tiles.

-
Image
163
- The roof in Sutton Coldfield before we started the re roof upon this.

-
Image
164
- New panels fitted here after removing the old ones..

-
Image
165
- We also fitted this small kitchen bay roof in rubber for the same customer we fitted new fencing panels.

-
Image
166
- Another job for Pam, dry verge clips fitted to the side of her house.

-
Image
167
- New fascias, soffits, gutters and down pipes fitted here for Nigel’s rented property in Wolverhampton.

-
Image
168
- New fascias fitted.

-
Image
169
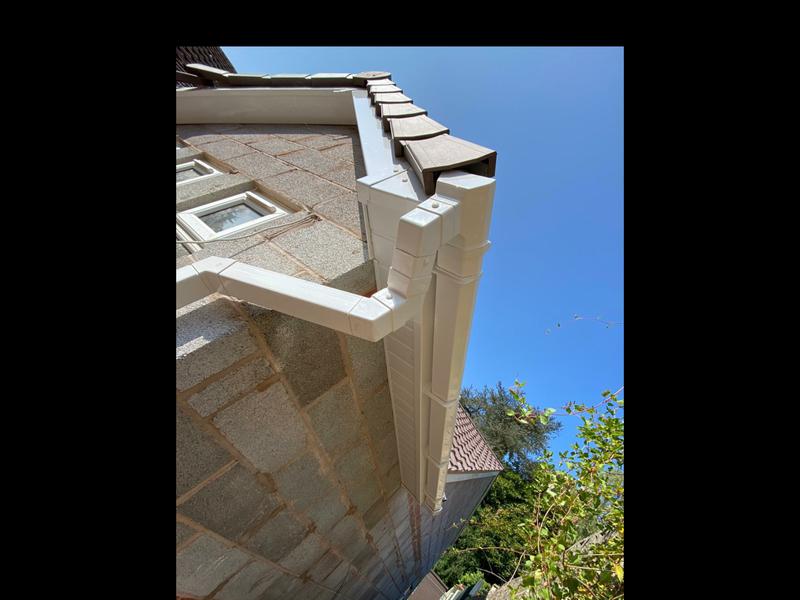
- Fascias, soffits, gutters, down pipes in Perton for Mark.

-
Image
170
- Flat roof in Northfield before we applied new osb boards.

-
Image
171
- This is also the small flat roof that we fitted with the re roof to the bungalow in Northfield.

-
Image
172
- Another fascia

-
Image
173
- We fitted here new sliding doors in the Walsall area for Nancy.

-
Image
174
- Happy with the rubber roof we completed in June 23

-
Image
175
- A new rubber roof here we fitted for Christine.

-
Image
176
- Another house in Perton we fitted with new fascia, soffits, guttering and Down pipes.

-
Image
177
- Photo showing the old felt we removed from the roof, before we installed a new rubber roof.

-
Image
178

-
Image
179

-
Image
180

-
Image
181
- We also completed this house in Perton with new white fascias, Sofitts in June.

-
Image
182
- Photo to the rear of the property completed.

-
Image
183
- Flat roof changed here for Marcin in Telford.

-
Image
184
- Bungalow we stripped down, changed the membrane and Laths and re applied the original tiles back on with some new ones.

-
Image
185
- Flat roof that was rebuilt in Wolverhampton, you can see the new bricks etc

-
Image
186
- Re roof here along with new fascias, soffits etc fitted in Regent road.

-
Image
187
- You see the re roof we where installing along with neighbours Alan, both had the same tiles upon there re roof along with fascias, soffits etc

-
Image
188
- Finished result of both properties completed together, lovely people and a lovely job we completed on this.

-
Image
189
- Neighbours in Renet road, Alan’s re roof along with fascias etc

-
Image
190

-
Image
191
- Completed and scaffold removed.

-
Image
192
- Photo of the panels before we changed them.

-
Image
193
- Another photo of the fencing panels we fitted.

-
Image
194
- New white fascias, soffits, guttering etc fitted to the rear of this property in Walsall. We are to fit new Rubber roof too after the Fascias have been installed.

-
Image
195
- Frontage showing the new white fascias high and low level.

-
Image
196
- Completed home with Fascias, soffits front, rear, high and low level along with two flat roofs to the side and rear of this property.

-
Image
197
- New white fascias here to the front and rear of Dee’s home in Wolverhampton.

-
Image
198
- Lovely completed photo.

-
Image
199
- Dee also had a glass roof here around the back, we removed this, a complete timber rebuild, followed by Rubber

-
Image
200
- The end result in rubber with soffits boards to finish this whole new roof off.

-
Image
201
- Firestone rubber completed roof for Dee.

-
Image
202
- Chimney here in Kingswinford, firstly we have installed a slab upon the top, then we flaunched it.

-
Image
203
- This then is the first course of rendering.

-
Image
204
- Second course of rendering, awaiting for this to dry out before we then paint it for Rob.

-
Image
205
- Completed lovely job after it having two coats of complete render.

-
Image
206
- Completed clean from moss, big difference.

-
Image
207
- This chimney was in need of the moss cleaning from her roof, as you see how thick of moss this is.

-
Image
208
- Chimney here in Kidderminster that we rebuilt.

-
Image
209
- End result from a rebuild with re claimed bricks.

-
Image
210
- Flat dormer roof in Telford that we changed materials from fibre glass roof to a Firestone rubber roof, along with trims.

-
Image
211
- Rubber roof in Telford.

-
Image
212
- Stephen in Telford requested some fascias and soffits fitted to his home in Telford

-
Image
213
- We fitted the OG guttering to the front, rear of his home, OG is the larger guttering in size.

-
Image
214
- New white fascias, soffits with black OG guttering .

-
Image
215
- To the side of the house there was rotten fascias on top and underneath that needed to be changed before we could fit the white fascia and soffits over the wood.

-
Image
216
- Lovely finish coming along with this job, how difference your home looks once we have installed new fascias

-
Image
217
- We fitted new guttering to the rear of Sonia’s home, she called us back to fit new guttering to the front of her home this time.

-
Image
218
- Her neighbour Jean also asked us to change her guttering too while we was fitting Sonia’s guttering.

-
Image
219
- Chimney rebuilt 7 courses up because it wasn’t straight.

-
Image
220
- Completed rubber roof that Pam and Mike where very happy with my suggestion rather than the tiled roof.

-
Image
221
- Tiles here being removed from the pitched roof.

-
Image
222
- Stages of this pitched roof that had tiles on and we stripped it down ready to fit a rubber roof on.

-
Image
223
- Another lovely job completed here, a flat roof fitted in the Firestone rubber from a tiled roof.

-
Image
224
- Lovely completed re roof we done for Sarah in Wolverhampton, Smooth grey Major Ludlow tiles.

-
Image
225
- Side photo of the roof.

-
Image
226
- Very happy with this job tbh especially with the new white fascia system we also fitted for them, the both compliment each other.

-
Image
227
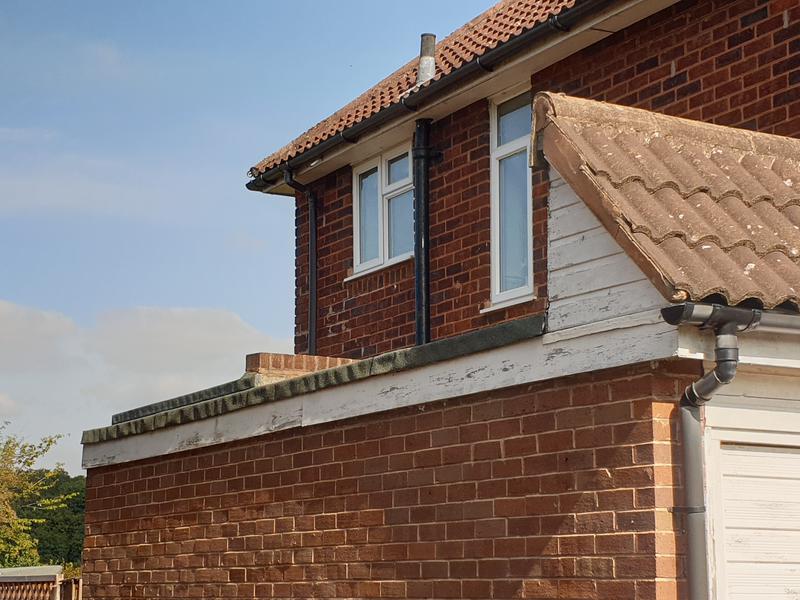
- Photo to the rear of the property, we also pointed some of the chimney up and re leading around the base of the chimney.

-
Image
228
- Here you see my lads in the process of fitting new treated Laths.

-
Image
229
- Roof here stripped down, new membrane and treated Laths fitted, all ready to be tiled.

-
Image
230
- Sarah’s roof here where fitted new white fascia, we shall be fitted a new roof for them over the next few weeks, you shall have these photos attached.

-
Image
231
- Customer here wanting new white fascias etc in Telford

-
Image
232
- Here is the end result after the fascias, guttering and Down pipes fitted.

-
Image
233
- To the rear of the property, the before photo

-
Image
234
- Unfortunately to the rear, the wooden fascia boards where completely rotten so we had to change that first before we could fit the fascias, guttering and Down pipes

-
Image
235
- A re roof we started here in December 22 on the Lickey hills, being the second one on the same street, please check all photos of the work we carried out.

-
Image
236
- New white cladding also to the front gable with grey dry verge clips to finish this off nicely

-
Image
237
- To the rear of the property there where two flat roofs that we also changed and installed Firestone rubber upon them both.

-
Image
238
- The second re roof we completed on the Licky Hills, Birmingham in December 22

-
Image
239
- We also fitted new white fascias, soffits etc

-
Image
240
- Flat roof here in Wolverhampton that we also fitted with the Firestone rubber

-
Image
241
- Completed roof with the rubber fitted.

-
Image
242
- Displayed my advert board showing you and others our flat roof we fitted and a lovely review received from Emily, thank you.

-
Image
243
- Also the fascia on the top gable was changed to Rosewood to match the rest of the house.

-
Image
244
- Job in Kingswinford wanted his wood removed from the front of house, because it had started to rot.

-
Image
245
- Once wood was removed, we installed the Rosewood soffits too and bottom.

-
Image
246
- We also added some insulation to the top area because there wasn’t any there, then fitted Rosewood soffits, trims etc all to complete this for John.

-
Image
247

-
Image
248
- Here in Lower Penn, we changed partial membrane and Laths to the request of the customer due to some of the Laths starting to rot, cleaned moss from the roof, mortared all ridges to the four sides of his home.

-
Image
249
- A small fencing job from a customer we had cleaned the guttering out for him, changed a few tiles etc

-
Image
250
- Fencing here also changed to new fencing to the rear of his property.

-
Image
251
- As you see the new fencing that we did install to the front of his house, I had forgotten to take a photo to the rear of the house showing new fencing there for Dave.

-
Image
252
- Small job for Diane in Wolverhampton, all windows and doors where re sealed with white sealant.

-
Image
253
- Diane’s bungalow here, we had quite a few jobs to do, all from a previous Cowboy that had deliberately concocted things to go wrong upon her bungalow.

-
Image
254
- New Ridges installed with the Dry fix system for Peter.

-
Image
255
- Looks so much better than the mortar, as this is a little dated now, dry fix lasts a lot longer for the customers.

-
Image
256
- This is a job we completed for Mike in Shrewsbury by fitting Snow guards to the guttering within picture, to stop falling tiles the best they can.

-
Image
257
- Snow guards to the two sides you see within the photo

-
Image
258
- Lovely completed photo to the front of Rory’s property with the scaffolding now removed.

-
Image
259
- Completed photo here to the rear of the property now the scaffolding is down.

-
Image
260
- Further photos will follow.

-
Image
261
- Photos are a little dark due to the weather.

-
Image
262
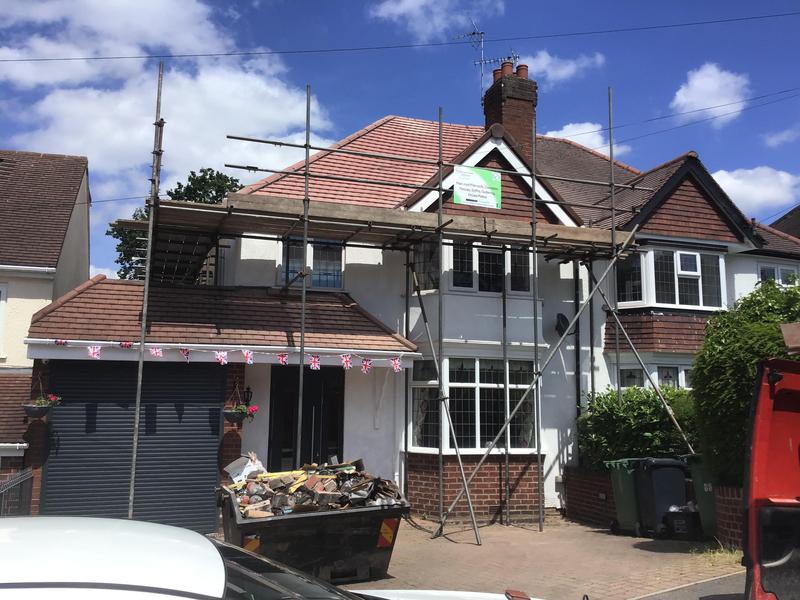
- Rory contacted me via Trustatrader wanting a new roof, as it was 1927 built, we discussed prices and difference in tiles, this is the before photo.

-
Image
263
- Rear photo before shot.

-
Image
264
- Work in progress here, using a Bumpa heist to help the lads transport the tiles upon the scaffolding rather than carry them up.

-
Image
265
- Work in progress here to the rear, Laths and membrane has been fitted so far.

-
Image
266
- Second job here for Cliff in Telford after fitting new fascias for him, we are installing a new driveway for him and Lorraine’s also here.

-
Image
267
- These blocks where specially chosen by Lorraine and Cliff

-
Image
268
- Lovely completed photo of the new driveway now, they are so pleased with this, it looks so much nicer, and bigger.

-
Image
269
- Materials delivered ready to strip down the original materials upon Emily’s roof, we shall then fit a rubber roof for them

-
Image
270
- A re roof we are to do for Emily in Wolverhampton, fitting Firestone rubber.

-
Image
271
- Showing the completed job here along with wall trim, edging trims.

-
Image
272
- Lovely completed re roof in the Firestone rubber.

-
Image
273
- Completed photo showing my advertisement boards I use on completion.

-
Image
274
- Re mortared top ridges.

-
Image
275
- Lindsay, Jays dormer, we also re mortared there chimney and re leaded this, also cleaned the moss from of the roof.

-
Image
276
- While we were doing the work for Jay, there neighbour asked us to re mortar there chimney and top ridges also, review in the post for this.

-
Image
277
- Dormer flat roof here within photo, we re installed this with Firestone rubber, wiped the dormer down also.

-
Image
278
- End result of there re roofed dormer, moss removal, re mortared there ridges and chimney.

-
Image
279
- First bedroom window.

-
Image
280
- 2nd bedroom window.

-
Image
281
- We had already fitted new guttering around James property, we have now fitted two bedroom windows for him.

-
Image
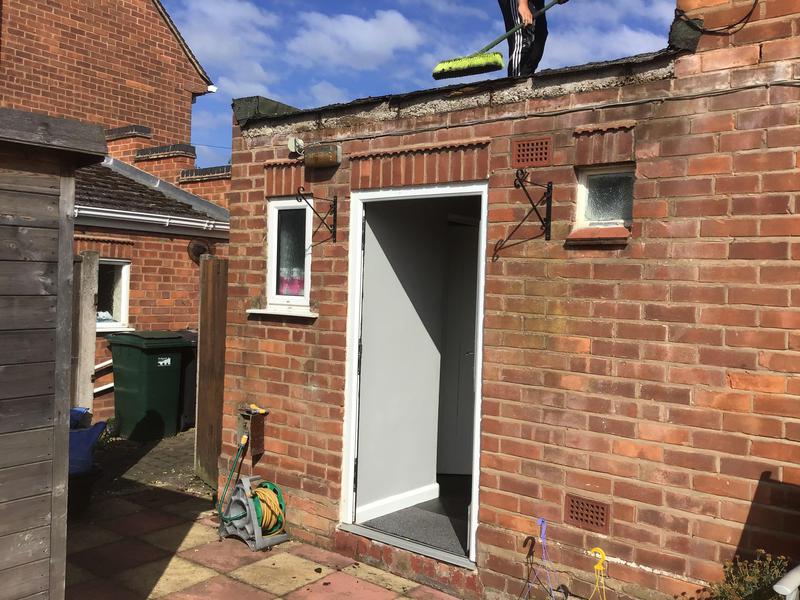
282
- Photo here where we removed the old round gutters and down pipe to the front of the bungalow.

-
Image
283
- Before photo to the rear of the bungalow.

-
Image
284
- Lovely completed photo to the rear of the property, me and the lads where very happy with the outcome of this bungalow and the transformation.

-
Image
285
- Showing the side of the semi detached bungalow, lovely white fascias with Tongue and groove soffits fitted right done the side.

-
Image
286
- Showing a lovely completion job from ourselves here, also under the canopy area by the front door, this stands out so much.

-
Image
287
- Full frontal photo of the bungalow completed, awaiting a lovely review back from Patricia.

-
Image
288

-
Image
289
- Showing here the installation of a new re-roof for Lindon based in Wolverhampton. We pride ourself to fit the new ridges in the dry fix system rather than mortar.

-
Image
290
- Full new re-roof we completed here for Lindon in Wolverhampton, installed smooth grey Major Ludlow tiles, breathable membrane, new treated Laths.

-
Image
291
- To the rear of the property, the finished work from Platinum home solutions. I shall drop by to take a photo now the scaffolding has come down.

-
Image
292
- Another job here for Naomi, after we installed her with three rubber flat roofs, photo before we also fit the house with new fascias etc

-
Image
293
- My team installing new white fascias, soffits, guttering and down pipes.

-
Image
294
- Photo to the rear of the property where we fitted new fascias etc plus the bedroom bay flat roof that was installed two weeks prior.

-
Image
295
- Completion of the white fascias, white Tongue and groove soffits, square white guttering along with white square down pipes, lovely end result, and a happy customer

-
Image
296
- another job we were asked to do for Liz, a complete re-roof.

-
Image
297
- Phot at the back of the property while installed new smooth grey Major Ludlow plus tiles.

-
Image
298
- We also fitted to the both sides of her bungalow, new grey dry verge clips, this finishes the bungalow off nice.

-
Image
299
- Completed photo showing the whole of the property to the back, completed, customer very happy.

-
Image
300
- Completed photos to the front off the property also showing our work, once Skip and scaff have been removed I shall update a further photo.

-
Image
301
- Close up from the completion we achieved this week for Liz and her bungalow.

-
Image
302
- Small repair job needed for Mohammed upon the Mosc

-
Image
303
- Leaking coming from the small flat roof.

-
Image
304
- Laid charcoal felt upon the small flat roof.

-
Image
305
- Simple repair job upon the small flat roof, to prevent any further leaks.

-
Image
306
- Before photo of a small roof over the front door, we are to fit rubber, please look at the end result.

-
Image
307
- Also the front bay window for the same customer Naomi, we removed the old leading, fitted new osb boards followed by Firestone rubber.

-
Image
308
- The bay flat roof to the back of the property was the worst one, needed etc timber before we could continue with this roof.

-
Image
309
- As you see we fitted Firestone rubber upon the roof, makes it look a lot better.

-
Image
310
- The after photo here once the Firestone rubber fitted with wall trim, corners etc to complete this in full.

-
Image
311
- But as you see, we completely transformed it , and the customer happy with all three roofs completed by me and my team.

-
Image
312
- Richard in Stourbridge wanted new fascias installed, to the back, front and side of his home.

-
Image
313
- Before we fit new fascias etc

-
Image
314
- All materials laid out and ready for the installation.

-
Image
315
- Finished photo showing the back of the property, please check my reviews out.

-
Image
316
- To see my lads working on the job in hand installing the fascias etc

-
Image
317
- Finished photo of the new Fascias, soffits, guttering, down pipes, high and low level, along with hedgehog installed in the guttering to prevent leaves from the tree over hanging the property.

-
Image
318
- We have Harun’s extension to the back of his property, he wants new ridges fitted.

-
Image
319
- We also cleaned all the moss from the tiles upon the extension.

-
Image
320
- The end result once we installed new ridges with the dry fix system upon the ridges.

-
Image
321
- Photo to the right side showing off the new ridges that have been fitted in the dry fix system, no more mortar, membrane, batons, ridges then mechanically fitted down.

-
Image
322
- A new Velux window installed to the back of his roof within the Wolverhampton area.

-
Image
323
- Customer here requested us to remove his black round guttering in Wolverhampton.

-
Image
324
- Some previous company installed guttering but unfortunately not to the current standard.

-
Image
325
- Me lads completing the guttering change for the customer in Wolverhampton, received a lovely review from Keith.

-
Image
326
- New black square guttering installed just to the front of the property.

-
Image
327
- Firstly we had the Asbestos from the roof, ready to install a new torch back felted roof.

-
Image
328
- Asbestos removed, 18” osb boards being fitted

-
Image
329
- 18” osb boards being fitted to the whole of the roof, before the 2ml underlay followed by the Red torch back felt.

-
Image
330
- After the installation of the new osb boards, we fitted new Velux windows to the both sides of the flat roof.

-
Image
331
- Completed photo., Asbestos removed, velux windows installed, along with underlay and Red torch back felt.

-
Image
332
- Completed the front with new black square guttering and down pipes, along with grey dry verge clips to the front gable.

-
Image
333
- Property here wanting new guttering along with grey dry verge clips to the front gable.

-
Image
334
- Also at the back he currently has rosewood guttering and down pipes, we have no in the next picture changed them to …….

-
Image
335
- Finished at the back of the property with new black square guttering and down pipes.

-
Image
336
- Extension we re-roofed with the dry fixed ridges, now the scaffolding is completely down.

-
Image
337
- Lovely photo of the back of the extension now scaffolding is down.

-
Image
338
- We have an extension here in Walsall to re roof with Red Rosemary small tiles, followed by new guttering to the extension and the house along with down pipes.

-
Image
339
- We removed the old batons, installed new breathable membrane and Laths, along with new eps trays.

-
Image
340
- Once the membrane and Laths have been installed, we shall then install new leading to all sides of the extension, using code three and code four leading.

-
Image
341
- Photo to the back of the property, showing tiles have been installed, awaiting to fit the dry fix system to the hips along with hip trays before the new ridges are installed.

-
Image
342
- A lovely completed photo here of the front of the extension, we also fitted new black guttering and down pipe to the extension after the re-roof.

-
Image
343
- Another completed photo to the front right, we shall update a photo once the scaffolding has been taken down.

-
Image
344
- Close up photo here showing the new ridges that have been installed in the dry fix system.

-
Image
345
- You can in this photo the end result of all the work we completed on Karen’s house. White fascias all round, new ridges in the dry fixed system, cleaned moss from the roof, and fitted two brand new gardens to the left/right of the house.

-
Image
346
- Before photo of Karen’s house to the side before installing new whites fascias etc

-
Image
347
- Another photo of the high gables awaiting new white fascias etc

-
Image
348
- New white fascias etc fitted to the back and side of the property..

-
Image
349
- Here is a nice side view of the property we completed in full.

-
Image
350
- Here showing the new fascias and soffits installed.

-
Image
351
- A little dark on the photo because of the time we completed this yesterday.

-
Image
352
- Here is the first photo I did take of Karen’s house in Telford, we were down to remove the brown gutter and down pipes, install new white fascias, soffits, guttering and down pipes, along with two new gates to either side of the property, clean the moss upon all of the roof and extension, followed by new ridges bought and fitted in the dry fixed system, very pleased with the overall make over of this property tbh

-
Image
353
- The chimney here upon one of the roofs we completed in Griffith drive, we did a part re build and then re pointed it, big difference with this, and a very happy customer.

-
Image
354
- The two gates that we removed and installed two new ones, within the final photo you will see the whole job completed.

-
Image
355
- The first property in Griffith drive we installed a new roof for Martin, we also part re built his chimney followed by re pointing the other part of the chimney.

-
Image
356
- Chimney in Stourbridge, we re flaunched this along with new leading that was installed to the gable area.
-
Image
357
- Here we had a very large chimney to be removed in Bilston .

-
Image
358
- The end result, after we removed the large chimney for Leighton, sealed this back up with new membrane, Laths and purchased new tiles.

-
Image
359
- Another angle showing the two chimneys.

-
Image
360
- Photo showing here two large chimneys, before removal of them

-
Image
361
- Finish photo here showing how we have completely removed both chimneys, replaced with new membrane, Laths, followed by re-claimed Rosemary tiles, like for like, lovely finish.
-
Image
362
- Chimney re pointed and lead flashing was completed for Rob in Stourton.
-
Image
363
- These two large chimneys were repointed for Rob along with new leading.
-
Image
364
- Repointed large chimneys in Stourton for Rob.

-
Image
365
- Re furbed chimney in full.
-
Image
366
- Chimney in need of a new re furb

-
Image
367
- Back of the chimney

-
Image
368
- New cowls installed on the two large chimneys that were re pointed.
-
Image
369
- Chimney completed in 2 days with new engineering bricks installed.
-
Image
370
- Chimney had to have new engineering bricks when we re built this chimney so far down, in picture you see how porous the bricks became and broke away
-
Image
371
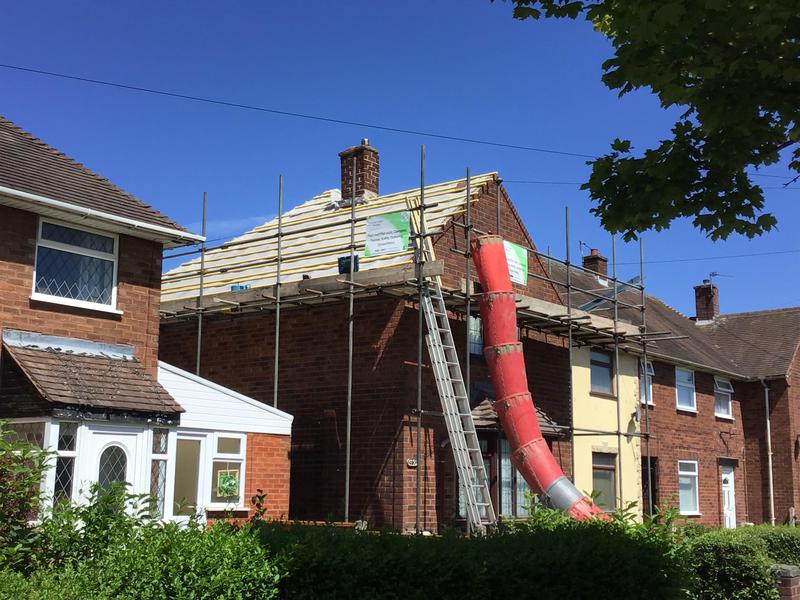
- This is the before photo of the re-roof in Wolverhampton for Alex, you will notice the chimney, this will also be removed.

-
Image
372
- New roof just completed here along with white fascia, soffits, guttering and down pipes.
-
Image
373
- Big job we started here in the Wolverhampton area.

-
Image
374
- Regarding this house I was contacted via Trustatrader where as my customer requested me and my team to re roof her whole house along with three chimneys removed.

-
Image
375
- Anita’s property in Birmingham, installing new membrane and Laths.

-
Image
376
- New breathable membrane and Laths installed for Anila.

-
Image
377
- We installed new breathable membrane and Laths, we then installed the original tiles back on for Anila

-
Image
378
- Jaquis property here we changed her guttering for new to the front and back of her property.

-
Image
379
- Completed photo of the house in Griffith drive, just awaiting for scaffolding to be removed.

-
Image
380
- Back of the property in Griffith drive, completed roof and new fascias

-
Image
381
- Front of the property before we stripped it down ready for a new installation.

-
Image
382
- Front of the property installing this with new Old English red Marley modern tiles, all to match next doors to the left, after we fitted Dereks too.

-
Image
383
- The back of Johns property, third re roof we completed in Griffith drive

-
Image
384
- Another photo to the front of Johns house, completing the font of his house before we installed the fascias too.

-
Image
385
- Here if the end result of the chimney we also completed for the customer with re build and re point when re -roofing his home.

-
Image
386
- Pre photo of the chimney we are about to remove in full in the Bilston area.

-
Image
387
- This is the second re-roof we completed in Griffith Drive, Wolverhampton. Customer choice the Old English red Marley Modern flat large tiles.

-
Image
388
- Photo to the side of the property, dry fixed ridges also fitted, along with new leading around all four sides of their chimney.
-
Image
389
- On this photo we did have to use the neighbours driveway for the Bumpa heist, which helps transport the tiles to the top of the scaffolding, luckily I had also sold to the neighbours and will commence with their roof 15th Aug.

-
Image
390
- Scaffolding, materials, skip, all ready to commence the work required.
-
Image
391
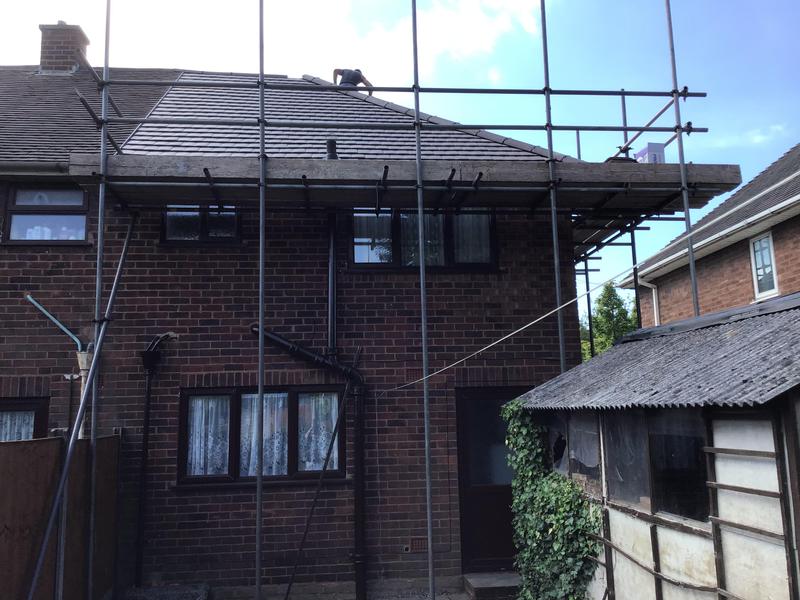
- First pictures of the property we are about to strip down and complete a new re-roof.

-
Image
392
- Photo to the back of the property, pre-instalment.

-
Image
393
- Back of the house showing new fascias etc.

-
Image
394
- Photo from the side of the property before tiles are installed here, we are also fitting to the front gable, down continuous dry verge clips with a centre piece, this will finish the roof off nicely, plus no issues with mortar in the future.
-
Image
395
- Flat roof in Telford that we removed the old felt from for Kully.

-
Image
396
- Another photo showing the before photo of the old felt that needs removing.

-
Image
397
- And here you will see the Firestone rubber that we fitted for her along with wall trims, edging trims etc to complete the job in hand.

-
Image
398
- Another part of the fascias showing part of it being rotten.

-
Image
399
- You can also see here, after we took the old fascias off, we came across some fascias starting to rot, we caught it in time.

-
Image
400
- We also fitted new guttering to Anita’s porch.

-
Image
401
- We took the old black cladding off and replaced it with new white, along with new grey dry verge clips..

-
Image
402
- Lovely finish to the front of the small flat roof we installed.

-
Image
403
- Also tidied the front up for him.

-
Image
404
- A completed flat roof in the Telford area, Kully had a Firestone rubber roof installed.

-
Image
405
- Photo to the rear of the property within the Birmingham area.
-
Image
406
- We fitted new fascias, soffits, guttering to Anita’s home, if you looked closely to this photo you will see that we came across the wooden fascias starting to rot.
-
Image
407
- We have done other work for Jo, and here we fitted new fencing to the whole of her garden.
-
Image
408
- Another photo of the fascias being installed

-
Image
409
- Side photo of the completed re roof within the Wolverhampton area.

-
Image
410
- Lovely photo of the completion of the new re-roof we completed within Wolverhampton, along with the chimney being part re built then re pointed and new leading around the base of the chimney.

-
Image
411
- Fencing here along with a new gate also installed.

-
Image
412
- Also to the back of the garden.
-
Image
413
- Fencing at the back of the garden.

-
Image
414
- You see how they have taped this up.

-
Image
415
- Photos of the fencing and property within the Birmingham area.

-
Image
416
- Another photo showing how this had been fitted wrongly and asked by Mohammed to put this right.

-
Image
417
- We have here a small area that has been felted but not in the correct way

-
Image
418
- Photo from the side of the property upon installation.
-
Image
419
- Tiles on the scaffolding ready to be installed followed by the membrane and Laths.

-
Image
420
- We shall install also valleys and bonding gutters within the installation.

-
Image
421
- A re-roof we shall be installing within the Wolverhampton area.

-
Image
422
- We have installed smooth brown Gemini tiles to the customers choice.
-
Image
423
- A re- roof we started to install in June in the Stourbridge area.

-
Image
424
- Old English red tiles the customer choice for her roof.

-
Image
425
- Completed re-roof before we removed the scaffolding where we shall attach a further photo to my customers review.

-
Image
426
- Some fencing work one of my team members completed couple of weeks ago in the Birmingham area.

-
Image
427
- We fitted feather edge.

-
Image
428
- Jo had fencing to the one side and to the back of the garden.

-
Image
429
- New gate also fitted

-
Image
430
- Back of the garden showing here

-
Image
431
- A new back door was fitted for this customer in the Telford area.

-
Image
432
- The back door also showing here.

-
Image
433
- These photos are showing the old fencing that has been there for around 50 years

-
Image
434
- All so showing the old fencing for Jo

-
Image
435
- The completed photo of the re-roof we installed in the Stourbridge area in June .

-
Image
436
- We installed Old English red tiles to the semi detached house here.
-
Image
437
- Photos as we are going through each day with our installation.

-
Image
438
- New re-roof in Stourbridge we commenced in June

-
Image
439
- New fascia and gutter was also installed to this flat roof, to complete the job in full.

-
Image
440
- Lovely photo of the Firestone rubber roof we installed in Albrighton

-
Image
441
- Felt removed, now we shall re board it with OSB boarding, followed by the rubber that shall be lay in one.

-
Image
442
- We removed the old felt upon this roof that had been down for a few years, to the point it was breaking away in our hands.
-
Image
443
- Photo here showing where we removed the part of the canopy to the left because it had starting to droop..

-
Image
444
- Customer decided for us to remove the left side of the canopy rather than re build it.
-
Image
445
- Canopy removed.

-
Image
446
- Photo here of broken and missing ridges to the back of the house.

-
Image
447
- Six sided roof re-installed with Smooth grey Marley Mods, three large chimneys removed, five flat roofs in all fitted with new grey torch back felt, two front bays, large garage, former roof back of house, and the front porch flat roof, all completed by ourselves.

-
Image
448
- Front photo also of the poor ridges with mortar falling out.

-
Image
449
- Lovely photos of the end results, where as we installed new Antique ridges in the dry fix system.
-
Image
450
- Photo after the scaffolding had been removed, all ridges replaced and installed in the dry fix system.

-
Image
451
- Scaffolding needed for the roofer to remove the old cladding before the installation here of the cladding.

-
Image
452
- Finish photo, new white cladding installed along with new fascias, guttering, lovely finish.

-
Image
453
- Front of house here in need of new cladding.

-
Image
454
- Back of property before new Fascias, soffits installed in Telford.
-
Image
455
- Photo to the back of the house before we installed the tiles, chimney has been removed.
-
Image
456
- We started the back of the property first, because we also removed the chimney.

-
Image
457
- Another fascia and soffits job we completed today, all in white square.

-
Image
458
- Before photo of a property in Telford before the installation of new Fascias
-
Image
459
- Completed photo at the back of the house with new white square Fascias and soffits
-
Image
460
- The finished result … the guys did an excellent job on re roofing this large house in the Wolverhampton area.

-
Image
461
- The customer in question is happy with our work and now requires us to install five flat roofs in all, pictures will follow with the end results.

-
Image
462
- Picture from the back of the house, completed with a new roof, chimneys removed, the extension didn’t have new tiles because it had been done previously.

-
Image
463
- Fascias stripped back here, we also needed to replace the wooden fascias because they were actually rotten underneath.
-
Image
464
- Before photo at the back of the property before new fascias are installed.
-
Image
465
- Front of the property awaiting new fascias to be installed, photos to follow
-
Image
466
- Lovely finished result here, replaced wooden fascias to the front only along with new fascias, soffits, guttering and all down pipes, front, back and the porch.

-
Image
467
- You have a before photo here awaiting scaffolding, to have a complete new roof

-
Image
468
- Property at the back before the re-roof

-
Image
469
- Photo taken today after the scaffolding has been removed from the re-roof we completed in the Albrighton area.

-
Image
470
- Lovely photo of smooth brown Major Ludlow tiles installed upon the roof, along with the ridges in the dry fix system, awaiting scaffolding to go down to take a full on photo

-
Image
471
- Installation of a new slated roof in Codsall for Margaret, we removed the old slate, they wanted to keep it in line with the other houses on the street, also having Slated roofs.

-
Image
472
- We were contacted in regards to the extension in need of new Soffitts, before photo.

-
Image
473
- Finished photo here of new Tongue and groove soffits fitted on all four sides of the extension along with new guttering to the back of the house.

-
Image
474
- Back of the extension showing new Soffitts along with new guttering and down pipe.

-
Image
475
- Another company hadn’t completed the job to the customers requirements

-
Image
476
- You can see here too how they had left this.
-
Image
477
- Completed this to a standard that my customer required after the last company had left the job half done.

-
Image
478
- We re-installed new black square guttering and down pipe in Worscester.

-
Image
479
- Before photo, we are going to install new ridges in the dry fix system, also new leading on the four sides at the base of the chimney.

-
Image
480
- Also on the back we applied new leading on the four sides of the chimney along with a small re-point on the top part of the chimney.
-
Image
481
- Lovely result we have here showing the new ridges installed and the chimney re-leaded.

-
Image
482
- Finished photo too of the back of the property.

-
Image
483
- Lovely finished photo here showing the transformation of the new white fascias.

-
Image
484
- You have a before photo that we shall be installing new white Fascias, guttering and a down pipe.
-
Image
485
- Also before photo before we installed the new fascias.

-
Image
486
- Finished photo, what a difference it makes to my customers Jane Cadman and Claire who contacted me from Trustatrader.

-
Image
487
- You see here Sally had damp issues and water ingress coming through from her dorms flat roofs above the garage

-
Image
488
- We stripped the old felt, installed new red torch back felt, followed by new boarding along with white fascias to complete the job in full.

-
Image
489
- Large Fibre glassed roof completed today, we also fitted new white fascias all around the flat roof along with black guttering to the far back of the roof.

-
Image
490
- Photo here as we were completing the roof in full, review will follow for this work by Anu my customer.

-
Image
491
- The fibre glass roof needed a complete structure timber rebuild, we also installed a small window enclosed in the photo to the centre of the roof.

-
Image
492
- My team are removing the old fascias etc around the porch first ready to install new fascias, soffits, guttering upon Jos house, she was very happy, awaiting her review.

-
Image
493
- A lovely fascia, soffits and guttering in white we installed today for Jo, here is the end result at the front of house.

-
Image
494
- Before and after photos with the new white fascia, soffits and guttering installed for Jo, review will follow.

-
Image
495
- Before and after photos of the back of the house, where there wasn’t any soffits here at the back of the of the house.

-
Image
496
- Another job we have completed for Jo, new porch door, in-fill and her front door has been changed.

-
Image
497
- She had a brown wooden door for 20 years, we changed this earlier in May along with the Porch.

-
Image
498
- Jo is happy with the work we completed for her, once again a lovely review received.

-
Image
499
- Above the Canopy/Porch area are also two flat roofs that we shall be installing once the scaffolding is down, we are to install them with the Firestone rubber, photos are in my TrustaTrader account, please view all my photos.

-
Image
500
- This bungalow was next door to the job we were installing the dry fixed ridges to the top of the roof, this is the second job for Olivia.

-
Image
501
- Lovely bungalow of In Birmingham … the top ridges we replaced with new brown ones, also in the Dry fix system.

-
Image
502
- We had previously installed the flat roof to the right, photos from Polycarbonate to a Firestone rubber roof along with timber for Olivia, this is her second job with us, please read reviews.

-
Image
503
- Photo of the back of the bungalow in the Birmingham area, showing off her ridges.

-
Image
504
- Here you will see the front of the property where we installed brown new ridges on top of the main roof with the dry fix system, lovely photo.
-
Image
505
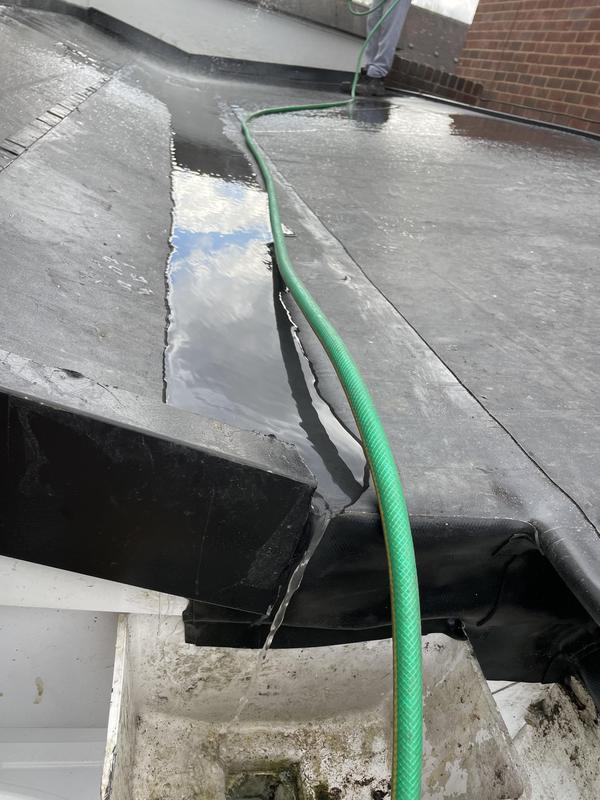
- The roofers got the hose pipe out for Mark and Derek to clean of the excess dust etc after we completed the job in hand for them, their review will follow.

-
Image
506
- Photo of the back of the neighbours house that also had new dry ridges installed in the dry fix system, we also changed the leading around the base of his chimney.
-
Image
507
- Their Canopy, grey in colour, was different to the brown tiles upon the main roof, we had to also replace some of the Major Ludlow tiles to the canopy because they were breaking when we removed the old ridges.

-
Image
508
- Here you have the other end of the canopy, where we installed new ridges in the dry fixed system.
-
Image
509
- You can see some of the new tiles we has to replace because the mortar when removed was bringing some of the tiles up and when the roofer walked in the tiles they were pore enough to crack.

-
Image
510
- Photo after scaffolding has been taken down but we had to have a little more scaff under the canopy so we could install new ridges here in the dry fix system, Because we came across issues here,

-
Image
511
- Another lovely job in Wolverhampton, bungalow here we installed the new dry fix system to the seven hips and three tops … the canopy to the front is being completed Tuesday.

-
Image
512
- Photos to the back of the bungalow showing the ridges in the dry fix system.
-
Image
513
- The before photo of this very well presented bungalow, Chris wanting his original ridges changed from mortar to the Dry fix system.

-
Image
514
- The right side of the bungalow at the back, besides installing the new dry ridge system, we also changed the leading around the base of the chimney.

-
Image
515
- The small flat roof we also installed with new red Torchback felt, this was to the front of the bungalow next to the canopy, it hadn’t been done for a while and the wood underneath was old.

-
Image
516
- Another satisfied customer happy to advertise our board, to his was only a small job installing a couple of tiles and one ridge that had fallen off with the bad winds.

-
Image
517
- This property was recently bought by Liz, she wanted us to do all home Improvements, involving a Large driveway, Patio, Firestone flat roof, new Fascias, soffits, guttering, down pipes, all photos are within my Trustatrader.

-
Image
518
- Regarding this house in the Aldridge area, Liz started with her Patio, we then did her driveway, followed by her flat roof installed with Firestone rubber upon her garage and extension, we then did what you see within the picture, fourth job fascia, soffit and guttering, this job we were so happy with as the customer hired us to complete the house that she bought only last year within her budget, Our fitters done me and the customer proud, if you scroll near the bottom of our pictures you will see the before photo of this property after the driveway was completed.
-
Image
519
- Completed job today on the house for Johnathan, TrustaTrader customer.

-
Image
520
- Finished photo of the work we completed on Johns home, he contacted us thro Trustatrader, scaffolding down, awaiting skip removal, I shall take further photos on this home from completion.

-
Image
521
- Back of the house completed with new white fascias, soffits, guttering and down pipes to the four sides of there home along with the porch are that also goes around to the right side of the house.
-
Image
522
- This is the before photo of the bungalow, please look above and you will see how different it does look after we installed the new ridges and applied the dry fix system.
-
Image
523
- Cladding to be installed here, these are before photos, of what it looks like now to when completed.
-
Image
524
- New cladding that was installed underneath along with new all new fascias, soffits, guttering and down pipes.
-
Image
525
- Flat roof also to be installed Friday when scaffold is taken down, this shall be installed with rubber for Johnathan to the right side of his canopy area of the house.

-
Image
526
- The final part of the house below, Firestone rubber fitted to the roof on the right, happy with the results.

-
Image
527
- Here on the back of the bungalow we completed changed all leadwork around the chimney. Brian was happy with the outcome of his roof.

-
Image
528
- Before we commenced all of the work for Brian and Jane
-
Image
529
- Good choice of ridges used on this bungalow, complimenting the slate tiles upon the bungalow, we also fitted covers on the chimney in the middle along with new leading around both chimneys.
-
Image
530
- Lovely finished photo here, of new smooth grey modern ridges installed in new dry fix system, rather than the round ridges, these compliment the bungalow, Brian found me on TrustaTrader.

-
Image
531
- Before photo of a new re-roof we shall be installing along with re-leading the chimney base.

-
Image
532
- The end result of the new old English red tiles installed to the back of the house.

-
Image
533
- Lovely end result of the front of the house, we installed customer was very happy.

-
Image
534

-
Image
535
- The property here .. we fitted new black guttering to the three sides of his home.

-
Image
536
- You see the difference from black to white, on the following photos.
-
Image
537
- Dave wanted new white guttering instead of the round black.
-
Image
538
- Front and back and side of the house we are to change in full.

-
Image
539
- End result … you see how the white fascias, soffits and gutter compliment Daves grey tiled roof, they were very happy with the end result.
-
Image
540
- Photos of this bungalow has sold many other roofs to various customers to be honest, because of how lovely the overall picture looks with the smooth grey small tile, any questions please ask us.
-
Image
541
- Before photos of a house in the Wolverhampton area, customer wanted my company to install new gutters and down pipes, along with roof ridges in the dry fix system, to remove the old mortar from them.

-
Image
542
- Three sided property we installed new black gutter and new down pipes, scaffolding down on completion.

-
Image
543
- We also re-pointed, re mortered his side of the chimney front and back and to secure the separators that are installed between his house and the neighbours to the left, at the customers request.

-
Image
544
- Here also you will see the bay window was stripped from the old felted roof and the lads re installed a new Firestone rubber roof, to the front bay.

-
Image
545
- Large detached home installed with the smooth grey Ludlow tiles in dry verge not the wet fix.

-
Image
546
- Front of the house with new Fascias and soffits.

-
Image
547
- There were a few things we successfully fitted for the customer in question, we where very happy he contacted us and off course he said he was happy with the outcome.

-
Image
548
- Different styles of roofing tiles.

-
Image
549
- Showing the back of the house with Tongue/Groove soffits installed.

-
Image
550
- A lovely job done here for Donna, new fascias and soffits installed to the front/back of her property, she didn’t want the side of the house done.

-
Image
551
- A picture showing customers the difference between wet fix and dry fix.

-
Image
552
- Detached property completed with new a roof, membrane and Lathe, all materials provided by us and fitted along with new soffits, fascia and guttering which completes the roofline of the property.

-
Image
553

-
Image
554

-
Image
555
- New Lathes and membrane being installed on this property before the installation of there new chosen Tiles.

-
Image
556
- Regarding another customers home, new coping stones to be installed, this is the before photo.

-
Image
557
- Before photo for new coping stones and the ridges on top of the house to be re installed but with a dry fix system, to remove all of the old mortar.

-
Image
558

-
Image
559
- Photos of new coping stones .. continued.

-
Image
560
- Enclosed the new coping stones that were installed.
-
Image
561
- Very happy with the outcome of these coping stones installed front and back of the property.

-
Image
562
-
Image
563
- Previous photo of the Polycarbonate before re installing the new roof, it had been down for quite a few years.

-
Image
564
- We needed to do a complete timber rebuild once we have removed all of the old Polycarbonate sheets

-
Image
565
- We have a Asbestos roof one side, Polycarbonate roof the other .. we had previously installed the Polycarbonate roof with Firestone rubber for Matt.

-
Image
566
- Unfortunately the Asbestos roof had cracked and could not be repaired.

-
Image
567
- Unfortunately we had Asbestos to the right side of the Polycarbonate roof.
-
Image
568
- The original roof of Polycarbonate that was removed.
-
Image
569
- After photo of the Asbestos roof that had been properly removed on site and then re-applied a further rubber roof, to match the original one we did the other side, for Matt

-
Image
570
- Using the customers original ridges on top of his house, remove the old mortar and re place with the dry fix system, much better and most houses are having this installed these days.
-
Image
571
- Lovely overall photo from customers Matt in the Wolverhampton area .. completed Firestone rubber roof installed, using a hose pipe to clean it all down.
-
Image
572
- Lovely customer named Harman and Liz, contacted me through TrustaTrader, his rubber roof was leaking through to the kitchen, you can see the following photos.

-
Image
573
- Here you will see where we have fitted new rubber going completely over the parapet wall, this in turn will secure both sides of the wall from any leaks ever occurring.

-
Image
574
- Previous roofer had not sealed the rubber securely and properly hence leaking within the kitchen area.

-
Image
575
- We have repaired this with correct sealant around the pipe area.

-
Image
576
- Coping stones .. too!

-
Image
577
- Here is showing the other side of the parapet wall, where we have installed rubber in full.

-
Image
578
- Polycarbonate roof we stripped down for my customer Olivia Goff who contacted me via TrustaTrader.

-
Image
579
- After the timber rebuild of the roof, we applied new osb boarding followed by Firestone rubber installed, photo below of the completed roof we completed last week.

-
Image
580
- The completed flat roof we installed in rubber, customers review has been posted out, it shall be updated when received and applied to this photo.

-
Image
581
- Another customer from Trustatrader called in regards to his car port leaking through .. as you see within enclosed photos, rotten wood.

-
Image
582
- This is the second job we have done for Huw, previously we did his ridges and re-pointed half of his chimney, please see his reviews.

-
Image
583
- Matt decided on having it stripped down and re installed with the Firestone rubber, we also needed a timber rebuild once Polycarbonate had been removed.

-
Image
584
- You see in this photo that we had to do a timber rebuild, the wood was wrotten.

-
Image
585
- Finished result for Matt and Jodie

-
Image
586
- White square fascia, soffit and guttering installed to this house, any enquiries please contact us.

-
Image
587
- And as mentioned above you can see the end result of the rubber that we installed, following the timber rebuild, new Osb board fitted, followed with the rubber, lovely finish.

-
Image
588
- Before photo of the old white gutter waiting to be re placed.

-
Image
589
- We are awaiting Donna’s review for the work we carried out on her home.

-
Image
590
- These are the before photos that I do like to show you, as you see no fascias here at all, showing you a close up photo of the back.

-
Image
591
- It took a few days digging the actual driveway out because of the amount of concrete we came across.

-
Image
592
- When we first started by digging up the original tarmac we unfortunately came across more concrete etc underneath the tarmac that then set us back a little.

-
Image
593
- Hardcore down, sand down, we had used the wacka plate upon the sand before the lads then started by laying the blocks in the 45 degrees herringbone style driveway to the customers requirement.

-
Image
594
- Cutting in the blocks.

-
Image
595
- Sand ready to be levelled out then we shall use the whacka plate, as you see within picture, this is now getting it all ready for the blocks to be finally laid.

-
Image
596
- A completed driveway 17th October ….. we installed Marigold blocks the customers choice in colour, very happy with this and off course our customer .. a review will follow this, pictures below are the stages of the driveway.

-
Image
597
- We used the whacka plate again after laying the sand upon the completed driveway.

-
Image
598
- Large house here, we are installing new ridges in the dry fix system, along with new fascias, Soffitts, guttering and down pipes, I also got the lads to clean the moss from the roof and remove the unwanted Ariel’s, all for Johnathan and Jess.

-
Image
599
- We also installed new fencing at the back of the garden, there wasn’t any fencing there at the time.

-
Image
600
- Also before photo before transformed for our customer
-
Image
601
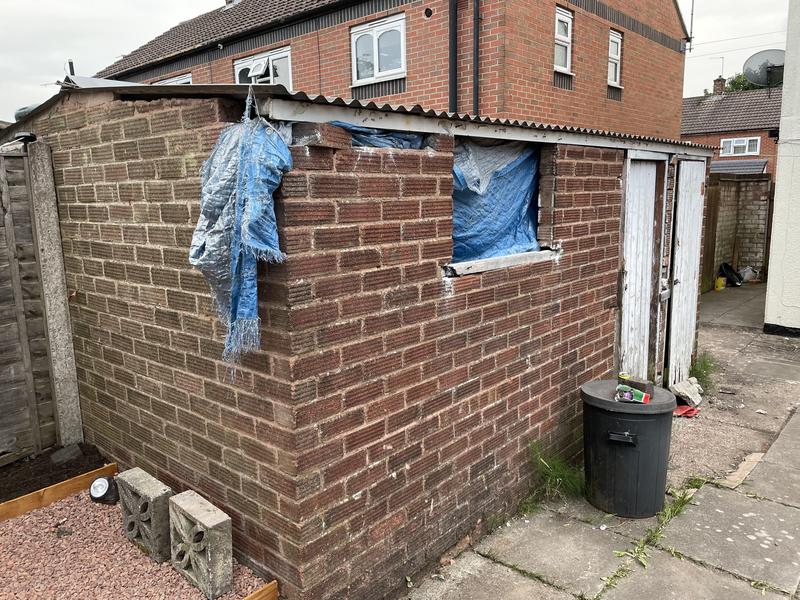
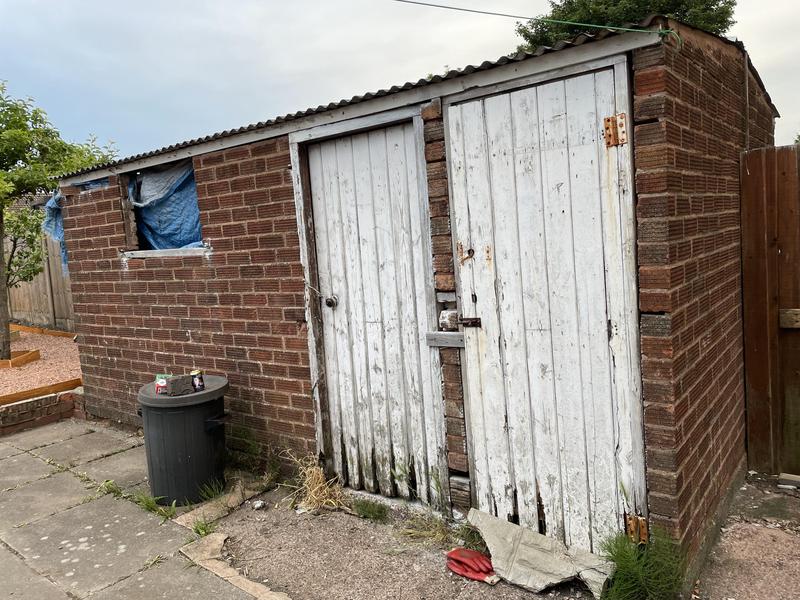
- Before photos of another customer garage/shed that we transformed to the customers budget
-
Image
602
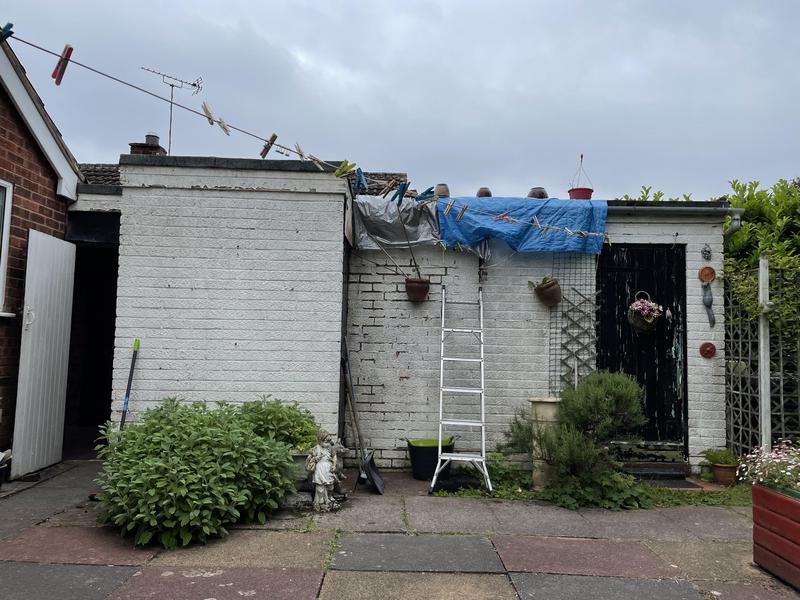
- As you see here the after photo of the transformed photo of the customers garage/shed, she was so pleased with the outcome.

-
Image
603
- Small repair to one of our customers roof, this part had a slight leak, we installed new Torch back felt.

-
Image
604
- After pictures of the felted roof we installed for Sally.

-
Image
605
- The customers garage that we installed a new felted roof along with new white fascias and guttering, you shall see the outcome enclosed within our photos.
-
Image
606
- Re he roof photo before we started to strip it down.
-
Image
607
- Before and after pictures of a felted flat roof that was completed

-
Image
608
- After photo of the felted roof that was installed, before picture is enclosed below
-
Image
609
- As you see here there roof had been leaking for quite a while to the point the roof then started to come down, we also put new plaster board on here after we installed the new roof for Sally and Tommy.
-
Image
610
- The end result for customers Sally and Tommy.

-
Image
611
- Flat roof that was re felted in torchback red felt with part new fascias and guttering to match up with the porch, job fitted in Great barr, review received.
-
Image
612
- Before picture of the flat roof we changed along with new fascias and guttering.

-
Image
613
- Completed fascias and guttering after the new roof was installed.

-
Image
614
- Before pictures, after the installation of the Firestone rubber, we also fitted new white cladding to complete the job in hand.
-
Image
615
- End result, photo out of the neighbours bathroom window, thanx to Chris the neighbour, who we also did some work for.

-
Image
616
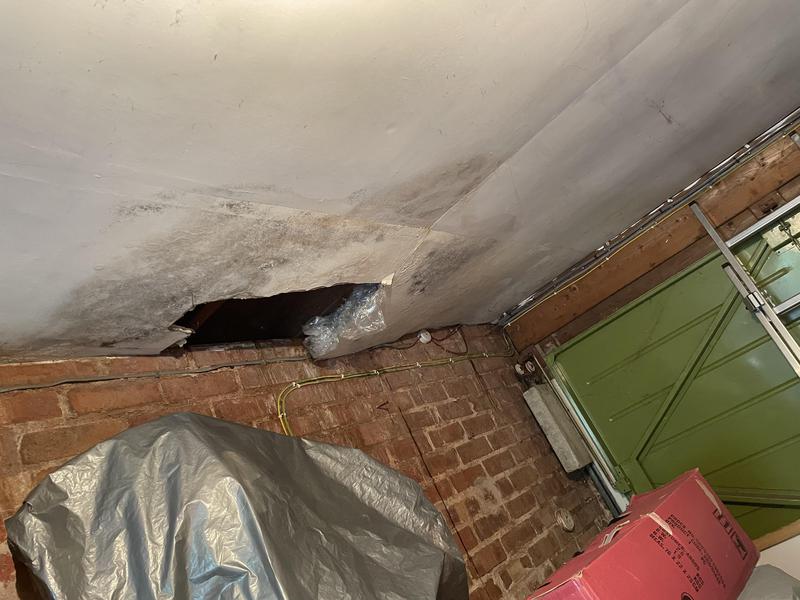
- Main flat roof in the Birmingham area that is leaking, as you see in the next photo, hole in the bedroom ceiling.
-
Image
617
- The leak became that bad it had come right through to the bedroom area. ..

-
Image
618
- Unfortunately in the next couple of pictures you will see that the customer did have some repairs carried out on his roof.

-
Image
619
- Unfortunately the repairs were at a very poor standard, by another company.

-
Image
620
- End result of the new Firestone rubber roof installed, along with the white cladding on the front, in picture.

-
Image
621
- We were called in and as you see clearly we stripped the customers roof and re covered it with new boards followed by new grey torch back felt.

-
Image
622
- Customer very happy with the fitters and he can now relax as he says knowing his roof is now secure.

-
Image
623
- As a result of our work we have now booked in a further 2 roofs, one in the same street and the other round the corner.

-
Image
624
- Matt carter called trustatrader regarding his roof last week.

-
Image
625
- You shall see here the roof was a little worse for wear after removing the felt, it had been left to long and as you see the results.
-
Image
626
- As you see the pooling on top of the roof, the other photo is clearly showing you the underneath as a result of this ponding we’re it had given way and roof came down.

-
Image
627
- The fitter re roofing the whole lot in high performance felt, and as an emergency we managed to install this new roof on Sunday .... happy customer.

-
Image
628
- New roof completed.

-
Image
629
- Old roof, leaking in slightly so the customer decided on the Firestone rubber.

-
Image
630
- New rubber roof installed over front door and bay window.

-
Image
631
- Customer from the Solihull area wanted our services for a new Fibre glass roof.

-
Image
632
- Fibreglass roof it was leaking when we were contacted.

-
Image
633
- New fibreglass roof installed.

-
Image
634
- 5 photos before the installation of new fascias, soffits and guttering on a bungalow that is currently being extended, it was completed today.

-
Image
635
- We started the installation yesterday and finished it off today, customer and myself very happy with the outcome.

-
Image
636
- This is a extension on a bungalow currently being done up by Barrie, he contacted me via my leaflet through his door.

-
Image
637
- Photos before installation of new Fascias, soffits.

-
Image
638
- Photos before the installation of new Fascias, soffits.

-
Image
639
- Please view the next 13 photos inclusive of the one showing the quality of our work installing new fascia, Soffitts, guttering and new down pipes.

-
Image
640

-
Image
641

-
Image
642
- Loved doing this job, how nice it looks from the installation.
-
Image
643
- Customer preferred the Tongue and Groove soffits at the back of the property.

-
Image
644
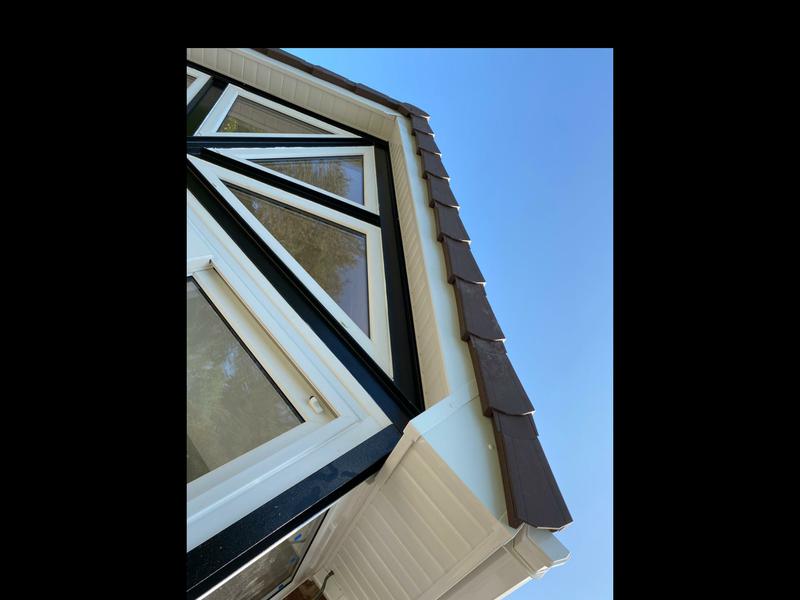
-
Image
645

-
Image
646
- Lovely photos here, on completion.

-
Image
647
- Lovely completed photos from the new white Fascias, soffits, guttering.
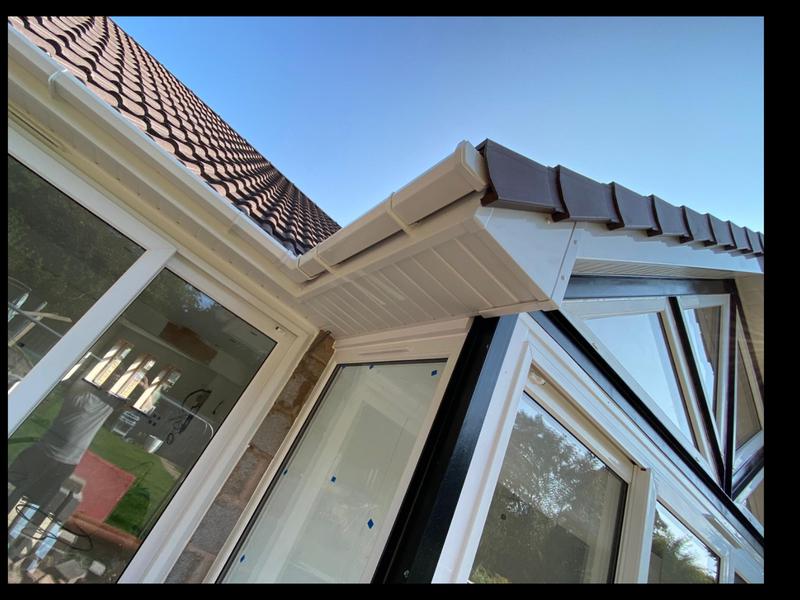
-
Image
648
- Box end.
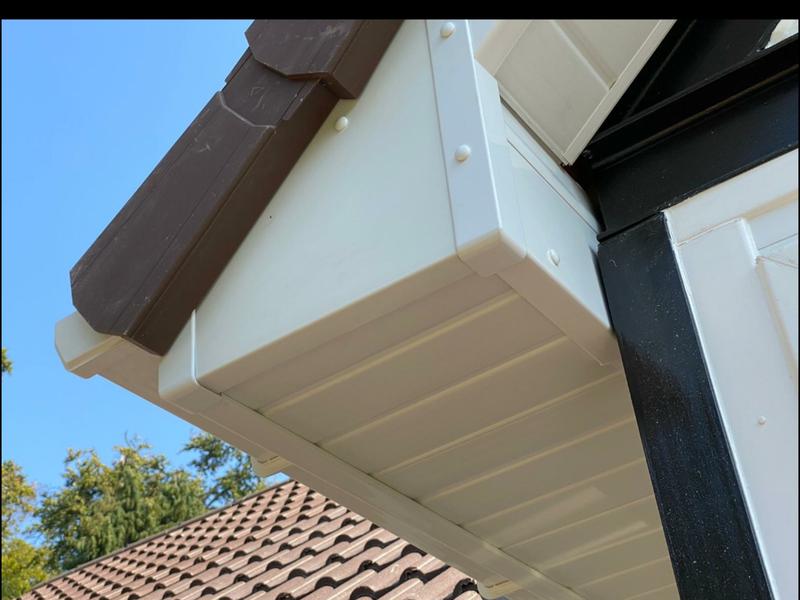
-
Image
649

-
Image
650
- Pictures From the back of the bungalow.

-
Image
651
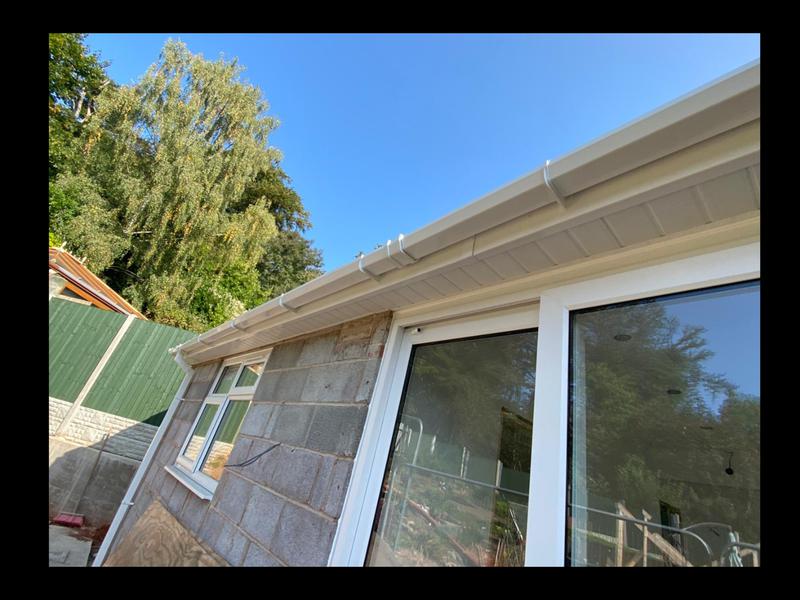
-
Image
652
- And here you see the back door after the installation of the rubber roof with new cladding and doors arriving soon to be fitted.
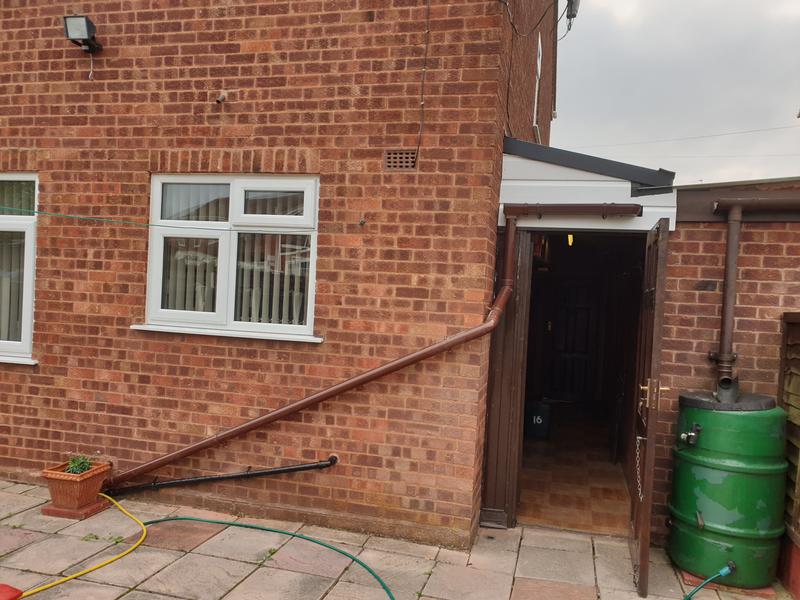
-
Image
653
- And the last photo here before the polycarbonate roofs and the car port roof was taken off.
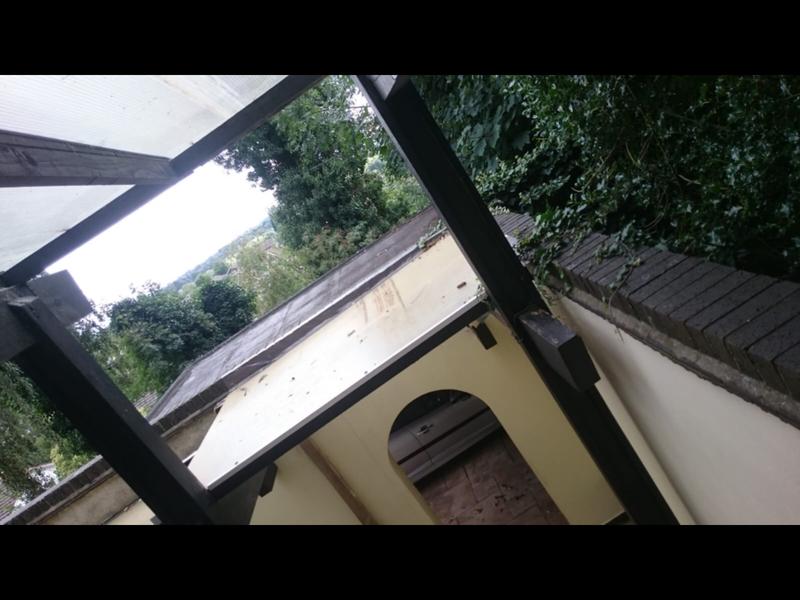
-
Image
654
- This is the front door with cladding above after the rubber roof was installed, new doors are to be fitted in the next 2 weeks.
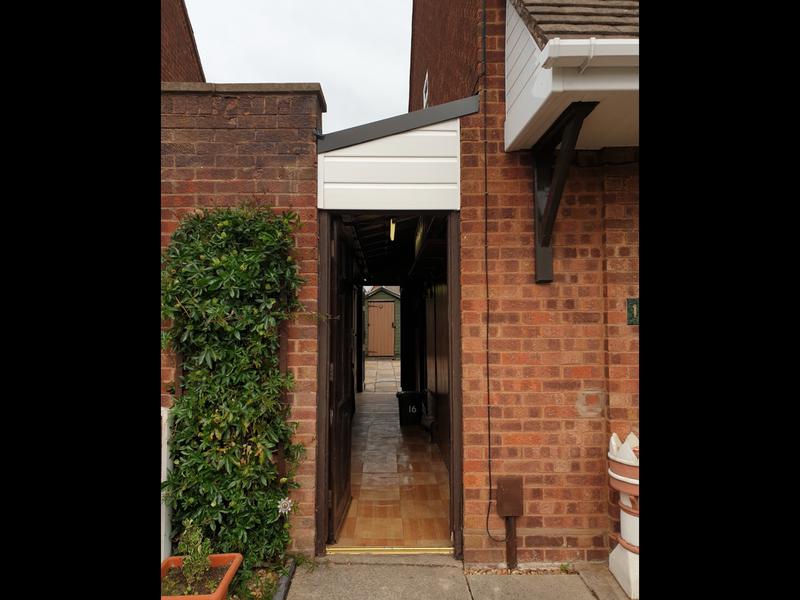
-
Image
655
- The customers back door before any new installation made.
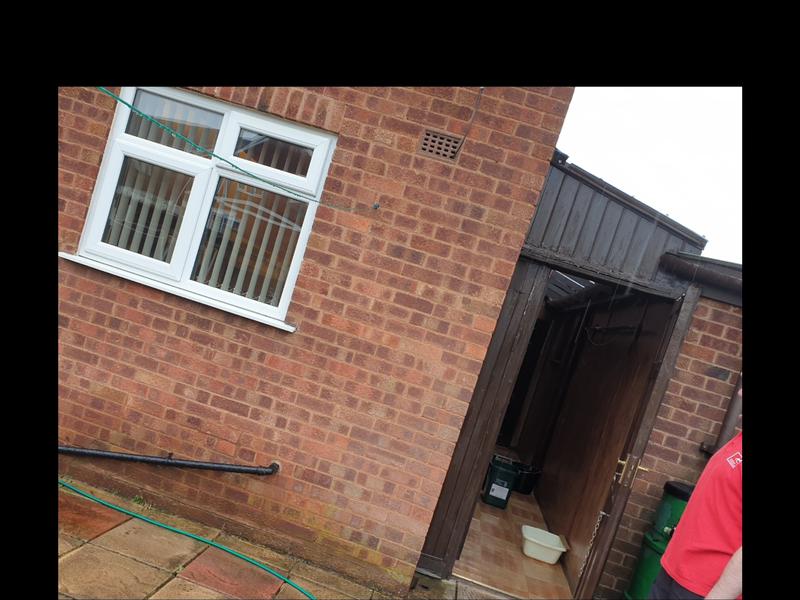
-
Image
656
- This is one of the photos before Andrew had a new rubber roof installed, as you see to the right the picture of his roof currently polycarbonate, but unfortunately leaking through.

-
Image
657
- Another customer Andrew with a polycarbonate roof, he decided on having it changed to the rubber style roofing with cladding above the doors, in the other pictures

-
Image
658
- This photo is the first of 9 in all, customer had 4 flat polycarbonate roofs leading to the last one which was her carport, as you see the age and deterioration of the roofs.
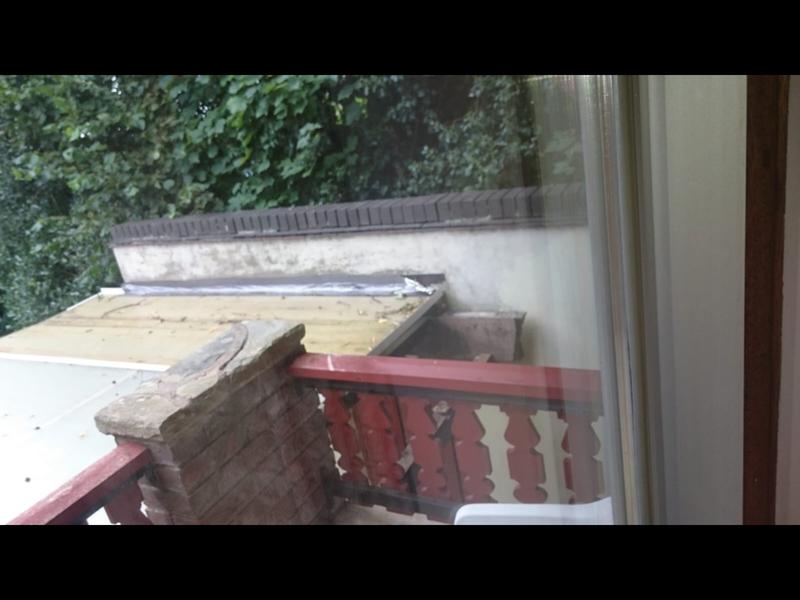
-
Image
659
- Another photo all at different angles.
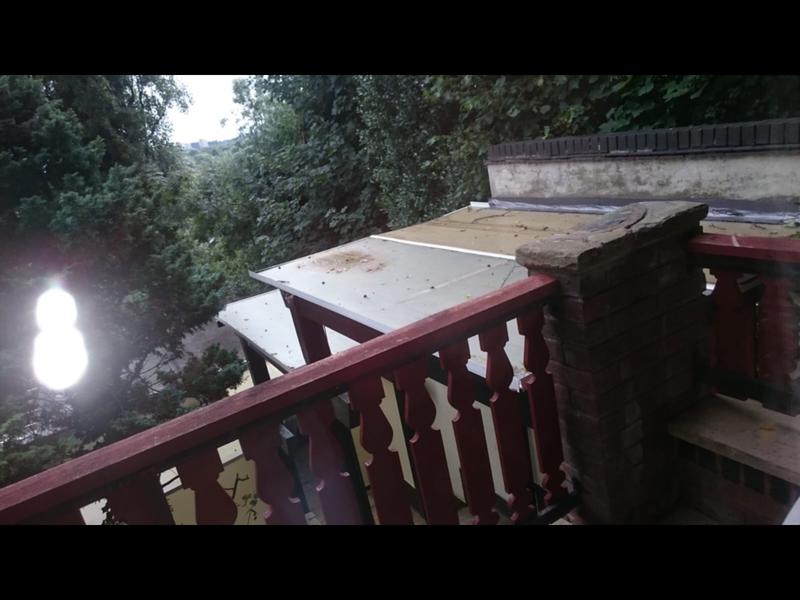
-
Image
660
- Here is a side view of the 5 Firestone rubber that was fitted to all 5 roofs.
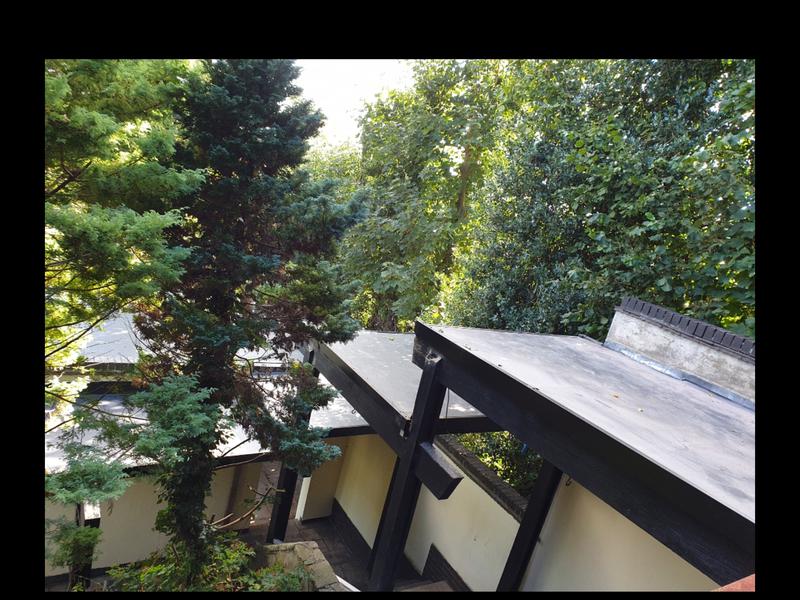
-
Image
661
- A nice view of the tops, customer was happy with the transformation of these and how safe she felt with the falling branches sometimes coming down from the trees.

-
Image
662
- In these 2 images you see how the carport also was fitted with Firestone rubber, Margaret was pleased with the outcome of this.
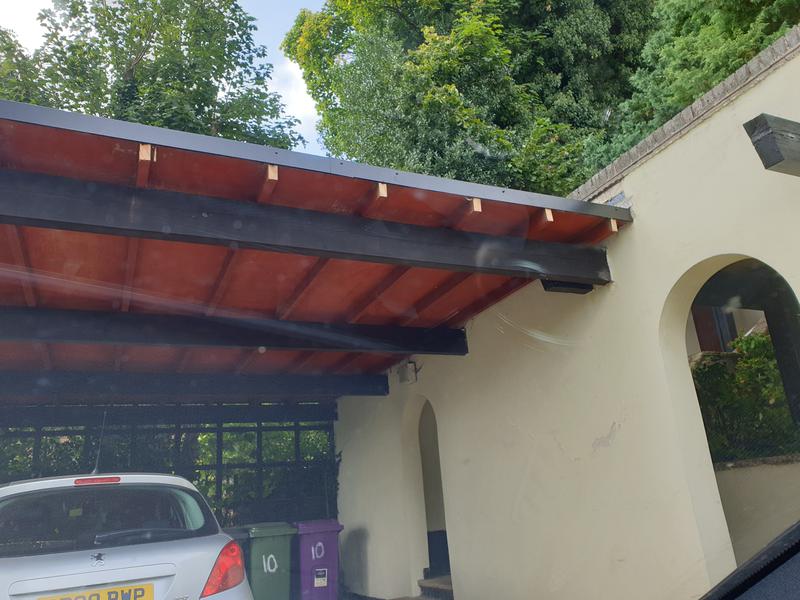
-
Image
663
- Again more security for this customer and how tidy, clean and it helps with the safety of her car of course.

-
Image
664
- A photo I did take underneath the polycarbonate roofing, this was quite a big job done for Margaret in Wolverhampton.

-
Image
665
- Picture too of Debbie's ridge tile that was missing, we completed this job 8th Aug, thankyou.

-
Image
666
- Repairs to Margarets roof back of the house, in 5 places. Happy with the service and a nice review she left for us.
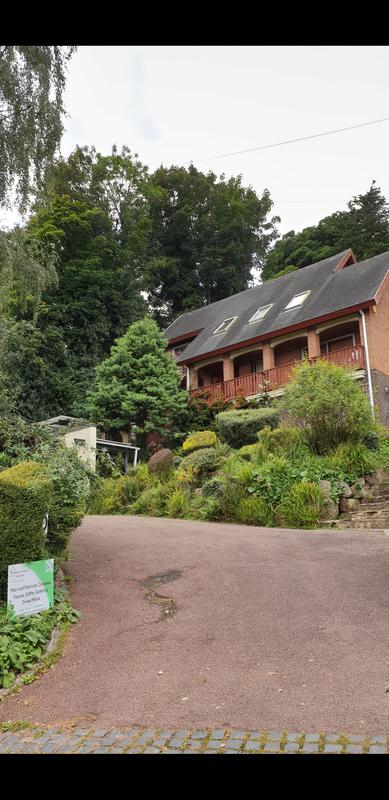
-
Image
667
- Customers extension transformed from Ludlow major tiles to the following picture above being .....

-
Image
668
- An image of the roof being changed from tiles to a Firestone rubber roof .. much lighter in weight compared to Ludlow tiles .... this couple were happy with the work completed.

-
Image
669
- Regarding this image, a customer had part of a tree drop onto her roof and crack some of her tiles, we attended the day she called.
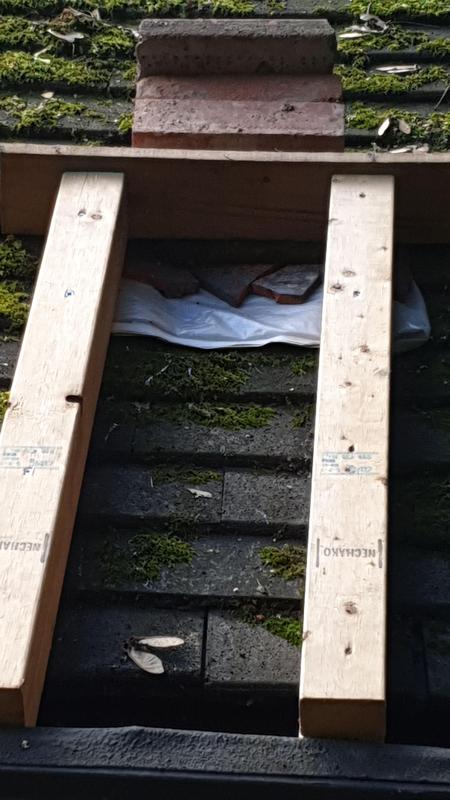
-
Image
670
- First job we completed for Margaret, Part of a tree had fallen on to her home and cracked a few tiles.

-
Image
671
- While we were there Margaret asked us to change the other lose tiles, I went around the house with the roofer calculating all the repairs needed.

-
Image
672
- There were also a few areas upon the roof that needed attention.

-
Image
673
- 1 of 5 pics showing new tiles, recon and original tiles replaced upon this customers roof within pictures.
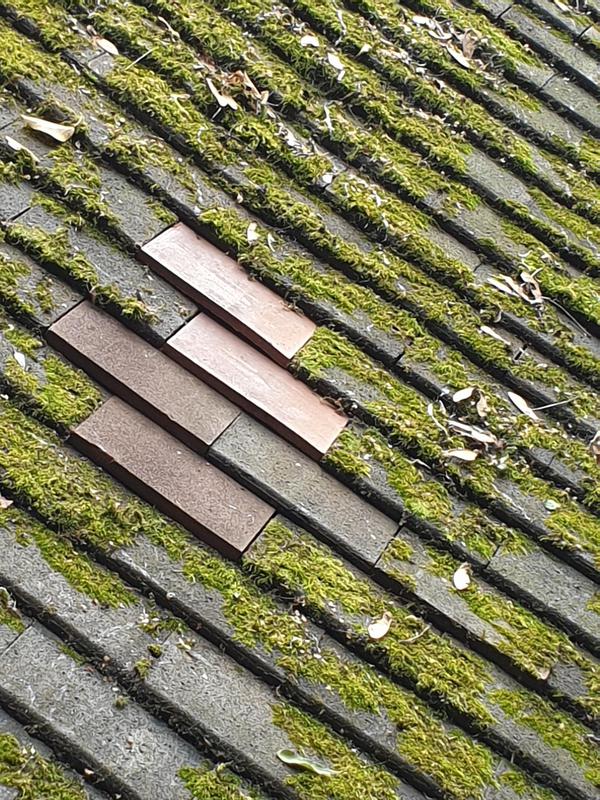
-
Image
674
- However big or small jobs are looked at, quoted and off course considered

-
Image
675
- 3 of 5 - further tiles placed on roof.

-
Image
676
- 4 off 5

-
Image
677
- Last picture, all tiles have been dealt with for this customer today after her call only yesterday morning, she was concerned about the rain with her tiles being cracked so we fitted today for her.

-
Image
678
- Debbie contacted us regarding one of her roof tiles that had fallen off alongside her ridge tile, we reinstalled her tiles back for her.

-
Image
679
- Chris was concerned about the mortar falling on to her car, she had a few missed calls, one part nearly hit her head when falling out of the ridges.

-
Image
680
- Closer look at the hips to the side of the property, you will also see the customers fascia, soffitts that have alot of wear and tear on them due to the age of them

-
Image
681
- Back of the house view before photo of the work we shall be doing for Chris.

-
Image
682
- Following the 3 images you will see the work we carried out starting with new dry ridges fitted in the dry fix system, with new fascias, soffits and guttering.
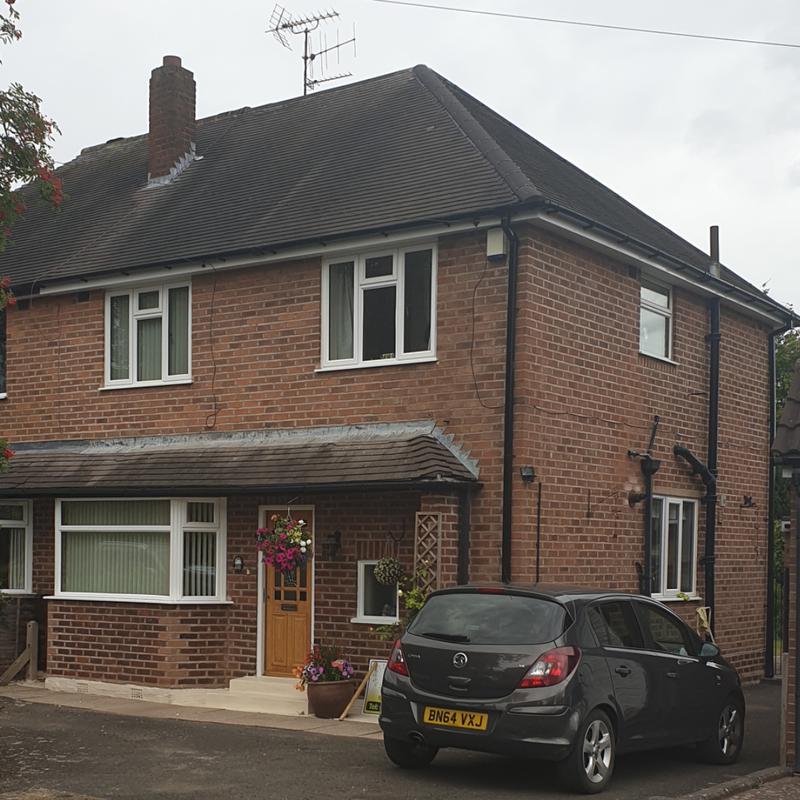
-
Image
683
- Smooth grey Ludlow tiles installed with dry verge stystem rather than wet fix.
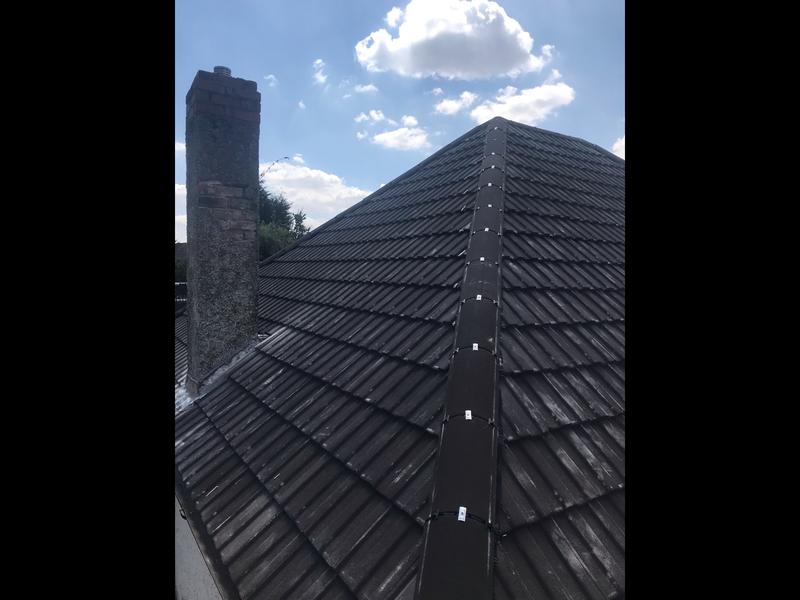
-
Image
684
- In this image you will see the end result of the installation of Firestone rubber to this customers garage/extension, it was washed down as you see to remove foot mark after installation.

-
Image
685
- Fascia, soffits and guttering plus down pipes all new installed for the customer following her dry Ridges installed in the dry fix system, very happy customers.

-
Image
686
- Roof in need of repair, it was leaking through to the wood within the garage, picture to the right of this image, Liz unfortunately had left it to long to have repaired, damaged her Piano within the garage.

-
Image
687
- Underneath the felt roof in need of repair if not a new roof, in this image it is within the garage and extension.

-
Image
688
- Looking at the felt roof that needed changing, you can also see in this image the wood was rotten on the side of the garage/extension so we did replace the wood first before we added white cladding then we installed Firestone rubber to the Roof and extension.

-
Image
689
- Installing Firestone rubber along with guttering.
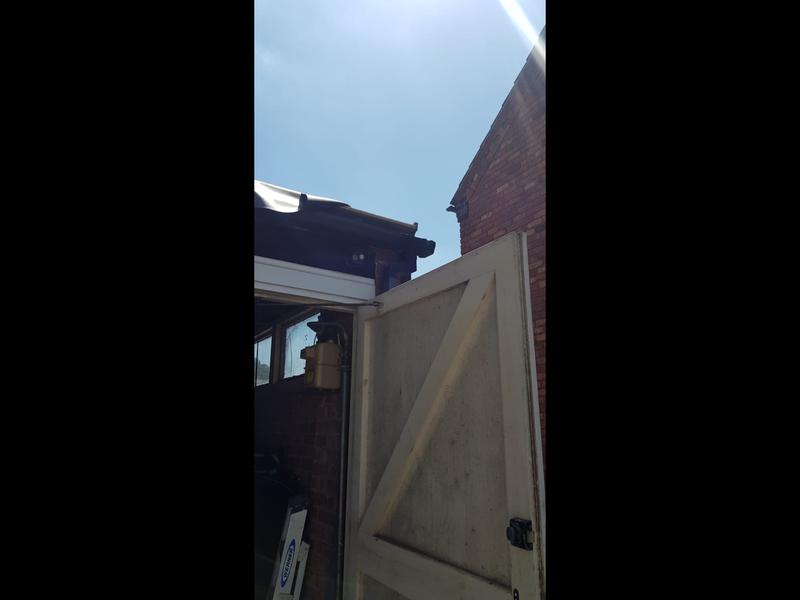
-
Image
690
- Finishing touches to the installation of the roof.

-
Image
691
- Before .....
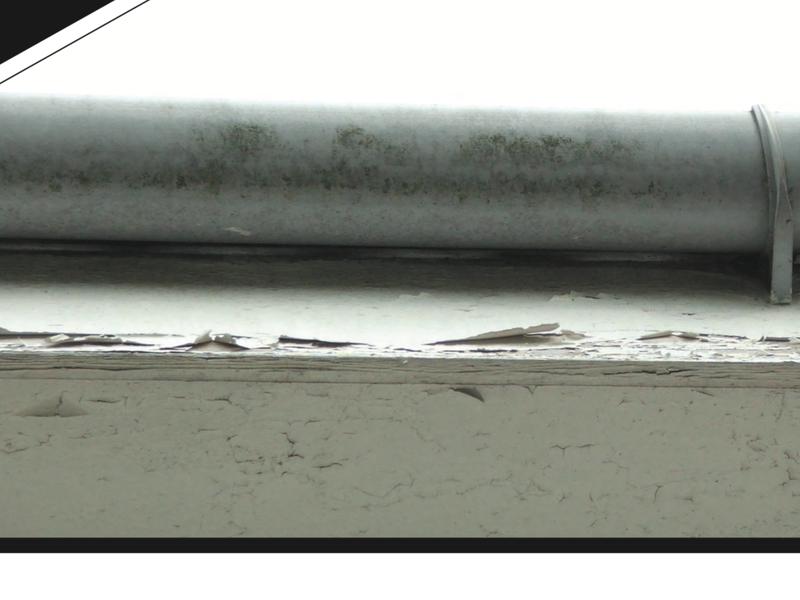
-
Image
692
- Before ....

-
Image
693
- Results of Fascia, Soffitts and guttering being installed after pictures enclosed to the right of old Fascias and Soffitts.
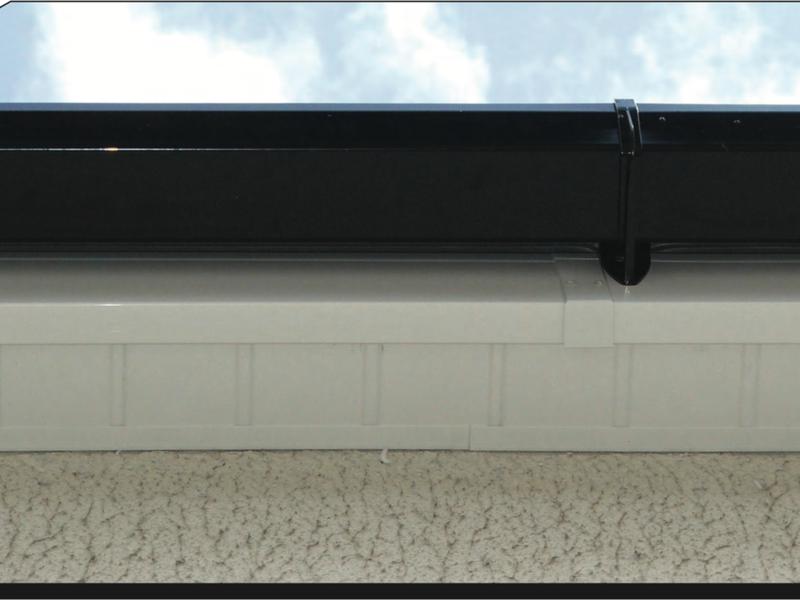
-
Image
694
- How we finish of the installation.
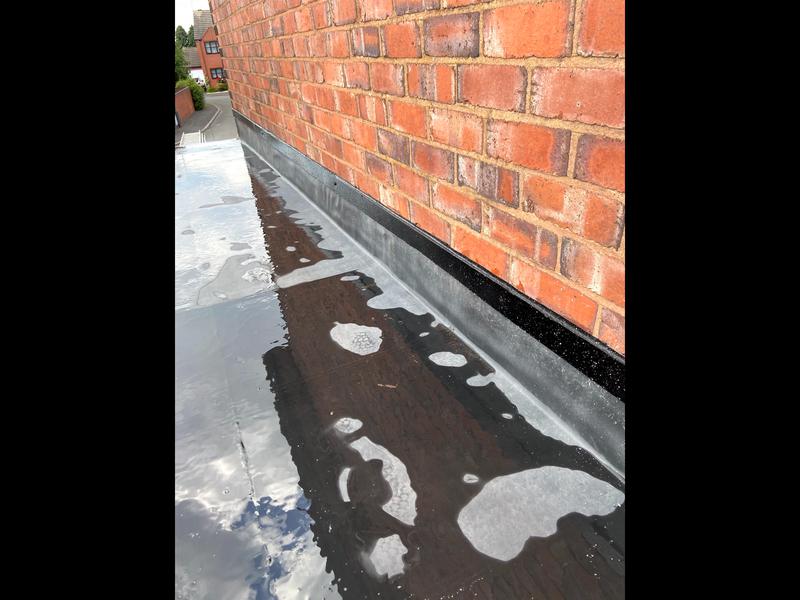
-
Image
695
- Sjj hi owing these before photos of fascias, soffits and guttering in need of replacing, if not replaced it can and will effect your wall cavity from water ingress.

-
Image
696
- Before ....

-
Image
697
- Newly installed Fascia, Soffitts and guttering.
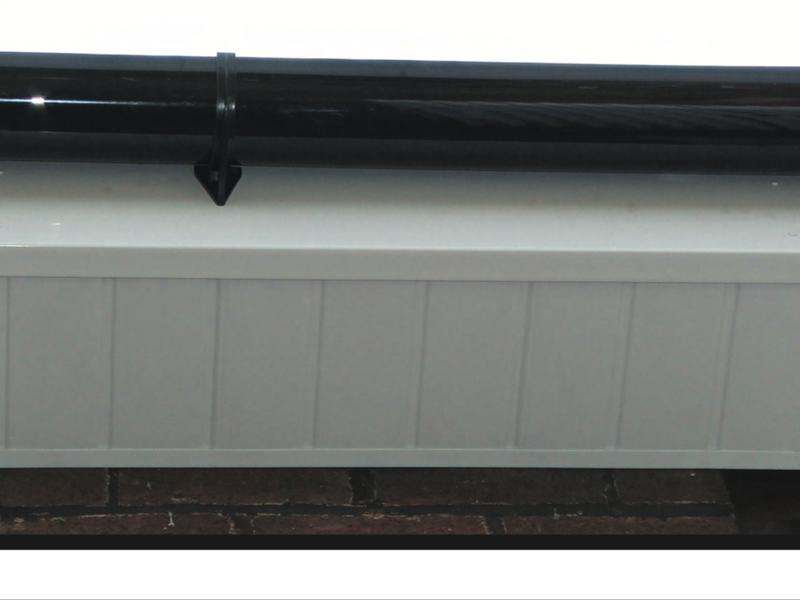
-
Image
698
- Before ....

-
Image
699
- Customers ask us for quotes on rendering there home, granted it looks good, holds value but it can be a little pricy so we do introduce repair and then painting there property so they have 2 options that will then suit there budget.

-
Image
700
- Please request a quote if this is something you are looking into for your home.

-
Image
701
- Rendering.

-
Image
702
- Rendering.

-
Image
703
- Rendering on this property, all enquiries we shall reply too.

-
Image
704
- Enclosed in this picture is a three sided roof completely fitted with smooth grey Ludlow tiles, new membrane and lathes, gable at the front also was within this fit.
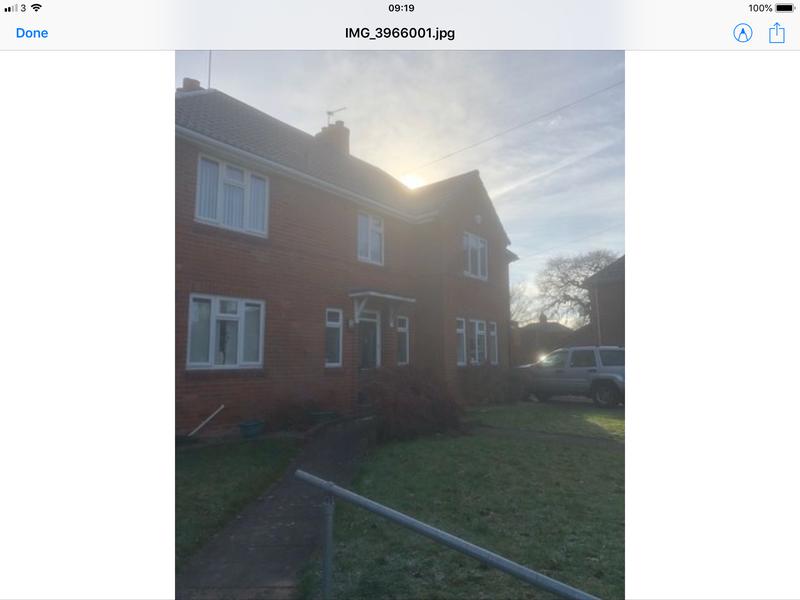
-
Image
705
- Front picture of the three sided roof we fitted with smooth grey Ludlow tiles, membrane and Lathes.

-
Image
706

-
Image
707
- Heavy duty white fascia and square guttering.

-
Image
708
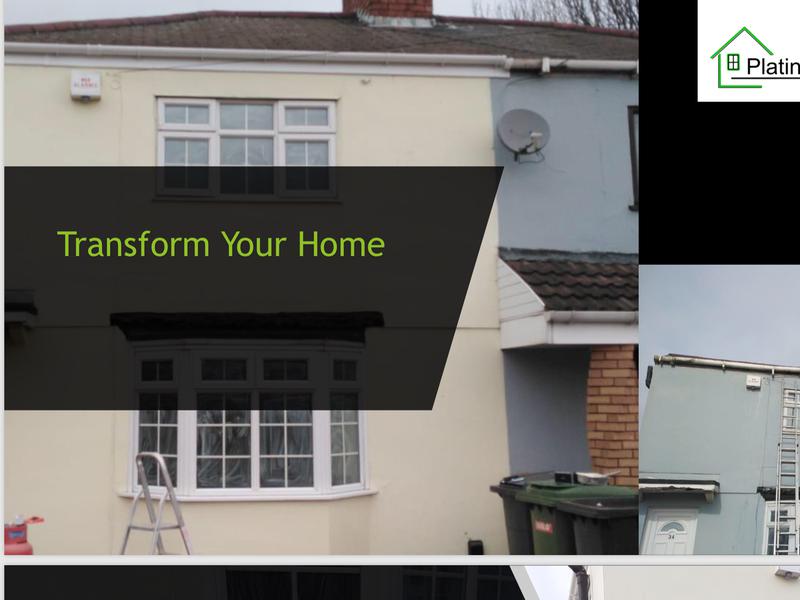
-
Image
709
- White square guttering.

-
Image
710
- Close up to different options for various customers, black square gutter with white (tongue and groove) heavy duty soffit.

-
Image
711
- Side view of the house fitted with new roof, membrane and Lathes.

-
Image
712
-
Image
713
- 3 sided house with front gable fitted with new tiles (smooth grey Major Ludlow)

-
Image
714
- Another house completed with fascia, soffit and white guttering.

-
Image
715
- White guttering alongside cladding to finish it off nicely.

-
Image
716
- Wishin this picture further work had to be carried out because the roof had been left to long before re roofing so we had to do a complete timber rebuild which granted it will cost the customer more money for this with extra materials and definitely more work to be carried out by our fitters.

-
Image
717
- Regarding some roofs, they are older than others as you see the photos enclosed, also the before and after picture that we do like to show our customers as and when we carry out the work.

-
Image
718

-
Image
719
- Our flat roofs are to the customers choice, felt or Firestone rubber, we shall give you a no obligated quote on what your requirements are on the day.

-
Image
720
- The roof in this picture is the porch way as you see the front door, very weathered roof and over 10 years old, we fitted with Firestone rubber as this was what the customer preferred as it does have a life expectancy of around 50 years, you will see the after picture to follow.

-
Image
721
- This is the picture to follow as we fitted Firestone rubber roof to this ladies porch, she had the option of felt or rubber, much preferred the rubber as most customers do these days.

-
Image
722

-
Image
723

-
Image
724

-
Image
725
- Picture of the back of the house to the right hand side of the scaffolding, showing different angles for our valued customers.

-
Image
726
- Again the side view after completion.

-
Image
727
- A view from the corner showing how the side of the house looks.

-
Image
728
- This is the right hand side of the house where we are half way through fitting white fascia and soffit.
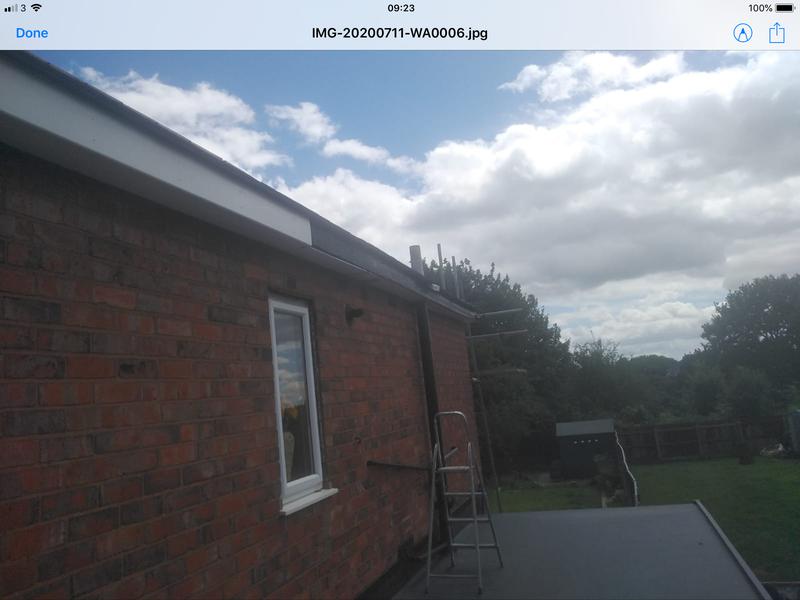
-
Image
729
- As you see on this picture of the right hand side of the house, the before picture, it’s original fascia and soffit, the wood is start to detoriate so we fitted new.

-
Image
730
- Three sided house we completed with white fascia, soffit and guttering the weekend for Liz, also cladding underneath the bedroom bay window, you will see before and after pictures on here.

-
Image
731
- As you see in this picture, the back of the house fitting the table and fascia, soffits, plus you can see the end result too of the side of the house.

-
Image
732
- A closer look of the side of the house were we fitted fascia and soffit.
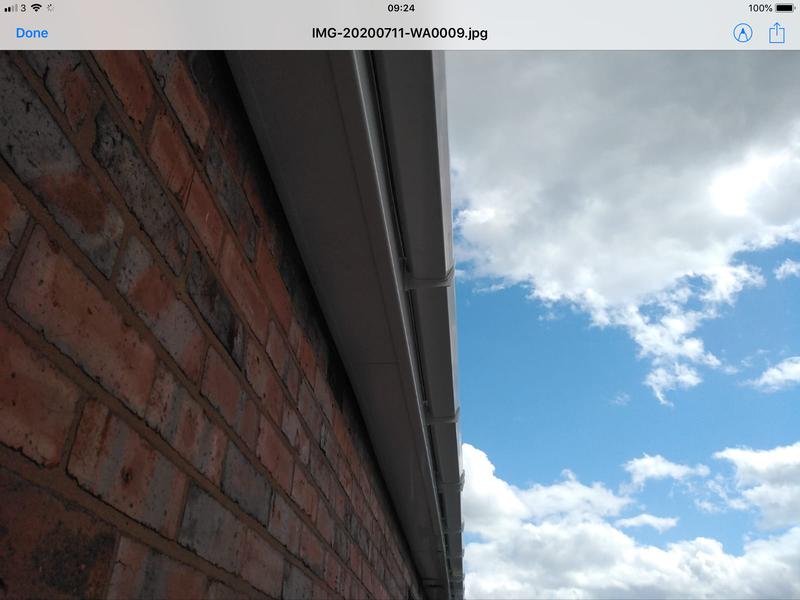
-
Image
733
- Full view of the back of the house showing all new white square fascia, soffit and guttering installed, a further picture will be put up when the scaffolding comes down next week.

-
Image
734
- Please contact us if you have any questions relating to any home improvement work that you need help with, we have fitters to cover various jobs.

-
Image
735
- We can go through each and every design for each individual customers desire, photos of some Landsape work that was carried out.

-
Image
736
- Our fitters also cover Landscape gardening.

-
Image
737
- A small canopy above your front door from start to finish, being the next photo, we like to show our customers as much detail as possible.

-
Image
738
- The end result of the canopy, granted customers tend to have a different out look and that's why our sales team will go through as many pictures required by yourself to find the right one that will suit to fit your requirements

-
Image
739
- Other designs we do on the canopies.
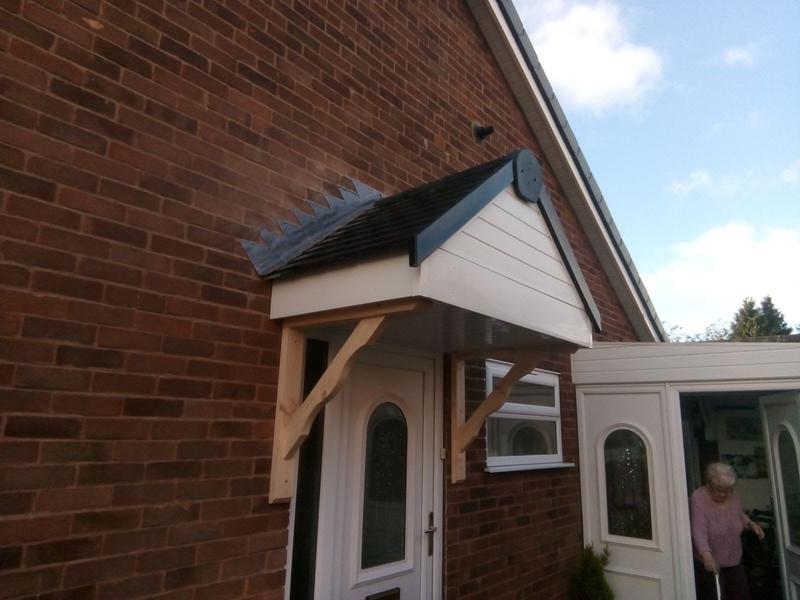
-
Image
740
- Please ask us any questions relating to any home improvement enquiry.

-
Image
741
- A closer look to the polycarbonate roofing we use, please view other pictures with more explanations of the product itself.
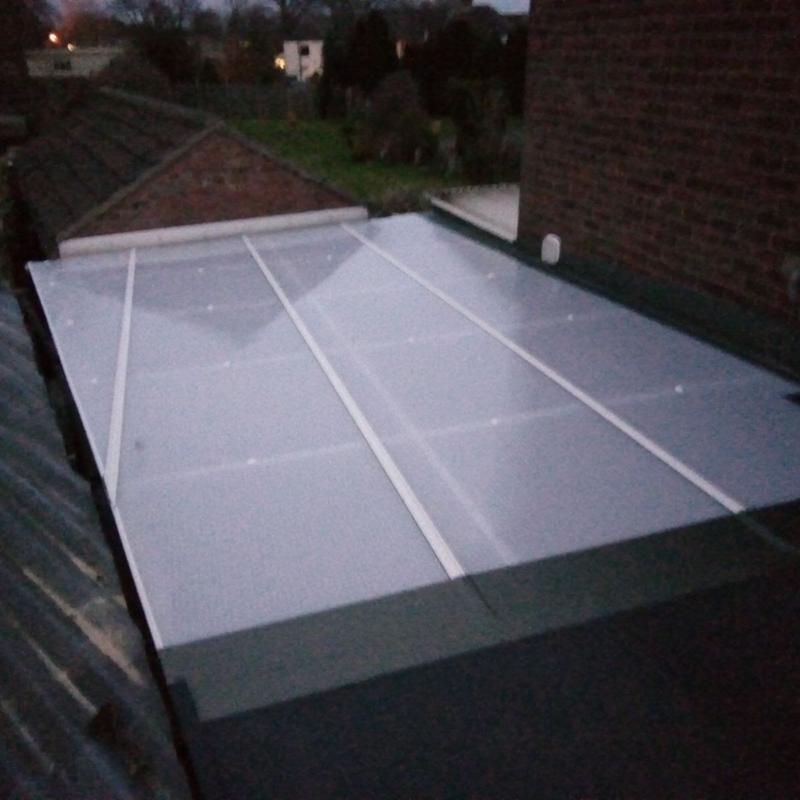
-
Image
742
- Just showing a different angle to the same photo below.
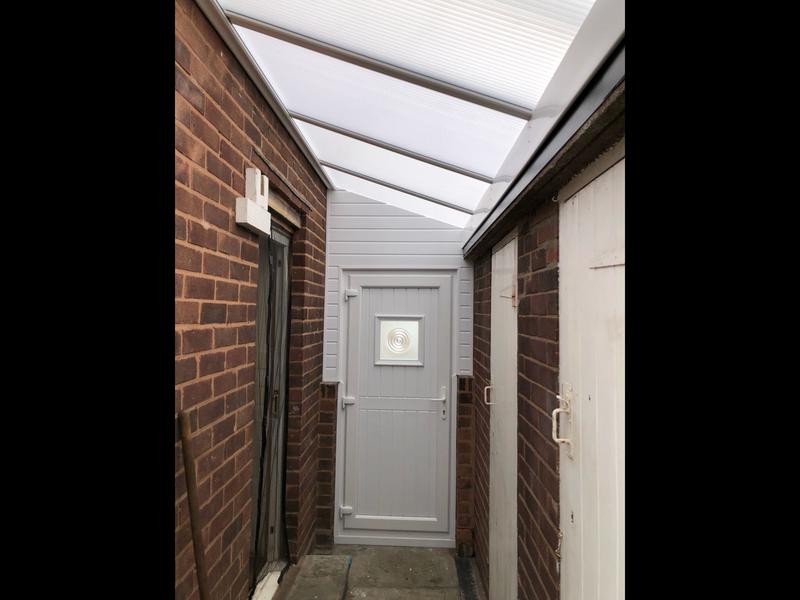
-
Image
743
- Regarding Car ports that we fit, there is a choice in colour being, Opal, beige or white, polycarbonate roofs can be fit on any scale.

-
Image
744
- Also the polycarbonate comes in single, double or triple thickness again to each individuals choice, taste or even price bracket.

-
Image
745
- Fiited on this property is white square fascia, soffit, gutter.

-
Image
746
- Some customers have been see to have it along the passageway at the side of there home, again to there design and requirement.

-
Image
747
- A poor flat roof of over 10 years old, a large amount of ponding upon the top and various items of growth as clear to the picture, the customer preferred us to cover her roof with the firestone rubber rather than felt, the next 2 photos will follow within the next procedures.

-
Image
748
- Second stage of the flat roof, stripped back the old felt, cleaned the whole surface then re-boarded it with OSB before applying the rubber, please look at the third picture with the end result.
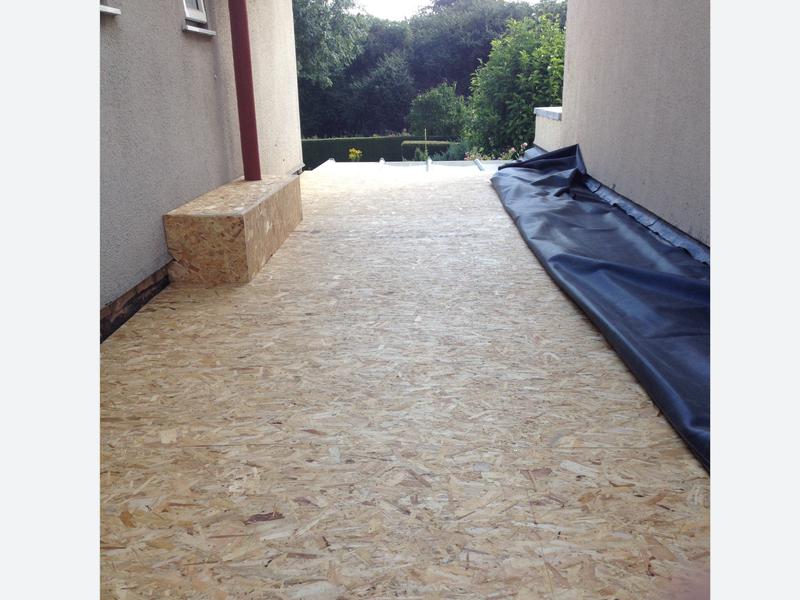
-
Image
749
- This picture is the end result of the firestone rubber we installed, customer was so happy with the transformation from the beginning to the end.

-
Image
750
- As a company we have found whites fascia, soffit and gutter seems to be the most popular amongst our customers.

-
Image
751
- A closer look at the detailed work after installation.

-
Image
752
- Closer look at the white square gutter rather than the round.

-
Image
753

-
Image
754
- A close up photo of white square guttering with Heavy duty tongue and groove soffit and plain fascia.

-
Image
755
- A large house completed with white square fascia, tongue and groove soffit and guttering, down pipes, on all sides of her home,.

-
Image
756
- This customer preferred black guttering on her white fascia and soffits, all customers like there own design work upon there home.

-
Image
757
- Black guttering upon the white fascia.
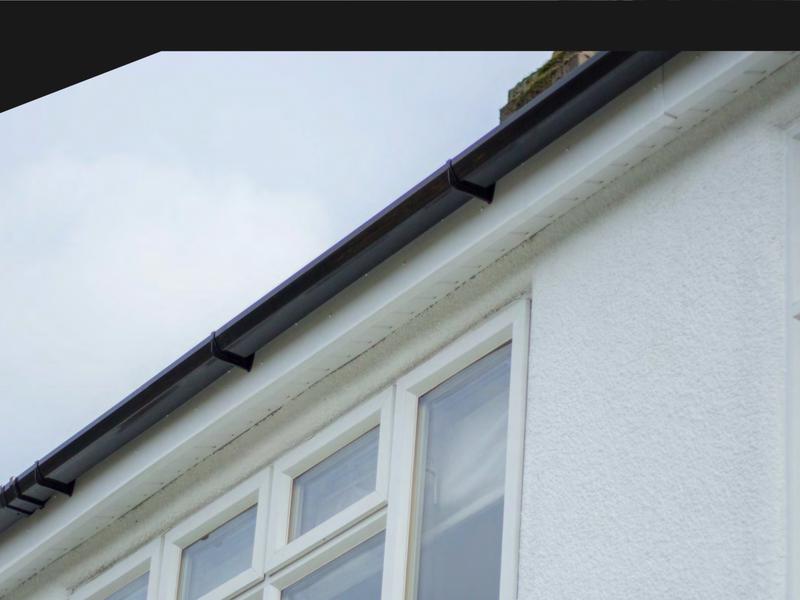
-
Image
758
- Bathroom flooring to your choice and design

-
Image
759
- Floor tiling.

-
Image
760
- Any type of floor styling to the customers choice can be discussed with us.

-
Image
761
- Bathroom flooring to your design or choice.

-
Image
762
- From start to finish 3 pictures of wall tiling if applicable to your needs.

-
Image
763
- Continuing wall tiling.

-
Image
764
- Any design, style to the customers choice.

-
Image
765
- Various fencing to suit each customer

-
Image
766
- Customers tend to a have different views on likes and dis-likes, our number is provided for any questions regarding fencing.

-
Image
767
- Please email, call or just query your remarks, comments, questions in relation to fencing or anything else you see on our sites.
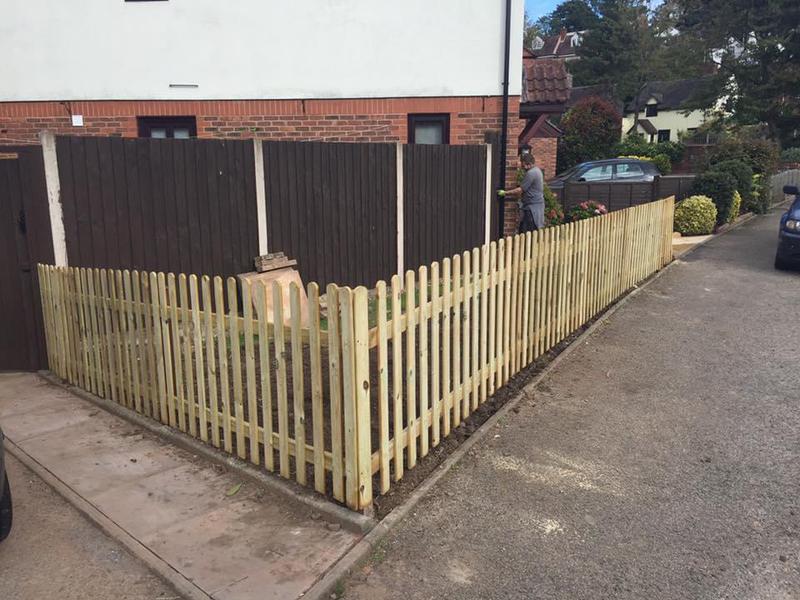
-
Image
768
- Customers end photo of the Patio and garden.

-
Image
769
- Customer wanted blocks layed around her garden as a single design in separation of the outer layer were she lays her plants, sets the garden of so much.

-
Image
770
- Regarding this patio, not only was she happy with the work, she asked us to complete the design through the garden as seen in the next photo.
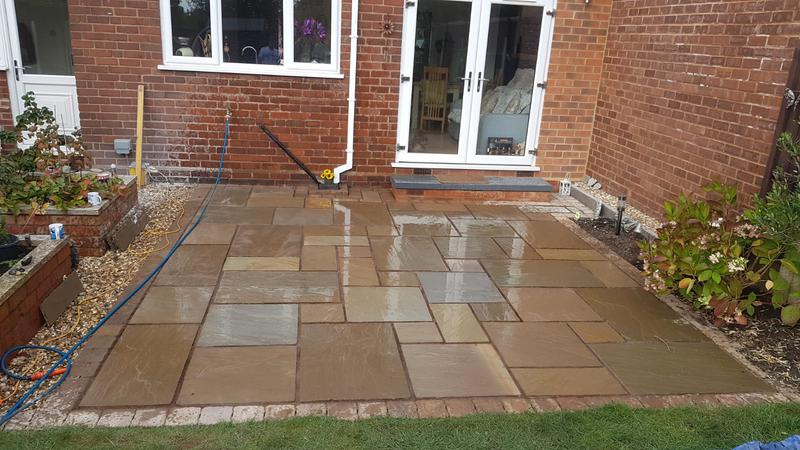
-
Image
771
- A designed Patio area to the customers choice alongside the preferred slabs.
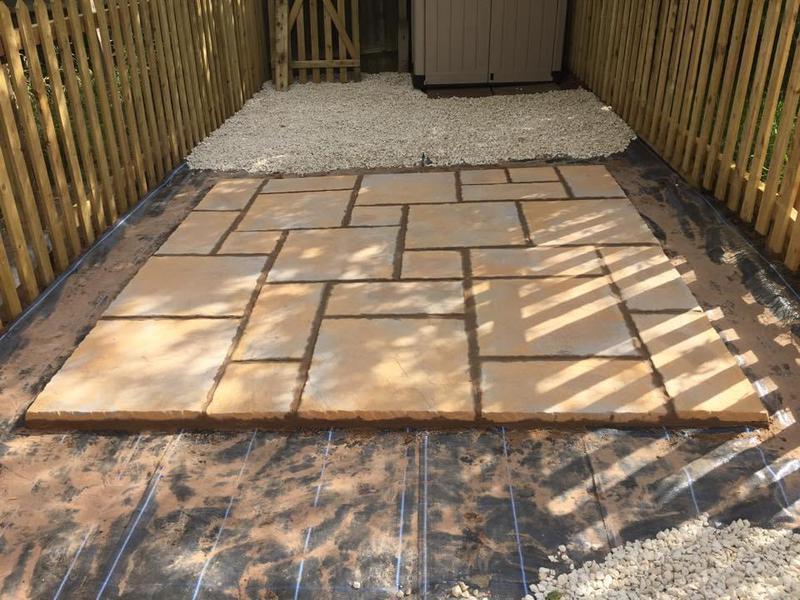
-
Image
772
- Small patio area.

-
Image
773
- Patio installed with a step to match the same slabs we played to the customers choice.
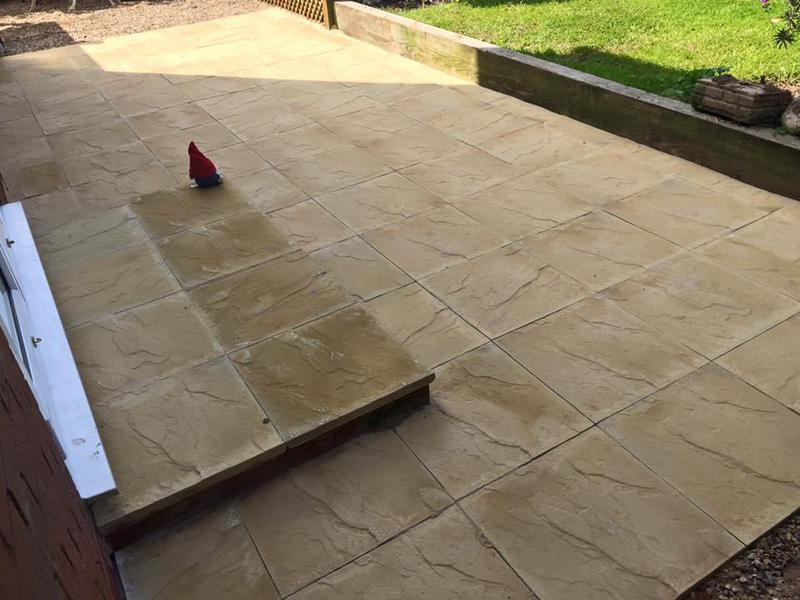
-
Image
774
- Driveway

-
Image
775
- Driveway

-
Image
776
- A nice little before and after job here to show you.

-
Image
777
- The end product, again if there is anything that you like on this site or our facebook site please contact us with your questions or queries.

-
Image
778
- This was a large Patio area that had to be covered for a public house as you can see in all 3 of the photo attached.

-
Image
779
- Just tidying up with the completion of the job.

-
Image
780
- The end result.

-
Image
781
- Follow up pictures of the driveway we completed in the Aldridge area.

-
Image
782
- Different angle of the driveway in Aldridge.

-
Image
783
- As our customer was very happy with her drive she then booked us in for further work, next job is her garage roof and the roof of the extension, these pictures will be put up at some point.

-
Image
784
- As you can see in this picture and the following 2 in order of this a Patio is being done for another customer in the Bridgnorth area.
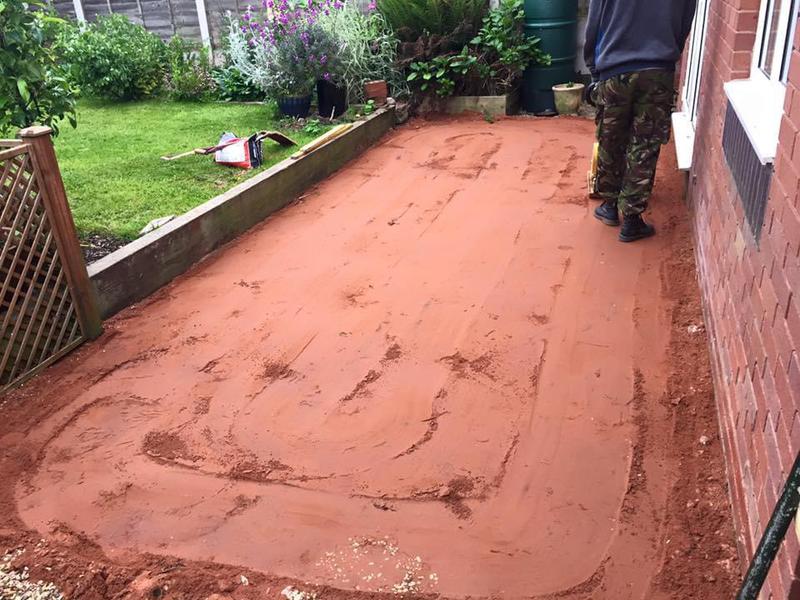
-
Image
785
- Stage 2 of the Patio

-
Image
786
- Completed the Patio and the next picture actually shows more on the completed stage and how impressive it looks to us and definitely the customer.

-
Image
787
- The after shot, completed Patio, happy with the overall of this, please look through the before and after pictures.

-
Image
788
- As you see this is the first photo that was taken, we do try to take the before and after pictures for all future customers to see were we start and the end result.

-
Image
789
- The blank canvas to commence work.

-
Image
790
- And the end result that yes always puts a smile on our face and hopefully future customers see the insight of all the work we do.

Platinum Home Solutions
- Identification checked
- Company address verified
- Customer references checked
- Agreed to TrustATrader's high standards
- Agreed to complaints procedure
Staffordshire
WV6 7TF
Insurance details
| Provider | Simply Business Insurance |
|---|---|
| Verified | 24th November 2023 |
Associations
Reviews (278)
-
Average rating: 5.0 out of 5
Review by Robert
on 19th April 2024
Robert - Image 1 3 images Robert - Image 2 Robert - Image 3 "Excellent service, kept informed the whole time, replaced lead flashing around chimney breast and remortered edging"
Trader reply: "Thank you for your review Rob much appreciated."
- Initial impression Initial impression: 5 out of 5.0
- Punctuality Punctuality: 5 out of 5.0
- Cleanliness Cleanliness: 5 out of 5.0
- Quality Quality: 5 out of 5.0
- Value Value: 5 out of 5.0
- Overall opinion Overall opinion: 5 out of 5.0
-
Average rating: 5.0 out of 5
Review by Eyelyn Langan
on 18th April 2024
Eyelyn Langan - Image 1 2 images Eyelyn Langan - Image 2 "Thank you."
Trader reply: "Thank you Evelyn for your review, have a lovely time in Ireland."
- Initial impression Initial impression: 5 out of 5.0
- Punctuality Punctuality: 5 out of 5.0
- Cleanliness Cleanliness: 5 out of 5.0
- Quality Quality: 5 out of 5.0
- Value Value: 5 out of 5.0
- Overall opinion Overall opinion: 5 out of 5.0
-
Average rating: 5.0 out of 5
Review by D Carter
on 17th April 2024
D Carter - Image 1 "Thank you for being able to help me quite quickly, much appreciated!"
Trader reply: "Just a small Moss clean here for Diane, thank you for my review."
- Initial impression Initial impression: 5 out of 5.0
- Punctuality Punctuality: 5 out of 5.0
- Cleanliness Cleanliness: 5 out of 5.0
- Quality Quality: 5 out of 5.0
- Value Value: 5 out of 5.0
- Overall opinion Overall opinion: 5 out of 5.0
-
Average rating: 5.0 out of 5
Review by Sandra
on 17th April 2024
"Thanks to Marie and her team for doing a fantastic job fitting a nice new roof. Many thanks for a great job, highly recommended!"
Trader reply: "Thank you for the work Sandra and here’s to the next up and coming job, speak soon."
- Initial impression Initial impression: 5 out of 5.0
- Punctuality Punctuality: 5 out of 5.0
- Cleanliness Cleanliness: 5 out of 5.0
- Quality Quality: 5 out of 5.0
- Value Value: 5 out of 5.0
- Overall opinion Overall opinion: 5 out of 5.0
Feeling social?
See more of what we do and give us a follow on our social media.