
Handy's Property Services
Reliable South London property specialist with 25+ years’ experience. Vast experience in all types of work, from small handyman type repairs up to full refurbishments. No payments up front – you only pay when the job is done and you’re totally happy with it.
Membership number TT6283
Don't forget! Please mention TrustATrader when you contact any of our trusted traders.
All TrustATrader members are checked and vetted!
Get extra peace of mind and cover your next agreed job with this trader for free by registering for the TrustATrader Guarantee. Find out more
Register GuaranteeAbout Handy's Property Services, London
Reliable South London Fencing Specialist with 25+ Years’ Experience.
Vast experience in all types of work, from small fence repairs up to full property refurbishments.
No payments up front – you only pay when the job is done and you’re totally happy with it.
See me completing 70+ real jobs for real clients on YouTube: https://www.youtube.com/@TheToolOnTrial?sub_confirmation=1
Hi
I’m Russell from Handys Property Services.
I specialise in high quality workmanship, attention to detail, and jobs done to a VERY high standard.
If you are looking for real quality, you are in the right place.
I also aim to remove the guesswork and risk involved when hiring a tradesperson, ideally giving you full peace of mind before you employ me that you're making the right decision.
Here is how I do so -
YOUTUBE CHANNEL – REAL PROJECTS
Most tradespeople show staged photos. I show the actual work.
My YouTube channel contains over 70 videos of real jobs carried out for past clients, showing both the process and the finished results.
This takes away the guesswork when hiring me.
You already know how I work, the quality of my work, and you get a good feel for the type of person I am just by watching the videos.
YouTube:
https://www.youtube.com/@TheToolOnTrial?sub_confirmation=1
NO UPFRONT PAYMENTS
There are no advance payments at all. You pay ONLY when the job is finished and you have confirmed you're happy with it.
This is a level of reassurance that NO other tradespeople offer their clients in the South London area.
I am literally putting my money where my mouth is.
ONE PERSON ON SITE AND ACCOUNTABLE FROM START TO FINISH
Nearly all work is carried out by me personally, so there is one experienced tradesperson fully accountable throughout your project.
If a task legally requires certification or a specialist, such as a gas engineer, trusted professionals are brought in while I continue to oversee the work to ensure the right standard.
NO LABOURERS OR SEMI-SKILLED WORKERS
Apart from rare circumstances, I do not use labourers, apprentices, or semi-skilled assistants.
Important work is NEVER handed over to someone less experienced, less skilled, or less motivated to achieve a high quality finish and protect your home.
Many companies use labourers or semi-skilled workers to keep their own costs down. This almost always results in a lower standard of work.
I avoid this by carrying out the work myself, to my standard, resulting in the highest quality work.
REVIEWED & CHECKED
My background, insurance, and qualifications have been checked by TrustATrader and other independent bodies, so you can have full peace of mind.
2 FREE 1-YEAR GUARANTEES
I provide a one-year workmanship guarantee on any job that I do, free of charge.
TrustATrader also has so much confidence in my work that they also put a second, free of charge, 12-month guarantee on any work that I do.
This guarantee has never been used by any of my clients to date.
However, for peace of mind, it doesn't cost you anything to register your TrustATrader guarantee, and you can do so on the link below.
https://www.trustatrader.com/register-guarantee/terms
Regards
Russell Kiani
Handys Property Services
SOME EXAMPLES OF THE WORK I CARRY OUT:
DECKING / FENCING
Fence repairs
Fence panel replacement
New fence installations
Closeboard fencing
Feather edge fencing
Timber fencing
Concrete post and gravel board systems
Gates supplied and fitted
Decking installation
Decking repairs
Decking framing and bases
Weatherproofing
Painting or staining
CARPENTRY & JOINERY
Bespoke furniture (wardrobes, seating benches, alcove units, boiler cupboards)
Timber garden structures
Garden rooms
Sheds and timber buildings
Timber stud partition walls (non-structural)
Deck subframes and timber bases
Shelving
Hanging doors
Planing doors
Architrave, skirting, coving
Fitted furniture
Laminate flooring
HOME IMPROVEMENTS & PROPERTY REFURBISHMENTS
Full or partial refurbishments
Internal and external refurbishments
Room transformations
Layout changes and adjustments
Property improvements and modernisation
General building improvements
Multi-trade projects managed and completed
KITCHEN WORK
Full or partial refurbishments
Kitchen fitting
Worktops
Mitre joints
Cabinet adjustments
Sinks and appliances installed
Tiling and flooring
BATHROOMS
Full or partial refurbishments
Showers
Baths
Basins (all types)
New toilets
Tiling
Extractor fans
Towel heaters
Plumbing adjustments
Repairs
FLOORING
Laminate
Engineered oak
Luxury vinyl tiles (LVT)
Vinyl / lino
Herringbone
Tongue & groove
Floating or fixed systems
FLOOR SANDING & RESTORATION
Floor sanding
Floor restoration
Refinishing timber floors
Surface preparation and sanding
Sealing and finishing
Restoring worn or damaged floors
Repairing minor floor defects before finishing
DAMP SPECIALIST
Diagnosing rising, penetrating, and condensation-related damp
Chemical DPC (including Dryrod installation)
Tanking using KA tanking slurry
Salt treatment and neutralising
Render repairs and make-good after damp work
Breathable coatings and water-resistant finishes
Minor external fixes contributing to damp issues (pointing, sealant, small repairs)
HANDYMAN / ODD JOBS
Flat pack furniture assembly
Wardrobes assembled
Beds assembled
Chest of drawers
Desks and office furniture
IKEA and all major brands assembled
Disassembly and reassembly
Wall-mounting furniture
Blind and curtain installation
Shelves and mirrors
Hand rails
General repairs
Wall-mounting TVs
Carpentry repairs
Plumbing repairs
Electrical repairs
General household fix-ups
ELECTRICAL
Replace light switches
Wall sockets
Additional sockets
Install new light fittings
Doorbells
Rewiring
Downlights installed or removed
PLUMBING
Tap replacements
Leaking or dripping taps
Toilet flush issues
Cistern problems
Waste traps
Leaks
Blockages
Installing washing machines / dishwashers
Radiator installation or replacement
TILING
Floor and wall tiling
Large format tiles
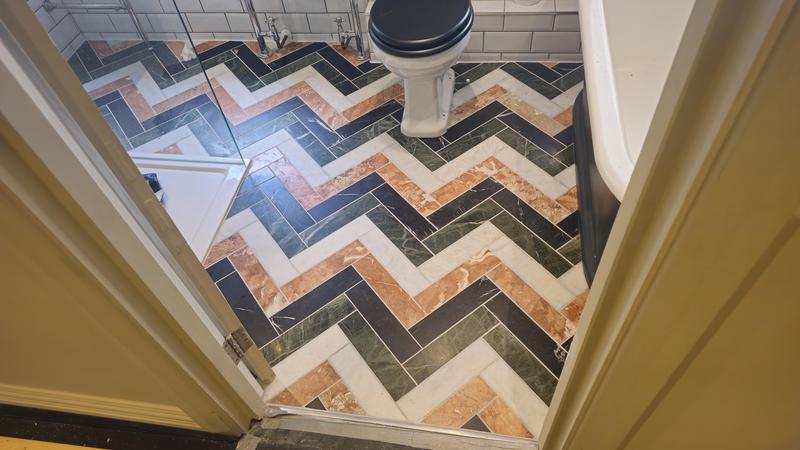
Herringbone
Mosaic
Victorian style
Borders
Floor levelling
Decoupling membranes
Hardie Backer installation
WALLPAPERING
Wallpaper removal
Wallpaper hanging
Pattern matching
Feature walls
Full room wallpapering
Lining paper installation
Surface preparation for wallpaper
Repairs before wallpapering
DECORATING
Painting walls and ceilings
Feature walls
Woodwork painting (doors, skirting, architrave)
Gloss, satin and eggshell finishes
Filling and preparation work
Sanding and surface preparation
Stain blocking
Touch-ups and redecoration
Interior and exterior painting
PLASTERING
Skimming walls and ceilings
Patching and repairs
Filling holes and cracks
Boarding (plasterboard installation)
Dot and dab plasterboarding
Ceiling repairs
Bonding and backing coats
Re-skimming over old plaster
Making good after electrical or plumbing work
Small area rendering repairs
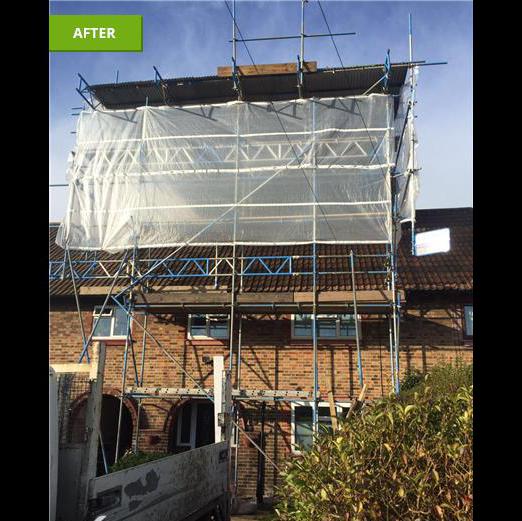
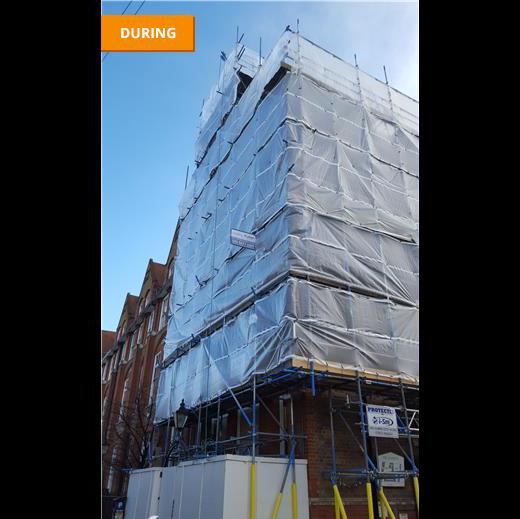
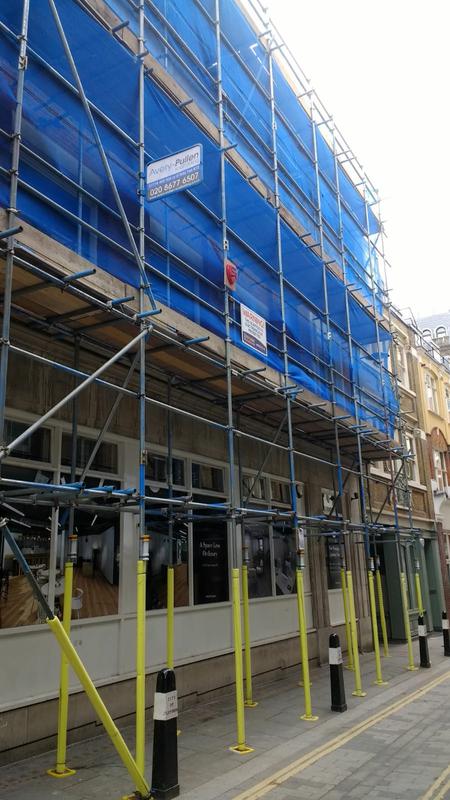
SCAFFOLDING
Fully insured up to 10 million pounds
Fully accredited
Highly trained scaffolders
Full installations
Repairs
Weatherproofing
Painting
Photo gallery
Fencing and Decking
285 photos
-
Image
1
- Raised decking area built.

- Video 2 - A little bit of fencing and laying of paving stones.
-
Image
3
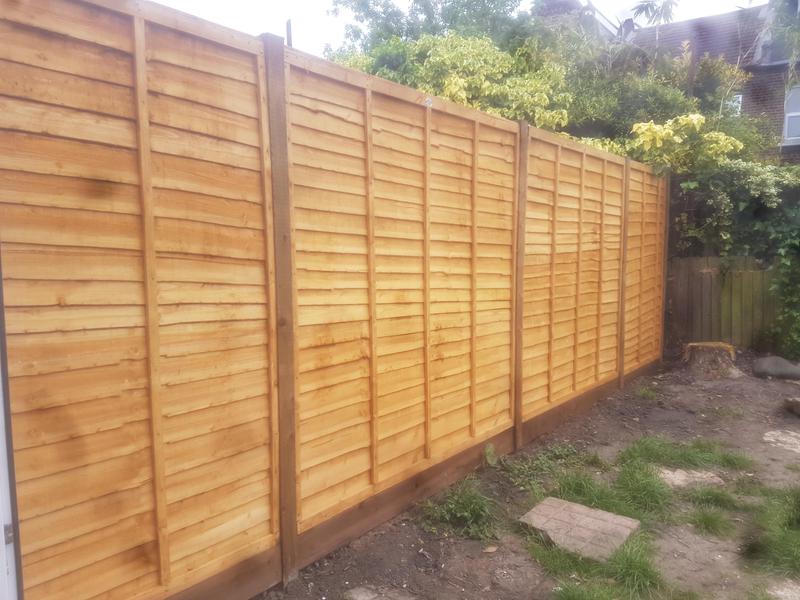
- New fence installed
-
Image
4
- New fence, posts and trellis installed.

- Video 5 - Exterior electric and gas meter cupboard refurbishment
-
Image
6

-
Image
7
- New fence with posts installed.

-
Image
8
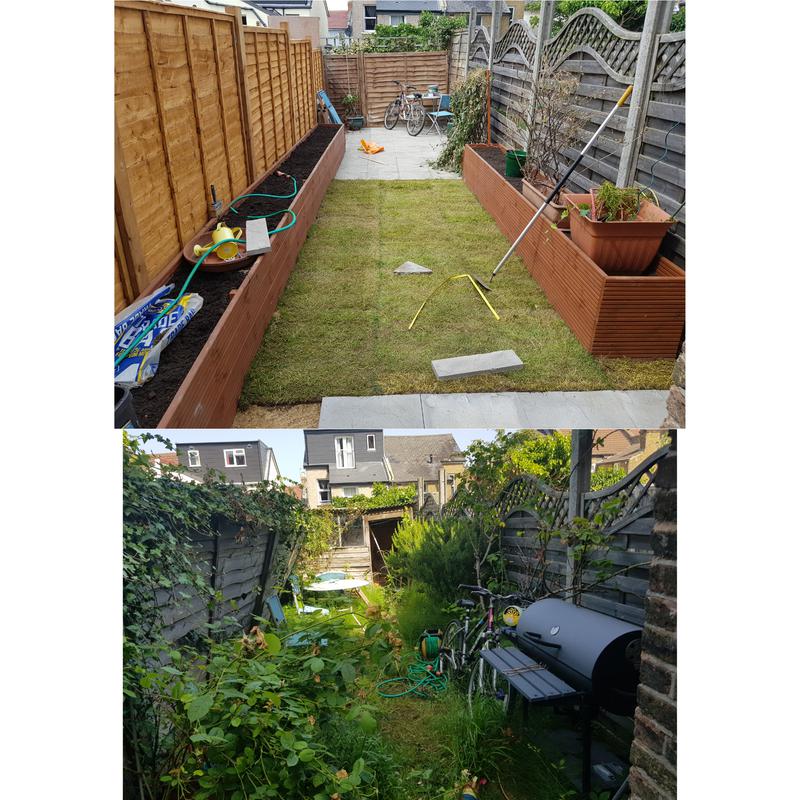
- Full garden refurbishment.
-
Image
9

-
Image
10
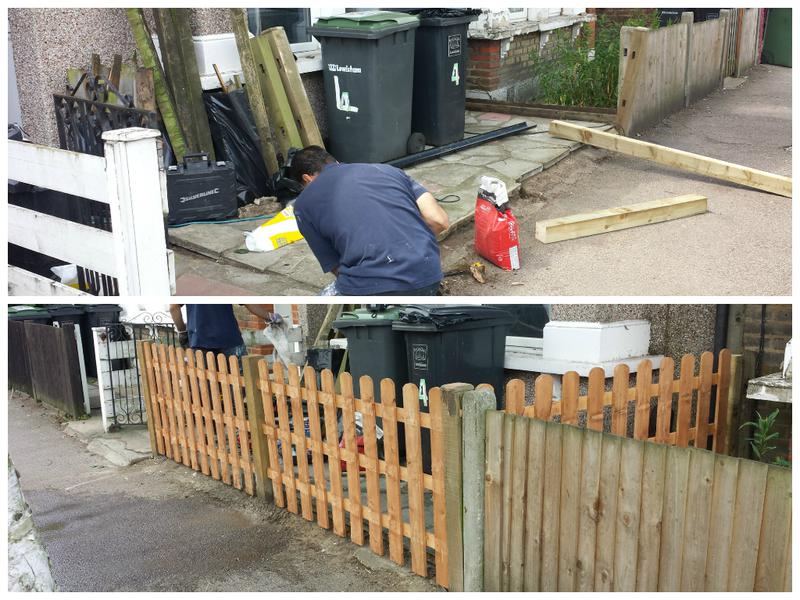
- New picket style fence installed this was later painted as well.
-
Image
11
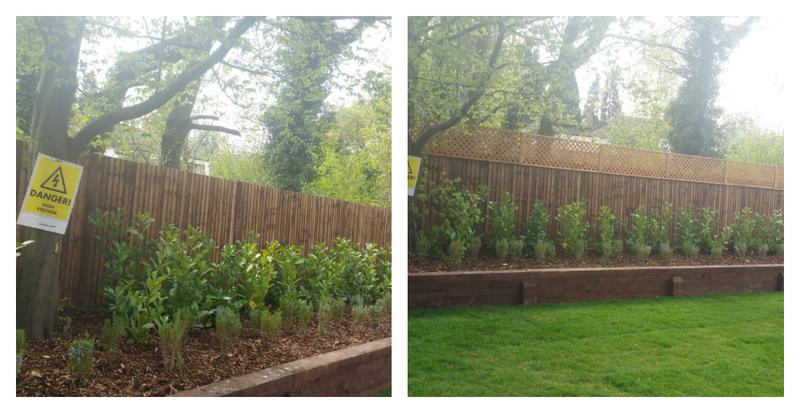
- Trellis fitted to the top of an existing fence.
-
Image
12
- Replacement fence panels installed.

-
Image
13
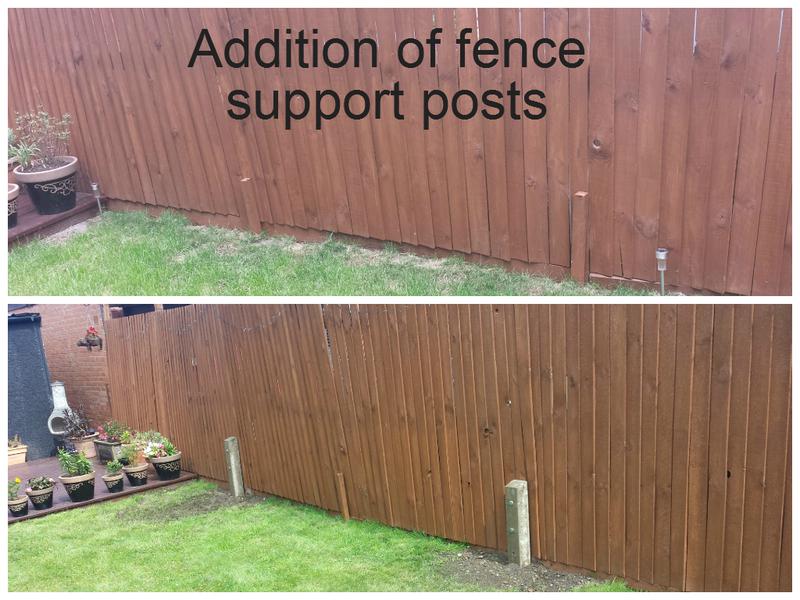
- Fence support posts installed to an existing fence.
-
Image
14
- Decking area built to the customers requirements

-
Image
15
- Decked area

-
Image
16
- Decking area

-
Image
17
- Concrete area installed over a run down part of the garden. The customer later install the summerhouse over this area.

-
Image
18
- New fence installed.

-
Image
19

-
Image
20

-
Image
21

- Video 22 - Our first utube video. A guide on floor tiling.
- Video 23 - Complete novice learning to MIG weld.
- Video 24 - Our excellent scaffolders
- Video 25 - Our scaffolders
-
Image
26

-
Image
27

-
Image
28

-
Image
29

-
Image
30

-
Image
31

-
Image
32

-
Image
33

-
Image
34

-
Image
35

-
Image
36

-
Image
37

-
Image
38

-
Image
39

-
Image
40

-
Image
41

-
Image
42

-
Image
43

-
Image
44

-
Image
45

-
Image
46

-
Image
47

-
Image
48

-
Image
49

-
Image
50

-
Image
51

-
Image
52

-
Image
53

-
Image
54

-
Image
55

-
Image
56

-
Image
57

-
Image
58

-
Image
59

-
Image
60

-
Image
61

-
Image
62

-
Image
63

-
Image
64

-
Image
65

-
Image
66

-
Image
67

-
Image
68

-
Image
69

-
Image
70

-
Image
71

-
Image
72

-
Image
73

-
Image
74

-
Image
75

-
Image
76

-
Image
77

-
Image
78

-
Image
79

-
Image
80

-
Image
81

-
Image
82

-
Image
83

-
Image
84

-
Image
85

-
Image
86

-
Image
87

-
Image
88

-
Image
89

-
Image
90

-
Image
91

-
Image
92

-
Image
93

-
Image
94

-
Image
95

-
Image
96

-
Image
97

-
Image
98

-
Image
99

-
Image
100

-
Image
101

-
Image
102

-
Image
103

-
Image
104

-
Image
105

-
Image
106

-
Image
107

-
Image
108

-
Image
109

-
Image
110

-
Image
111

-
Image
112

-
Image
113

-
Image
114
-
Image
115

-
Image
116
-
Image
117

-
Image
118

-
Image
119
-
Image
120

-
Image
121

-
Image
122

-
Image
123

-
Image
124

-
Image
125

-
Image
126

-
Image
127

-
Image
128

-
Image
129

-
Image
130

-
Image
131
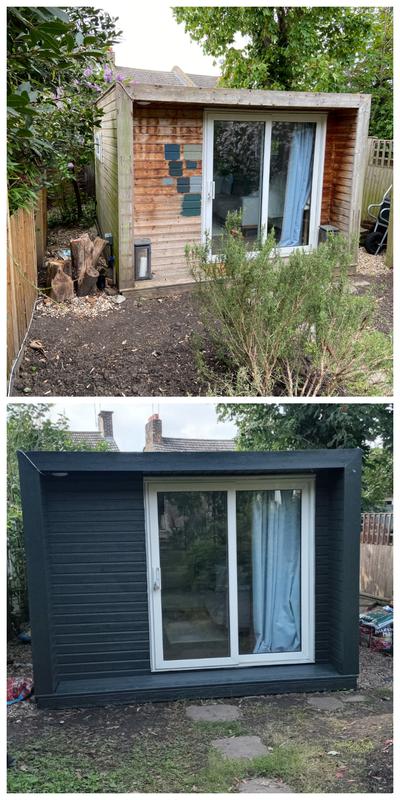
-
Image
132
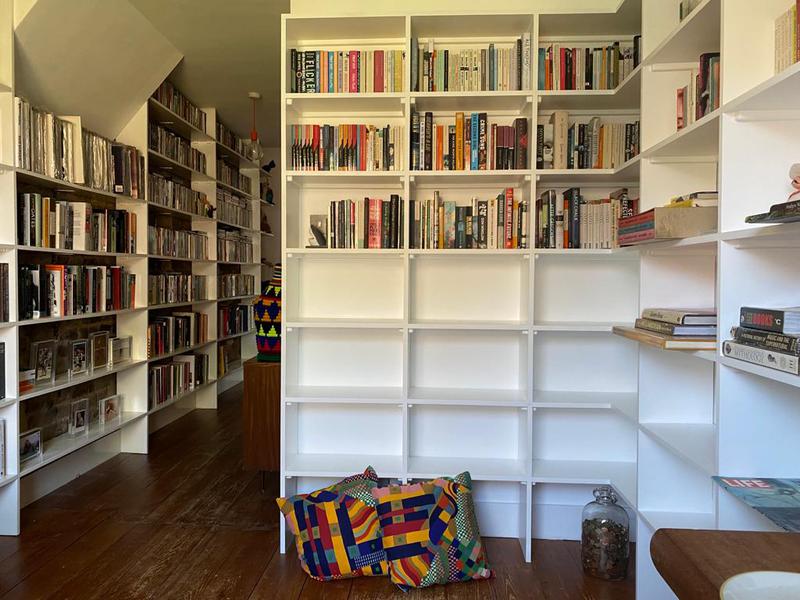
-
Image
133
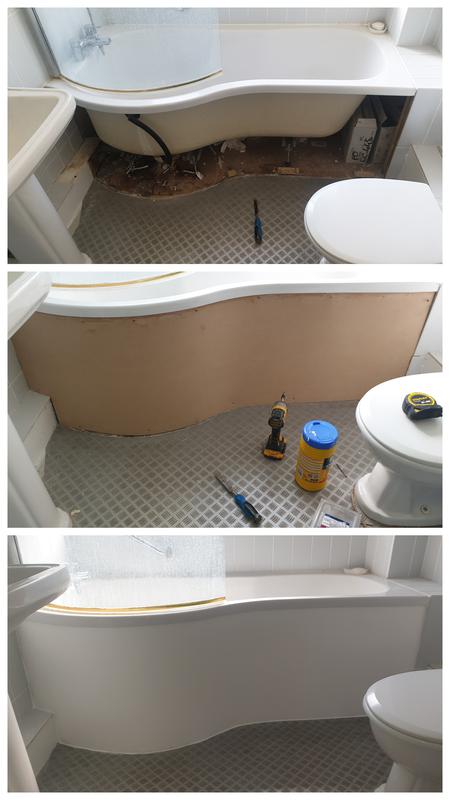
-
Image
134
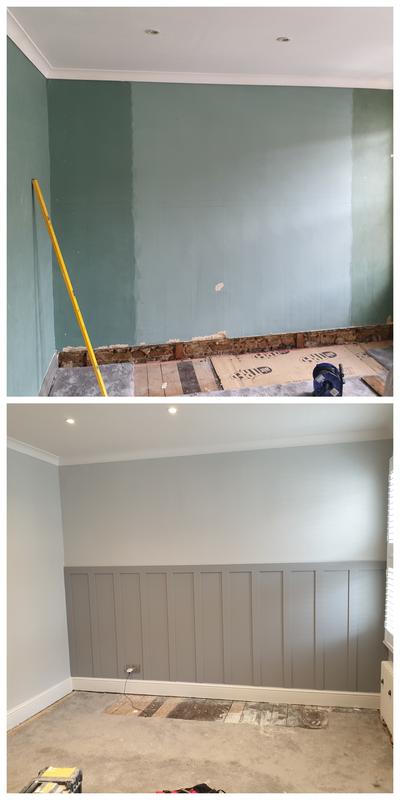
-
Image
135

-
Image
136
- Bedroom back to brick refurbishment.

-
Image
137
- Refurbishment
-
Image
138
- Bedroom back to brick refurbishment.

-
Image
139
- Living room full back to brick refurbishment

-
Image
140
- New kitchen fitted.

-
Image
141
- Bespoke shelving unit built and painted.

-
Image
142
- Pattern repeating wallpaper hung and new laminate flooring.

-
Image
143
- Horizontal striped paper hung for a feature wall.

-
Image
144
- Pattern repeating wallpaper hung.

-
Image
145
- Lounge lining paper installed.

-
Image
146
- Pattern repeat wallpaper in a bedroom.

-
Image
147
- Striped wallpaper installed on a hall stairs and landing.

-
Image
148
- Wall tiling.

-
Image
149
- Floor tiling with wood effect tiles.

-
Image
150
- Floor tiling.

-
Image
151
- Difficult floor tiling including underfloor heating.

-
Image
152
- Difficult floor tiling including underfloor heating.

-
Image
153
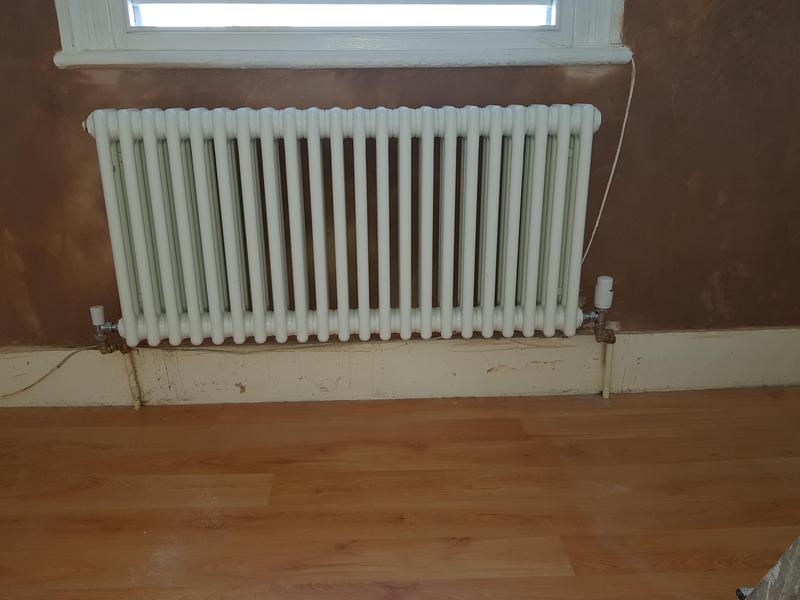
- Wall plastered and new radiator installed.
-
Image
154
- New kitchen sink installed.

-
Image
155
- New kitchen sink installed.

-
Image
156
- Installation of dishwasher to replace a kitchen cabinet.

-
Image
157
- Replacement of exterior waste pipe work that was leaking.

-
Image
158
- Repair of collapsed artex ceiling including redecorating.

-
Image
159
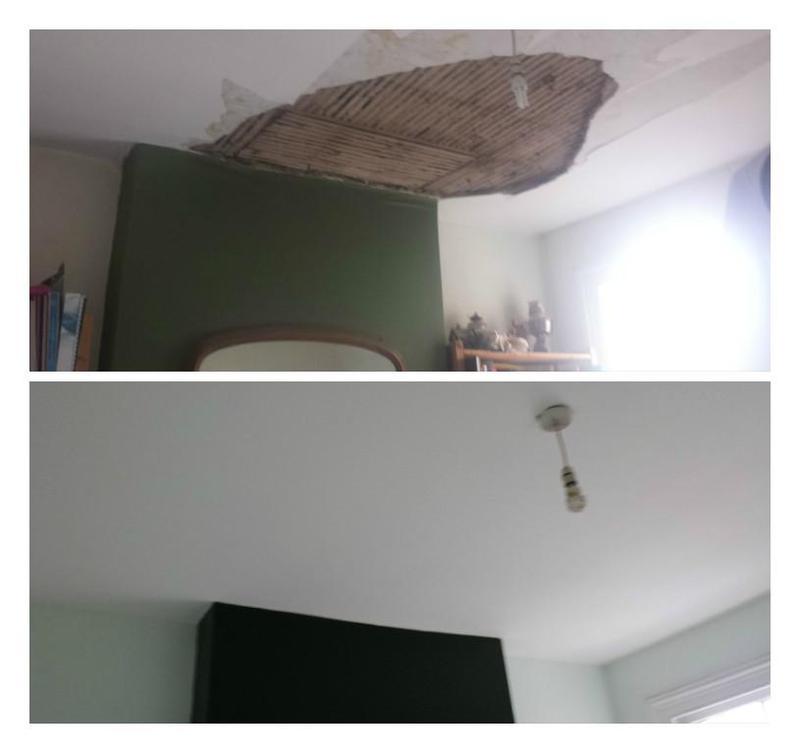
- Repair of a collapsed ceiling including plastering and redecorating the room.
-
Image
160
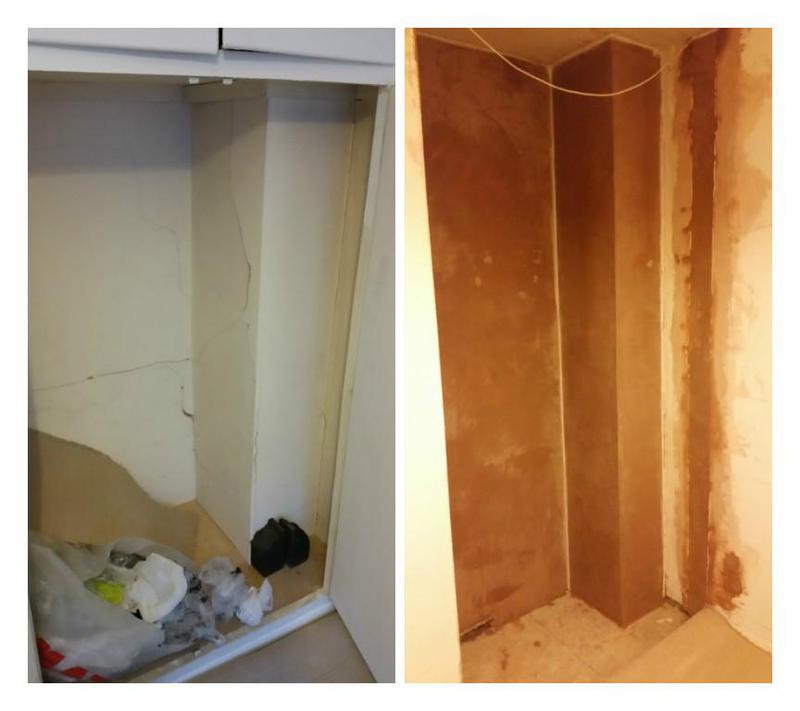
- Plastering.
-
Image
161
- Repair of a collapsed ceiling including plastering and redecorating.

-
Image
162
- Kitchen walls re plastered, tiled and redecorated.

-
Image
163
- Kitchen walls re plastered.

-
Image
164
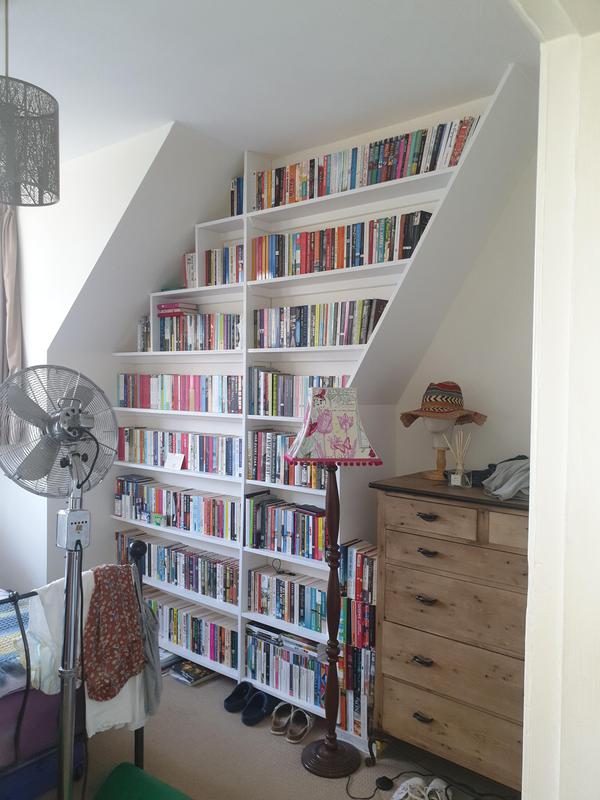
- Bespoke unusual design book shelving built and decorated. This picture was taken about a year after it was built.

-
Image
165
- Bespoke unusual design book shelving built and decorated. This picture was taken about a year after it had been built.
-
Image
166
- Full refurbishment of a bedroom.

-
Image
167
- Redecorating a kitchen with damp issues.

-
Image
168
- Plastering and redecoration

-
Image
169
- Full redecoration

-
Image
170
- Full redecoration

-
Image
171
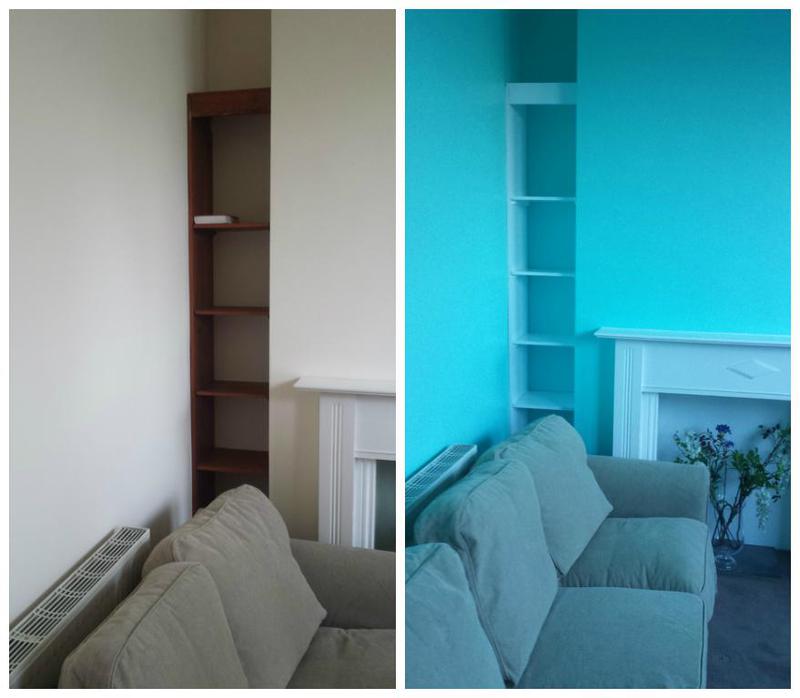
- Full redecoration
-
Image
172
- Full redecoration

-
Image
173
- Wallpaper removed, wall plastered and the room decorated

-
Image
174
- Refurbishment of a room.

-
Image
175
- Room fully decorated.

-
Image
176
- Full refurbishment including plastering floor refurbishment with varnishing. The room was also decorated.

-
Image
177
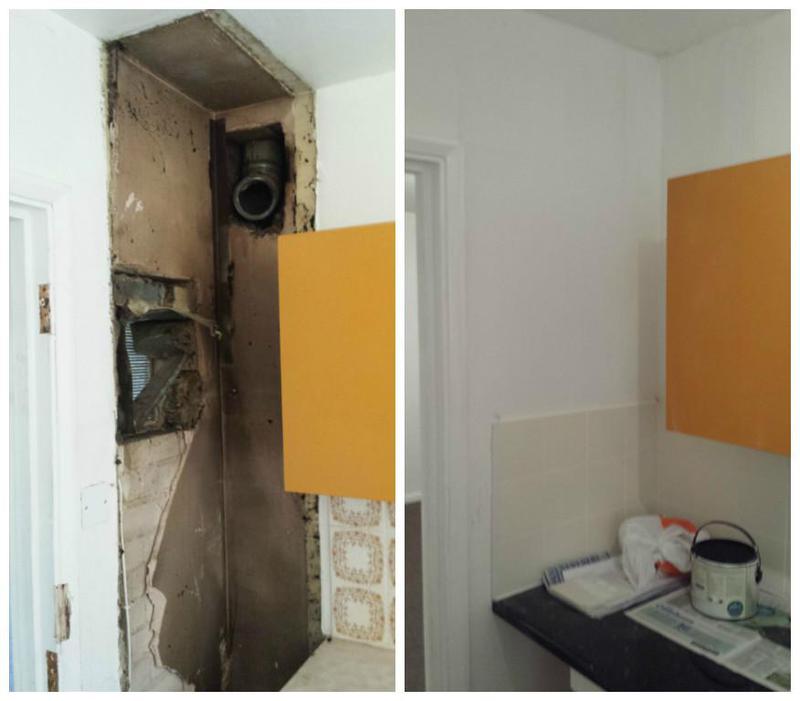
- Kitchen made good from the removal of heating.
-
Image
178
- Kitchen decorated.

-
Image
179
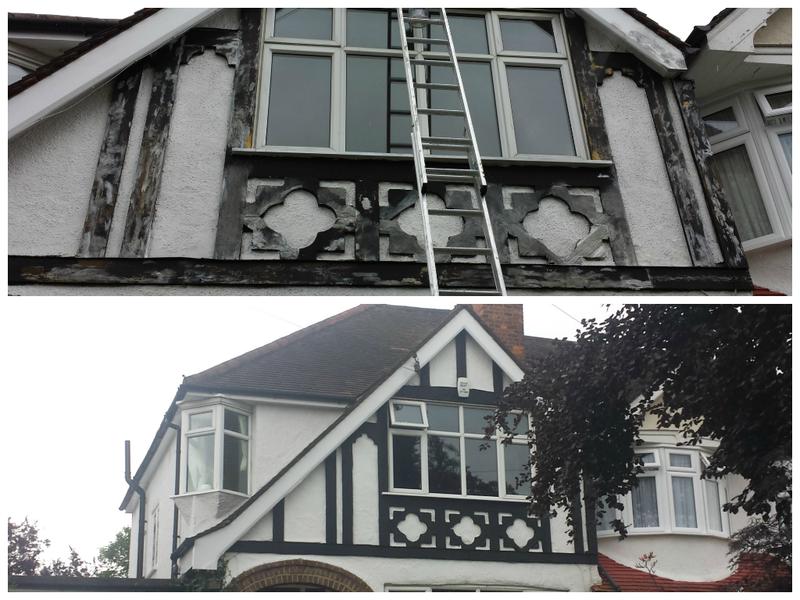
- Tudor style cladding refurbished and decorated.
-
Image
180
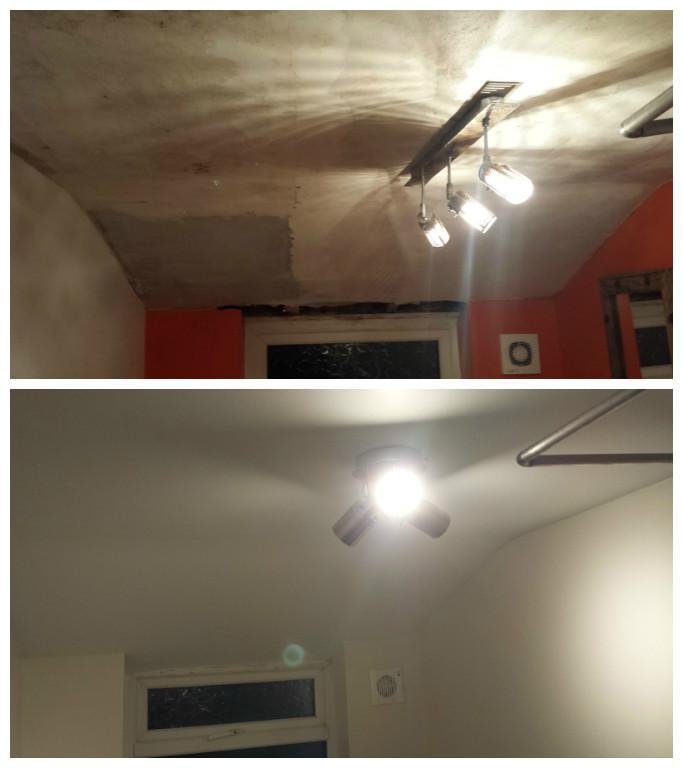
- Badly deteriorated bathroom ceiling refurbished and the room decorated.
-
Image
181
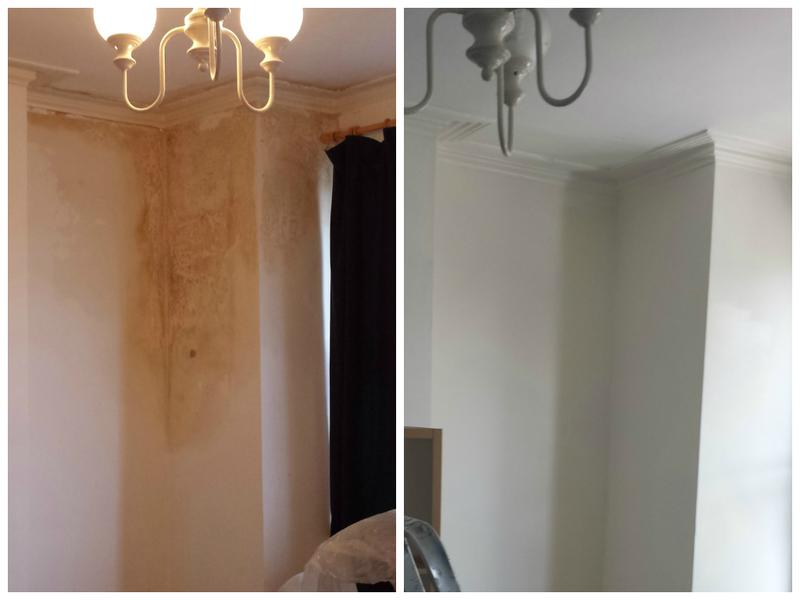
- Water-damaged wall made good and redecorated.
-
Image
182
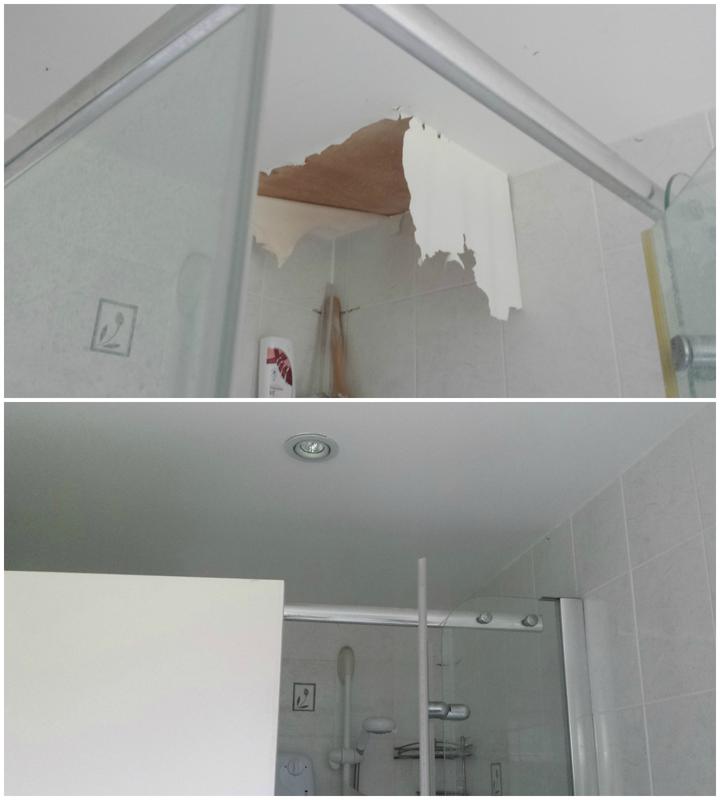
- Repair to badly deteriorated ceiling paint.
-
Image
183
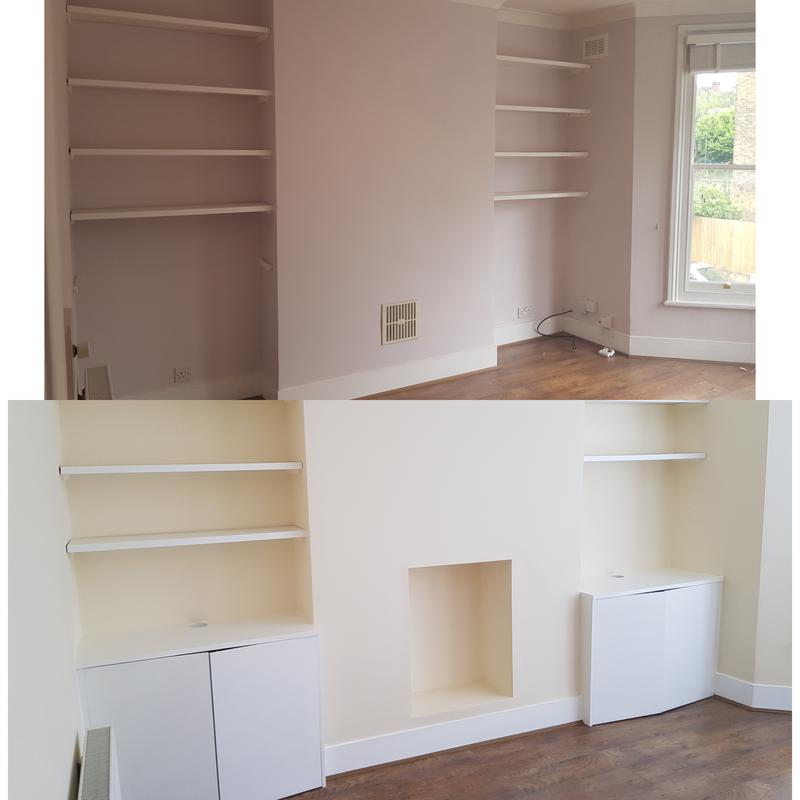
- Bespoke carpentry and decorating.
-
Image
184
- Wallpaper removed, a wall plastered and painted.

-
Image
185
- Front door painted.

-
Image
186
- Plastering and decorating of a hall stairs and landing.

-
Image
187
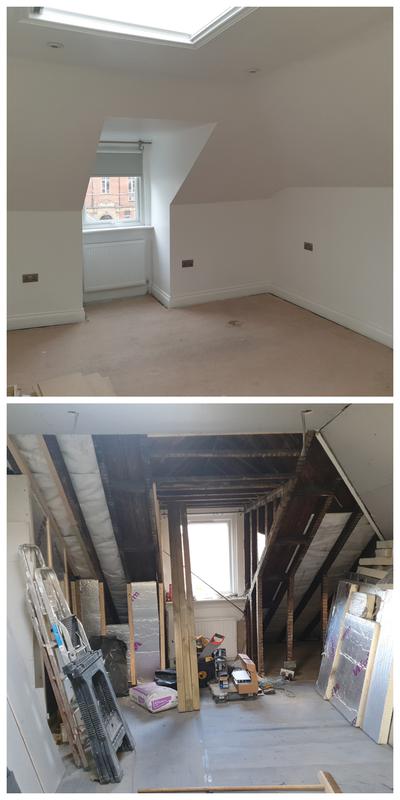
- Refurbishment of attic bedroom including plastering and painting.

-
Image
188
- Back to brick refurbishment of a bedroom.

-
Image
189
- Back to brick refurbishment of a bedroom.

-
Image
190
- Tudor style cladding refurbished and painted.

-
Image
191
- Refurbishment of very deteriorated brick walls.

-
Image
192
- Kitchen walls plastered, tiled and painted.

-
Image
193
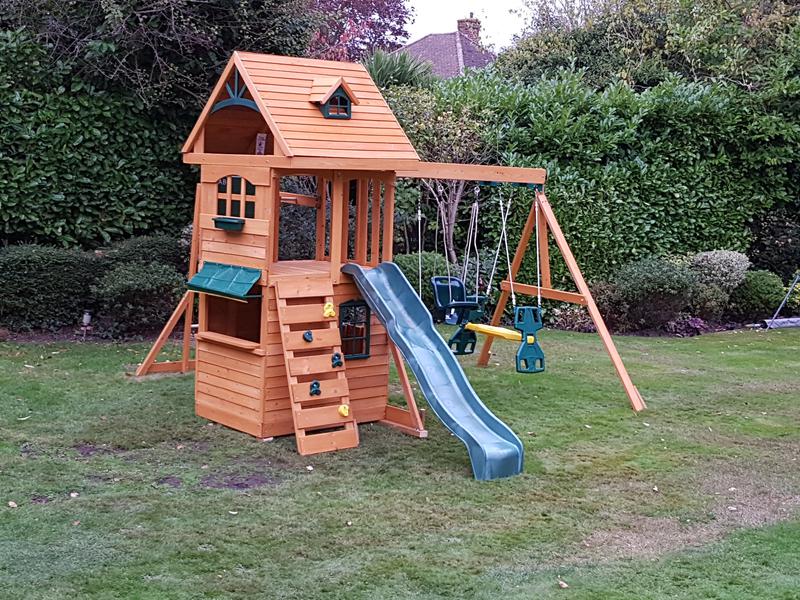
- Children's playhouse installed.
-
Image
194
- Fan installed.

-
Image
195
- Removal of front door lean-to.

-
Image
196
- Repair to deteriorated section of wall.

-
Image
197
- Wall mounted TV installed with hidden wiring.

-
Image
198
- Window removed and blocks in before making the walls good. This was so kitchen cabinets could be installed in this area.

-
Image
199
- Concrete step refurbished.

-
Image
200
- Fire installed.

-
Image
201
- Concrete step refurbished.

-
Image
202
- New bin storage installed

-
Image
203
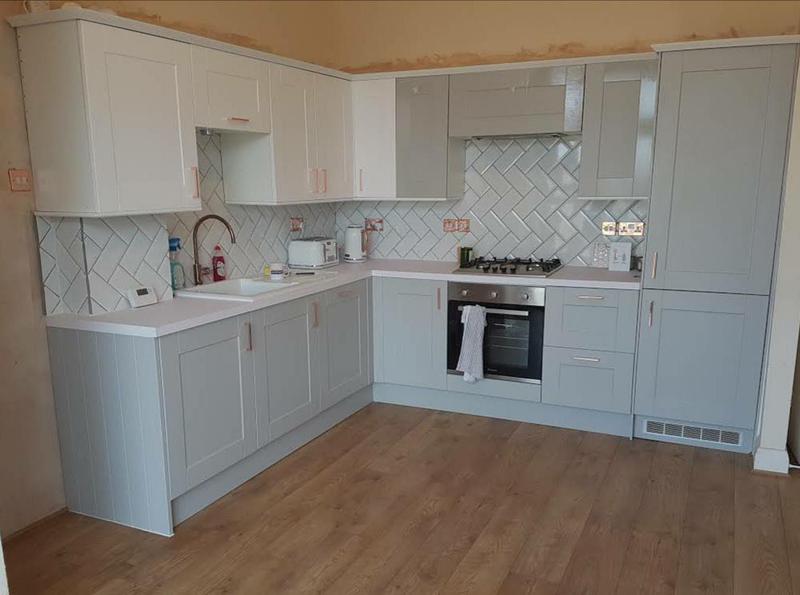
- Full kitchen refurbishment. Including herringbone style tiling. The manufacturer did send the correct colour doors later as they sent the incorrect ones by mistake.
-
Image
204
- New worktops and sink installed to an existing kitchen.

-
Image
205
- Dining room turned into a kitchen.

-
Image
206
- Refurbishment of an awkward shaped small kitchen.

-
Image
207
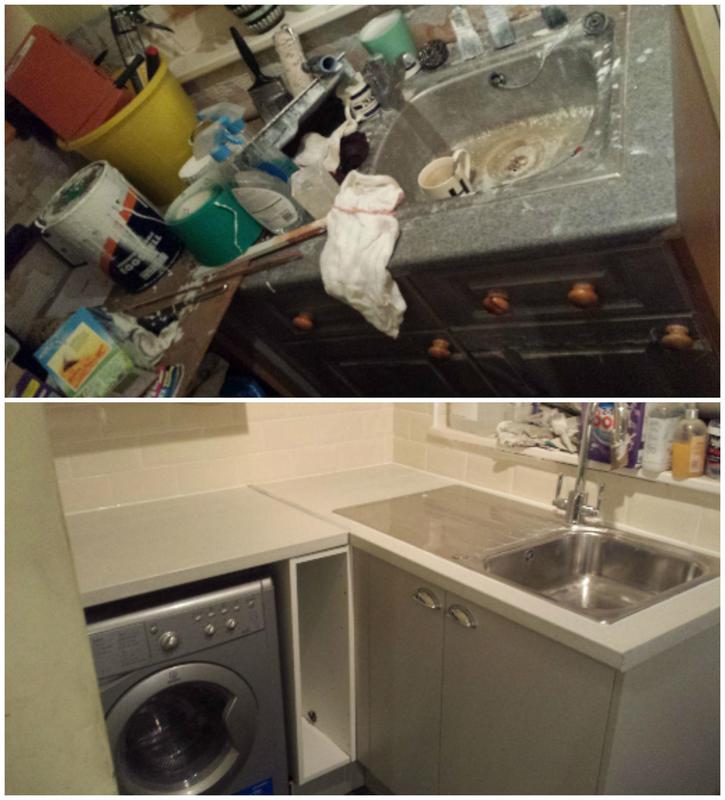
- Full kitchen refurbishment.
-
Image
208
- Full kitchen refurbishment.

-
Image
209
- Full kitchen refurbishment.

-
Image
210
- Full kitchen refurbishment.

-
Image
211
- New kitchen unit and worktops installed including decorating the room.

-
Image
212
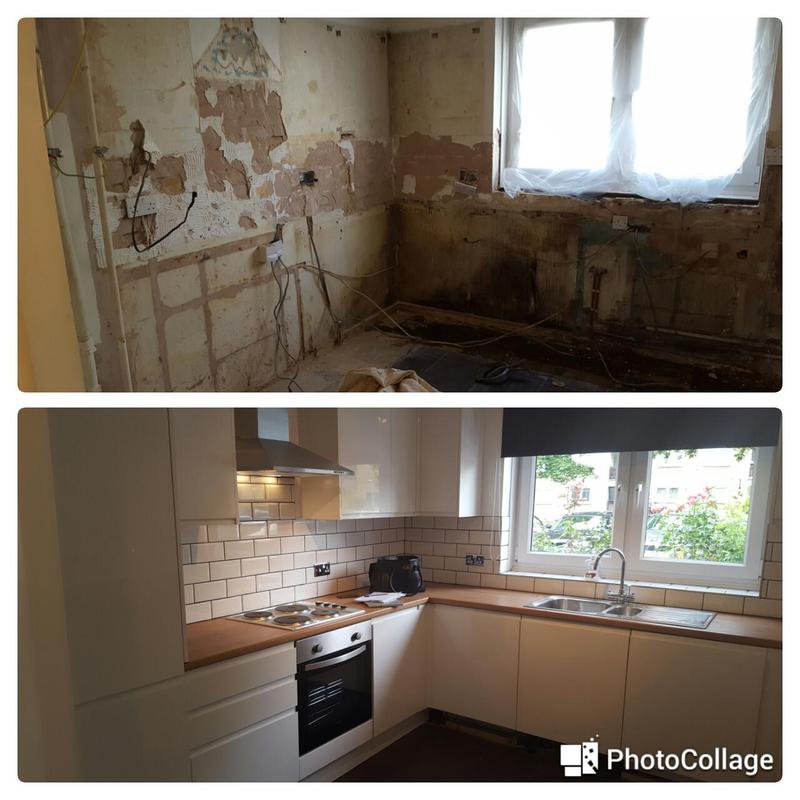
- Full kitchen refurbishment.
-
Image
213
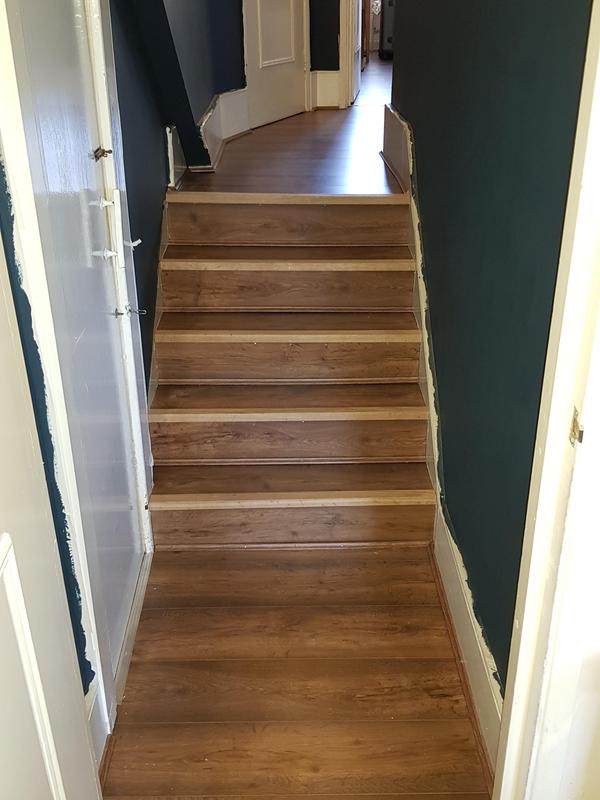
- Laminate flooring installed on a staircase with hardwood stair nosing which was later varnished the same colour as the floor.
-
Image
214
- Engineered oak flooring installed.

-
Image
215
- Original floorboards refurbished and varnished.

-
Image
216
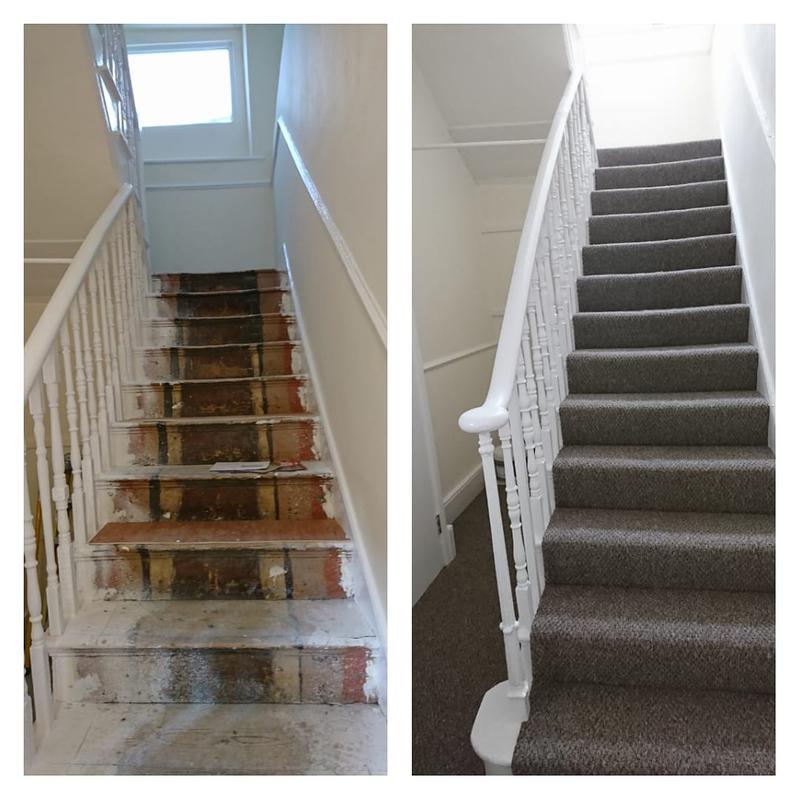
- Carpets fitted to the staircase.
-
Image
217
- Engineered hardwood flooring installed.

-
Image
218
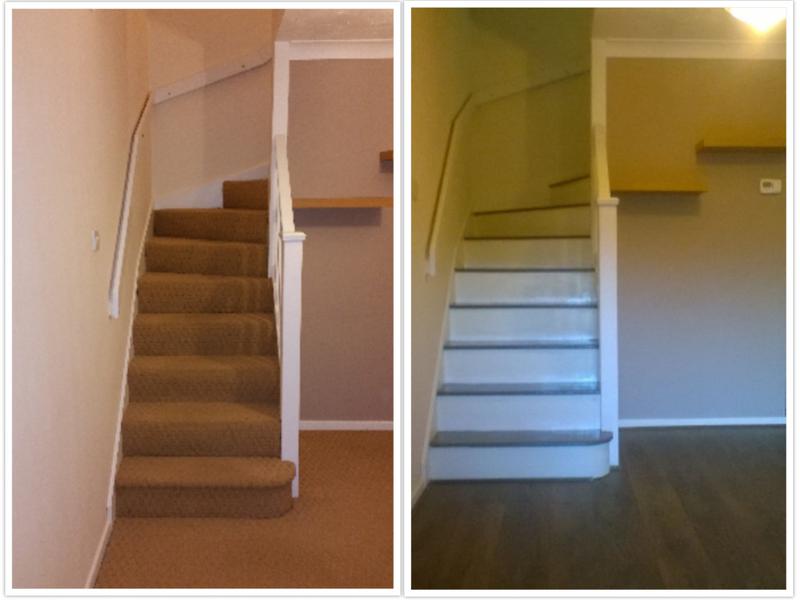
- Laminate flooring installed and staircase painted.
-
Image
219
- Laminate flooring installed.

-
Image
220
- Bespoke shelving and laminate flooring installed.

-
Image
221
- Rotten section of floor fully replaced.

-
Image
222
- Floorboards sanded and varnished.

-
Image
223
- Vinyl flooring installed.

-
Image
224
- Laminate flooring installed to replace the carpet.

-
Image
225
- Floor fully sanded and varnished.

-
Image
226
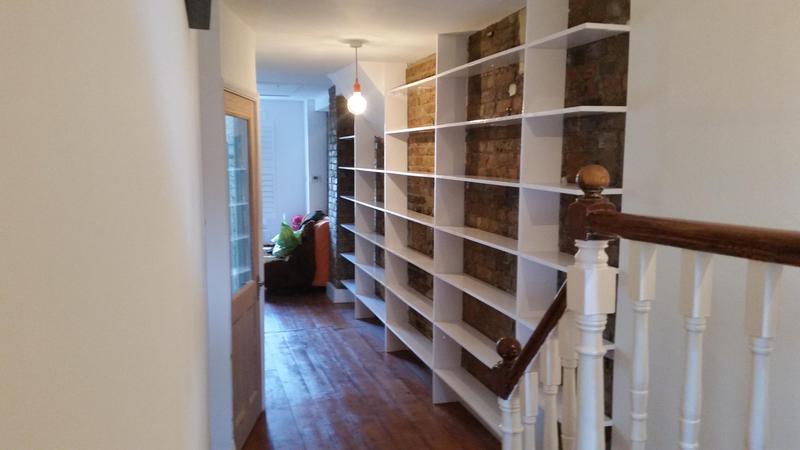
- Large bespoke book shelving.
-
Image
227
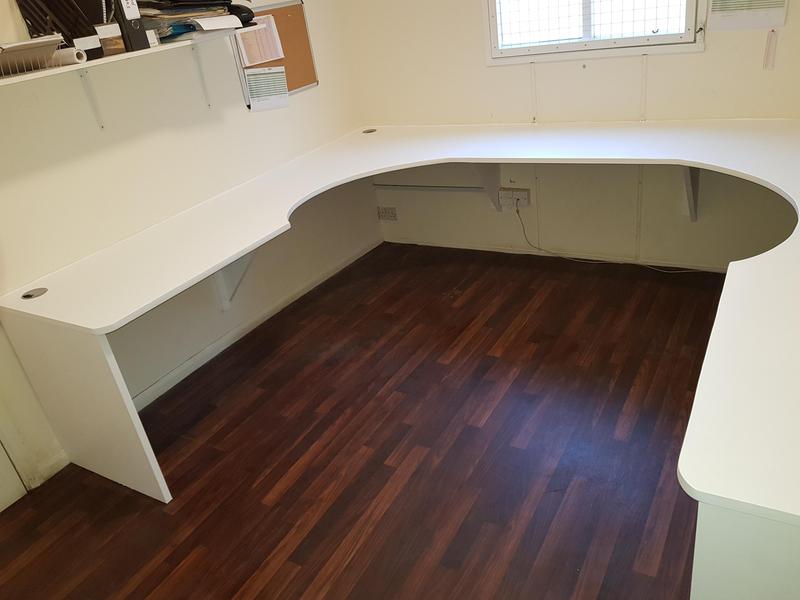
- Office desks built for a charity.
-
Image
228
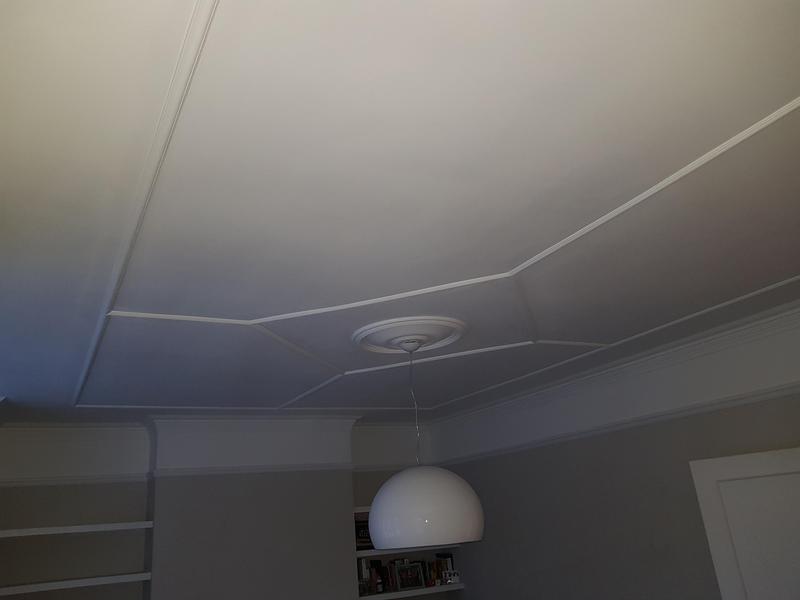
- Decorative cladding fitted to the ceiling and painted.
-
Image
229
- Unusual barn style bunk bed built for two children

-
Image
230
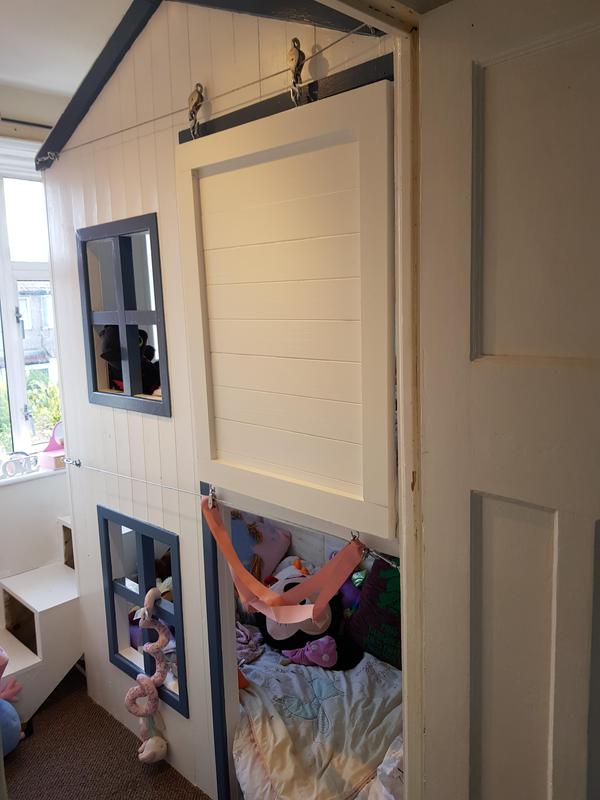
- Unusual barn style bunk bed for two children
-
Image
231
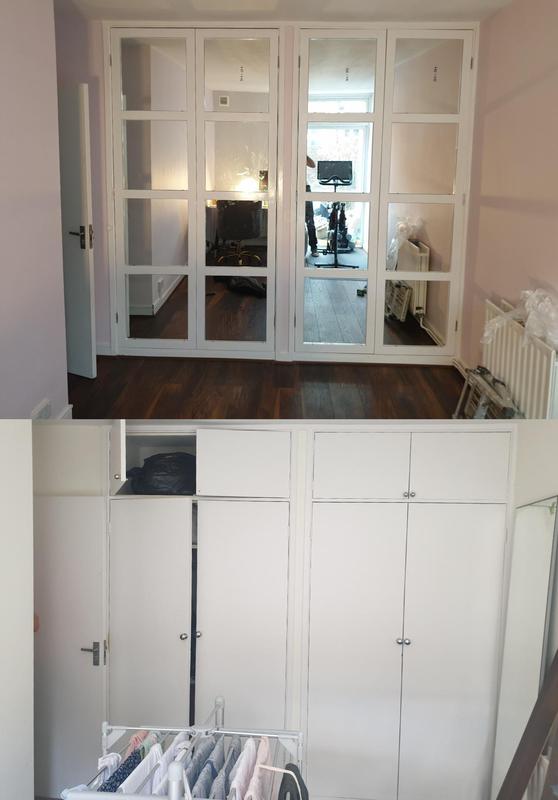
- Mirrored glass wardrobe doors built and painted to replace the originals
-
Image
232
- Full bathroom refurbishment

-
Image
233
- Full bathroom refurbishment

-
Image
234
- Full bathroom refurbishment
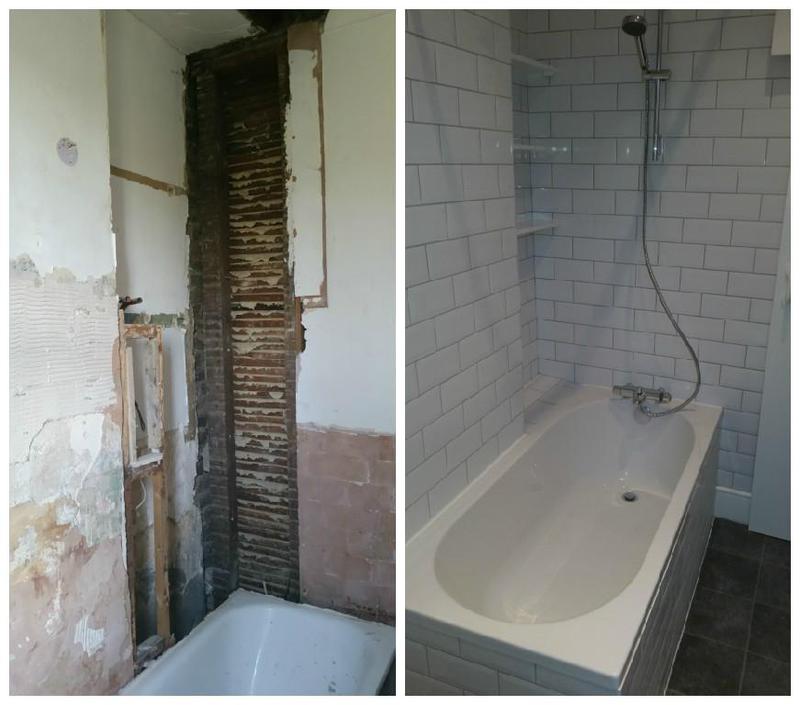
-
Image
235
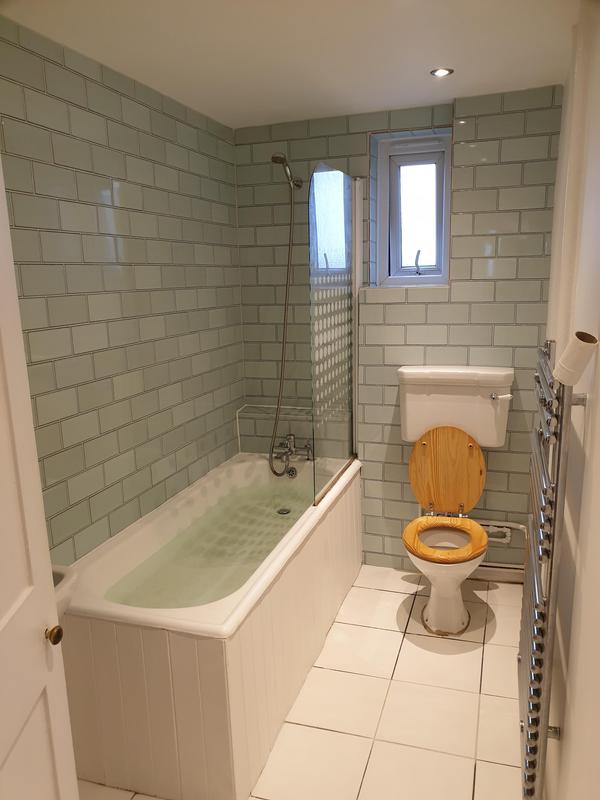
- Part bathroom refurbishment, new wall tiles new bath panels, new shower screen
-
Image
236
-
Image
237
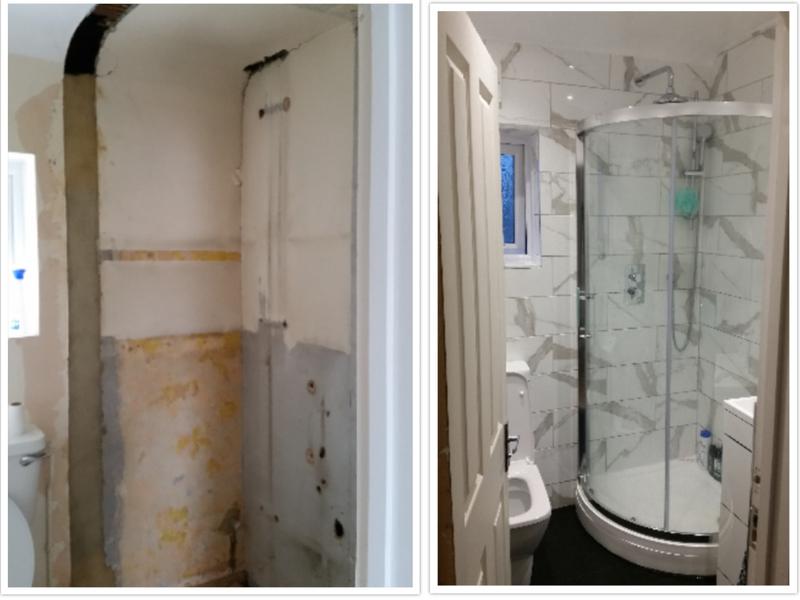
- Full shower room refurbishment

-
Image
238
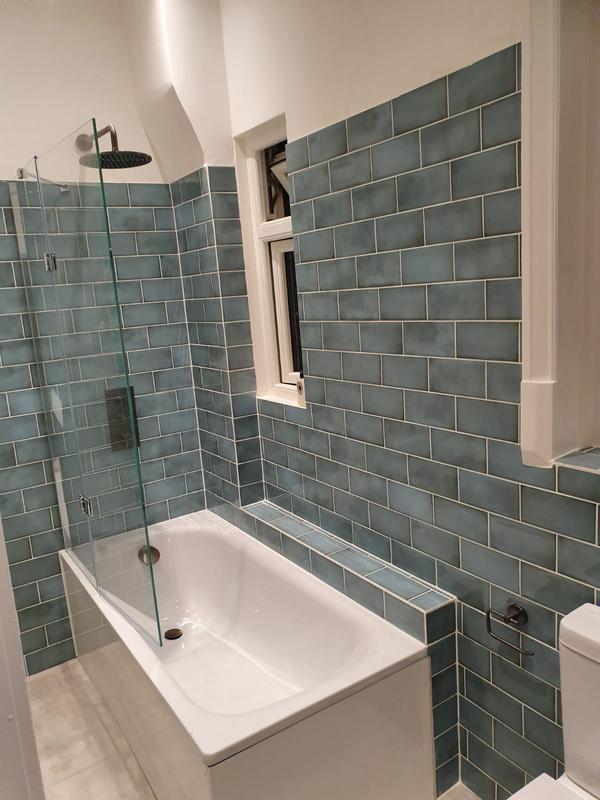
- Full bathroom refurbishments
-
Image
239
- Full bathroom refurbishment

-
Image
240
-
Image
241
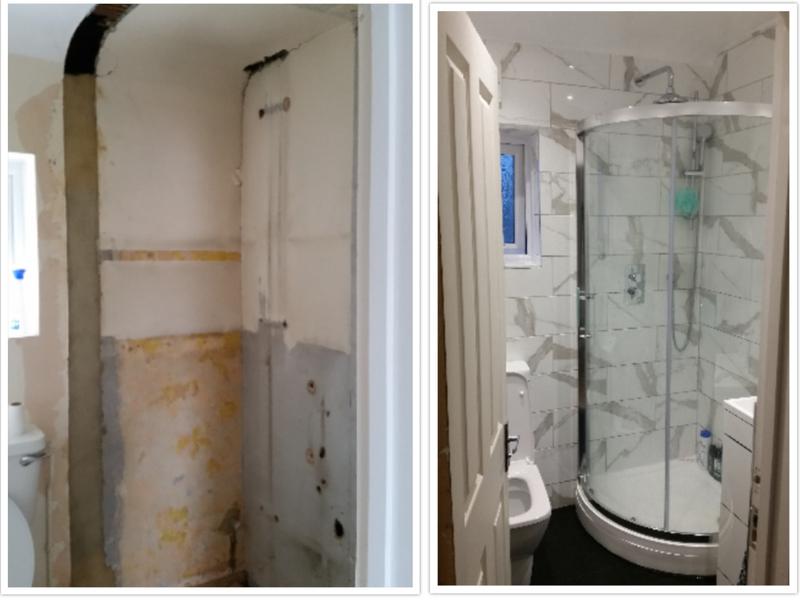
- Addition of toilet and shower to replace an under stair cupboard

-
Image
242
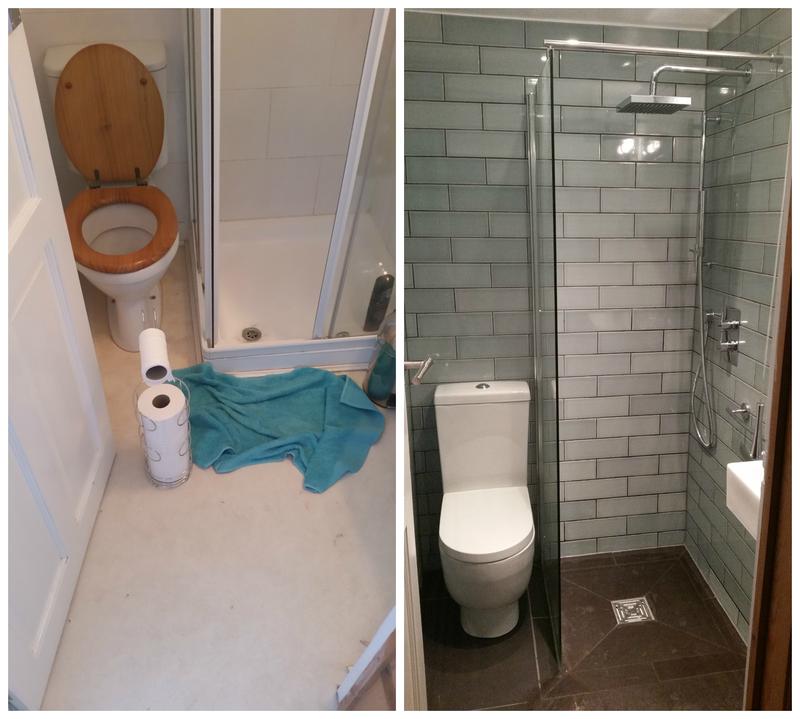
- Wet room style shower room
-
Image
243
- Bathroom converted into a shower room

-
Image
244
- Bespoke window seat built from scratch and painted. This holds radiator inside and has storage on the side sections.

-
Image
245
- Bespoke cupboard fitted and painted.

-
Image
246
- Unusual bespoke shelving fitted and painted.

-
Image
247
- Unusual bespoke shelving fitted and painted.

-
Image
248
- natural wood shelving unit built with no visable joins or brackets. all dowelled and glued.

-
Image
249
- Two wardrobes built from scratch and painted.

-
Image
250
- alcove shelving built and painted.

-
Image
251
- bespoke wardrobe built and painted

-
Image
252
- drawers build and fitted, then painted
-
Image
253
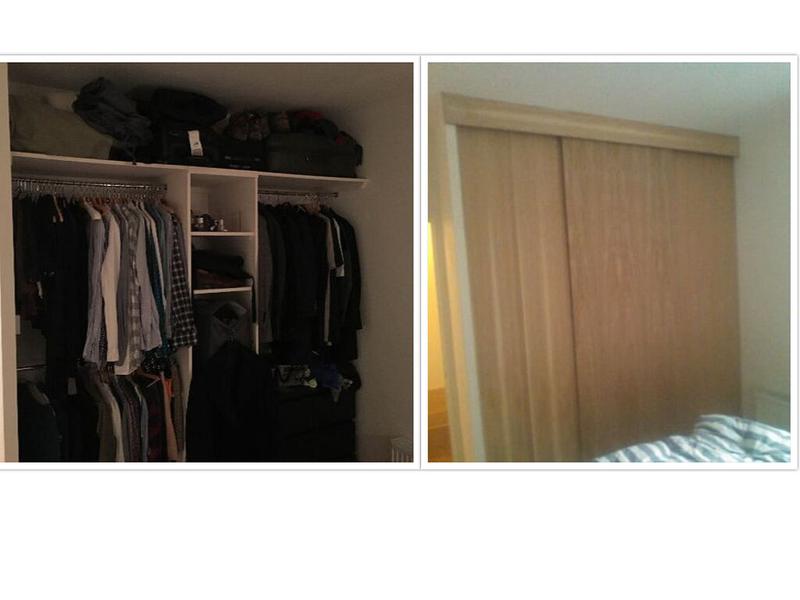
- sliding doors built and hung
-
Image
254
- wadrobes built, flooring laid and the room plastered and decorated..

-
Image
255
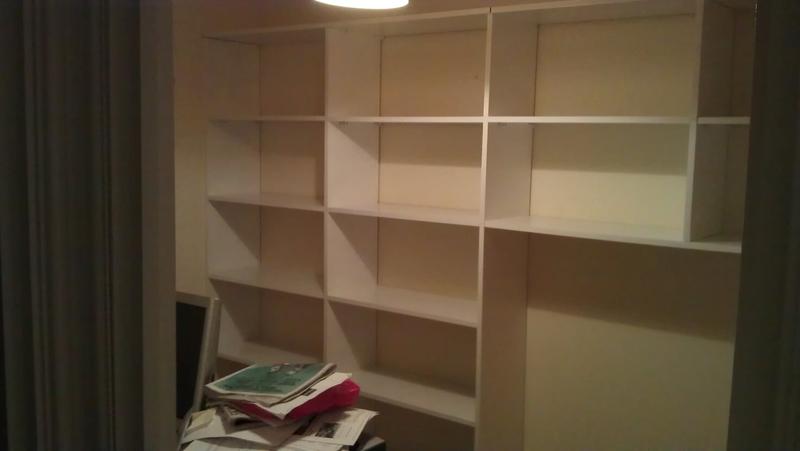
- bespoke shelving
-
Image
256
- shelves, cabinates and wall papering

-
Image
257
- bespoke wardrobe built and painted

-
Image
258
- bespoke shelving built and painted

-
Image
259
- bespoke utility room cabinate built

-
Image
260
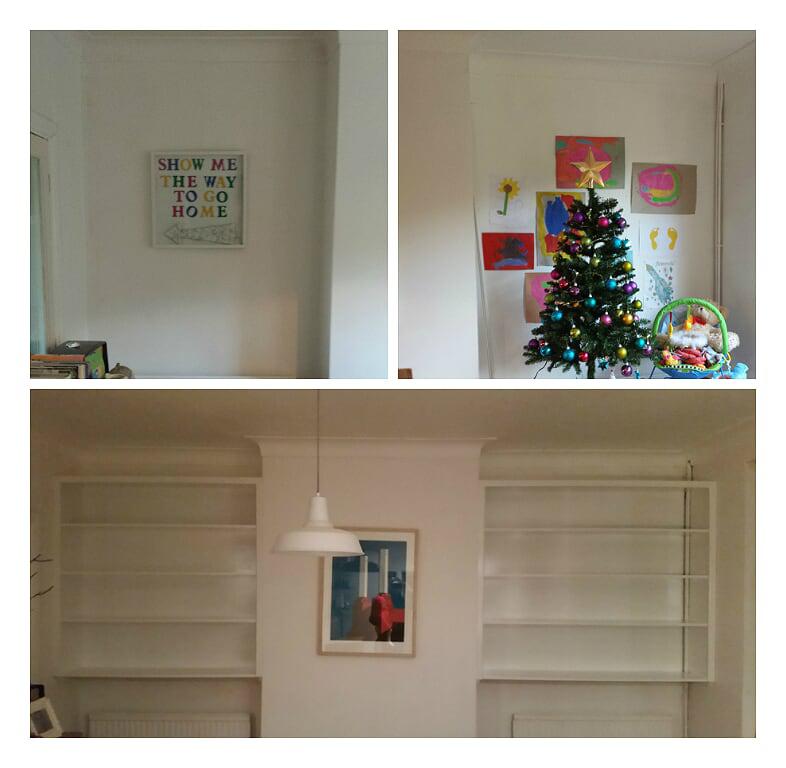
- Wall mounted units built and painted.
-
Image
261

-
Image
262
-
Image
263
-
Image
264

-
Image
265

-
Image
266

-
Image
267

-
Image
268
- Video 269 - Refurbishment of staircase so that entrance of the building including yorkstone steps installed and Victorian style tiling.
- Video 270 - Rotten window frame replacement and painting
- Video 271 - IKEA kitchen worktops installed. Seamless joint
- Video 272 - Towel heater install start to finish
- Video 273 - Bathroom refurbisment start to finish x 100 speed
- Video 274 - Hidden under floor safe installed.
- Video 275 - Old loft hatch removed and the ceiling made good. A new loft hatch opened up in a different room and a quality loft ladder installed.
- Video 276 - Hallway floor fully prepared, insulated and then tiled with Victorian style tiles. The hallway was also fully decorated
- Video 277 - Shaker style wardrobe doors built a fitted and painted decorated
- Video 278 - How to install a wardrobe hanging rail. DIY help.
- Video 279 - Wardrobe built from scratch with sliding doors plus hinged door including full decorating
- Video 280 - Refurbishing an original door to remove cat flap and get ready for painting.
- Video 281 - Installing a curtain rail step by step.
- Video 282 - Making good a water damaged wall and decorating. Also fitted a blind and a new electric heater
- Video 283 - Fitting a new blind
- Video 284 - Victorian style floor tiling.
- Video 285 - How to install a new gas meter cupboard fast and cheap.
Handyman type odd jobs
280 photos
-
Image
1
- Children's playhouse installed.
- Video 2 - How to install a new gas meter cupboard fast and cheap.
-
Image
3
- Full garden refurbishment.
- Video 4 - Refurbishing an original door to remove cat flap and get ready for painting.
-
Image
5
- Fence support posts installed to an existing fence.
- Video 6 - Installing a curtain rail step by step.
- Video 7 - Old loft hatch removed and the ceiling made good. A new loft hatch opened up in a different room and a quality loft ladder installed.
-
Image
8
- Rotten section of floor fully replaced.
- Video 9 - Hidden under floor safe installed.
-
Image
10
- New bin storage installed
- Video 11 - A little bit of fencing and laying of paving stones.
-
Image
12
- Concrete step refurbished.
- Video 13 - Exterior electric and gas meter cupboard refurbishment
-
Image
14
- Wall mounted TV installed with hidden wiring.
- Video 15 - Rotten window frame replacement and painting
-
Image
16
- Fan installed.
- Video 17 - Our first utube video. A guide on floor tiling.
-
Image
18
- Repair to badly deteriorated ceiling paint.
- Video 19 - Victorian style floor tiling.
-
Image
20
- New kitchen sink installed.
- Video 21 - Refurbishment of staircase so that entrance of the building including yorkstone steps installed and Victorian style tiling.
- Video 22 - How to install a wardrobe hanging rail. DIY help.
- Video 23 - Hallway floor fully prepared, insulated and then tiled with Victorian style tiles. The hallway was also fully decorated
- Video 24 - Wardrobe built from scratch with sliding doors plus hinged door including full decorating
- Video 25 - Shaker style wardrobe doors built a fitted and painted decorated
- Video 26 - Fitting a new blind
- Video 27 - Making good a water damaged wall and decorating. Also fitted a blind and a new electric heater
-
Image
28
- Floor fully sanded and varnished.
-
Image
29
- bespoke utility room cabinate built
-
Image
30
- Replacement fence panels installed.
-
Image
31
- Fire installed.
-
Image
32
- Concrete step refurbished.
-
Image
33
- Repair to deteriorated section of wall.
-
Image
34
- Removal of front door lean-to.
- Video 35 - Complete novice learning to MIG weld.
-
Image
36
- Replacement of exterior waste pipe work that was leaking.
-
Image
37
- Installation of dishwasher to replace a kitchen cabinet.
-
Image
38
- New kitchen sink installed.
-
Image
39
-
Image
40
-
Image
41
-
Image
42
-
Image
43
-
Image
44
-
Image
45
-
Image
46
-
Image
47
-
Image
48
-
Image
49
-
Image
50
-
Image
51
-
Image
52
-
Image
53
-
Image
54
-
Image
55
-
Image
56
-
Image
57
-
Image
58
-
Image
59
-
Image
60
-
Image
61
-
Image
62
-
Image
63
-
Image
64
-
Image
65
-
Image
66
-
Image
67
-
Image
68
-
Image
69
-
Image
70
-
Image
71
-
Image
72
-
Image
73
-
Image
74
-
Image
75
-
Image
76
-
Image
77
-
Image
78
-
Image
79
-
Image
80
-
Image
81
-
Image
82
-
Image
83
-
Image
84
-
Image
85
-
Image
86
-
Image
87
-
Image
88
-
Image
89
-
Image
90
-
Image
91
-
Image
92
-
Image
93
-
Image
94
-
Image
95
-
Image
96
-
Image
97
-
Image
98
-
Image
99
-
Image
100
-
Image
101
-
Image
102
-
Image
103
-
Image
104
-
Image
105
-
Image
106
-
Image
107
-
Image
108
-
Image
109
-
Image
110
-
Image
111
-
Image
112
-
Image
113
-
Image
114
-
Image
115
-
Image
116
-
Image
117
-
Image
118
-
Image
119
-
Image
120
-
Image
121
-
Image
122
-
Image
123
-
Image
124
-
Image
125
-
Image
126
-
Image
127
-
Image
128
-
Image
129
-
Image
130
-
Image
131
-
Image
132
-
Image
133
-
Image
134
-
Image
135
-
Image
136
-
Image
137
-
Image
138
-
Image
139
-
Image
140
-
Image
141
-
Image
142
-
Image
143
-
Image
144
-
Image
145
-
Image
146
-
Image
147
-
Image
148
-
Image
149
-
Image
150
-
Image
151
-
Image
152
-
Image
153
- Bedroom back to brick refurbishment.
-
Image
154
- Bedroom back to brick refurbishment.
-
Image
155
- Refurbishment
-
Image
156
- Living room full back to brick refurbishment
-
Image
157
- New kitchen fitted.
-
Image
158
- Bespoke shelving unit built and painted.
-
Image
159
- Pattern repeating wallpaper hung and new laminate flooring.
-
Image
160
- Horizontal striped paper hung for a feature wall.
-
Image
161
- Pattern repeating wallpaper hung.
-
Image
162
- Lounge lining paper installed.
-
Image
163
- Pattern repeat wallpaper in a bedroom.
-
Image
164
- Striped wallpaper installed on a hall stairs and landing.
-
Image
165
- Wall tiling.
-
Image
166
- Floor tiling with wood effect tiles.
-
Image
167
- Floor tiling.
-
Image
168
- Difficult floor tiling including underfloor heating.
-
Image
169
- Difficult floor tiling including underfloor heating.
-
Image
170
- Wall plastered and new radiator installed.
-
Image
171
- Repair of collapsed artex ceiling including redecorating.
-
Image
172
- Repair of a collapsed ceiling including plastering and redecorating the room.
-
Image
173
- Plastering.
-
Image
174
- Repair of a collapsed ceiling including plastering and redecorating.
-
Image
175
- Kitchen walls re plastered, tiled and redecorated.
-
Image
176
- Kitchen walls re plastered.
-
Image
177
- Bespoke unusual design book shelving built and decorated. This picture was taken about a year after it was built.
-
Image
178
- Bespoke unusual design book shelving built and decorated. This picture was taken about a year after it had been built.
-
Image
179
- Full refurbishment of a bedroom.
-
Image
180
- Redecorating a kitchen with damp issues.
-
Image
181
- Plastering and redecoration
-
Image
182
- Full redecoration
-
Image
183
- Full redecoration
-
Image
184
- Full redecoration
-
Image
185
- Full redecoration
-
Image
186
- Wallpaper removed, wall plastered and the room decorated
-
Image
187
- Refurbishment of a room.
-
Image
188
- Room fully decorated.
-
Image
189
- Full refurbishment including plastering floor refurbishment with varnishing. The room was also decorated.
-
Image
190
- Kitchen made good from the removal of heating.
-
Image
191
- Kitchen decorated.
-
Image
192
- Tudor style cladding refurbished and decorated.
-
Image
193
- Badly deteriorated bathroom ceiling refurbished and the room decorated.
-
Image
194
- Water-damaged wall made good and redecorated.
-
Image
195
- Bespoke carpentry and decorating.
-
Image
196
- Wallpaper removed, a wall plastered and painted.
-
Image
197
- Front door painted.
-
Image
198
- Plastering and decorating of a hall stairs and landing.
-
Image
199
- Refurbishment of attic bedroom including plastering and painting.
-
Image
200
- Back to brick refurbishment of a bedroom.
-
Image
201
- Back to brick refurbishment of a bedroom.
-
Image
202
- Tudor style cladding refurbished and painted.
-
Image
203
- Refurbishment of very deteriorated brick walls.
-
Image
204
- Kitchen walls plastered, tiled and painted.
-
Image
205
- Window removed and blocks in before making the walls good. This was so kitchen cabinets could be installed in this area.
-
Image
206
- Full kitchen refurbishment. Including herringbone style tiling. The manufacturer did send the correct colour doors later as they sent the incorrect ones by mistake.
-
Image
207
- New worktops and sink installed to an existing kitchen.
-
Image
208
- Dining room turned into a kitchen.
-
Image
209
- Refurbishment of an awkward shaped small kitchen.
-
Image
210
- Full kitchen refurbishment.
-
Image
211
- Full kitchen refurbishment.
-
Image
212
- Full kitchen refurbishment.
-
Image
213
- Full kitchen refurbishment.
-
Image
214
- New kitchen unit and worktops installed including decorating the room.
-
Image
215
- Full kitchen refurbishment.
-
Image
216
- Laminate flooring installed on a staircase with hardwood stair nosing which was later varnished the same colour as the floor.
-
Image
217
- Engineered oak flooring installed.
-
Image
218
- Original floorboards refurbished and varnished.
-
Image
219
- Carpets fitted to the staircase.
-
Image
220
- Engineered hardwood flooring installed.
-
Image
221
- Laminate flooring installed and staircase painted.
-
Image
222
- Laminate flooring installed.
-
Image
223
- Bespoke shelving and laminate flooring installed.
-
Image
224
- Floorboards sanded and varnished.
-
Image
225
- Vinyl flooring installed.
-
Image
226
- Laminate flooring installed to replace the carpet.
-
Image
227
- New fence, posts and trellis installed.
-
Image
228
- New fence installed.
-
Image
229
- New fence installed
-
Image
230
- Concrete area installed over a run down part of the garden. The customer later install the summerhouse over this area.
-
Image
231
- Decking area
-
Image
232
- Decked area
-
Image
233
- Decking area built to the customers requirements
-
Image
234
- New fence with posts installed.
-
Image
235
- Trellis fitted to the top of an existing fence.
-
Image
236
- Raised decking area built.
-
Image
237
- Large bespoke book shelving.
-
Image
238
- Office desks built for a charity.
-
Image
239
- Decorative cladding fitted to the ceiling and painted.
-
Image
240
- Unusual barn style bunk bed built for two children
-
Image
241
- Unusual barn style bunk bed for two children
-
Image
242
- Mirrored glass wardrobe doors built and painted to replace the originals
-
Image
243
- Full bathroom refurbishment
-
Image
244
- Full bathroom refurbishment
-
Image
245
- Full bathroom refurbishment
-
Image
246
- Part bathroom refurbishment, new wall tiles new bath panels, new shower screen
-
Image
247
-
Image
248
- Full shower room refurbishment
-
Image
249
- Full bathroom refurbishments
-
Image
250
- Full bathroom refurbishment
-
Image
251
-
Image
252
- Addition of toilet and shower to replace an under stair cupboard
-
Image
253
- Wet room style shower room
-
Image
254
- Bathroom converted into a shower room
-
Image
255
- Bespoke window seat built from scratch and painted. This holds radiator inside and has storage on the side sections.
-
Image
256
- Bespoke cupboard fitted and painted.
-
Image
257
- Unusual bespoke shelving fitted and painted.
-
Image
258
- Unusual bespoke shelving fitted and painted.
-
Image
259
- natural wood shelving unit built with no visable joins or brackets. all dowelled and glued.
-
Image
260
- Two wardrobes built from scratch and painted.
-
Image
261
- alcove shelving built and painted.
-
Image
262
- bespoke wardrobe built and painted
-
Image
263
- drawers build and fitted, then painted
-
Image
264
- sliding doors built and hung
-
Image
265
- wadrobes built, flooring laid and the room plastered and decorated..
-
Image
266
- bespoke shelving
-
Image
267
- shelves, cabinates and wall papering
-
Image
268
- bespoke wardrobe built and painted
-
Image
269
- bespoke shelving built and painted
-
Image
270
- Wall mounted units built and painted.
-
Image
271
-
Image
272
-
Image
273
-
Image
274
-
Image
275
-
Image
276
-
Image
277
-
Image
278
- Video 279 - Our scaffolders
-
Image
280
Utube videos of us doing various work types
32 photos
- Video 1 - Trocky skirting board instal, using exspanding foam.
- Video 2 - How to save big money building a fitted wardrobe. £3280 saved on this project.
- Video 3 - How to install a clothes hanging rail
- Video 4 - Windowsill refurbishment and replacement.
- Video 5 - What is scribing? A scribing tutorial.
- Video 6 - Decking football pitch built.
- Video 7 - beginer welding
- Video 8 - Bathroom refurbisment start to finish x 100 speed
- Video 9 - Wardrobe built from scratch with sliding doors plus hinged door including full decorating
- Video 10 - Hallway floor fully prepared, insulated and then tiled with Victorian style tiles. The hallway was also fully decorated
- Video 11 - Refurbishment of staircase so that entrance of the building including yorkstone steps installed and Victorian style tiling.
- Video 12 - Exterior electric and gas meter cupboard refurbishment
- Video 13 - Victorian style floor tiling.
- Video 14 - Our first utube video. A guide on floor tiling.
- Video 15 - Complete novice learning to MIG weld.
- Video 16 - A little bit of fencing and laying of paving stones.
- Video 17 - Old loft hatch removed and the ceiling made good. A new loft hatch opened up in a different room and a quality loft ladder installed.
- Video 18 - Shaker style wardrobe doors built a fitted and painted decorated
- Video 19 - Hidden under floor safe installed.
- Video 20 - Rotten window frame replacement and painting
- Video 21 - Installing a curtain rail step by step.
- Video 22 - How to install a wardrobe hanging rail. DIY help.
- Video 23 - Making good a water damaged wall and decorating. Also fitted a blind and a new electric heater
- Video 24 - Refurbishing an original door to remove cat flap and get ready for painting.
- Video 25 - Fitting a new blind
- Video 26 - IKEA kitchen worktops installed. Seamless joint
- Video 27 - How to install a new gas meter cupboard fast and cheap.
- Video 28 - Our excellent scaffolders
- Video 29 - Towel heater install start to finish
- Video 30 - Install door knobs like a Pro tutorial
- Video 31 - Our scaffolders
- Video 32 - loose staircase repair
Handy's Property Services
- Identification checked
- Company address verified
- Customer references checked
- Agreed to TrustATrader's high standards
- Agreed to complaints procedure
Insurance details
| Provider | Commercial Express Insurance |
|---|---|
| Verified | 12th November 2025 |
Associations

Reviews (333)
-
Average rating: 5.0 out of 5
Review by Quanisha Virginie
on 4th February 2026
"Great work by a great guy!"
- Initial impression Initial impression: 5 out of 5.0
- Punctuality Punctuality: 5 out of 5.0
- Cleanliness Cleanliness: 5 out of 5.0
- Quality Quality: 5 out of 5.0
- Value Value: 5 out of 5.0
- Overall opinion Overall opinion: 5 out of 5.0
-
Average rating: 5.0 out of 5
Review by Kimberley Duckett
on 1st December 2025
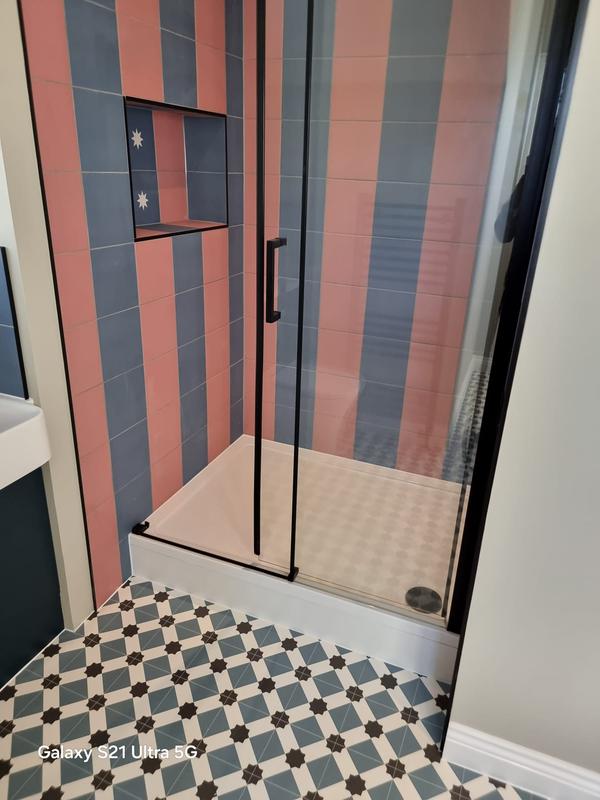
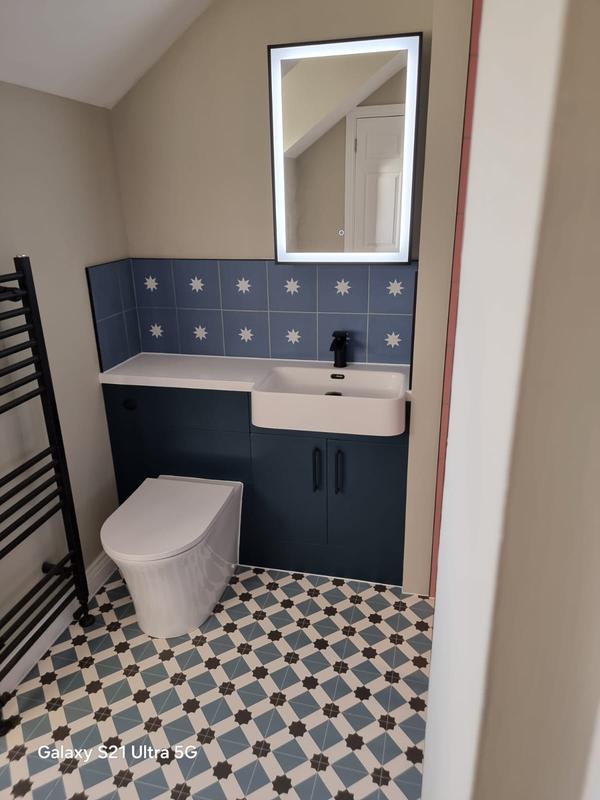
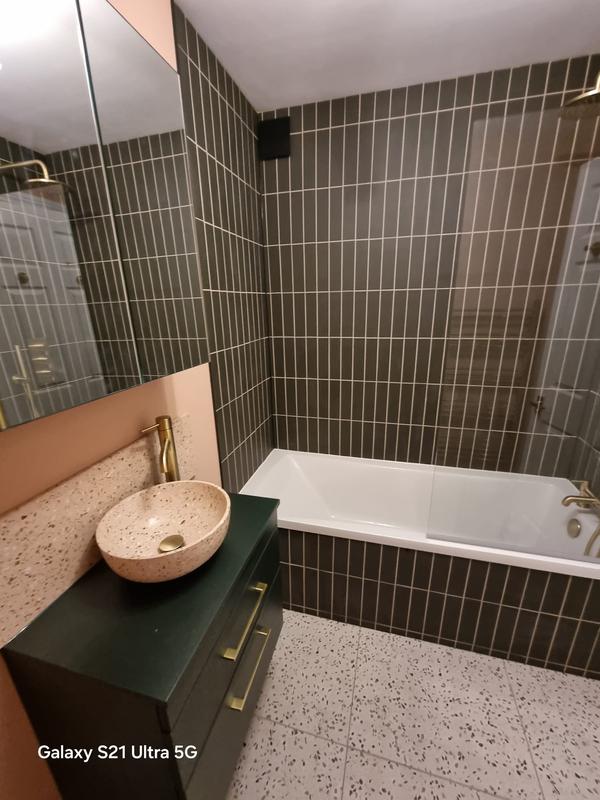
Kimberley Duckett - Image 1 3 images Kimberley Duckett - Image 2 Kimberley Duckett - Image 3 "2x bathroom - complete refit. No job too much & went above & beyond."
Trader reply: "Hi Thank you for the great review and for the work as well."
- Initial impression Initial impression: 5 out of 5.0
- Punctuality Punctuality: 5 out of 5.0
- Cleanliness Cleanliness: 5 out of 5.0
- Quality Quality: 5 out of 5.0
- Value Value: 5 out of 5.0
- Overall opinion Overall opinion: 5 out of 5.0
-
Average rating: 4.83 out of 5
Review by Aaron Bean
on 21st November 2025
Aaron Bean - Image 1 "Really happy with the work. Top quality finish. Nigel has been superb. Highly recommend and will be using again!"
- Initial impression Initial impression: 5 out of 5.0
- Punctuality Punctuality: 5 out of 5.0
- Cleanliness Cleanliness: 5 out of 5.0
- Quality Quality: 5 out of 5.0
- Value Value: 4 out of 5.0
- Overall opinion Overall opinion: 5 out of 5.0
-
Average rating: 5.0 out of 5
Review by Michael
on 13th October 2025
"Please withdraw previous review dated on 13 oct 2025 which was sent on my behalf but not by myself. This current review was posted by myself, and represents my sole opinion. Kind regards Michael"
- Initial impression Initial impression: 5 out of 5.0
- Punctuality Punctuality: 5 out of 5.0
- Cleanliness Cleanliness: 5 out of 5.0
- Quality Quality: 5 out of 5.0
- Value Value: 5 out of 5.0
- Overall opinion Overall opinion: 5 out of 5.0
Feeling social?
See more of what we do and give us a follow on our social media.