Diggins of Dulwich
Painters & Decorators. Diggins of Dulwich has been vetted and approved by TrustATrader. Covering Dulwich and surrounding areas
Membership number TT9000
Don't forget! Please mention TrustATrader when you contact any of our trusted traders.
All TrustATrader members are checked and vetted!
Get extra peace of mind and cover your next agreed job with this trader for free by registering for the TrustATrader Guarantee. Find out more
Register GuaranteeAbout Diggins of Dulwich, London
For more recent photos please check out my Instagram page:
https://www.instagram.com/digginsdecorating/
Diggins of Dulwich is an independent family-run business that pride themselves in providing a seemless decorating service. We focus on delivering the highest standard of quality. We understand that the customer wants: Reliability, cleanliness, Pleasantness and a professional finish.
We are based in West Dulwich in London and cover all surrounding areas.
Diggins of Dulwich offers a full range of internal and external decorating services to home and business owners, and can provide a wide range of wallpaper and painting designs. We offer a friendly, professional service to a very high standard.
Our services include:
- Domestic painting & decorating
- Interior decorating
- Exterior decorating
- Painting
- Wallpapering
- Plastering
- Coving
- Quality wall coverings
- Wood staining / Varnishing
- Specialist finishes
- Redecoration
We offer free quotes and estimates.
Please contact us today to discuss your requirements or for free friendly, professional and helpful advice.
We look forward to hearing from you. Please mention Trustatrader when calling.
Thank you.
Photo gallery
Rooms
67 photos
-
Image
1

-
Image
2
-
Image
3
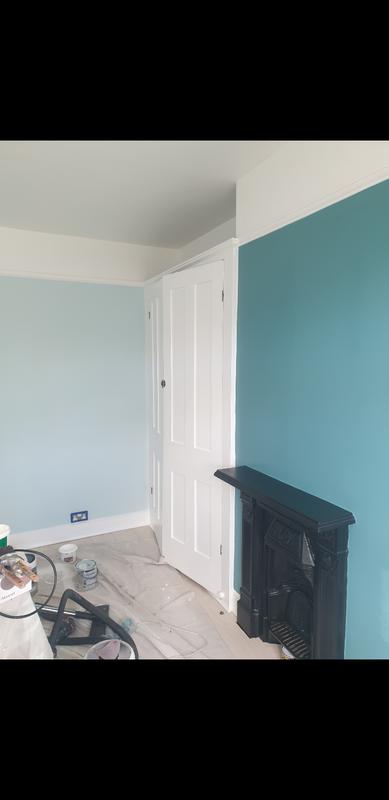
- This room was fully prepared, firstly filling all the holes and damages then sanding the walls, ceiling and woodwork using mirka sanders attached to dust extraction. Then we caulked all joints to prevent cracking, painted the ceiling with Diamond matt pure brilliant white, the walls were painted with farrow and ball 'de nimes' modern emulsion. The woodwork finished with farrow and ball 'de nimes' modern eggshell.

-
Image
4
- This room was fully prepared, firstly filling all the holes and damages then sanding the walls, ceiling and woodwork using mirka sanders attached to dust extraction. Then we caulked all joints to prevent cracking, painted the ceiling with Diamond matt pure brilliant white, the walls were painted with farrow and ball 'de nimes' modern emulsion. The woodwork finished with farrow and ball 'de nimes' modern eggshell.

-
Image
5
-
Image
6
-
Image
7
-
Image
8

-
Image
9

-
Image
10

-
Image
11

-
Image
12

-
Image
13

-
Image
14

-
Image
15

-
Image
16

-
Image
17

-
Image
18
- This room was fully prepared, firstly filling all the holes and damages then sanding the walls, ceiling and woodwork using mirka sanders attached to dust extraction. Then we caulked all joints to prevent cracking, painted the ceiling with Diamond matt pure brilliant white, and the walls with jasmine white. Woodwork finished using Diamond satinwood pure brilliant white.

-
Image
19
- This room was fully prepared, firstly filling all the holes and damages then sanding the walls, ceiling and woodwork using mirka sanders attached to dust extraction. Then we caulked all joints to prevent cracking, painted the ceiling with Diamond matt pure brilliant white, the walls were painted with farrow and ball 'de nimes' modern emulsion. The woodwork finished with farrow and ball 'de nimes' modern eggshell.

-
Image
20
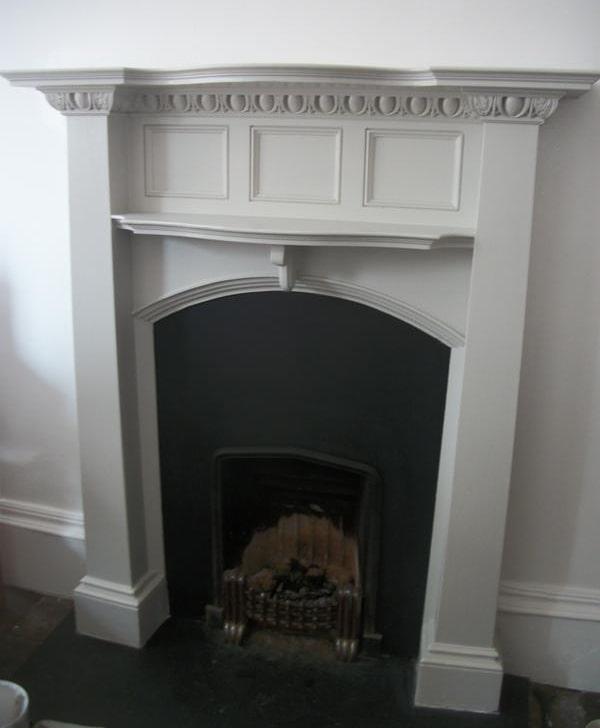
- This room was fully prepared, firstly filling all the holes and damages then sanding the walls, ceiling and woodwork using mirka sanders attached to dust extraction. Then we caulked all joints to prevent cracking, painted the ceiling and walls with diamond matt, woodwork with diamond satinwood and the fireplace with rustins firesafe black matt.

-
Image
21
- This room was fully prepared, firstly filling all the holes and damages then sanding the walls, ceiling and woodwork using mirka sanders attached to dust extraction. Then we caulked all joints to prevent cracking, painted the ceiling and walls with diamond matt, woodwork with diamond satinwood and the fireplace with rustins firesafe black matt.
-
Image
22
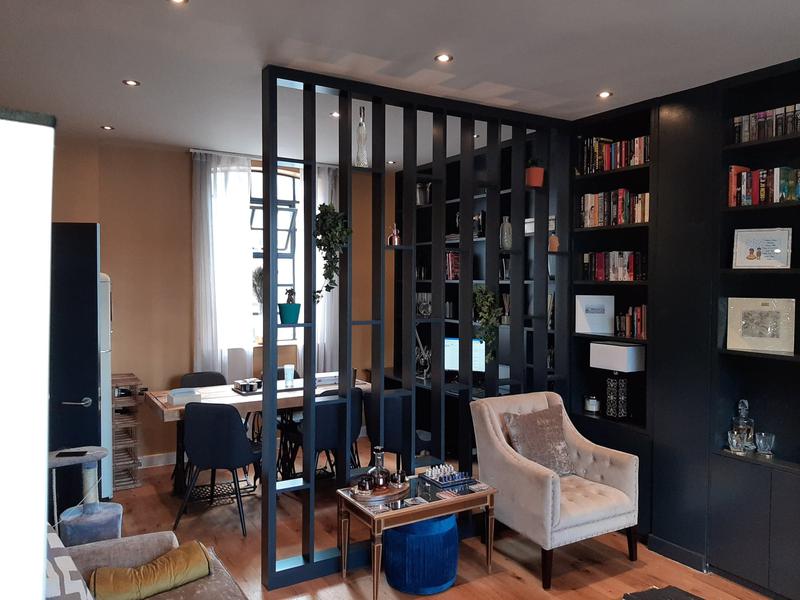
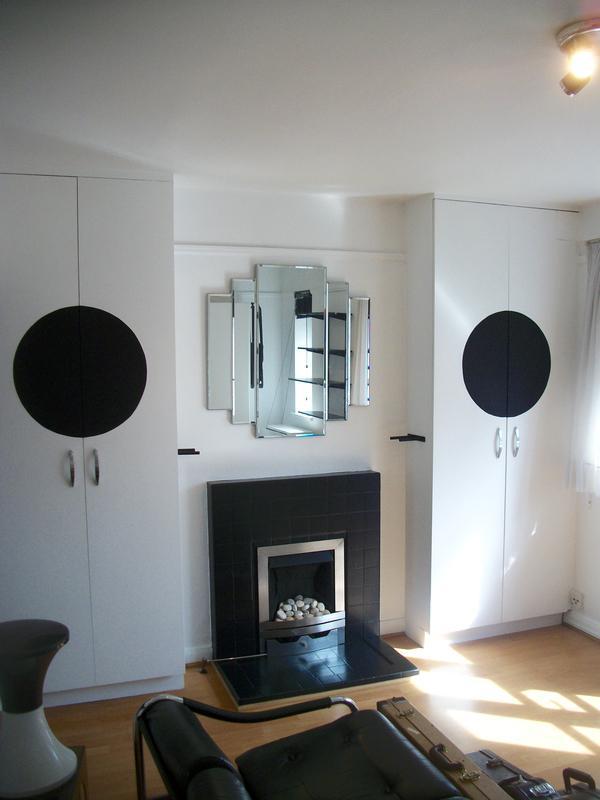
- Large double bespoke wardrobe with hanging space and drawers. Spray painted in little greene

-
Image
23
- Large double bespoke wardrobe with hanging space and drawers. Spray painted in little greene

-
Image
24
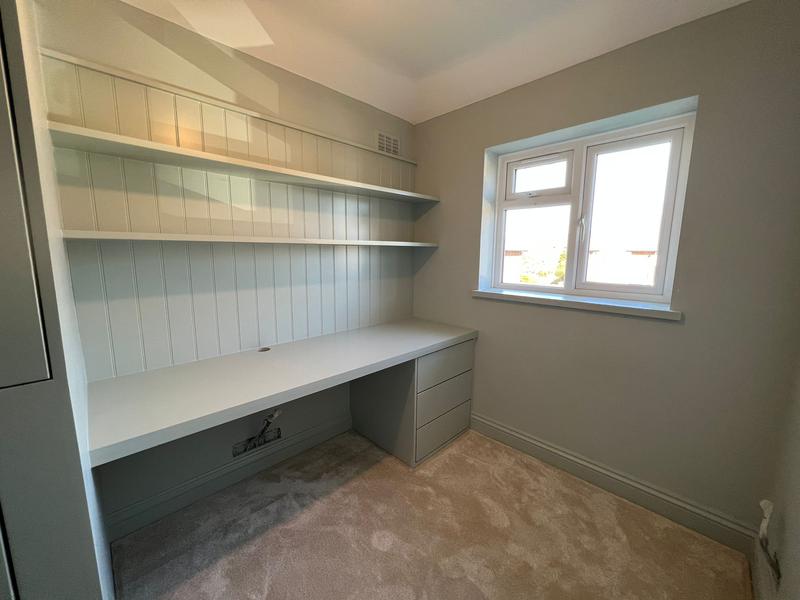
- CropDeleteWhole office conversion from a small bedroom. Bespoke wardrobe fitted over the top of the bulkhead of the stairs. Bead & Butt panelling fitted with floating shelves. Spray painted in little greene

-
Image
25
- CropDeleteWhole office conversion from a small bedroom. Bespoke wardrobe fitted over the top of the bulkhead of the stairs. Bead & Butt panelling fitted with floating shelves. Spray painted in little greene

-
Image
26
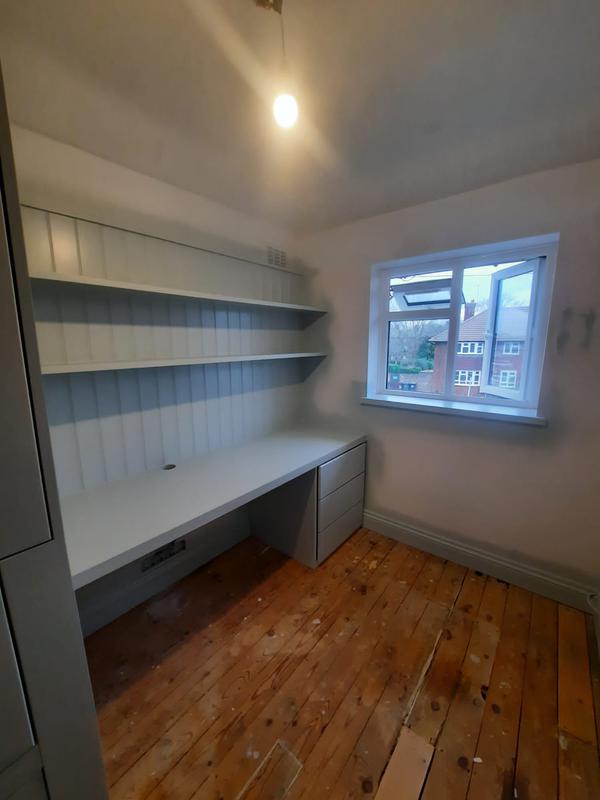
- Whole office conversion from a small bedroom. Bespoke wardrobe fitted over the top of the bulkhead of the stairs. Bead & Butt panelling fitted with floating shelves. Spray painted in little greene

-
Image
27
- CropDelete3.2 metre high bespoke wardrobes with built in drawers and hanging space. With a dressing table attached. Bead & Butt panelling fitted all the way around the room. Spray painted in little greene

-
Image
28
- 3.2 metre high bespoke wardrobes with built in drawers and hanging space. With a dressing table attached. Bead & Butt panelling fitted all the way around the room. Spray painted in little greene

-
Image
29
- Radiator cover with built in cupboards. To hide all pipework running underneath the radiator. All Cupboards fully removable for access.

-
Image
30
- Bespoke bed surround with shelving. Bespoke bedside tables to allow room for a double bed to fit inside. Bead & Butt panelling fitted all the way around the room. Spray painted in little greene

-
Image
31
- Large bespoke wardrobe, with hanging space and shelves. New engineered floor and new skirtings throughout. Painted by client

-
Image
32
- Large bespoke wardrobe, with hanging space and shelves. New engineered floor and new skirtings throughout. Painted by client

-
Image
33
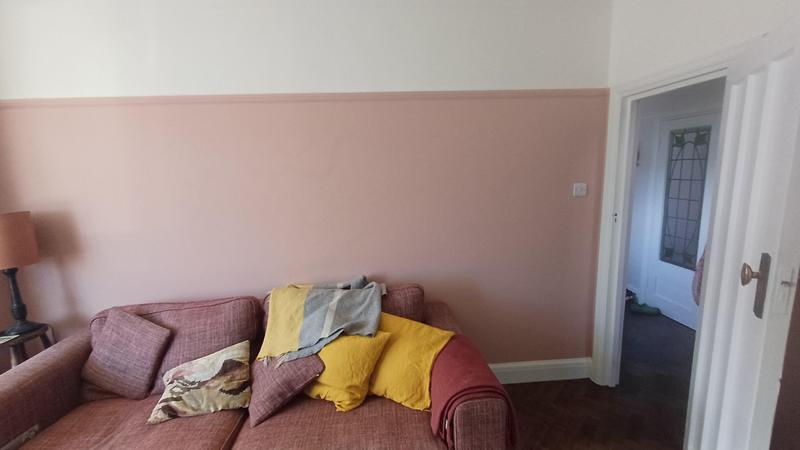
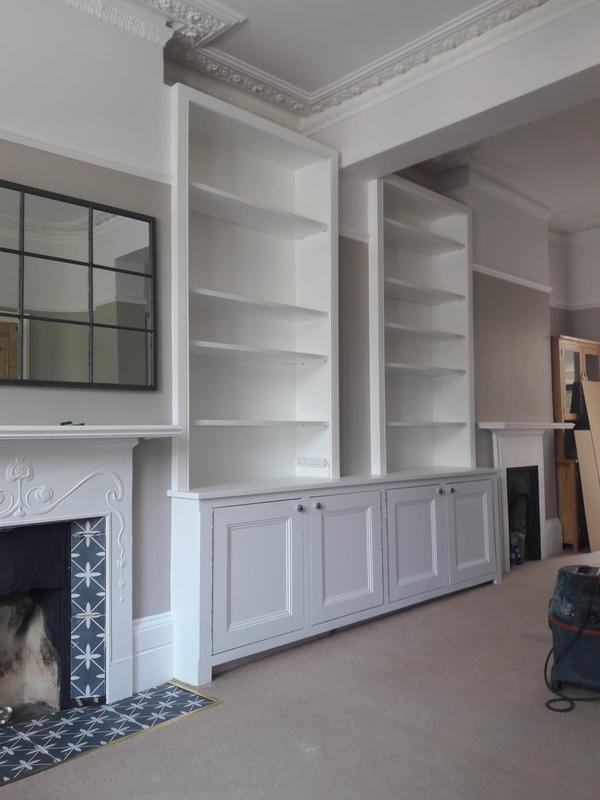
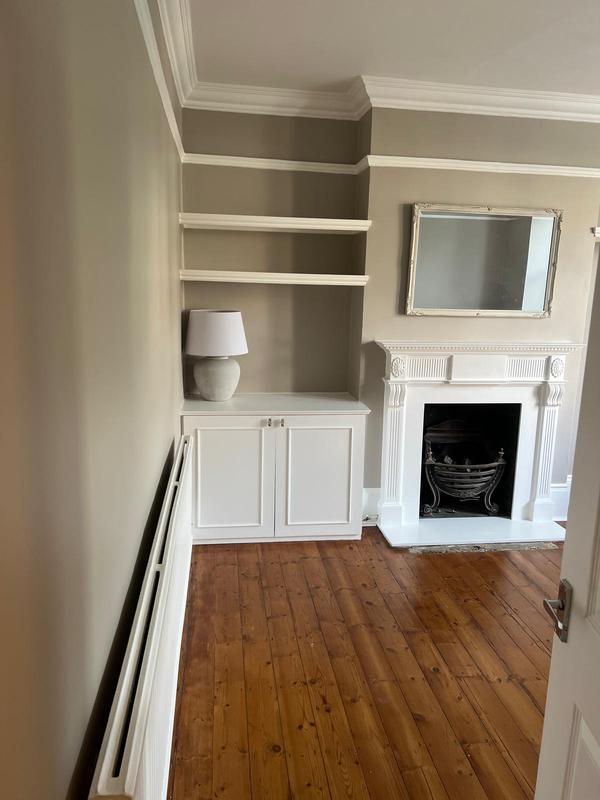
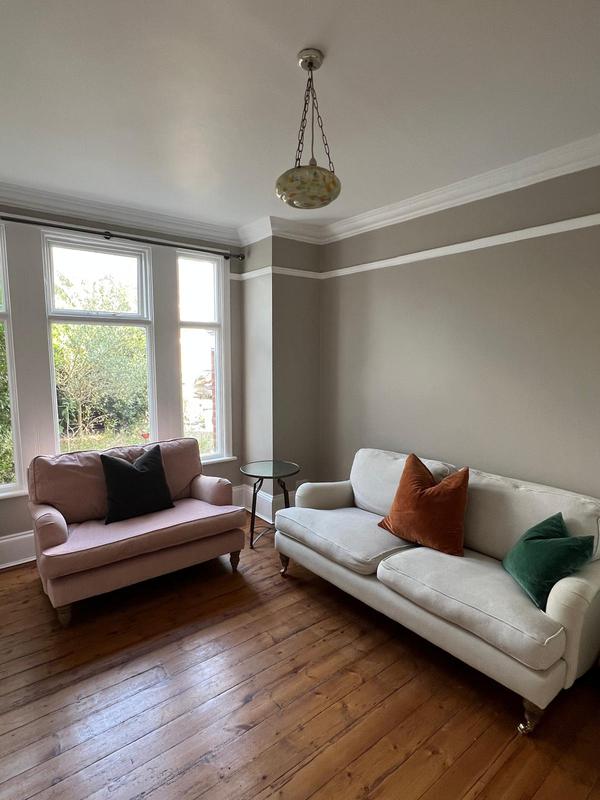
- Full front room redecoration all using Farrow and ball Modern emulsion and Modern eggshell.

-
Image
34
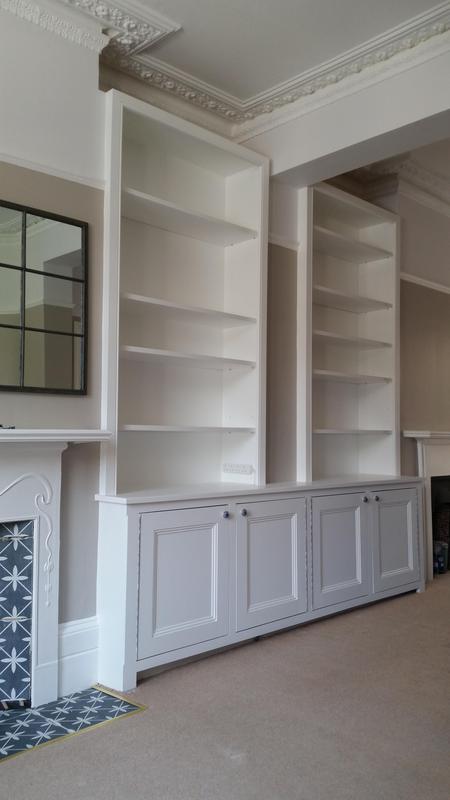
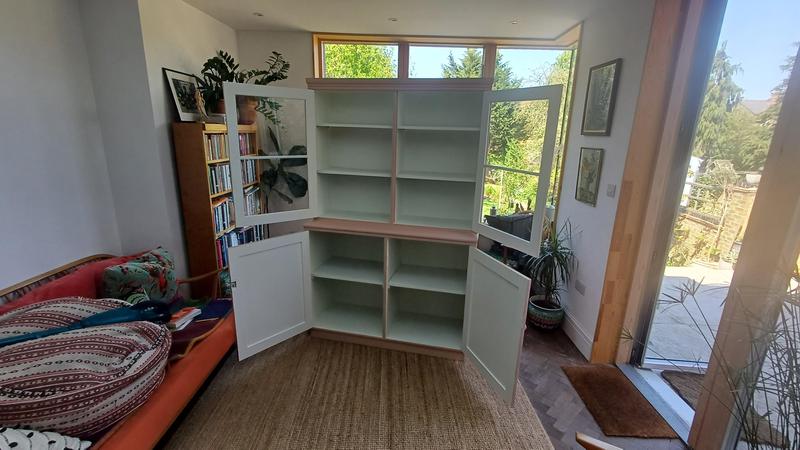
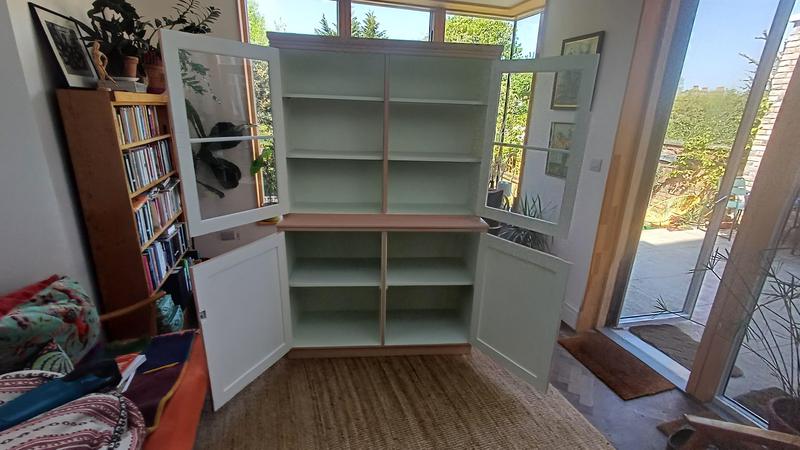
- Bookcase unit spray painted with graco turboforce 2, rest of room full redecoration using dulux diamond matt and dulux diamond eggshell
-
Image
35
- Bespoke wardrobes spray painted, walls plastered and painted using dulux diamond matt and dulux diamond satinwood
-
Image
36
- Bespoke wardrobes spay painted, walls plastered and painted using dulux diamond matt and dulux diamond satinwood

-
Image
37
- Bespoke wardrobes spay painted, walls plastered and painted using dulux diamond matt and dulux diamond satinwood

-
Image
38
- Bespoke wardrobes spay painted, walls plastered and painted using dulux diamond matt and dulux diamond satinwood
-
Image
39
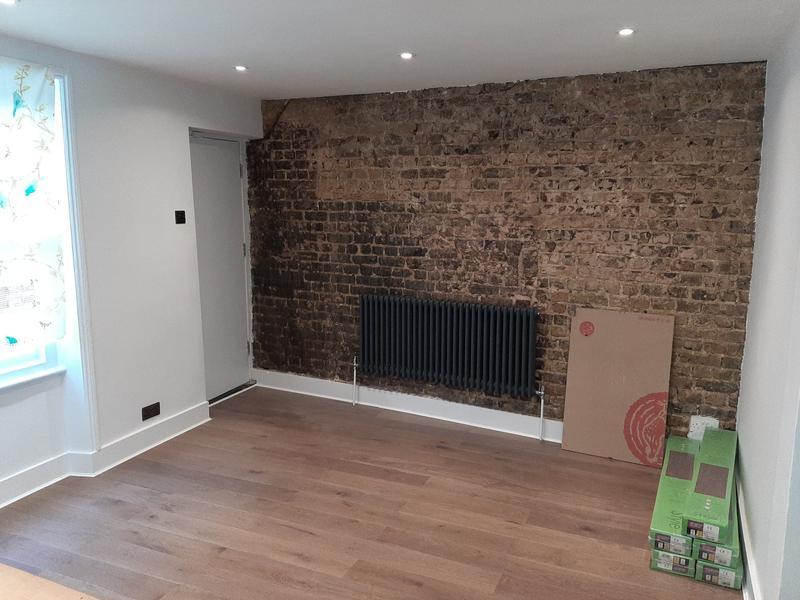
- Wall taken back to brickwork then sealed with PVA, rest of the room full redecoration using Dulux diamond matt and Dulux diamond eggshell

-
Image
40
- Bespoke wardrobes spay painted, walls prepped, filled and sanded and painted using dulux diamond matt and dulux diamond satinwood

-
Image
41
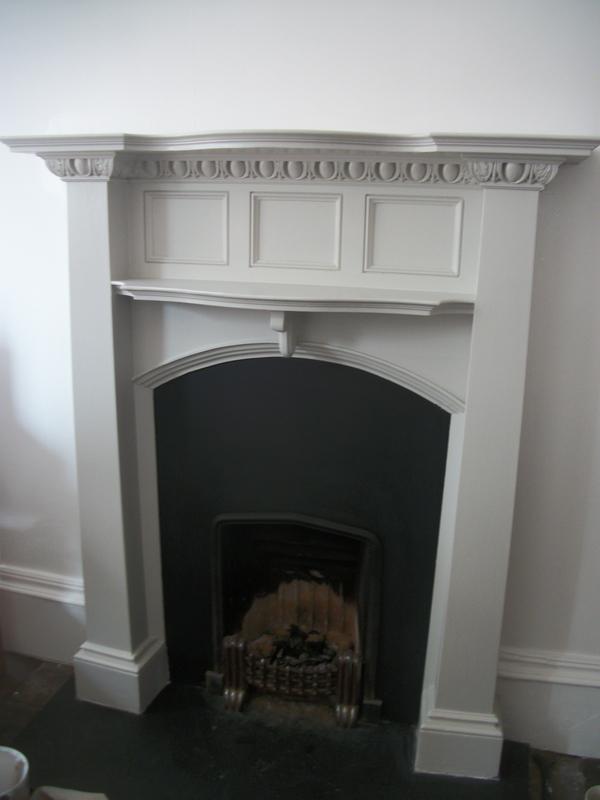
- Fire place, primed with zinsser primer and finished using dulux diamond eggshell
-
Image
42
- New plaster sanded primed and prepped, ceiling sanded prepped and painted with Dulux vinyl matt, walls painted with Dulux diamond matt, skirting sanded primed and prepped and painted with Dulux diamond eggshell, Fireplace sanded and sealed with PVA

-
Image
43
- New plaster sanded primed and prepped, ceiling sanded prepped and painted with Dulux vinyl matt, walls painted with Dulux diamond matt, skirting sanded primed and prepped and painted with Dulux diamond eggshell
-
Image
44
- New plaster sanded primed and prepped, ceiling sanded prepped and painted with Dulux vinyl matt, walls painted with Dulux diamond matt, skirting sanded primed and prepped and painted with Dulux diamond eggshell
-
Image
45
- Mininar built into the angle of the roof

-
Image
46
- Minibar built into the angle of the roof.

-
Image
47
- Minibar built into the angle of the roof

-
Image
48
- Bespoke wardrobes with a chest of drawers. All hand painted in Dulux diamond satinwood

-
Image
49
- Bespoke wardrobes with a chest of drawers. All hand painted in Dulux diamond satinwood

-
Image
50
- Bespoke wardrobes with a chest of drawers. All hand painted in Dulux diamond satinwood

-
Image
51
- Bespoke wardrobe with a chest of drawers. All hand painted in Dulux diamond satinwood

-
Image
52
- Bespoke wardrobe with a chest of drawers all hand painted in Dulux diamond satinwood

-
Image
53
-
Image
54

-
Image
55

-
Image
56

-
Image
57
-
Image
58
- New hardwood floors throughout 2 separate floors & new kitchen.

-
Image
59
- New hardwood floors throughout 2 separate floors & new kitchen install. All new doors also
-
Image
60
- New hardwood floors throughout 2 separate floors.
-
Image
61
- New hardwood floors throughout 2 separate floors.
-
Image
62
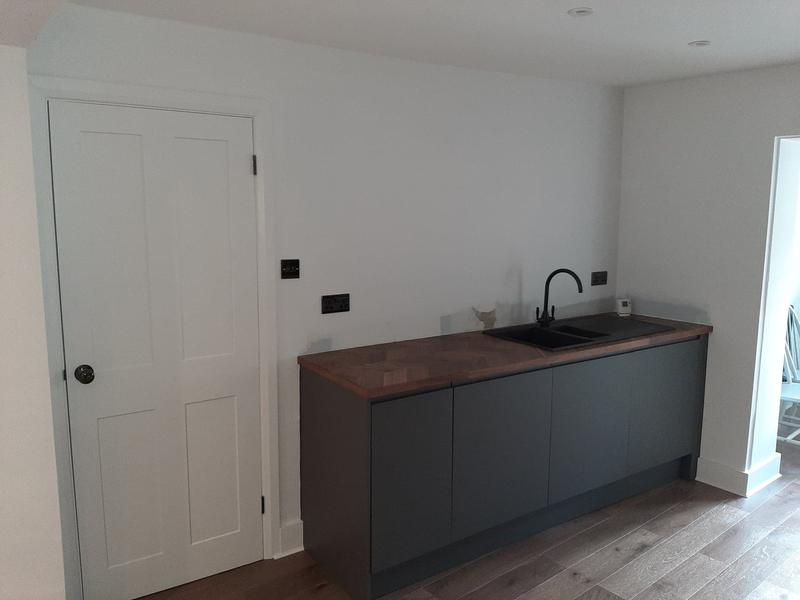
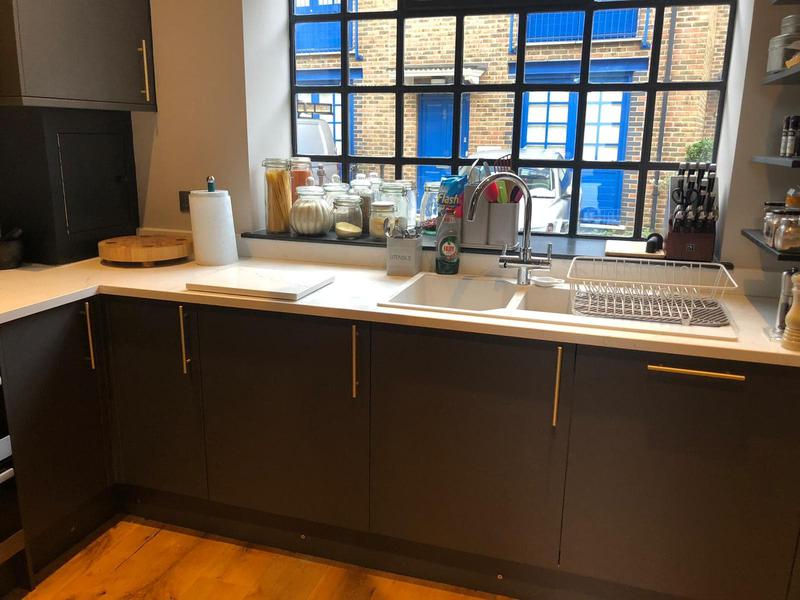
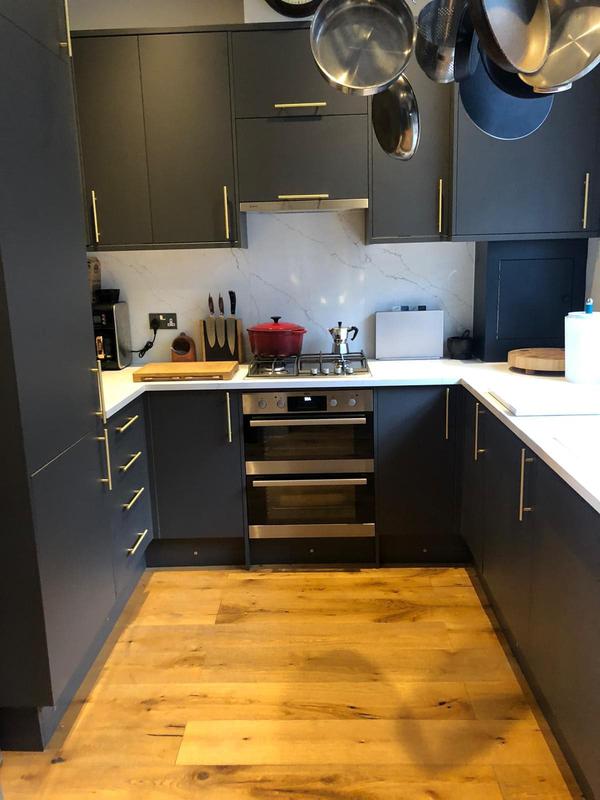
- Small, compact kitchen install. Finished with marble worktops & splashbacks
-
Image
63
- Small, compact kitchen install. Finished with marble worktops & splashbacks
-
Image
64
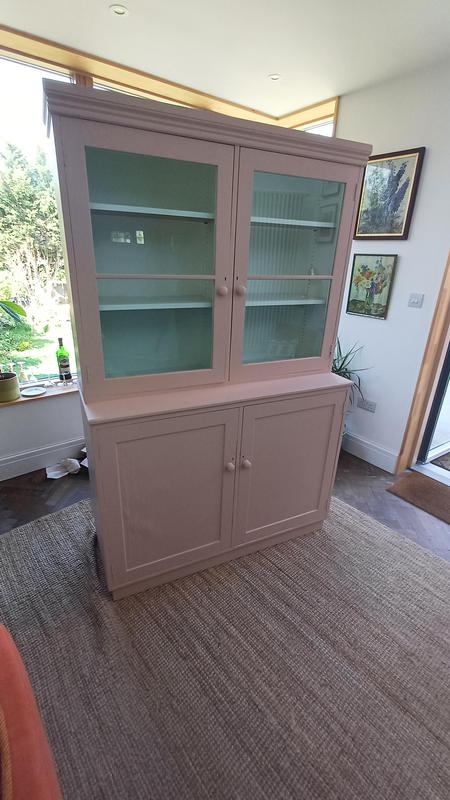
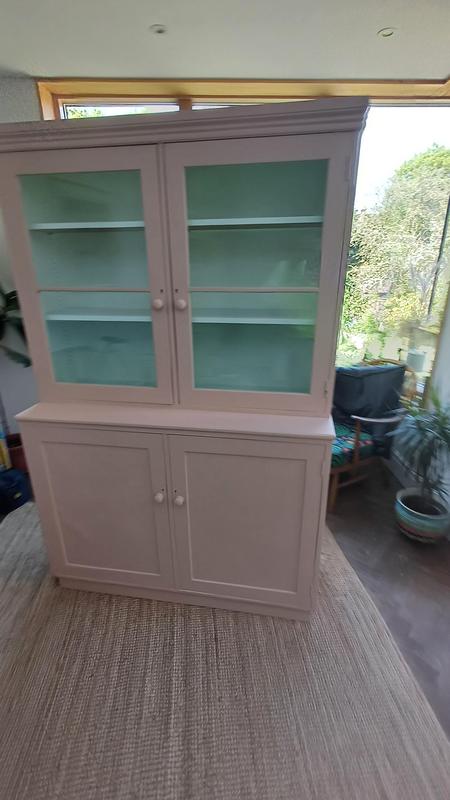
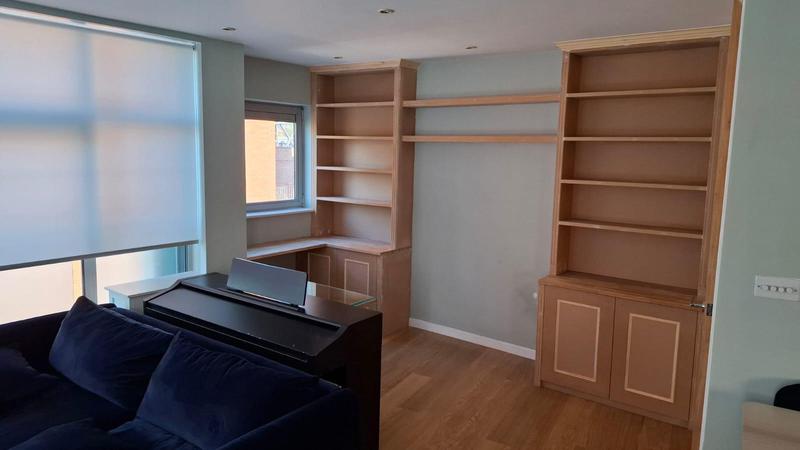
- Front room unit with adjustable shelving and built in lighting. Hand made and hand painted

-
Image
65
- Front room unit with adjustable shelving and built in lighting. Hand made and hand painted
-
Image
66
- White walls with black finish.

-
Image
67
- Doors Painted with grey and black pattern.

Hallway, stairs and landings
20 photos
-
Image
1
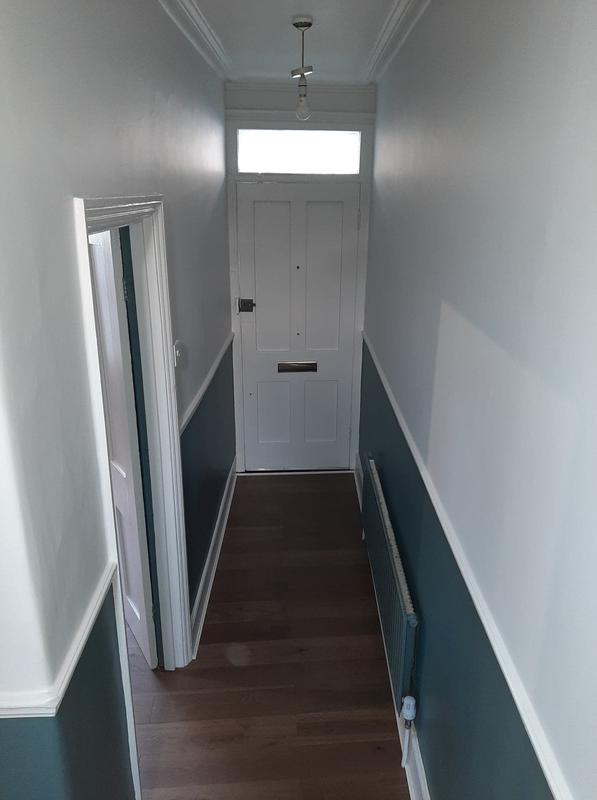
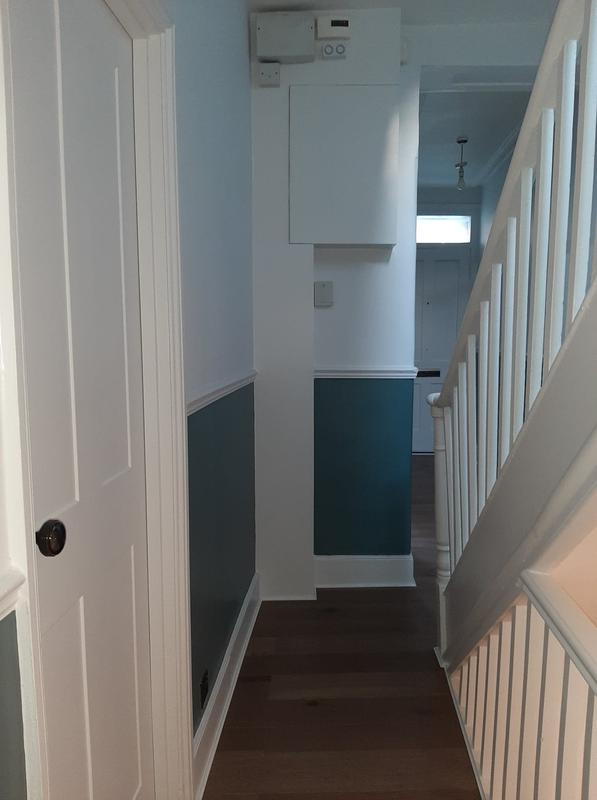
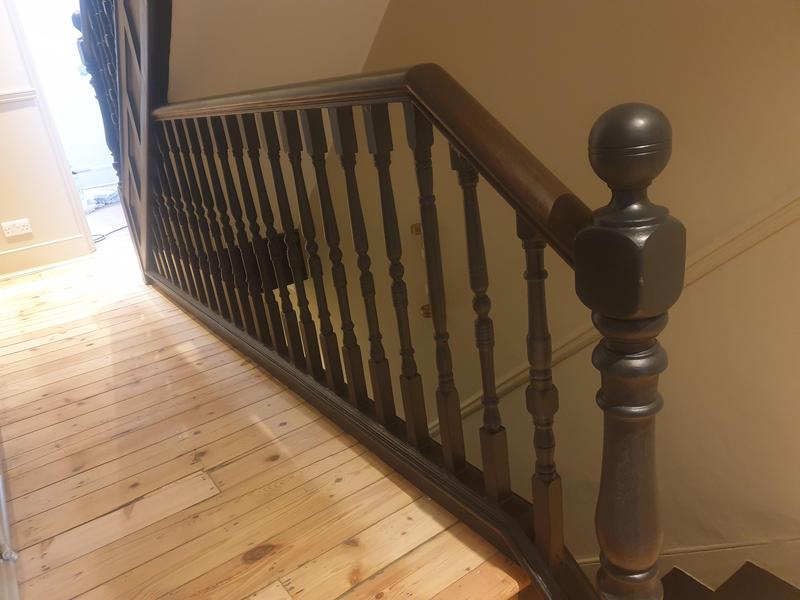
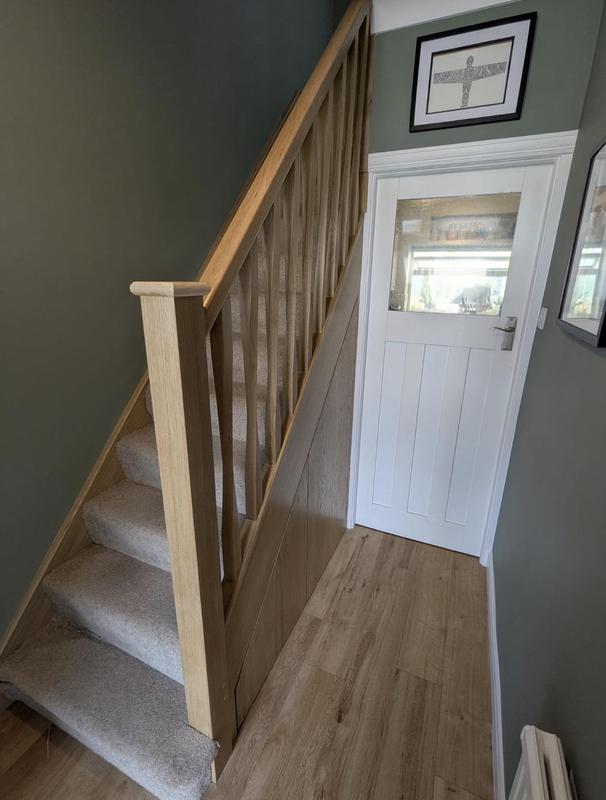
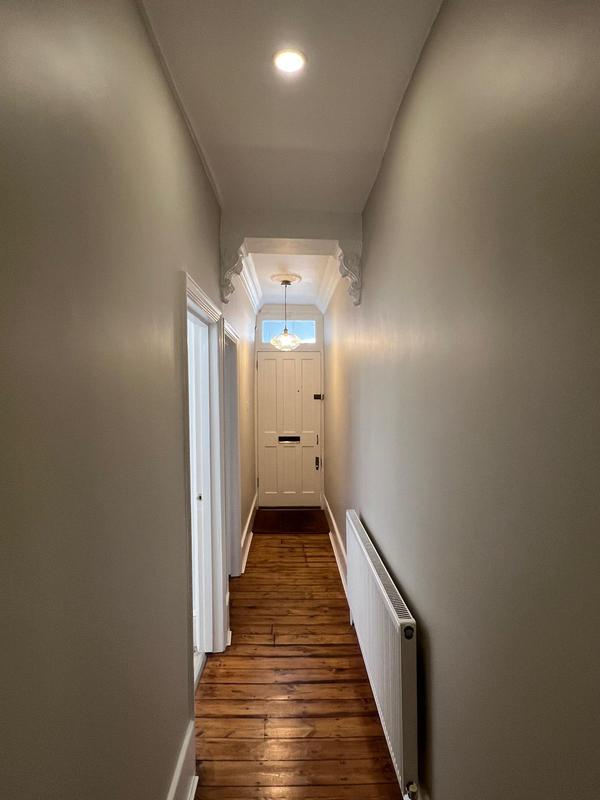
- Handrail stripped and lacquered with an ebony varnish, bannisters sprayed with a black satin finish, hallway completely decorated using diamond matt and diamond satinwood. The colour is ancient sandstone.

-
Image
2

-
Image
3

-
Image
4

-
Image
5
- Spindles painted in dark green gloss.

-
Image
6
- Handrail stripped and lacquered with an ebony varnish, bannisters sprayed with a black satin finish, hallway completely decorated using diamond matt and diamond satinwood. The colour is ancient sandstone.

-
Image
7

-
Image
8

-
Image
9
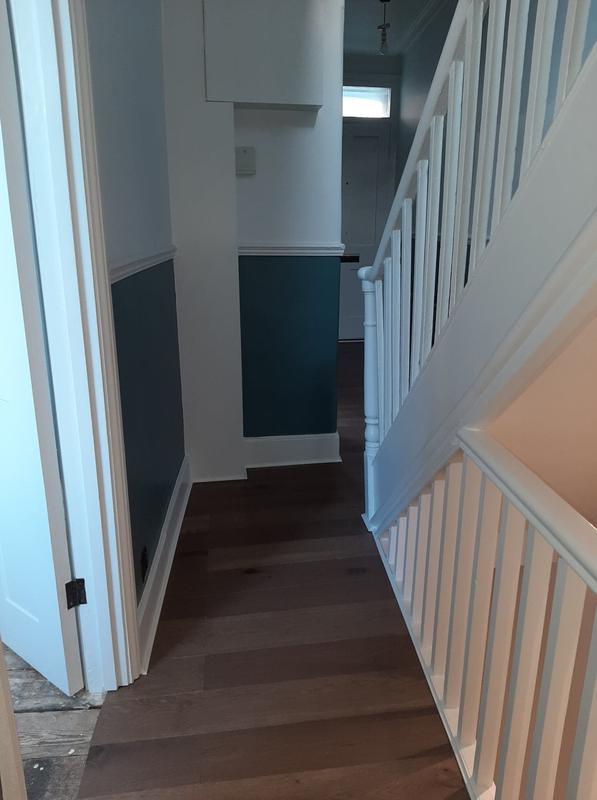
- New hardwood floors throughout 2 separate floors. All new doors also
-
Image
10
- New hardwood floors throughout 2 separate floors.
-
Image
11

-
Image
12

-
Image
13

-
Image
14

-
Image
15
- Handrail stripped and lacquered with an ebony varnish, bannisters sprayed with a black satin finish, hallway completely decorated using diamond matt and diamond satinwood. The colour is ancient sandstone.

-
Image
16
- Handrail stripped and lacquered with an ebony varnish, bannisters sprayed with a black satin finish, hallway completely decorated using diamond matt and diamond satinwood. The colour is ancient sandstone.
-
Image
17
- Handrail stripped and lacquered with an ebony varnish, bannisters sprayed with a black satin finish, hallway completely decorated using diamond matt and diamond satinwood. The colour is ancient sandstone.

-
Image
18
- Handrail stripped and lacquered with an ebony varnish, bannisters sprayed with a black satin finish, hallway completely decorated using diamond matt and diamond satinwood. The colour is ancient sandstone.

-
Image
19
- New hardwood floors throughout 2 separate floors. All new doors also
-
Image
20

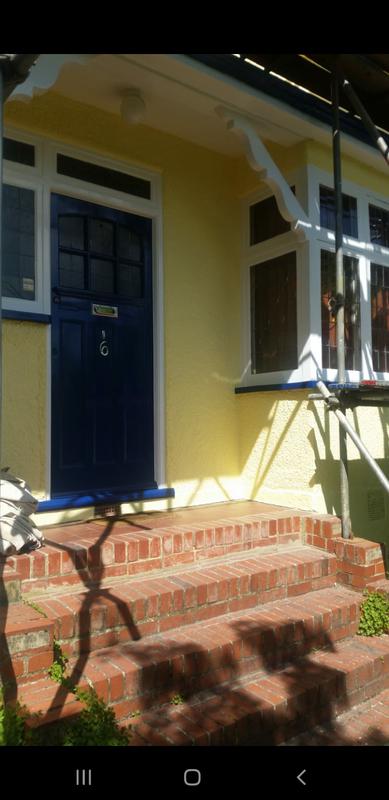
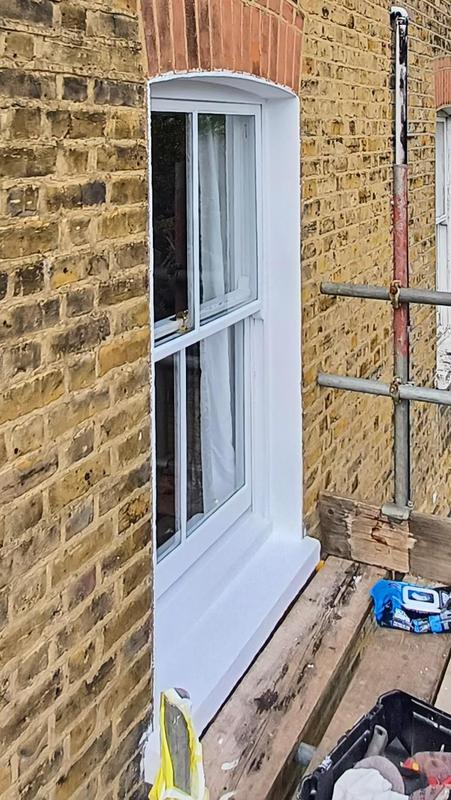
Exterior painting and decorating
37 photos
-
Image
1
-
Image
2
-
Image
3
-
Image
4

-
Image
5

-
Image
6
-
Image
7
-
Image
8
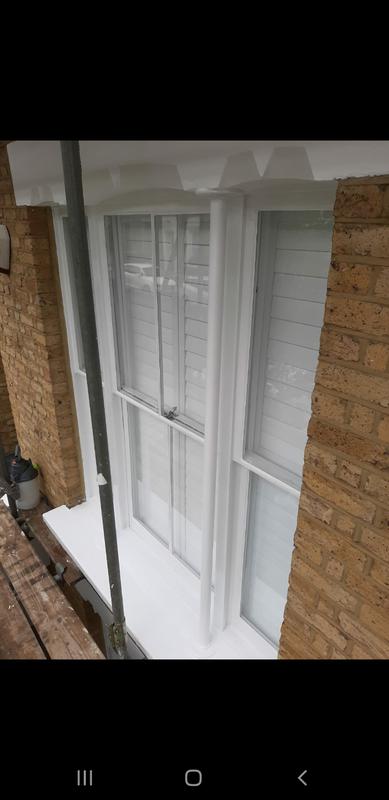
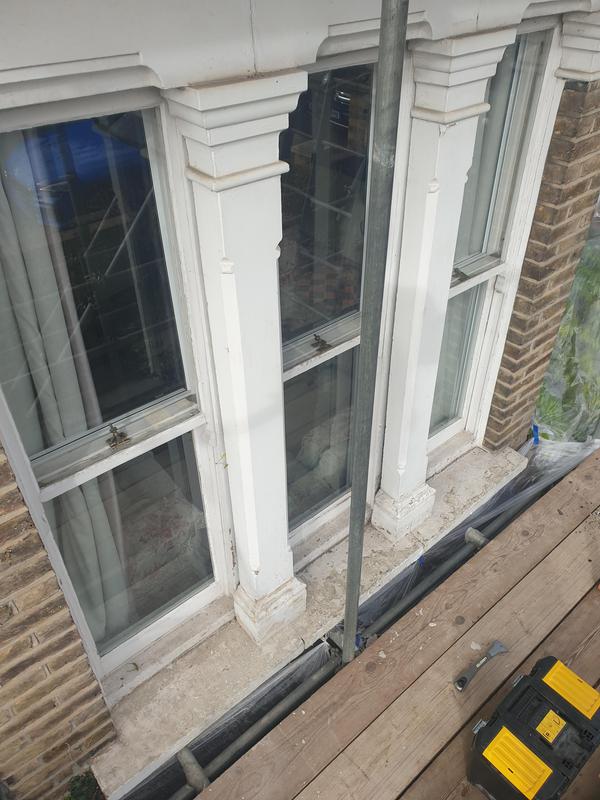
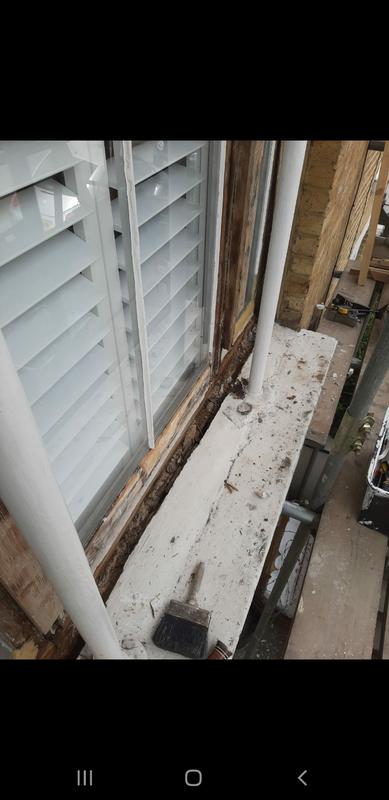
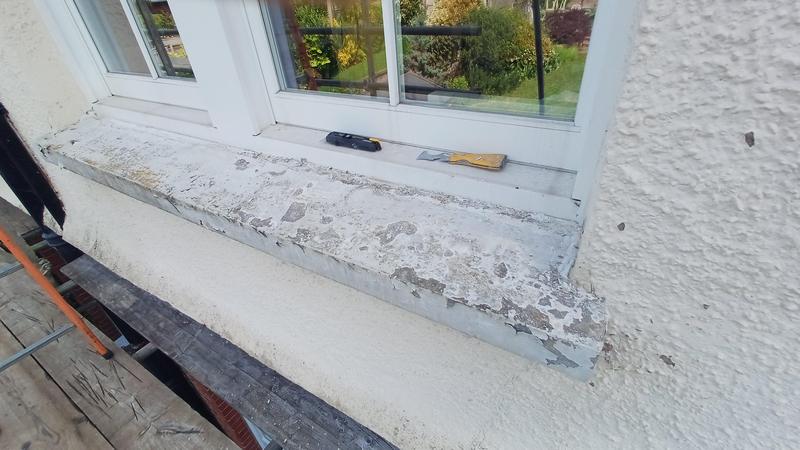
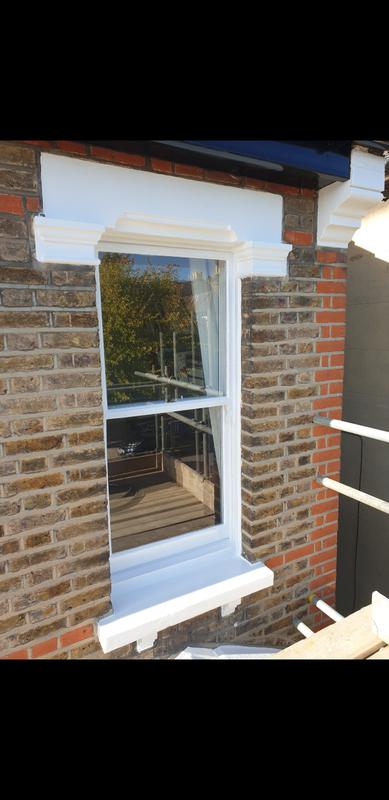
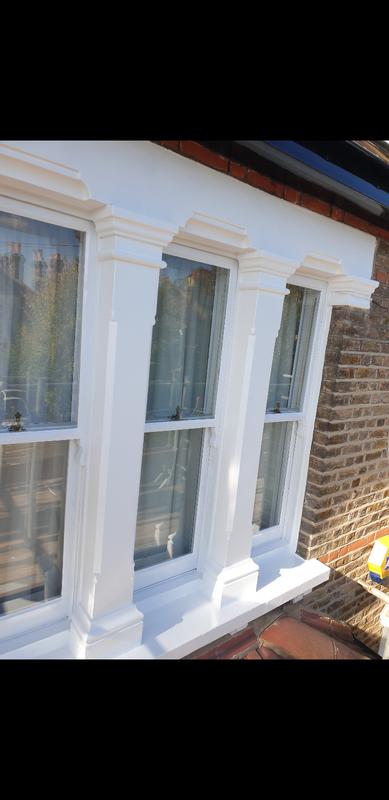
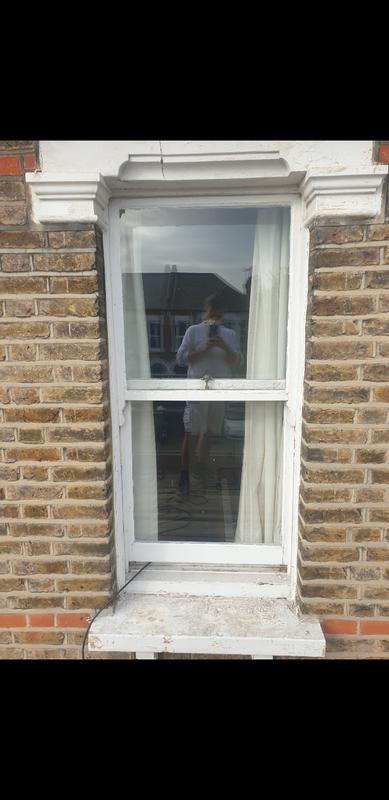
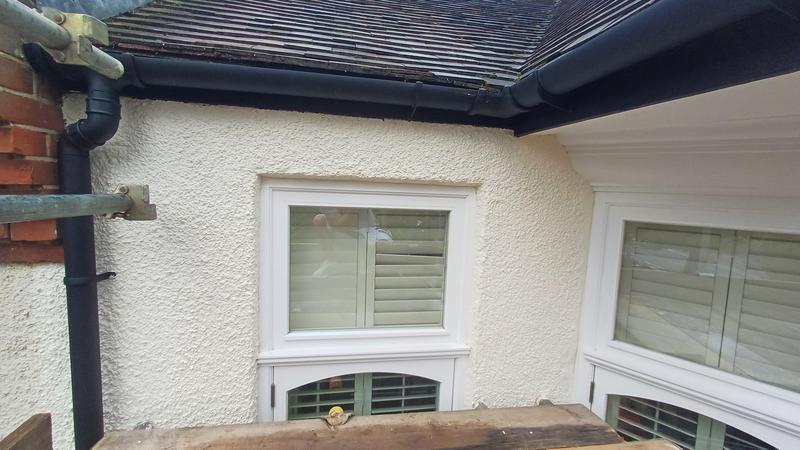
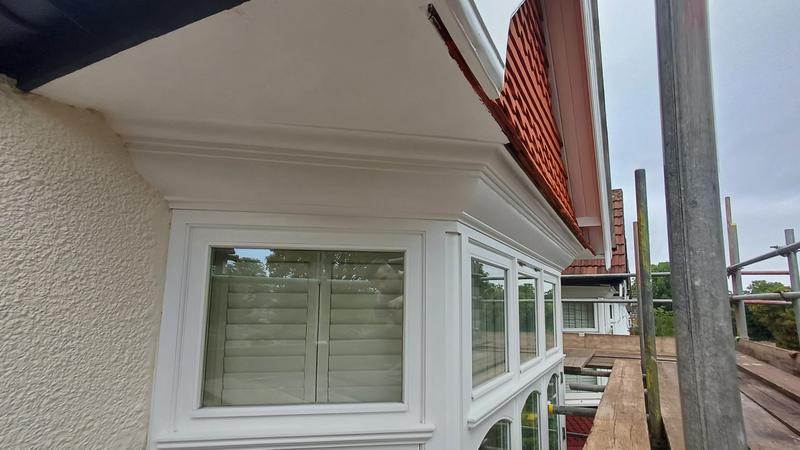
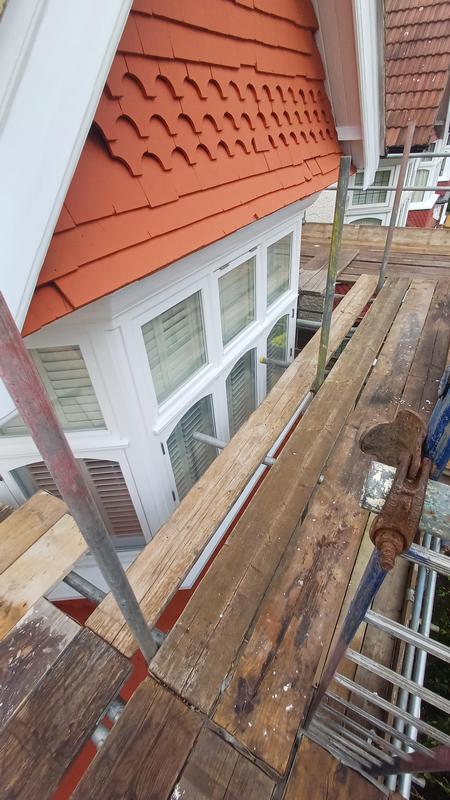
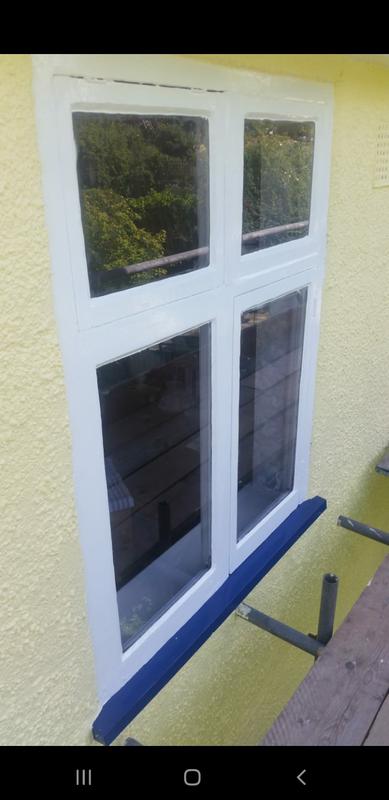
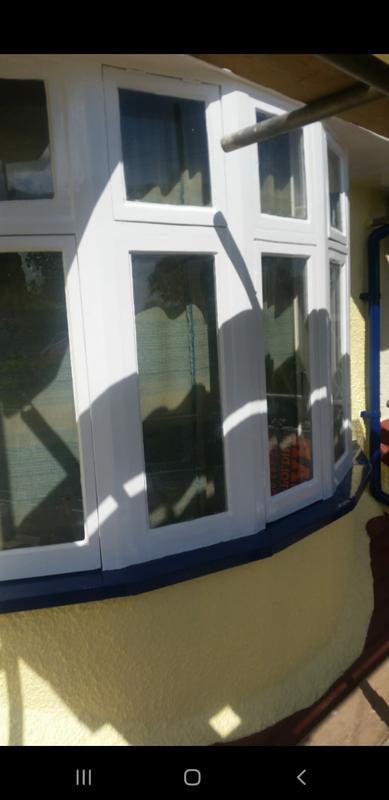
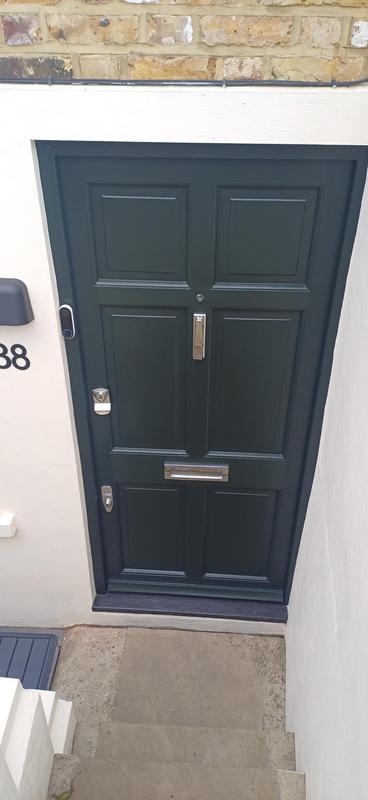
- This exterior, we stripped the paint off back to bare timber using our mirka sanders and dust extraction kit which minimises the mess created. We then removed all the rotten timber and treated the areas with a timber rot hardener, the damages and holes were then repaired with repaircare epoxy resin. Once dry we sanded the epoxy then primed the windows with Zinsser primer, then we sealed the windows with repaircare glazing sealant. Undercoated the windows with Dulux weathershield undercoat, and topcoated with dulux weathershield high gloss.

-
Image
9
-
Image
10
-
Image
11
- Old gate removed, replaced a new one, primed with one coat of Zinsser 123bullseye and finished with farrow and ball exterior satin

-
Image
12
- Old gate removed and replaced with a new one, primed with one coat of Zinsser 123bullseye and finished with farrow and ball exterior satin

-
Image
13
- This exterior, we stripped the paint off back to bare timber using our mirka sanders and dust extraction kit which minimises the mess created. We then removed all the rotten timber and treated the areas with a timber rot hardener, the damages and holes were then repaired with repaircare epoxy resin. Once dry we sanded the epoxy then primed the windows with Zinsser primer, then we sealed the windows with repaircare glazing sealant. Undercoated the windows with Dulux weathershield undercoat, and topcoated with dulux weathershield high gloss.

-
Image
14
- This exterior, we stripped the paint off back to bare timber using our mirka sanders and dust extraction kit which minimises the mess created. We then removed all the rotten timber and treated the areas with a timber rot hardener, the damages and holes were then repaired with repaircare epoxy resin. Once dry we sanded the epoxy then primed the windows with Zinsser primer, then we sealed the windows with repaircare glazing sealant. Undercoated the windows with Dulux weathershield undercoat, and topcoated with dulux weathershield high gloss.

-
Image
15
-
Image
16
-
Image
17
-
Image
18
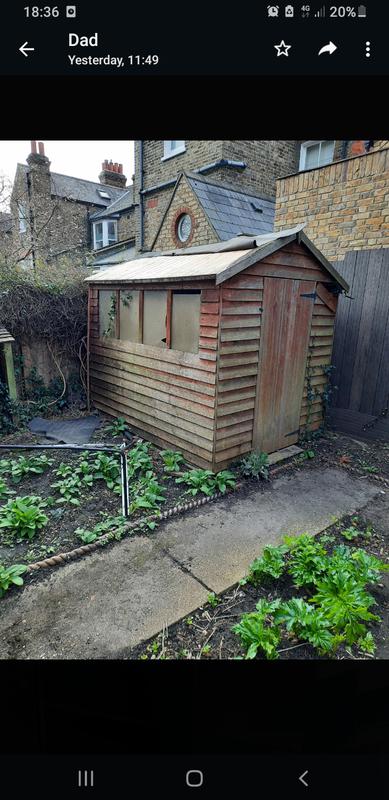
- Old shed removed and disposed of, new shed built then coated with 2 coats

-
Image
19
- This exterior, we stripped the paint off back to bare timber using our mirka sanders and dust extraction kit which minimises the mess created. We then removed all the rotten timber and treated the areas with a timber rot hardener, the damages and holes were then repaired with repaircare epoxy resin. Once dry we sanded the epoxy then primed the windows with Zinsser primer, then we sealed the windows with repaircare glazing sealant. Undercoated the windows with Dulux weathershield undercoat, and topcoated with dulux weathershield high gloss.
-
Image
20
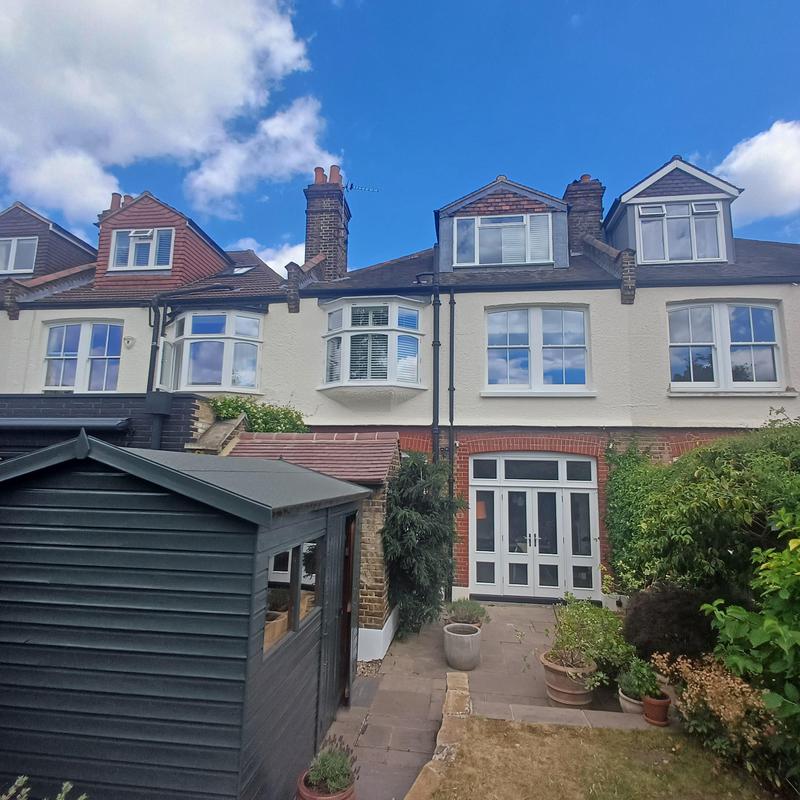
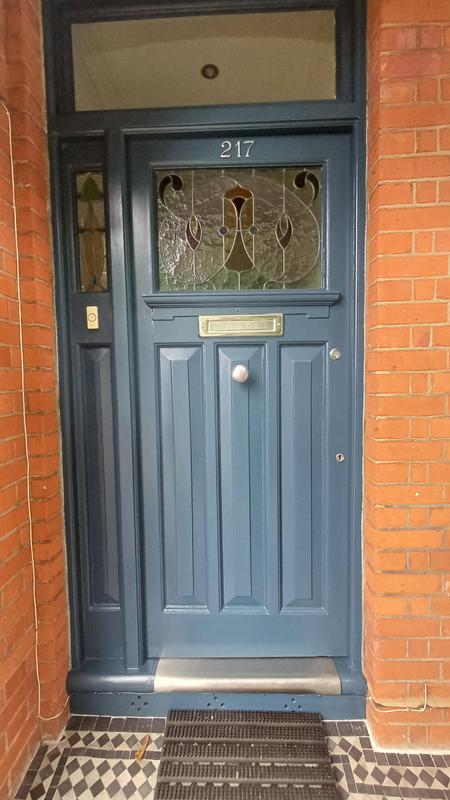
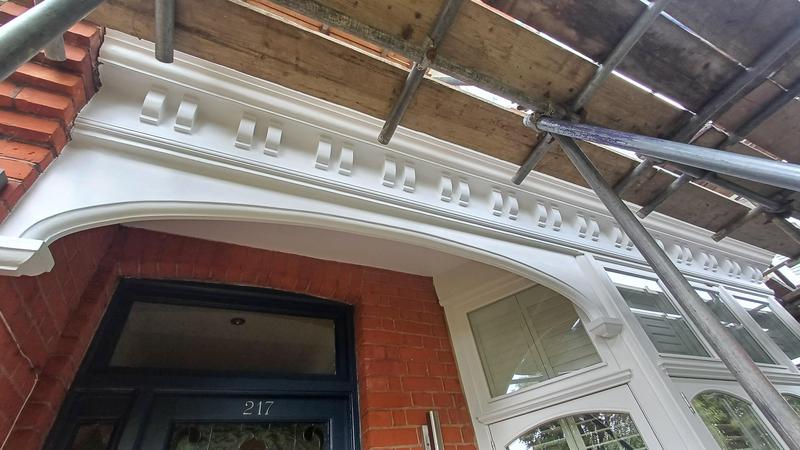
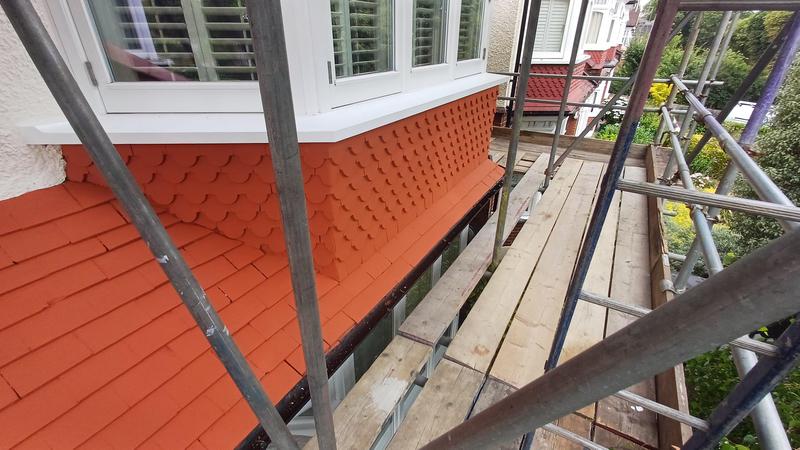
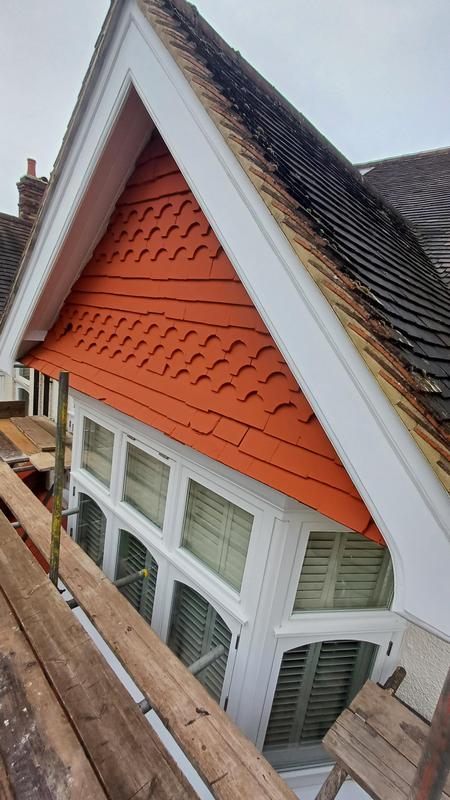
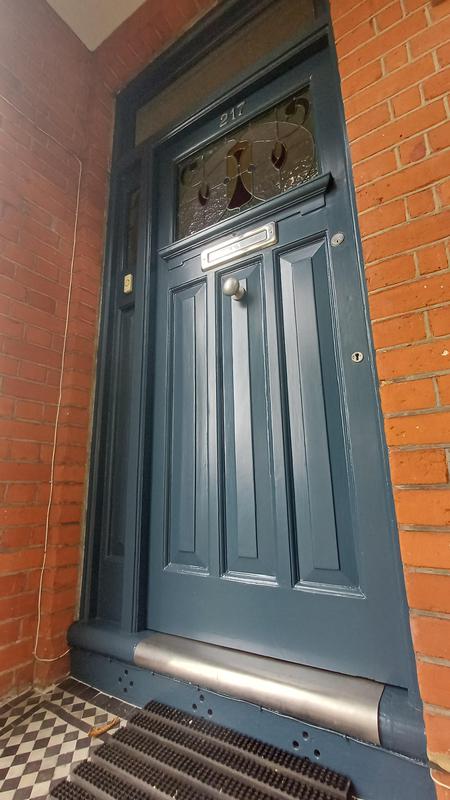
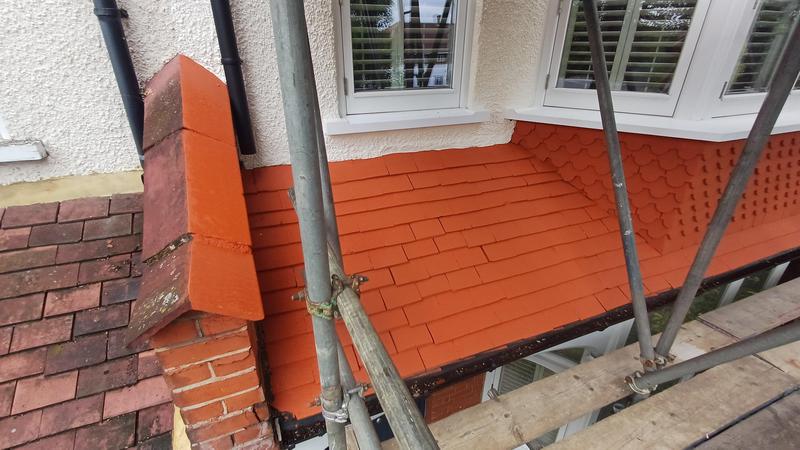
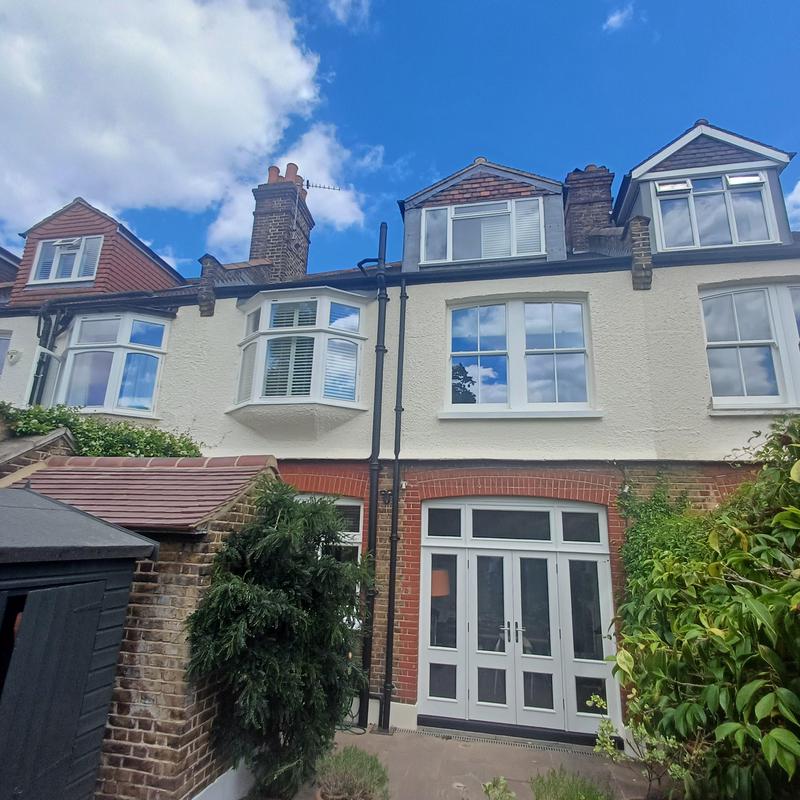
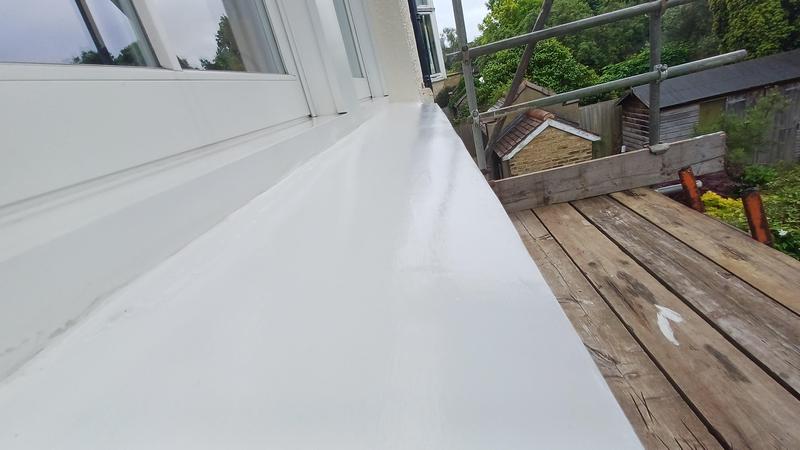
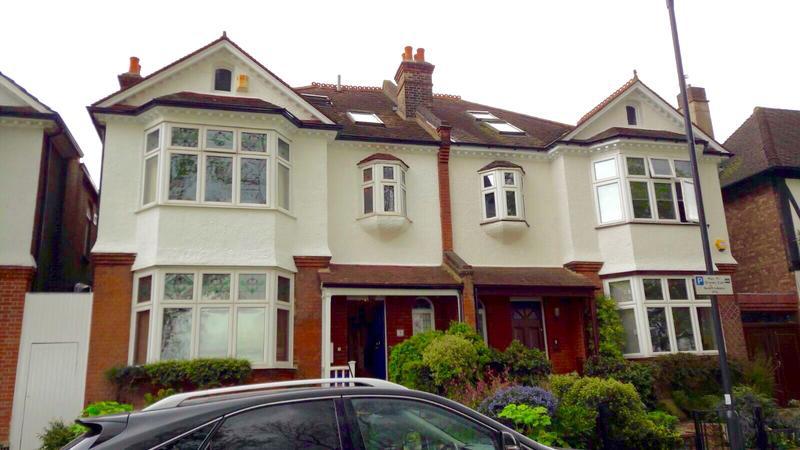
- Full exterior decoration. Including re-pointing of chimney stack.

-
Image
21
- This exterior, we stripped the paint off back to bare timber using our mirka sanders and dust extraction kit which minimises the mess created. We then removed all the rotten timber and treated the areas with a timber rot hardener, the damages and holes were then repaired with repaircare epoxy resin. Once dry we sanded the epoxy then primed the windows with Zinsser primer, then we sealed the windows with repaircare glazing sealant. Undercoated the windows with Dulux weathershield undercoat, and topcoated with dulux weathershield high gloss.
-
Image
22
- This exterior, we stripped the paint off back to bare timber using our mirka sanders and dust extraction kit which minimises the mess created. We then removed all the rotten timber and treated the areas with a timber rot hardener, the damages and holes were then repaired with repaircare epoxy resin. Once dry we sanded the epoxy then primed the windows with Zinsser primer, then we sealed the windows with repaircare glazing sealant. Undercoated the windows with Dulux weathershield undercoat, and topcoated with dulux weathershield high gloss.

-
Image
23
- This exterior, we stripped the paint off back to bare timber using our mirka sanders and dust extraction kit which minimises the mess created. We then removed all the rotten timber and treated the areas with a timber rot hardener, the damages and holes were then repaired with repaircare epoxy resin. Once dry we sanded the epoxy then primed the windows with Zinsser primer, then we sealed the windows with repaircare glazing sealant. Undercoated the windows with Dulux weathershield undercoat, and topcoated with dulux weathershield high gloss.
-
Image
24
- This exterior, we stripped the paint off back to bare timber using our mirka sanders and dust extraction kit which minimises the mess created. We then removed all the rotten timber and treated the areas with a timber rot hardener, the damages and holes were then repaired with repaircare epoxy resin. Once dry we sanded the epoxy then primed the windows with Zinsser primer, then we sealed the windows with repaircare glazing sealant. Undercoated the windows with Dulux weathershield undercoat, and topcoated with dulux weathershield high gloss.

-
Image
25
-
Image
26
-
Image
27
-
Image
28
-
Image
29
-
Image
30
-
Image
31

-
Image
32
-
Image
33
-
Image
34

-
Image
35
-
Image
36
-
Image
37
All other media
39 photos
-
Image
1
-
Image
2
-
Image
3

-
Image
4
-
Image
5
-
Image
6
-
Image
7
-
Image
8
-
Image
9
-
Image
10
-
Image
11
-
Image
12
-
Image
13
-
Image
14
-
Image
15
-
Image
16
-
Image
17
-
Image
18
-
Image
19
-
Image
20
- Stairs prepped, primed and gloss finished ready for the carpet runner to be put in place. Rest of the hallway decorated

-
Image
21
- Bespoke wardrobes spay painted, walls prepped, filled and sanded and painted using dulux diamond matt and dulux diamond satinwood

-
Image
22
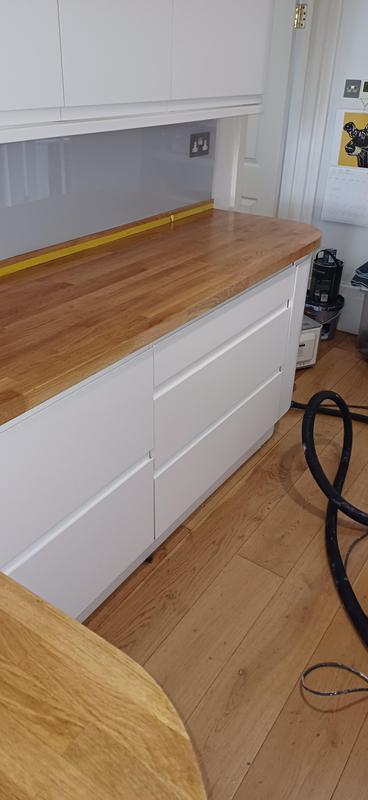
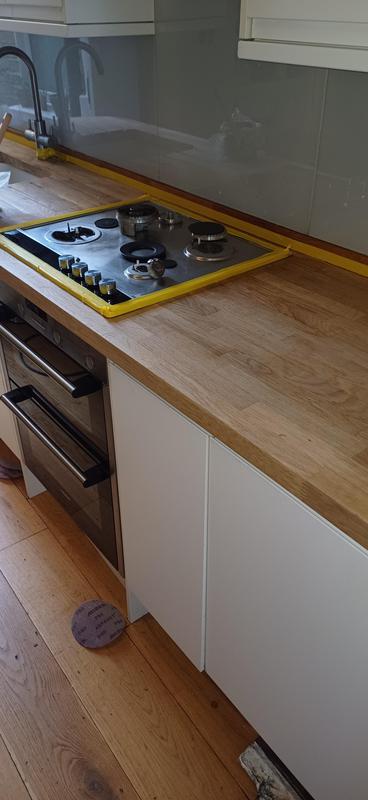
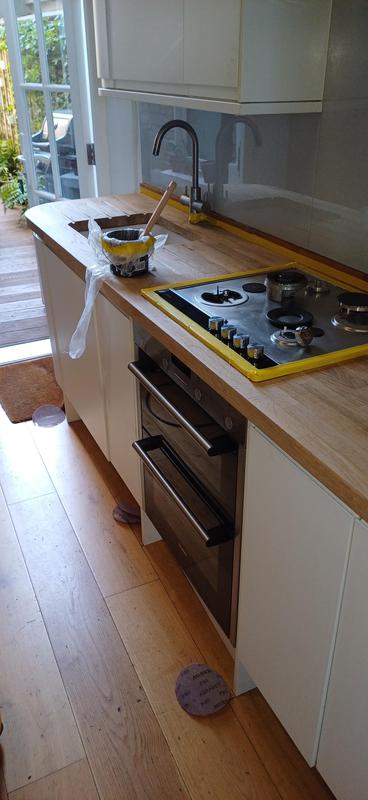
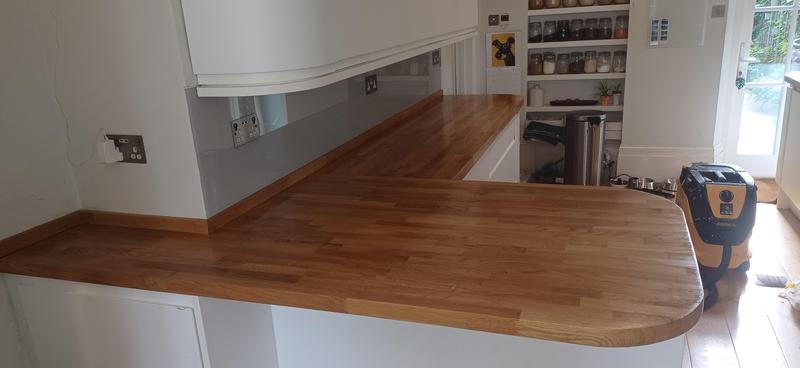
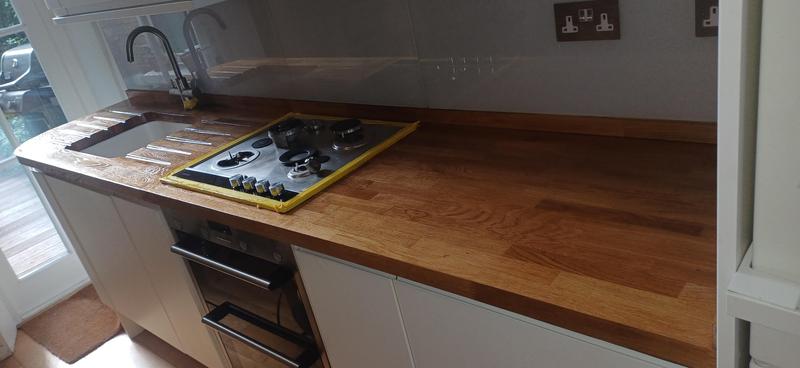
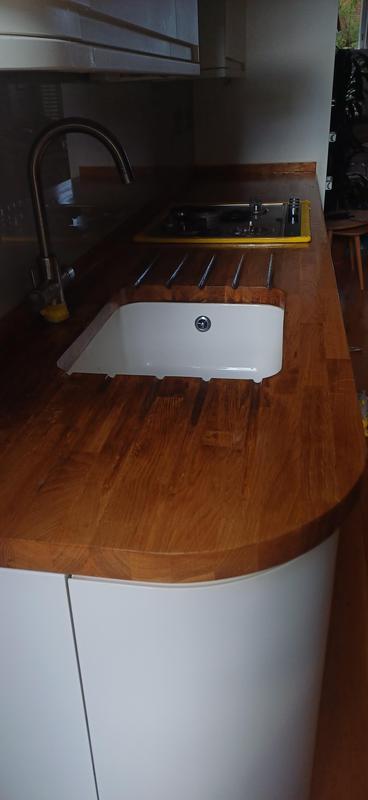
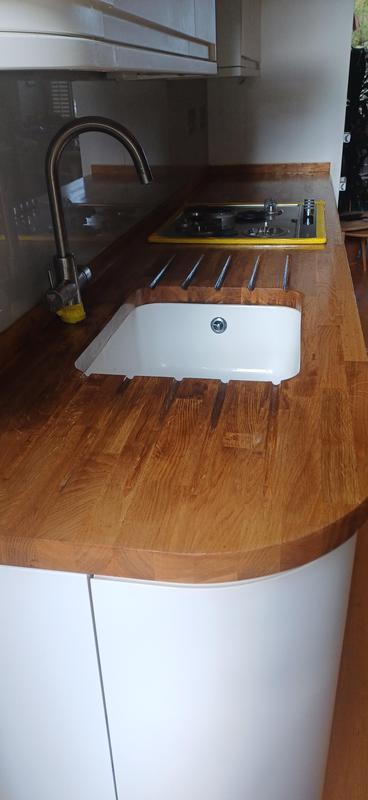
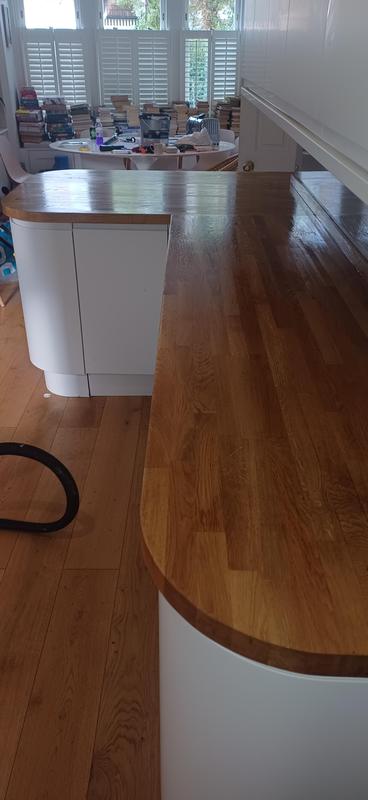
- Oak kitchen worktop repaired using timbabuild wood stabilizer and epoxy resin, then coated with 4 coats of Dulux diamond glaze varnish

-
Image
23
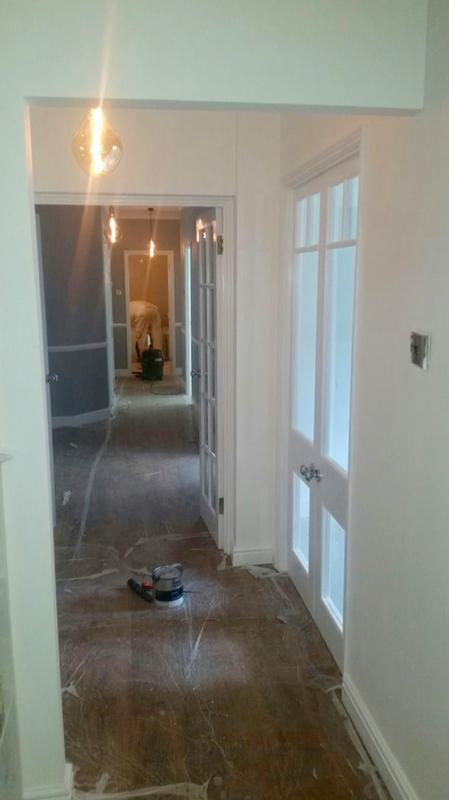
- Full redecoration to living room

-
Image
24
- Oak kitchen worktop repaired using timbabuild wood stabilizer and epoxy resin, then coated with 4 coats of Dulux diamond glaze varnish

-
Image
25

-
Image
26
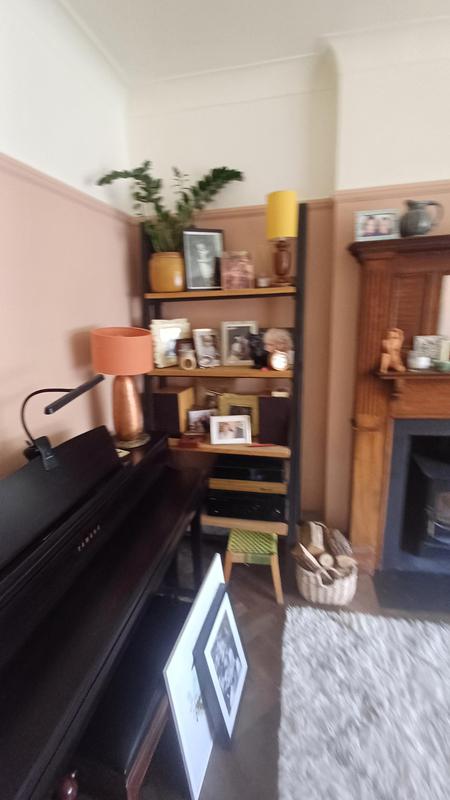
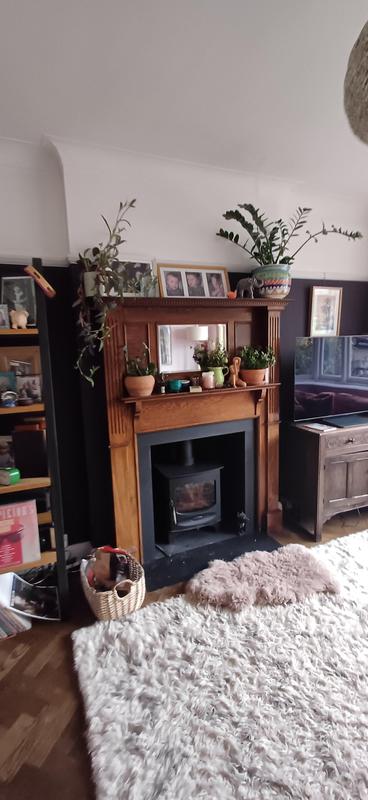
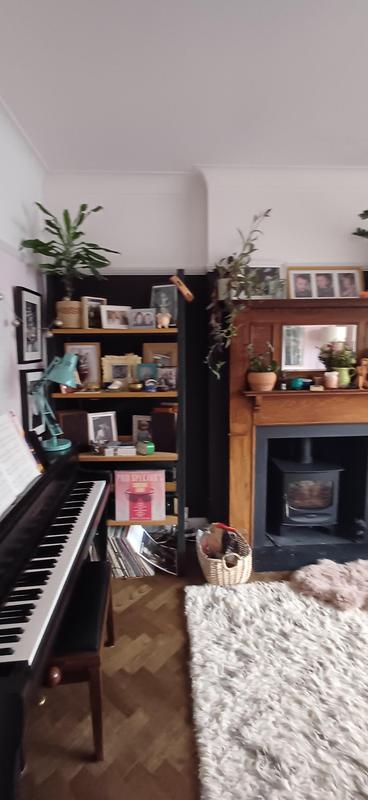
- Full redecoration to living room

-
Image
27
- Geoff front room full decoration.
-
Image
28
- Full exterior decoration. Including re-pointing of chimney stack.

-
Image
29
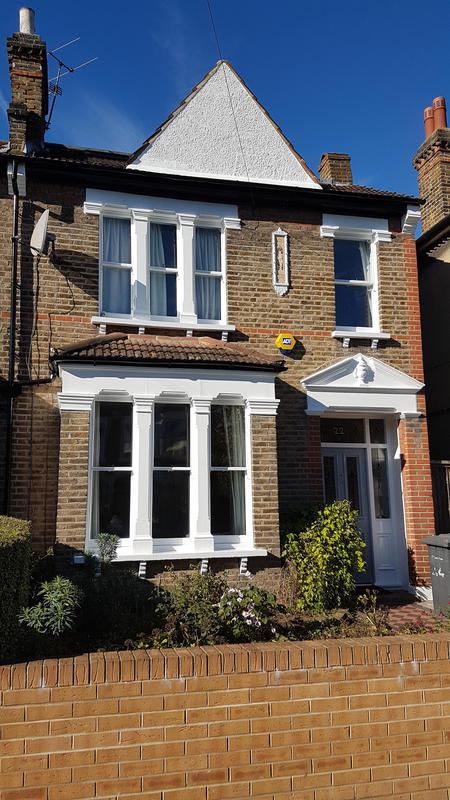
- Full frontal exterior redecoration to both houses.
-
Image
30
- Full frontal exterior redecoration to both houses.

-
Image
31
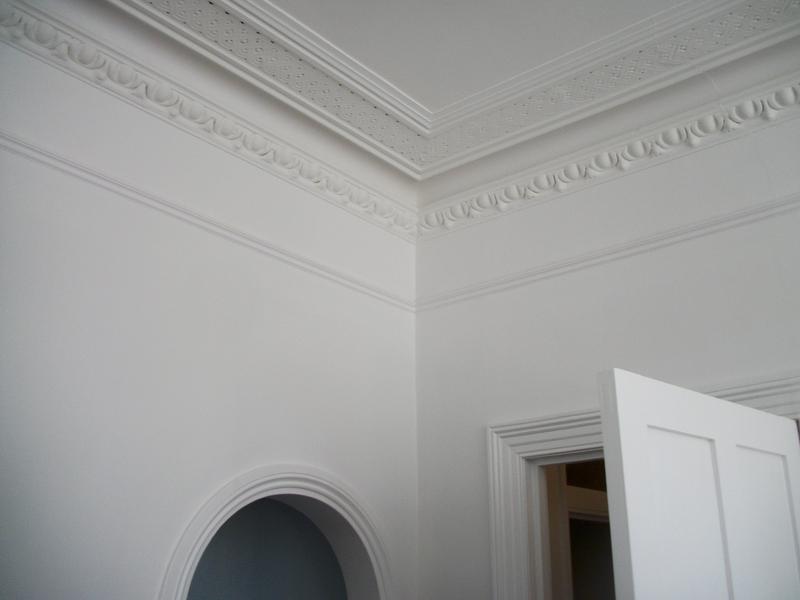
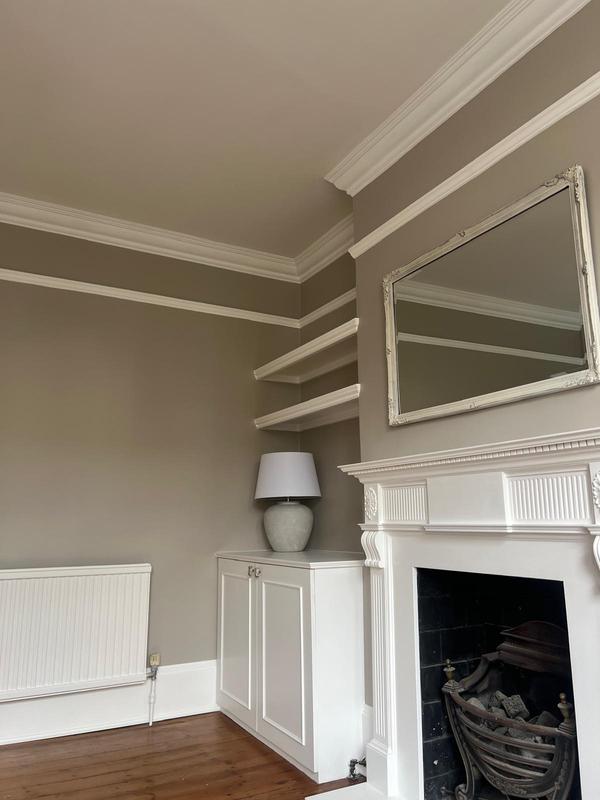
- Victorian ceiling rose stripped bare and painted.

-
Image
32
- Coving fitted and painted.

-
Image
33
-
Image
34
-
Image
35

-
Image
36
-
Image
37

-
Image
38

-
Image
39

Diggins of Dulwich
- Identification checked
- Company address verified
- Customer references checked
- Agreed to TrustATrader's high standards
- Agreed to complaints procedure
Reviews (72)
-
Average rating: 5.0 out of 5
Review by Sara
on 8th May 2026
Sara - Image 1 "Ollie installed a built-in system of wardrobes, shelving, and a wallbed that has transformed our small flat! We decided to go bespoke after months of trying and failing to find a wallbed company. We reached out to Ollie for a quote and came by the flat to have a look at the space that weekend. He was polite and confident about his ability to do the job, which gave us confidence in choosing him, too. Planning the job via emails was a breeze, we largely knew what we wanted but Ollie offered some great ideas that we ended up implementing into the final design. Finally, the quality of the work is astounding, especially given how challenging working in our (again, very small) flat must have been. The work is solid and has elegant solutions to our flat's unique problems. The paint job is flawless and Ollie was sure that our flat was clean and that every aspect of the work was perfect in the end. We recommend Ollie wholeheartedly and will hopefully have him back around again in future!"
- Initial impression Initial impression: 5 out of 5.0
- Punctuality Punctuality: 5 out of 5.0
- Cleanliness Cleanliness: 5 out of 5.0
- Quality Quality: 5 out of 5.0
- Value Value: 5 out of 5.0
- Overall opinion Overall opinion: 5 out of 5.0
-
Average rating: 5.0 out of 5
Review by Lizzy
on 16th March 2026
Lizzy - Image 1 "I recently had my hallway completely revamped by the Diggins brothers and I couldn’t be happier. Joe did an excellent job with the panting and decorating, helping me when I was undecided on the colour - very glad we chose the darker option - and Ollie fitted a new oak bannister and the finished product is better than imagined. Thank you both!"
- Initial impression Initial impression: 5 out of 5.0
- Punctuality Punctuality: 5 out of 5.0
- Cleanliness Cleanliness: 5 out of 5.0
- Quality Quality: 5 out of 5.0
- Value Value: 5 out of 5.0
- Overall opinion Overall opinion: 5 out of 5.0
-
Average rating: 5.0 out of 5
Review by Nick Edbrooke
on 23rd September 2025
Nick Edbrooke - Image 1 "Ollie has just finished installing custom shelving, cupboards and a desk area into my main lounge, and he did a fantastic job. The unit looks amazing, and really transforms the room! The quality of the work is also exceptional. Furthermore I was away during the process and he kept me informed at every stage of the job, checking with me when decisions needed to be made. He seemed to do the job extremely quickly and cleared everything away, leaving the space pristine and tidy. I thought the price was also extremely reasonable for the quality of the end product and services. Extremely highly recommended - thank you Ollie!"
- Initial impression Initial impression: 5 out of 5.0
- Punctuality Punctuality: 5 out of 5.0
- Cleanliness Cleanliness: 5 out of 5.0
- Quality Quality: 5 out of 5.0
- Value Value: 5 out of 5.0
- Overall opinion Overall opinion: 5 out of 5.0
-
Average rating: 5.0 out of 5
Review by Josh
on 11th August 2025
Josh - Image 1 4 images Josh - Image 2 Josh - Image 3 Josh - Image 4 "We used Diggins of Dulwich for some redecoration work at our flat in Balham. Joe was amazing from start to finish - he took the time to come and see the flat, recommended the work that he thought was needed, and provided a clear and competitive quote. He was great to have around the flat, always on time, very professional but also great to have a chat with! Joe did an excellent job fixing numerous problems that arose through the job and provided a great finish across our living room, hallway and bathroom. We are very happy with the end result and will definitely be using Joe and Diggins of Dulwich again for any future work!"
Trader reply: "Thank you very much for your kind words and wonderful review. I look forward to working for you both again in the near future, all the best. Joe"
- Initial impression Initial impression: 5 out of 5.0
- Punctuality Punctuality: 5 out of 5.0
- Cleanliness Cleanliness: 5 out of 5.0
- Quality Quality: 5 out of 5.0
- Value Value: 5 out of 5.0
- Overall opinion Overall opinion: 5 out of 5.0
Feeling social?
See more of what we do and give us a follow on our social media.